Lost Village


Introduction
Hi everyone! I'm Cger and I'm a Senior Environment Artist from Shenzhen, China.
Project
First of all, I would like to thank Mr. Sergey Vasnev for granting me permission to recreate “Village.”
This project is highly intriguing right from the conceptual stage. I was immediately captivated by it and gave it my full attention. Secondly, I am very confident in utilizing UE5 to infuse this project with my creative spirit, making it even more resilient in the 3D world.


Creative Background
I am accustomed to writing a short essay describing the work during the early stages of creation.
The first aspect is to enhance my understanding of the work in-depth and establish a solid and credible story background.
The second aspect is to have a wider range of choices when seeking references in the initial stages, in order to avoid blind searching. I hope to obtain more valuable reference material and incorporate my personal interpretation to breathe new life into this work.

Story Description
At the beginning of this piece, my perception was of a tranquil countryside, far from the hustle and bustle of the city, resembling a paradise scene. In this village, windmill structures are notably abundant, showcasing steampunk styles throughout. These buildings evoke a sense of antiquity and uniqueness.
Whenever the morning sun illuminates these structures, the entire village exudes a peaceful ambiance.
References
I mainly found four types of reference content:
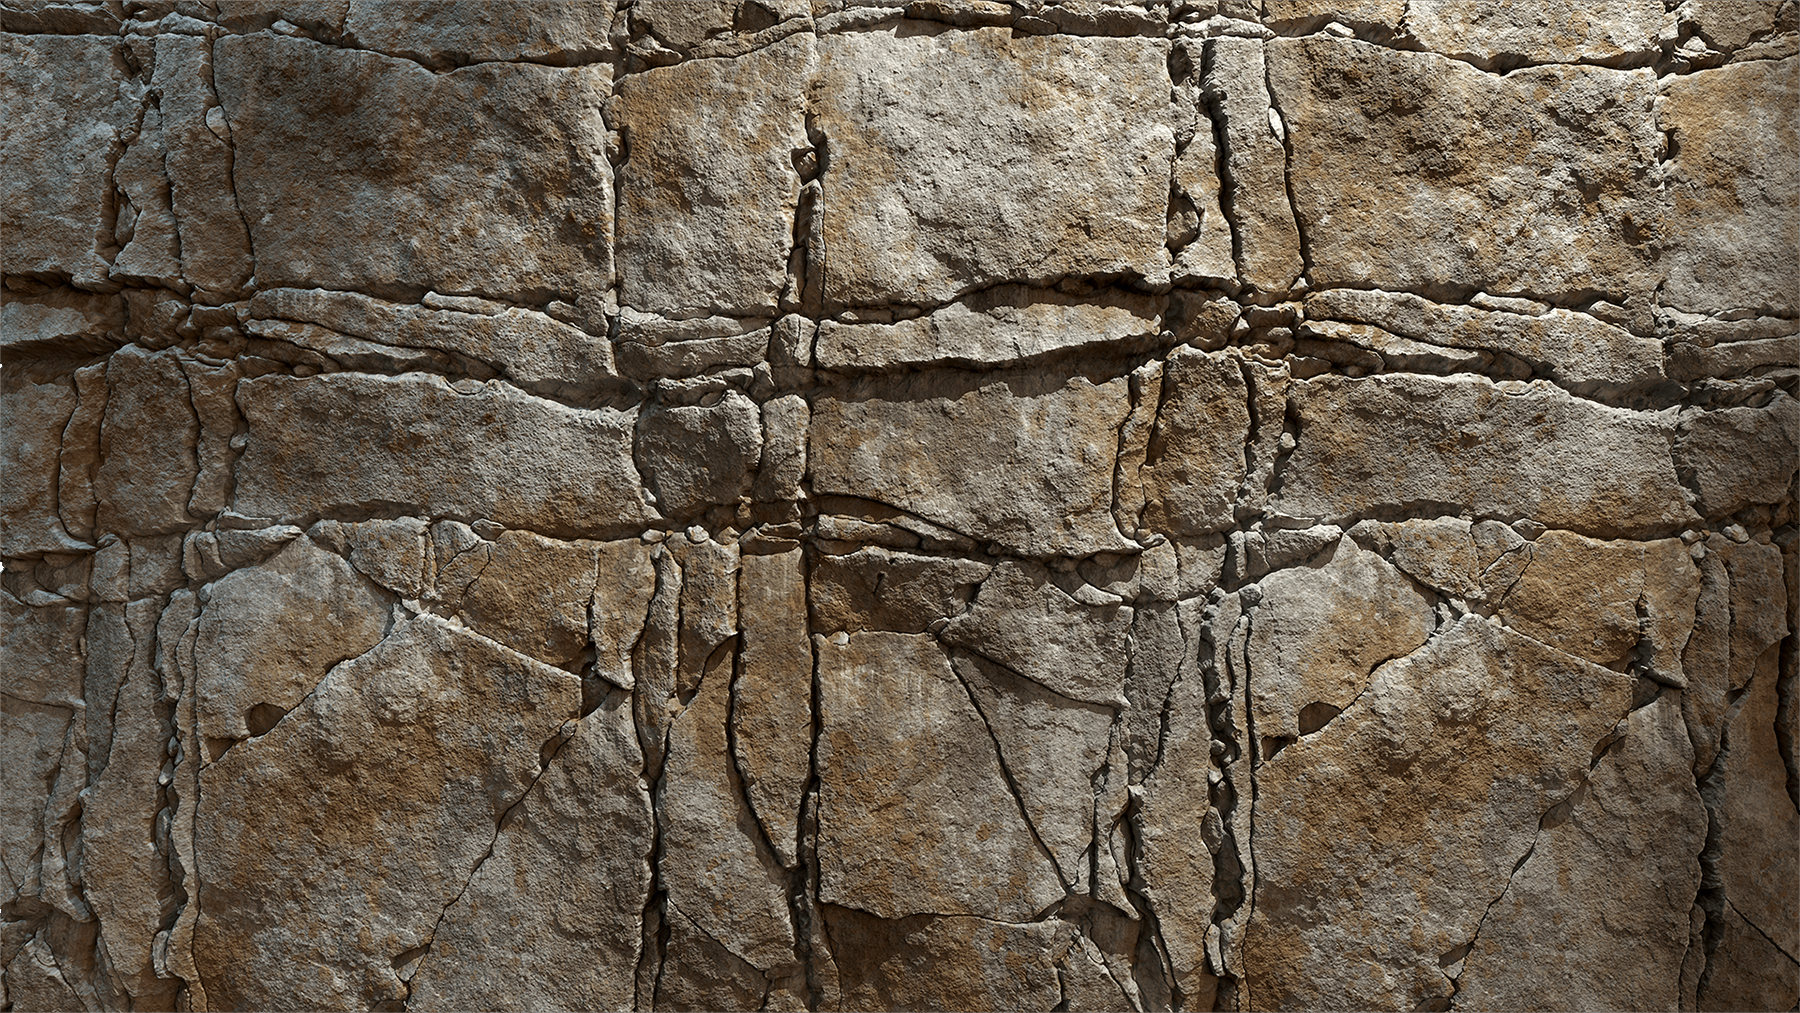
- The details of the stone are mainly to understand the texture of the stone surface formed between artificial and natural, as well as the general shape of the overall stone because this kind of work is more similar to a stone house shape.
- The expression of the village in reality and other works of art is very important. Because we will inevitably fall into aesthetic fatigue in the process of devotion to creation, so when I am stuck and unable to go deep, I will jump out again to look for content that can be reshaped in the picture, such as the undulations of the road, the placement of stones, the distribution of grass, and the hierarchical relationship of vegetation.


Blockout
This is the gray model built in the early stage. It is mainly used to create the undulations of the main building and the terrain, and to determine the proportion and layer relationship of the stone house.
At this stage, only the fixed lens needs to be considered. Once the main assets are completed, they will be split and deformed for further use.

Landscape
The terrain part is very simple. I used the Magic Map Material & Maker (M⁴) terrain plug-in to quickly switch between various terrain materials.
You can watch the specific operation in the following video.
Asset Split
This work is different from the previous split rules because there are many different shapes of elements visible on the screen, which are essentially inconsistent and of various types.
Therefore, you should carefully consider in the early stage which assets must be created with Blender or Zbrush, and which assets can be assembled using models from the Megascan asset library.
Everything is difficult at the beginning, but with sufficient preparation in the early stage, the subsequent process will be much smoother.

Stone House Making Process
First, I use UE5 to model the general shape and proportions, and then I import Zbrush for detailed sculpting.


I did not consider using too high a number of faces for the model of this stone house because it would put excessive pressure on modeling, rendering, and running.
Therefore, I kept the main structure in ZBrush as a low-polygon model. I then used Marmoset Toolbag 4 to bake the normal map, resulting in the following outcomes.

The Material Production Process Of The Stone House
The shader used is also very simple, using a three-layer mixed shader from Megascan. First, select two stone materials and use them as the main materials for the surface. Next, apply the mixed material to the low-poly stone model. At this point, you will notice that the details on the stone surface are significantly enhanced, which is the desired effect.
It is important to note that each layer in the mixed shader has its own purpose. Finally, we utilize the vertex color of the model to paint and apply other materials in areas of focus to avoid repetition. By adjusting the transparency and color between each layer using the height mixing feature in the mixed material ball, you can achieve the desired final effect.


Stone House Final Performance In UE5
In the end, you can see that the building, after I adjusted the color, is still very well integrated with the environment. In fact, the production of stones is quite simple. I hope that everyone will not limit themselves to a single production method but instead use their creativity to expand their production ideas.
For example, you can directly replace some attractive stone textures on the low-polygon model using displacement maps. Although the number of triangles has increased, the level of detail in the model will also increase significantly.

How The Metal Part Is Made
This part of the production is also very interesting. When I create these metal elements in Blender, I need to consider the interconnected relationship of these structures at all times and then unwrap the UV for each part.
I must pay special attention to the fact that the UV must be vertical and flat because the textures in the Megascan material library are horizontal and vertical, which include these stains and details.
Finally, each part of the metal element is assigned a different ID so that the metal material can be flexibly matched in the UE5 engine to achieve our desired effect.


About The Design Of The Stone House
Here is the corrected version of the article:
Because this stone house did not appear in the concept of the original painting, it involved how to redesign it. The design process needs to consider our basic aesthetics and the proportion of elements. The main blue stone is actually relatively rough. I simply carved a rough shape to ensure that the proportions and area meet the requirements. Secondly, I deformed and reused the metal elements marked in the red area. At this point, you can see that the texture of each piece of the metal element is different. This is why we need to distinguish the ID of each piece of material mentioned above in order to facilitate flexible collocation and reuse.
The stone part with green, accounting for 15%, is also very important because we need to ensure that not all parts of the picture appear messy.
Some parts need to be relatively flat to highlight the hierarchical relationship of the entire building. The part where purple accounts for 5% is mainly to add more details to the main building, ensuring its rationality, but not overdoing it.
The upper limit needs to be controlled. Lastly, the road with a yellow proportion of 5% may be small in area, but it serves a specific purpose and has a good guiding effect on the visual experience. Therefore, the road is also an essential element.

Ground Details
The raised surface part is actually very interesting in how it is made. I set aside all the complicated production processes and tried to use UE5’s modeling tools to create an undulating general shape with a box and adjust it in real-time on the screen. Furthermore, I subdivided this box, resulting in approximately 5000 triangles, and then I used the sculpting brush in the UE5 modeling tool to sculpt it, striving to make this shape more accurate and in line with the design reference. In fact, this part is also the finishing touch in the close-up shots.
Once I was completely satisfied with the shape, I used the same method as with the stone to select grass and mud. These two materials were mixed together, and I utilized the vertex color brush to delineate the specific material areas. The top was covered with grass, while the sides were coated with soil. Finally, I added some flowers and plants on top of the model to achieve the desired final effect.

Tree Resources
For the tree resources, I utilized free resources from the internet. This collection of scanned vegetation is of exceptional quality and offers a wide variety of tree types.
It includes a wind effect and is particularly suitable for realistic scenes. In the original concept painting, there were no trees. My intention was to effectively fill the void within the image.

Other Resources
Except for the assets I made myself, all of the above resources are from the Megascan asset library.
I have listed all the names of the assets used. If necessary, you can search by name.

Sign Making
I am accustomed to scenes with some humanistic elements, which can better highlight the history and civilization of that time.
Therefore, consider adding a signboard to the scene. Firstly, define the main purpose of each building, such as a grocery store, weapon store, pharmacy, posters, etc.
These are relatively simple to create, and there is nothing particularly special about them. I believe that you won’t encounter many problems when making assets.

Windmill Animation
The production of a windmill animation is very simple. This production method can be applied to any moving object in your scene and can be rotated and moved along the axis. The premise is that this object must be set to be movable; otherwise, it will remain static after running the game.

Uniform Color
The unity of color is a color correction principle that I have always followed. If you don’t follow the steps of uniform color correction, the picture may appear dull, chaotic, and messy.
Only by balancing the colors in the picture can the material, after being exposed to light, become more harmonious and cohesive. If you want a certain part to be the focal point, then you can adjust the contrast of that part appropriately.


Lighting Parameters
For the lighting part, I utilized the lighting blueprint provided with the M4 material. This blueprint combines all the essential elements, including skylight, fog, and sunlight, into a single blueprint.
It is incredibly convenient to adjust, and I didn’t make extensive modifications to ensure control over the final image in the lighting segment.


Final Render Output
The final rendered output is the best conclusion I have reached after exploration and experimentation. If you use the default material of the M4 terrain, the vegetation type layer is overly exaggerated, and each layer contains an excessive amount of vegetation information. The total amount is exaggerated as well. While you can see more details in the vegetation, the final rendering process cannot handle such a heavy load, leading to a 100% crash when using MovieRenderQueue.
Therefore, I disconnected all the vegetation Type layers in the original material, and ultimately kept only two relatively important vegetation layers, aiming to reduce the variety and quantity of vegetation layers. This resulted in a successful render. If you find that the effect is lacking, you can consider using a vegetation brush to add some grass, which is a safer option.

Summarize
Finally, I am very grateful to GamesArtist for the invitation, and I hope everyone will support Mr. Sergey Vasnev.
Read more articles
You might also like these articles.