LeMat 45-70 Gov.


Introduction
Hi everyone! My name is Alexander Smirnov, Lead 3d Weapon Artist at GSC Game World.


Idea
I’m a big fan of Hunt Showdown, and I spent a lot of time playing this game.
So I decided to create some kind of concept with a weapon, and the main goal was to do something according to the style, lore, and soul of this game.
Since I played a lot with LeMat Carbine, I decided to build my ideas around it.
“What if the American Hunters Association has an elite group of demon slayers for the most dangerous and biggest of them?” – I thought and started research.
I wanted to know which bullets had the biggest caliber with the most powerful stopping effect, according to the lore and time represented in the game.
In addition, it could be used with a Revolver-type carbine. So, my choice was .45-70-500 Government, especially because the game lore has high-explosive bullets. For the shotgun, I’d choose incendiary ammo.
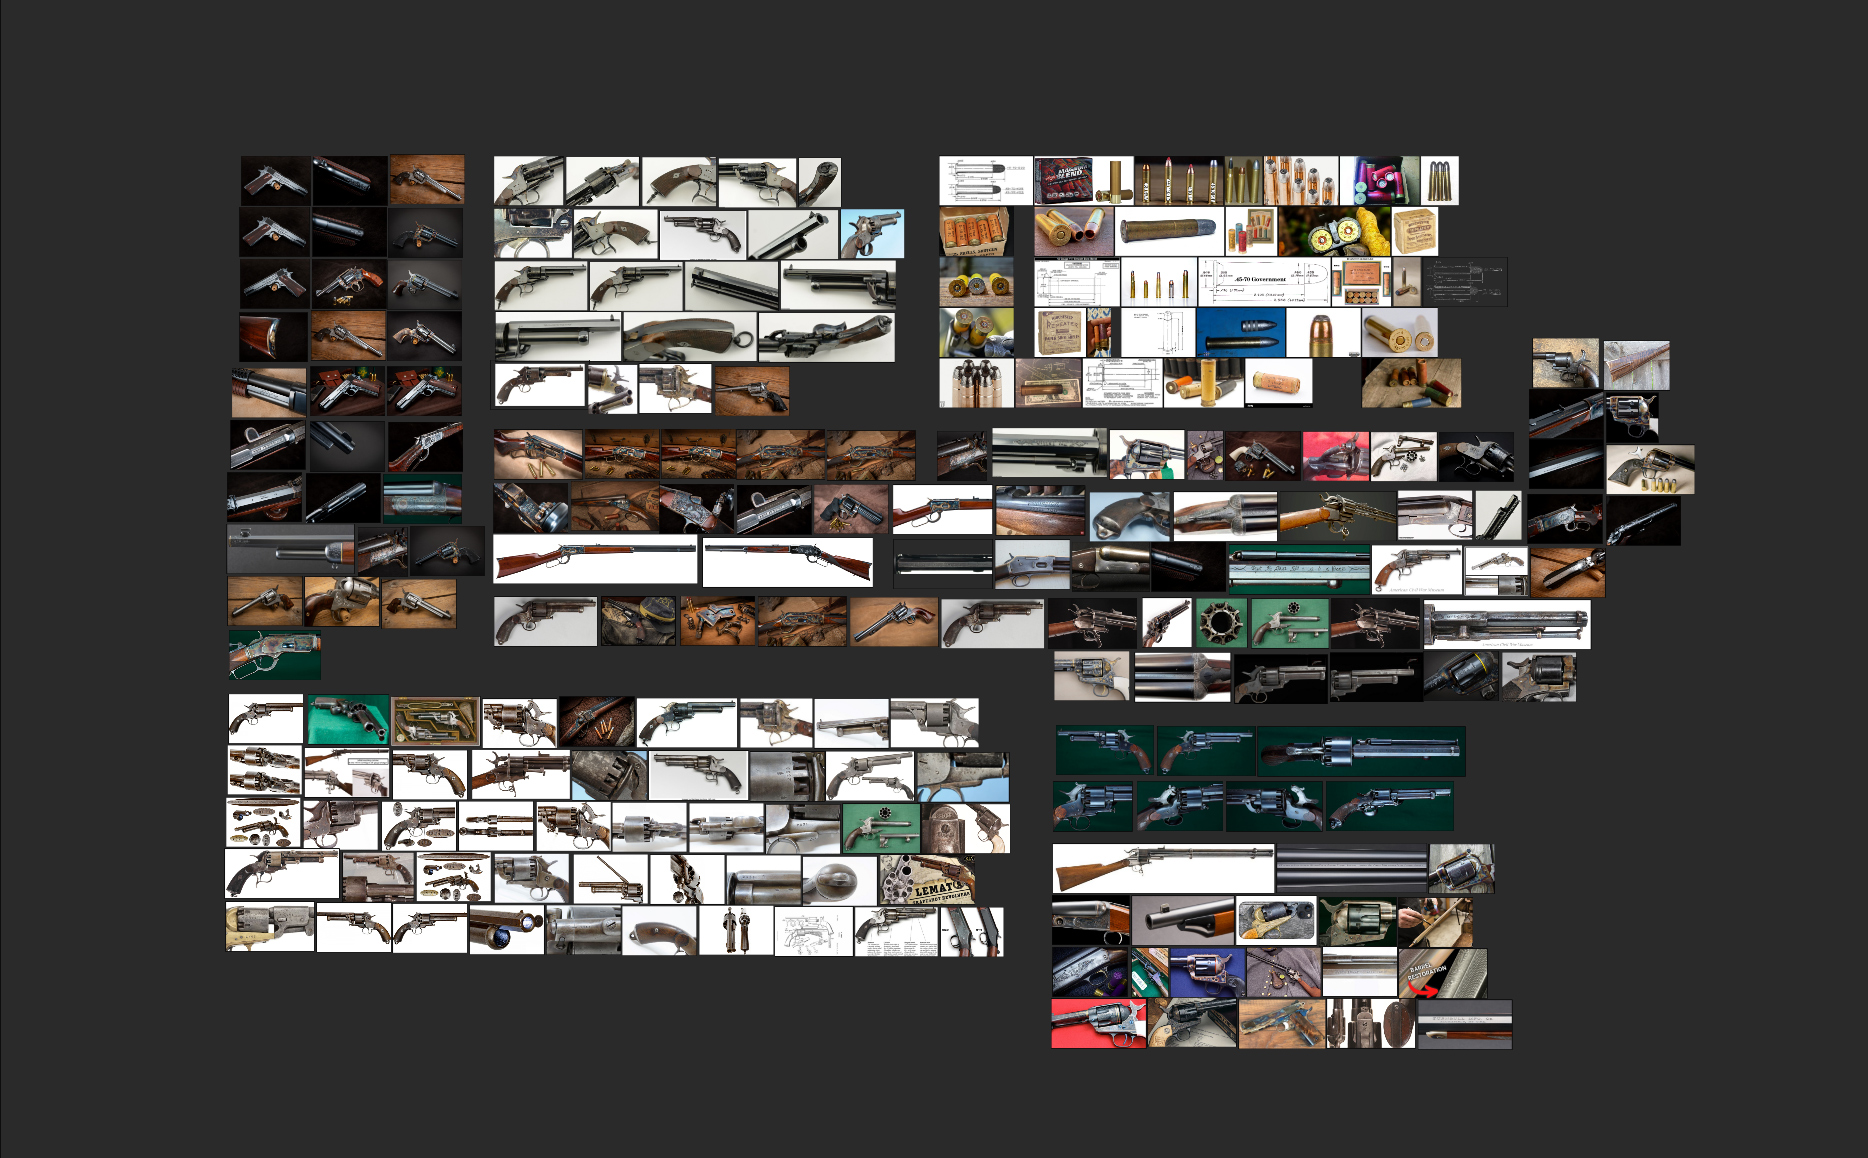
References
The internet has a huge amount of different images, concepts and art, but if you need references for vintage and old weapons, I recommend doing research at online auctions like GunBroker, Rockisland Auction, etc.
However, remember, you don’t need to search only for the weapon you are doing; you can easily use different parts, ideas, and approaches from other references.
It will only make your concept more interesting and unusual, and be sure it will lead you to the best results.
Concepting and Highpoly
When you have a full pack of needed references, it’s time to step up to the next stage – concepting and making high poly.
For these two stages, I use CAD software because it’s easier to use and more accurate with details than usual polygonal modeling, according to my experience.
Especially if you aren’t just a concept artist in the game development industry but have experience in real-world designs of weapons that could be used for industrial purposes.
I’m using Fusion 360 for now in my pipeline, but it doesn’t matter which CAD product you use – they are all very similar, and if you know how to work in CAD, you will quickly integrate your knowledge into any CAD software.
Tip
“Don’t be afraid to use a different type of software. If it’s easier and faster to make something with polygonal modeling, I’ll do it with polygons or sculpting. E.g. wires, pipes, or organic forms/details.”

From CAD to polygons
After finishing with the highpoly model, you have to convert it to a polygonal one.
You can use your CAD software (e.g., Fusion 360 has an OBJ exporter), Moi3d, 3ds Max, or Pixyz – all of them have flexible export settings and give you needed control over the future polygonal objects.
You will need two types of polygonal models:
- High dense mesh for polishing in ZBrush
- Low dense mesh for using as a low/mid-poly model which will have UVs and textures

Polishing
The mesh we exported from CAD isn’t ready for baking yet and needs some polishing and detailing.
I’m using ZBrush for polishing acute angles and parts of the model and adding extra details like dents, scratches and damages if needed.
In the case of doing a model with high texel density for render purposes, you could use small chamfers, and it won’t break the visual perception of the model.
However, in the case of doing a model for game dev, you have to increase the size of chamfers due to limitations of the game engine and resizing of texture maps.
The game-ready model and its textures shouldn’t have visual bugs on acute angles and other visible artifacts.

Lowpoly
The low dense mesh you exported before should be prepared for future texturing by unwrapping UVs and baking normal maps.
In this case, I’ve used 3ds Max, but it doesn’t matter which software to use; it should be comfortable for you (3ds Max, Maya, Blender, Modo, etc).
If you’re doing a model for Gamedev, you should follow the limits you have for the model, its polycount, and texture sizes. Otherwise, if you’re doing a model for rendering only, you shouldn’t have any limits.
The main rule – the mesh should be as smooth as possible in close-up renders. Also, keep in mind the topology; it should be comfortable to cut it into UV shells.
The decision about triangulation is only on you, but often it helps avoid visual bugs in the next stages (baking, texturing, etc.)

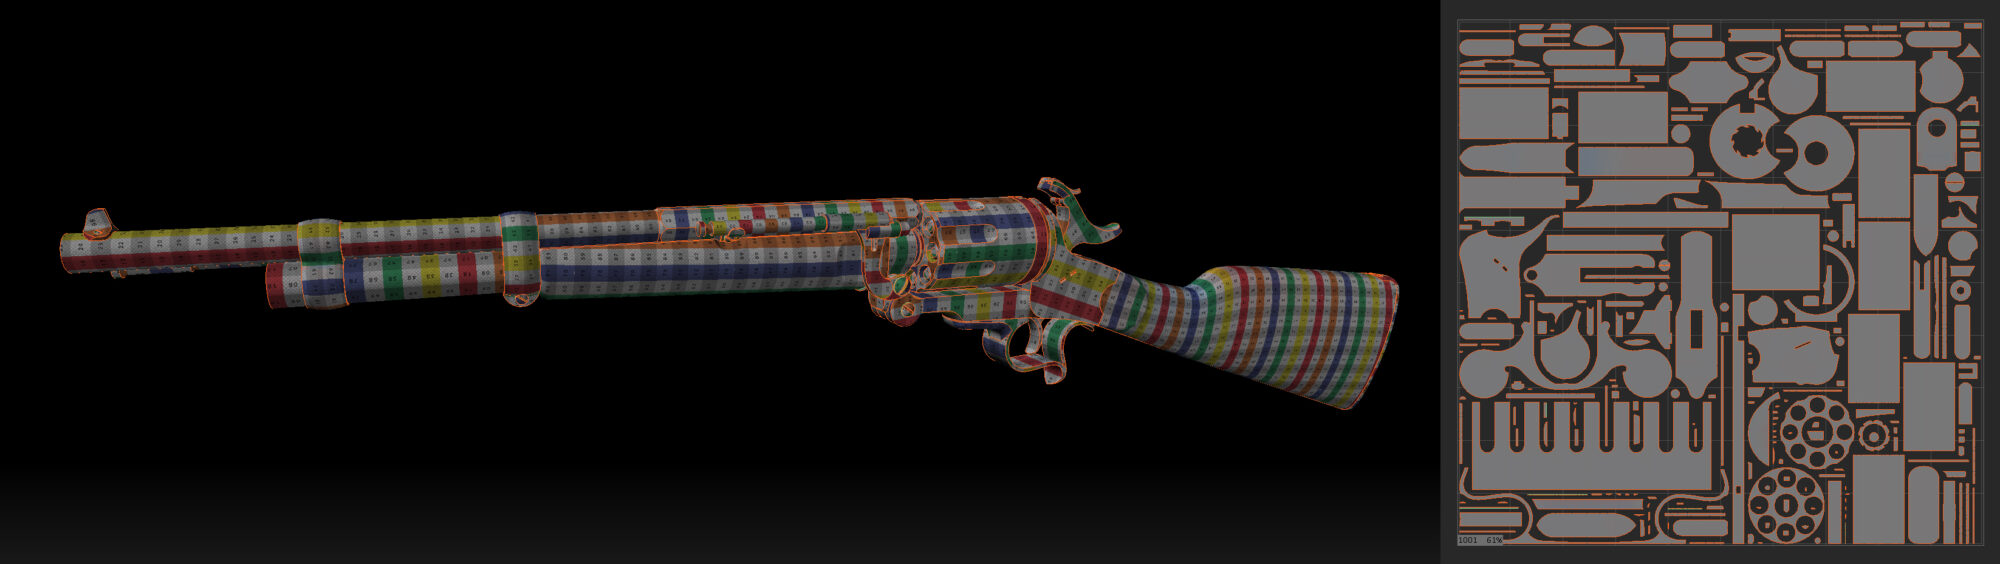
Unwrapping
When the polycount and topology of the model are ready, you should go to the next stage – unwrapping.
I’m using RizomUV – really good software for fast and high-quality unwrapping.
Tips
“Please keep in mind how you will use patterns in the texturing stage (milling, threads, knurling, etc).
Don’t do unnecessary cuts and seams.”
“Don’t forget to set up shading of the model using soft/hard edges. UV borders need to be as hard edges.”
Baking Normal
The next stage after unwrapping is baking. I’m using the Marmoset Toolbag for it.
If you have never used this software before, I recommend watching their tutorials on MarmosetCo’s YouTube channel and then trying it.

Texturing
So, here we are – the most important part of asset creation – texturing. I’ve decided to do textures of LeMat using the Specular/Glossiness pipeline, but you could use Metallic/Roughness.
It doesn’t matter if you know how each of them works.
The results on renders will be the same, but the approach could be different.
During the texturing process in Adobe Painter, I recommend importing your model to Marmoset Toolbag and from time to time check how it looks there – in software for future final render.
The displayed images in both of them (Adobe Painter and Marmoset) could be quite different, and you will need to tweak the final result of the textures.
As for texturing, everything is on you and your vision of the final result of textures (aging, using, dirt, dust, etc). I’ve decided not to make LeMat heavily used, very dirty and damaged according to the lore.
It isn’t the 50+ years old rifle, which was used a billion times and found in the swamp deeps. It’s a brand new weapon, made and released for the elite group of demon slayers at the time represented in the game.


Tip
“If you’re thinking you finished with textures, I recommend you take a break for a day or two and look at it with fresh eyes or even better show it to friends or colleagues.
A different look at your asset could bring feedback to improve textures.
However, not all feedback should be implemented and not from everyone.
In my case, I’ve shown it to my bro Ivan Filipchenko, and I got some useful thoughts from him.
Remember, it’s really important to get feedback from someone you trust and exchange experience.”
Rendering
As I mentioned before, I used the Marmoset Toolbag for the final renders of LeMat.
It’s important to decide which camera angles and positions you want to have, and only then you should do some lighting setup.
Don’t be afraid of using Quixel Megascans for the environment and background image.
The lighting setup for me is a combination of an HDRI map (fill light and caustics) and placing some additional point lights (emphasize forms and details of the model).


Conclusion
I hope you enjoyed it, and maybe you learned something for yourself. Good luck and awesome renders!
Read more articles
You might also like these articles.


