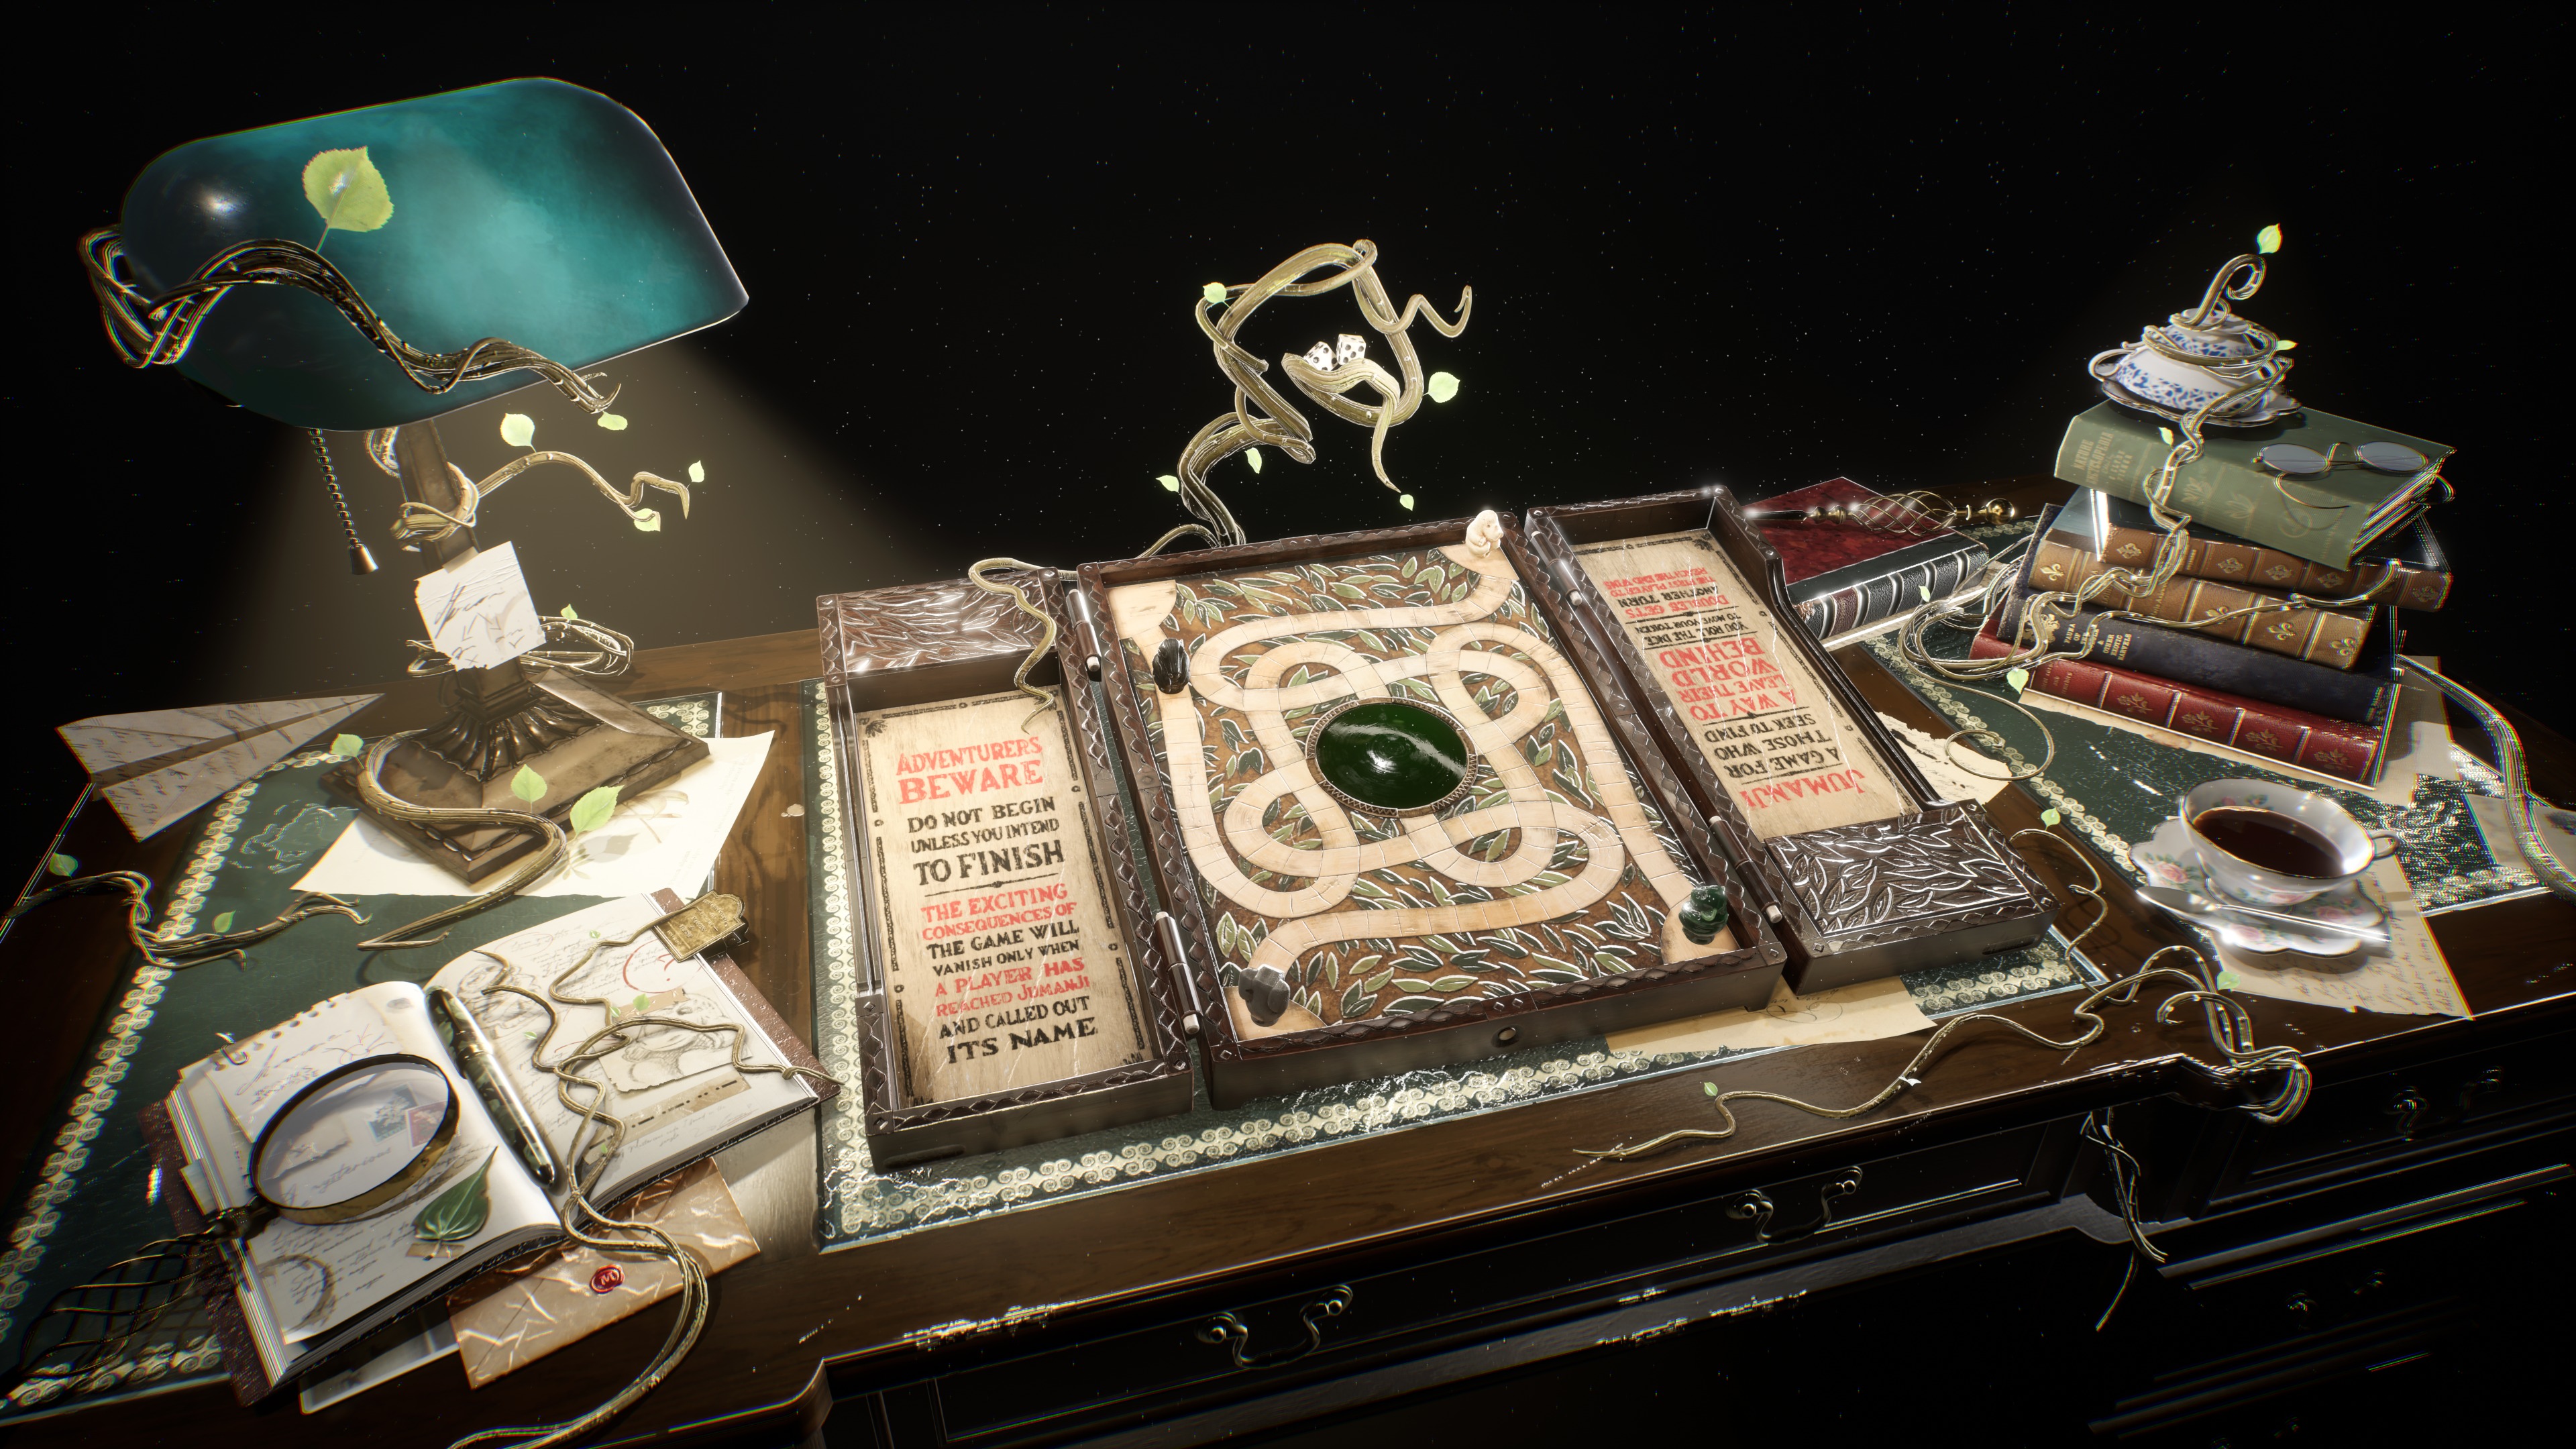
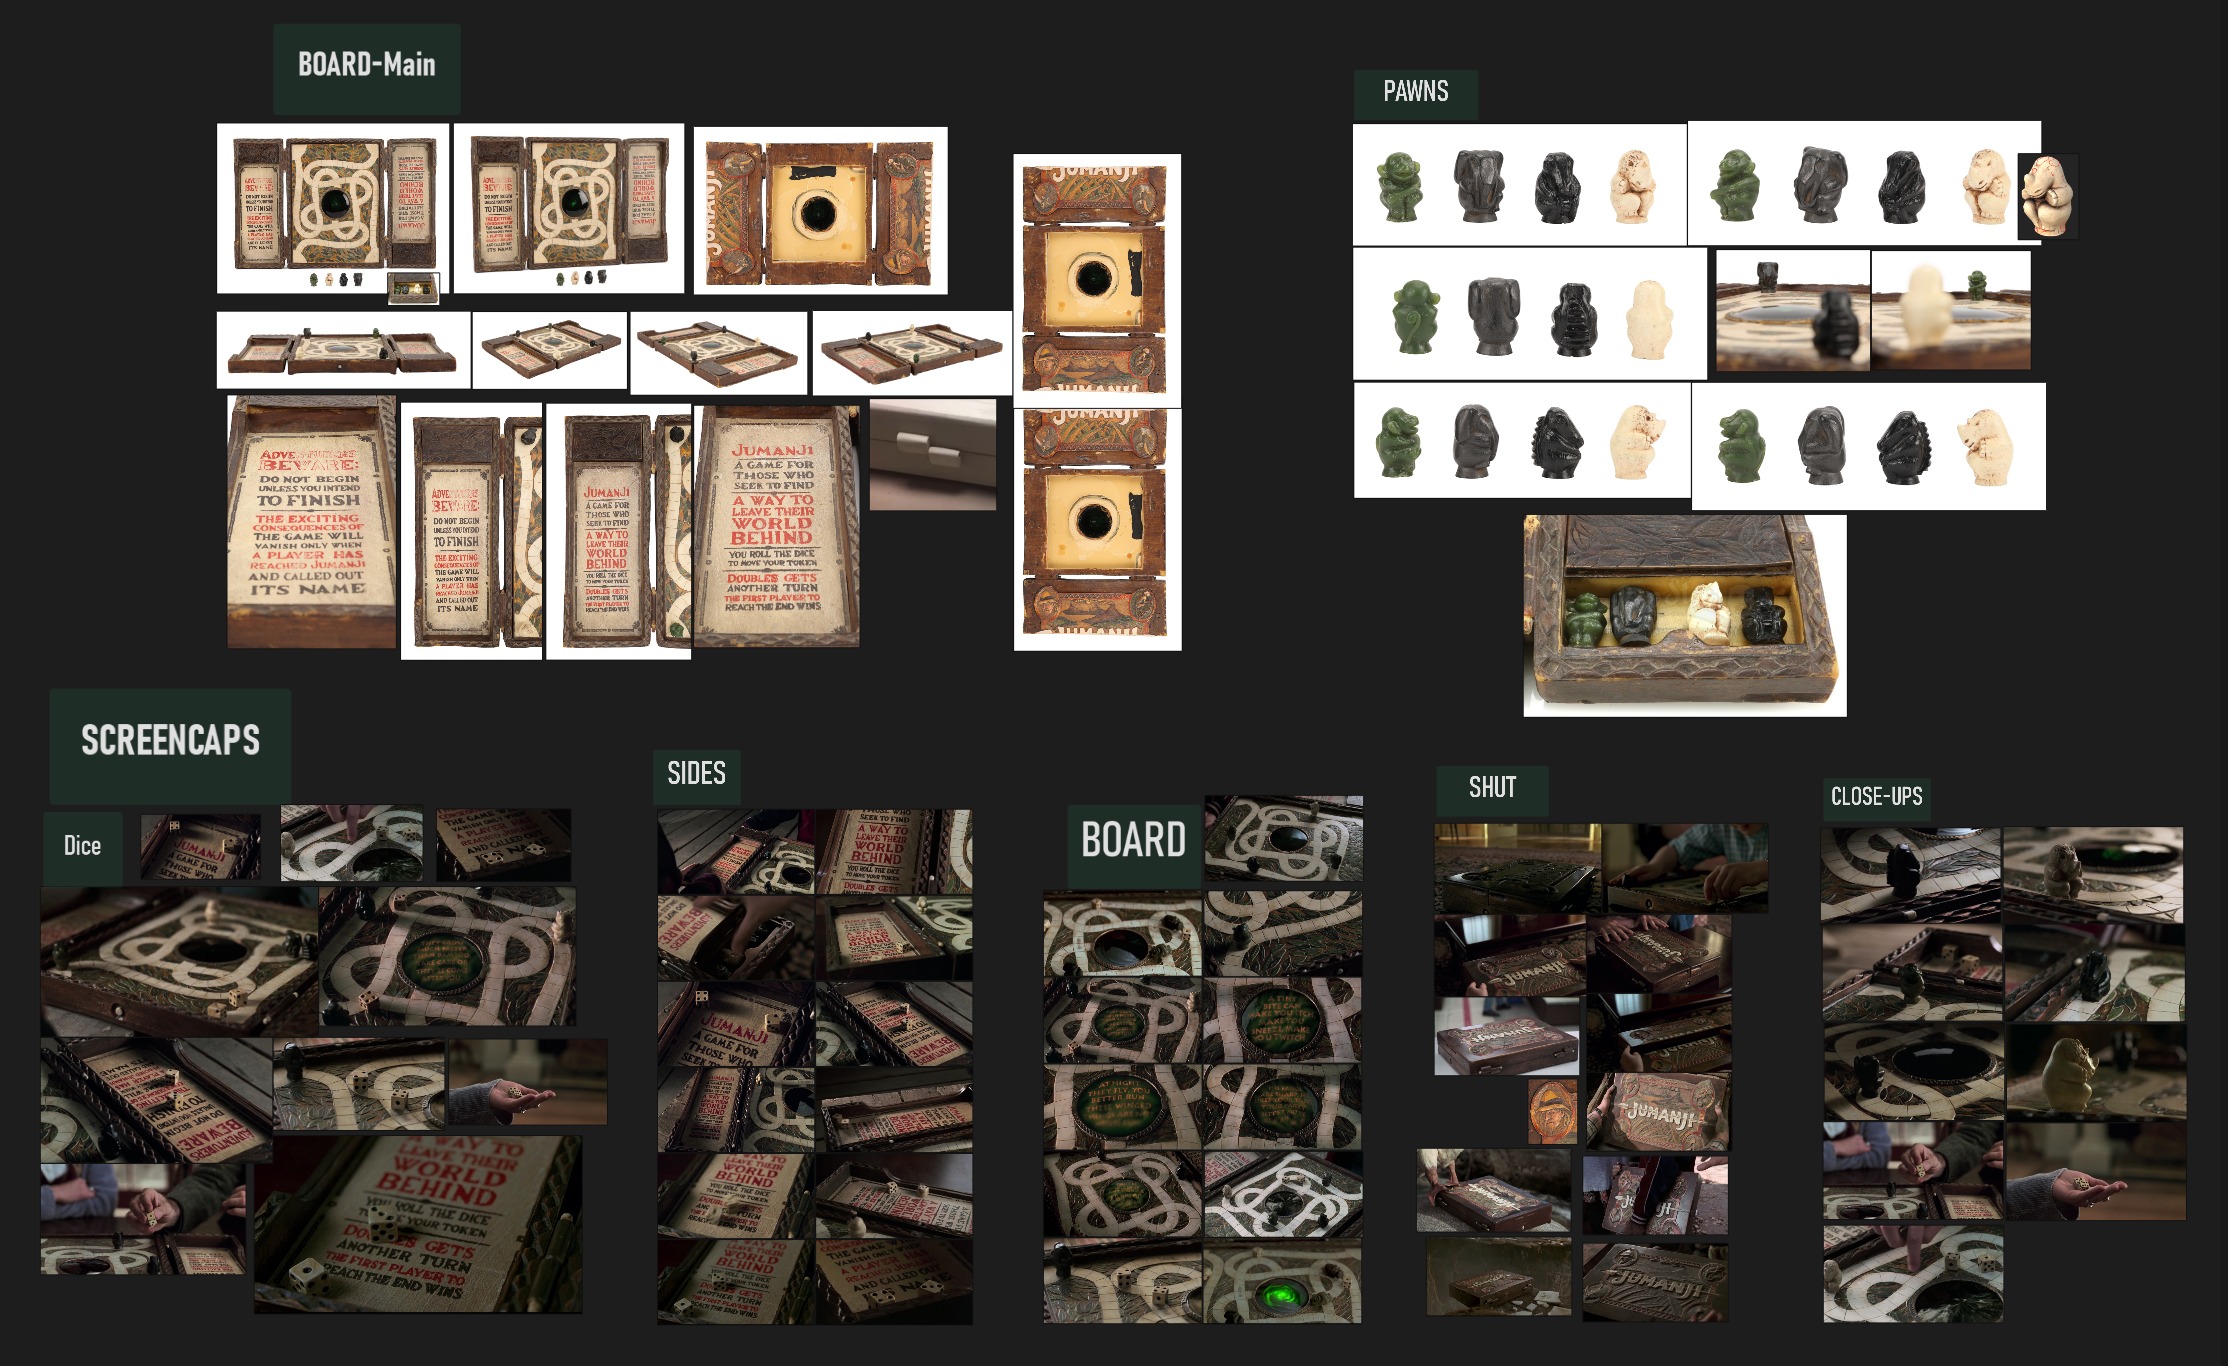
Jumanji Board

Introduction
Hi everyone!
My name is Marie Boisnard, I’m a French Junior Environment and Props Artist, with a focus on texturing.
In the near future, I would love to work in either cinema or video games. Feel free to contact me!
Goals
The main goal for me was to showcase my realistic texturing abilities.
After an insightful chat with different professionals from my Wia mentorship, it became clear I needed to work on a new project with a varied lot of textures to display my adaptability and realistic texturing skills.

Paying homage to a movie that fueled my love for both cinema and props felt like a good idea, as the love you have for your subject often helps to keep you engaged.
References
Finding quality references is a key part of starting your project. A phrase I always come back to is “Don’t base your work on your mind’s eye”, as the most interesting details that make or break your object are often found in various HD close-ups of real objects.
Websites like eBay, auction webpages, or even popular museums’ online archives are gold mines for high-quality pictures with good lighting and insightful angles.
My personal favorite place to gather texture and props data is my local antique market. Nothing beats getting out in the field!

Ideas/Storytelling & Design
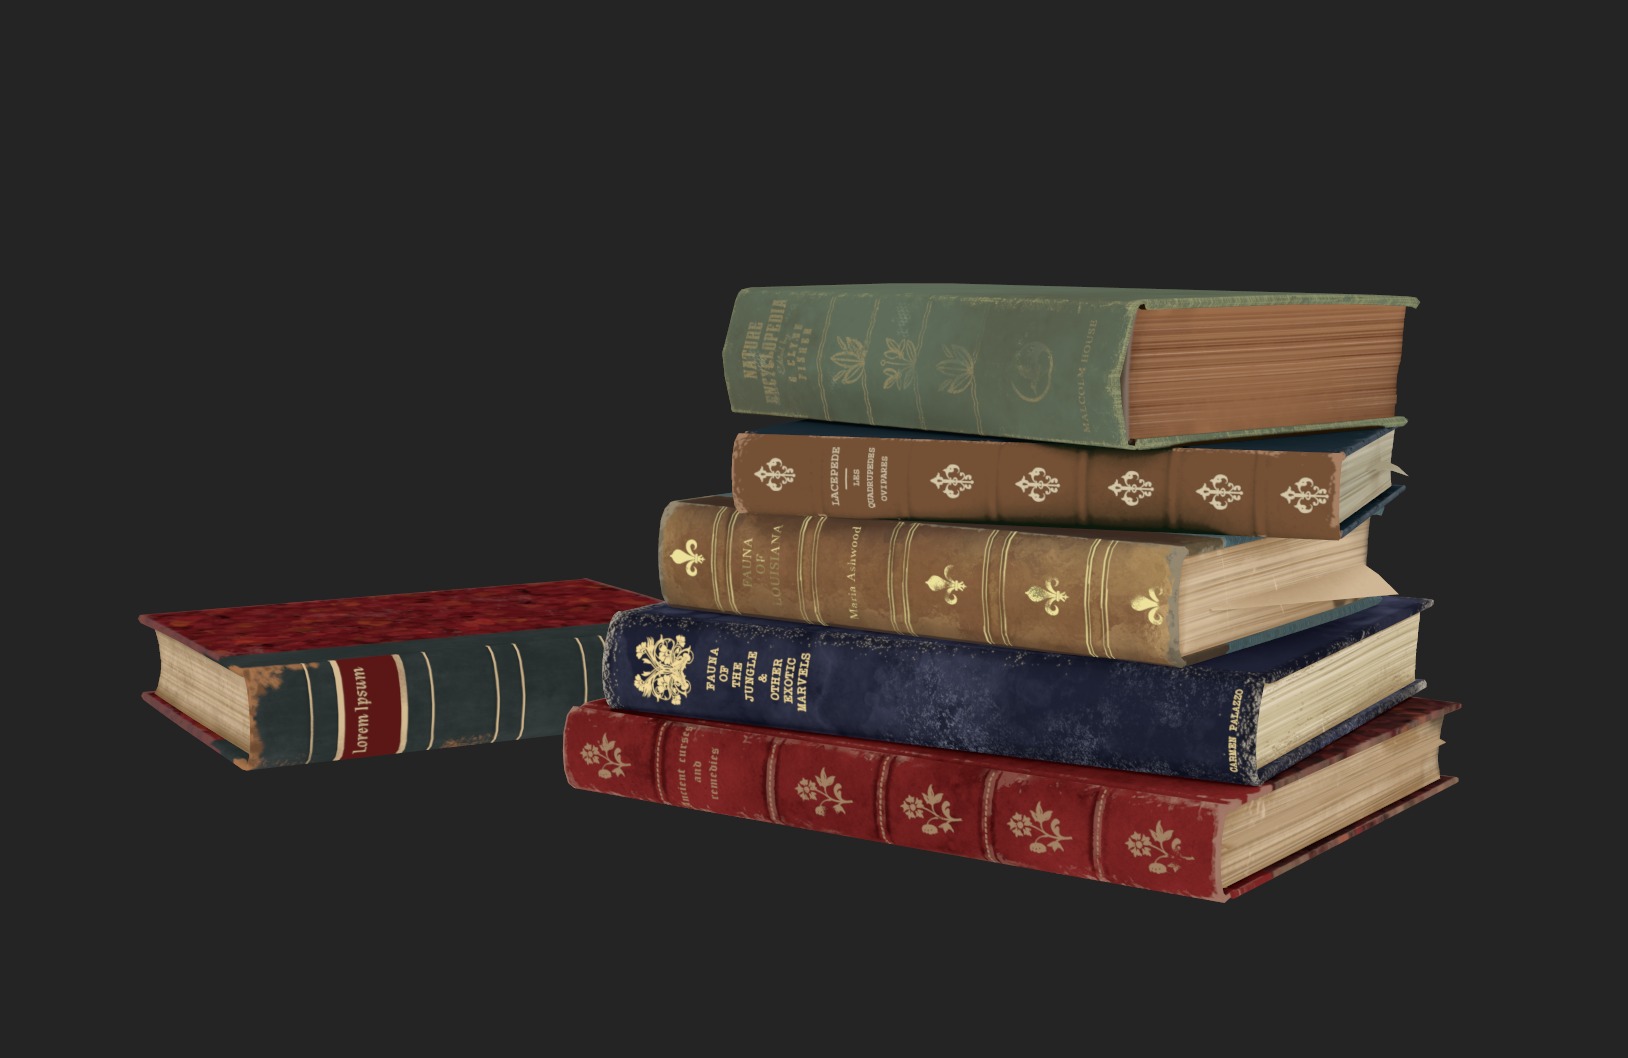
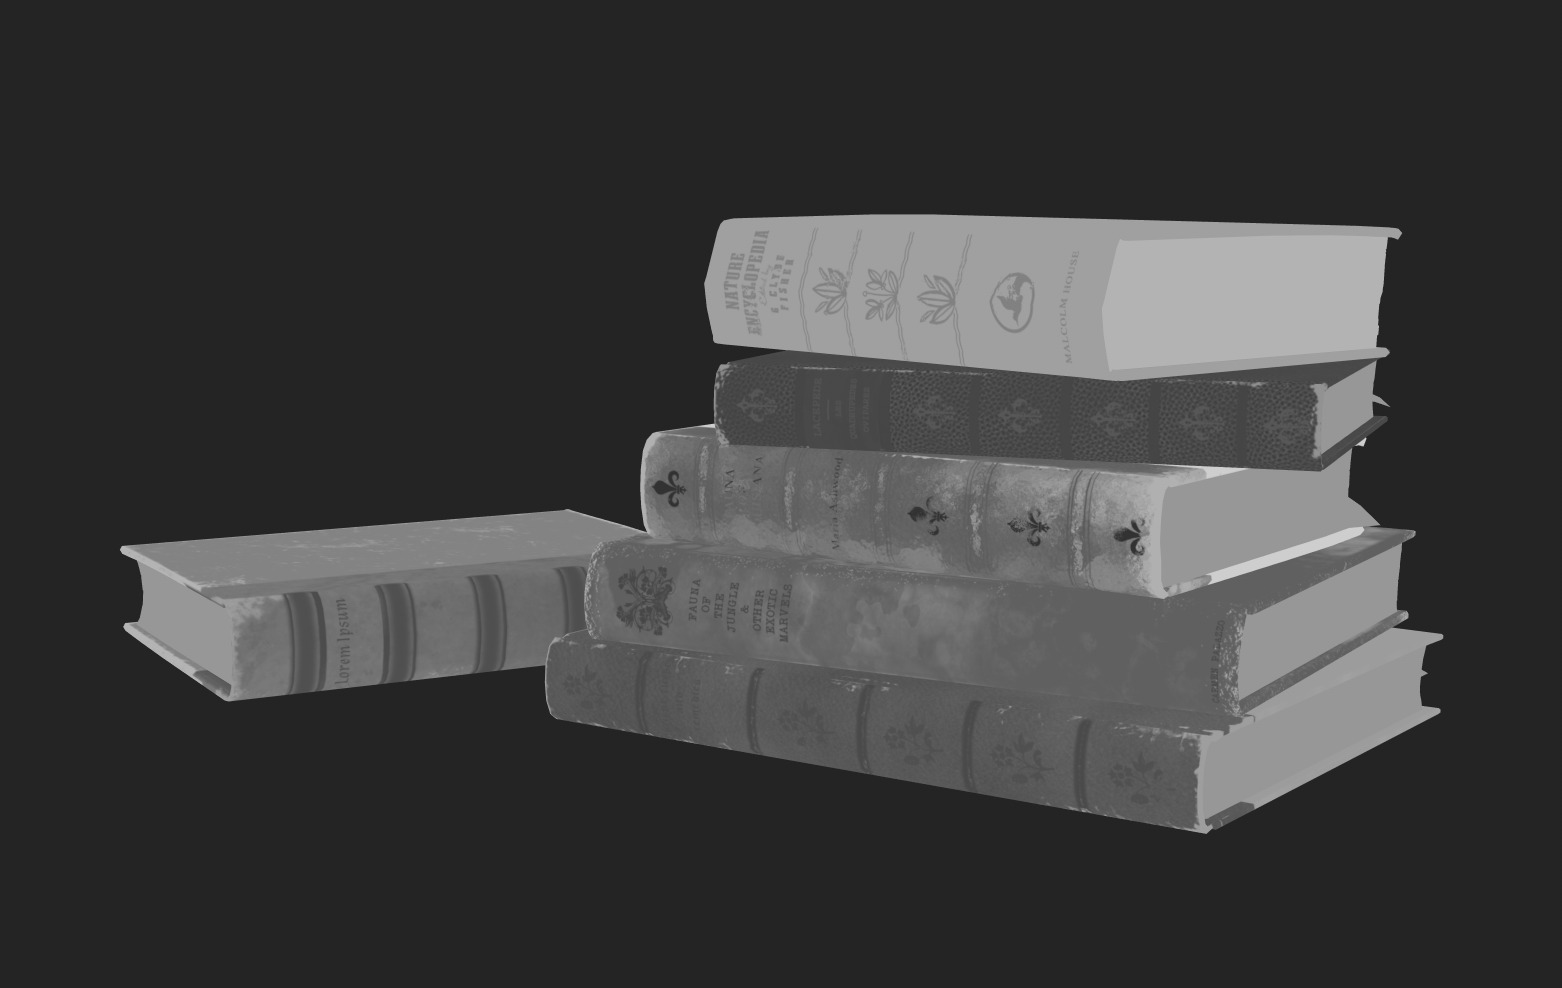
The original idea for the piece was to have the board and pawns as standalone props, until a peer suggested creating an environment. And so, before I knew it, I was researching antique books on eBay.
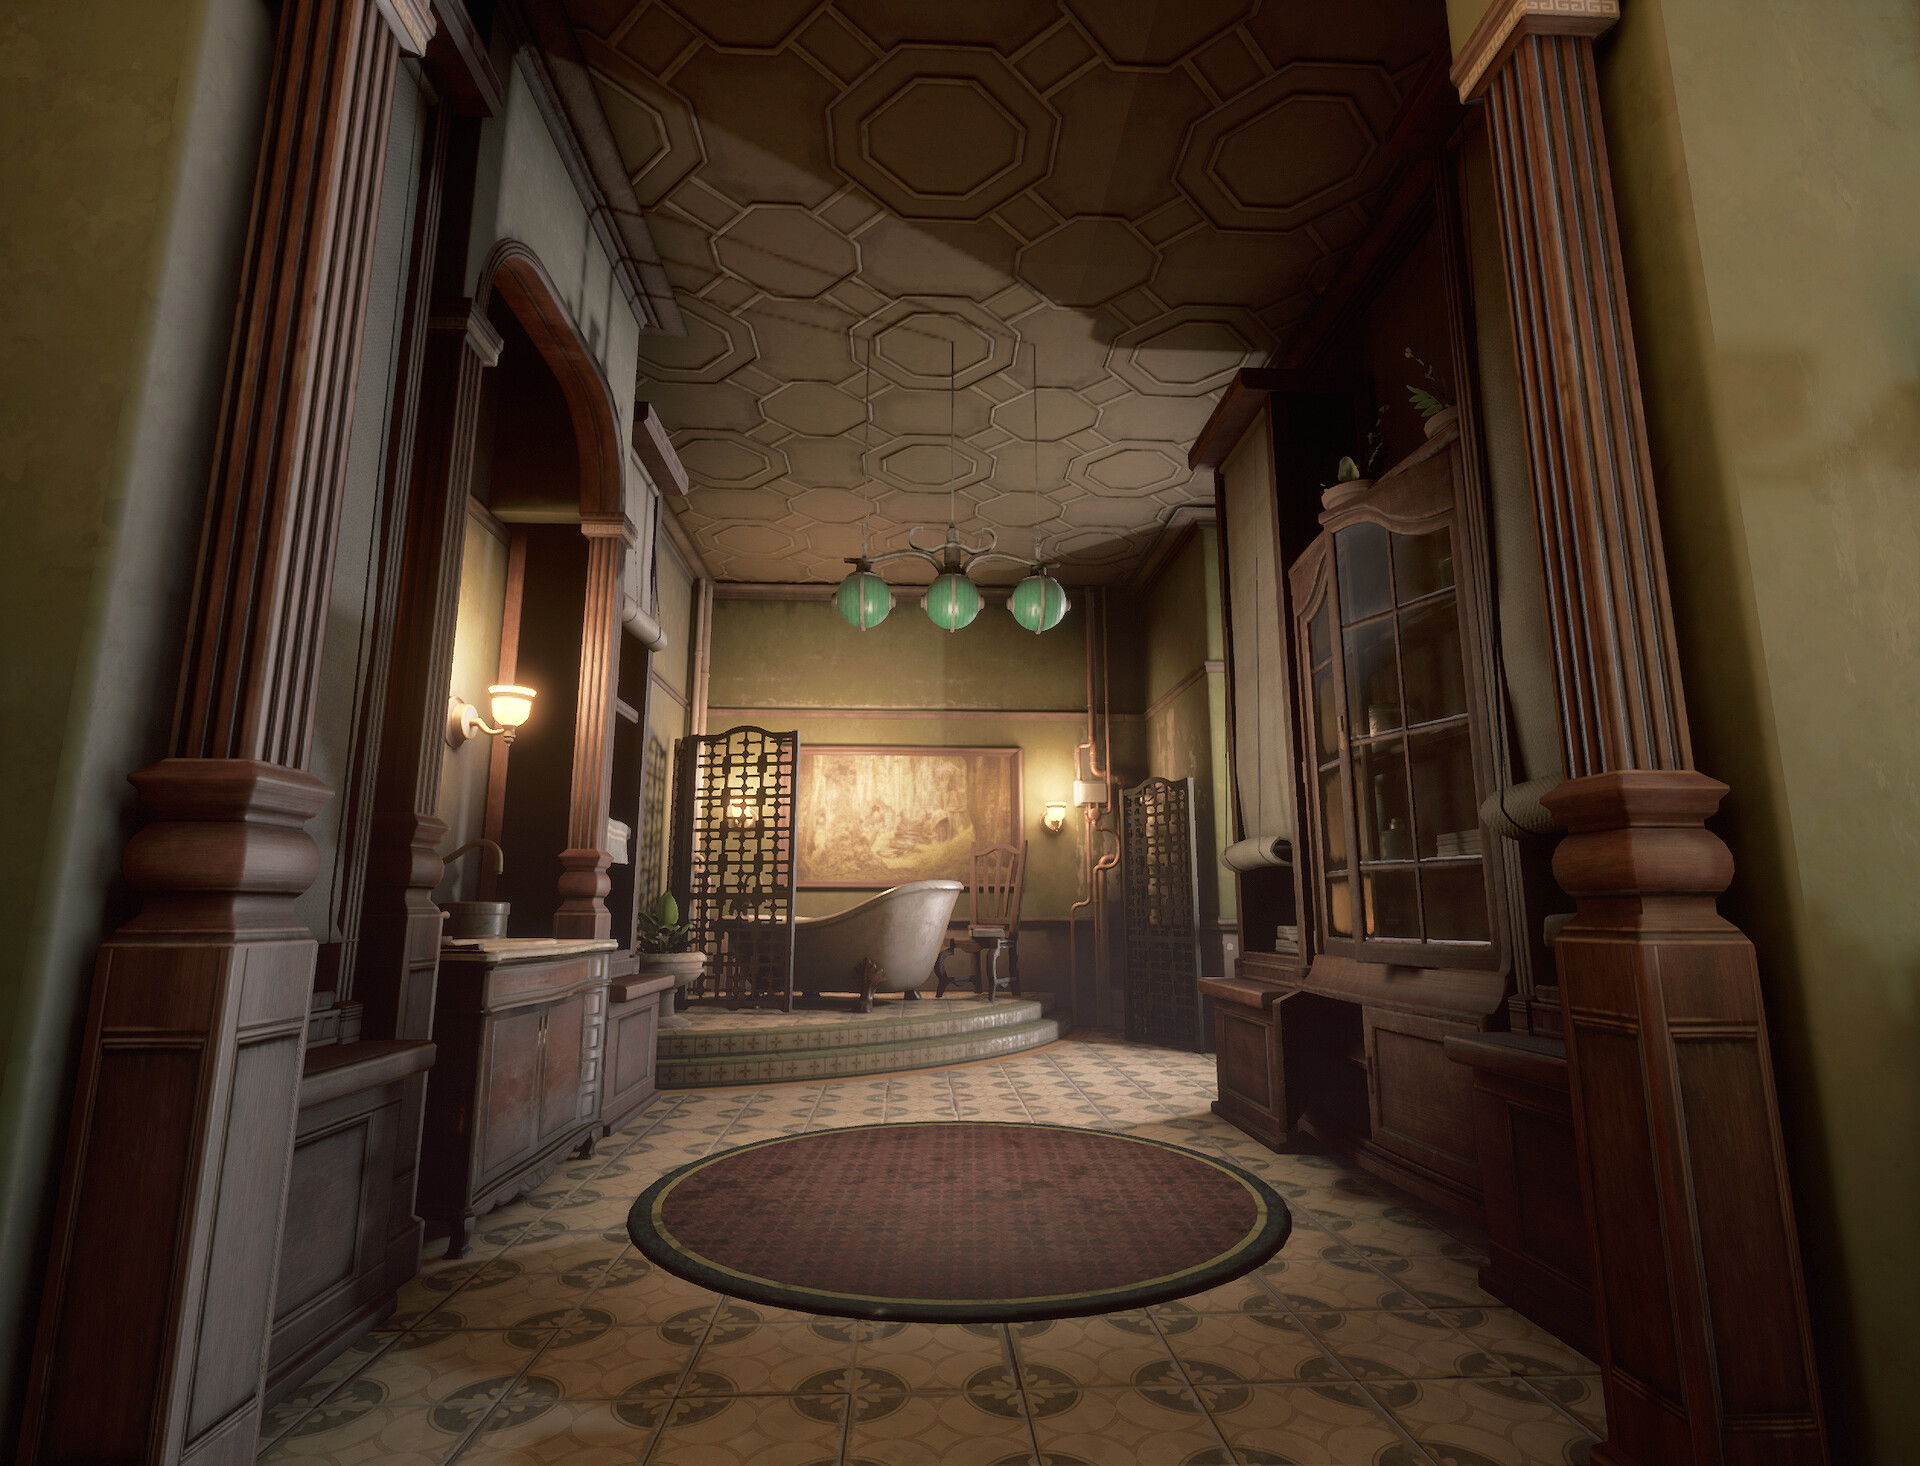
After this, the project was separated into two blocks: the board and the storytelling-oriented desk scene.
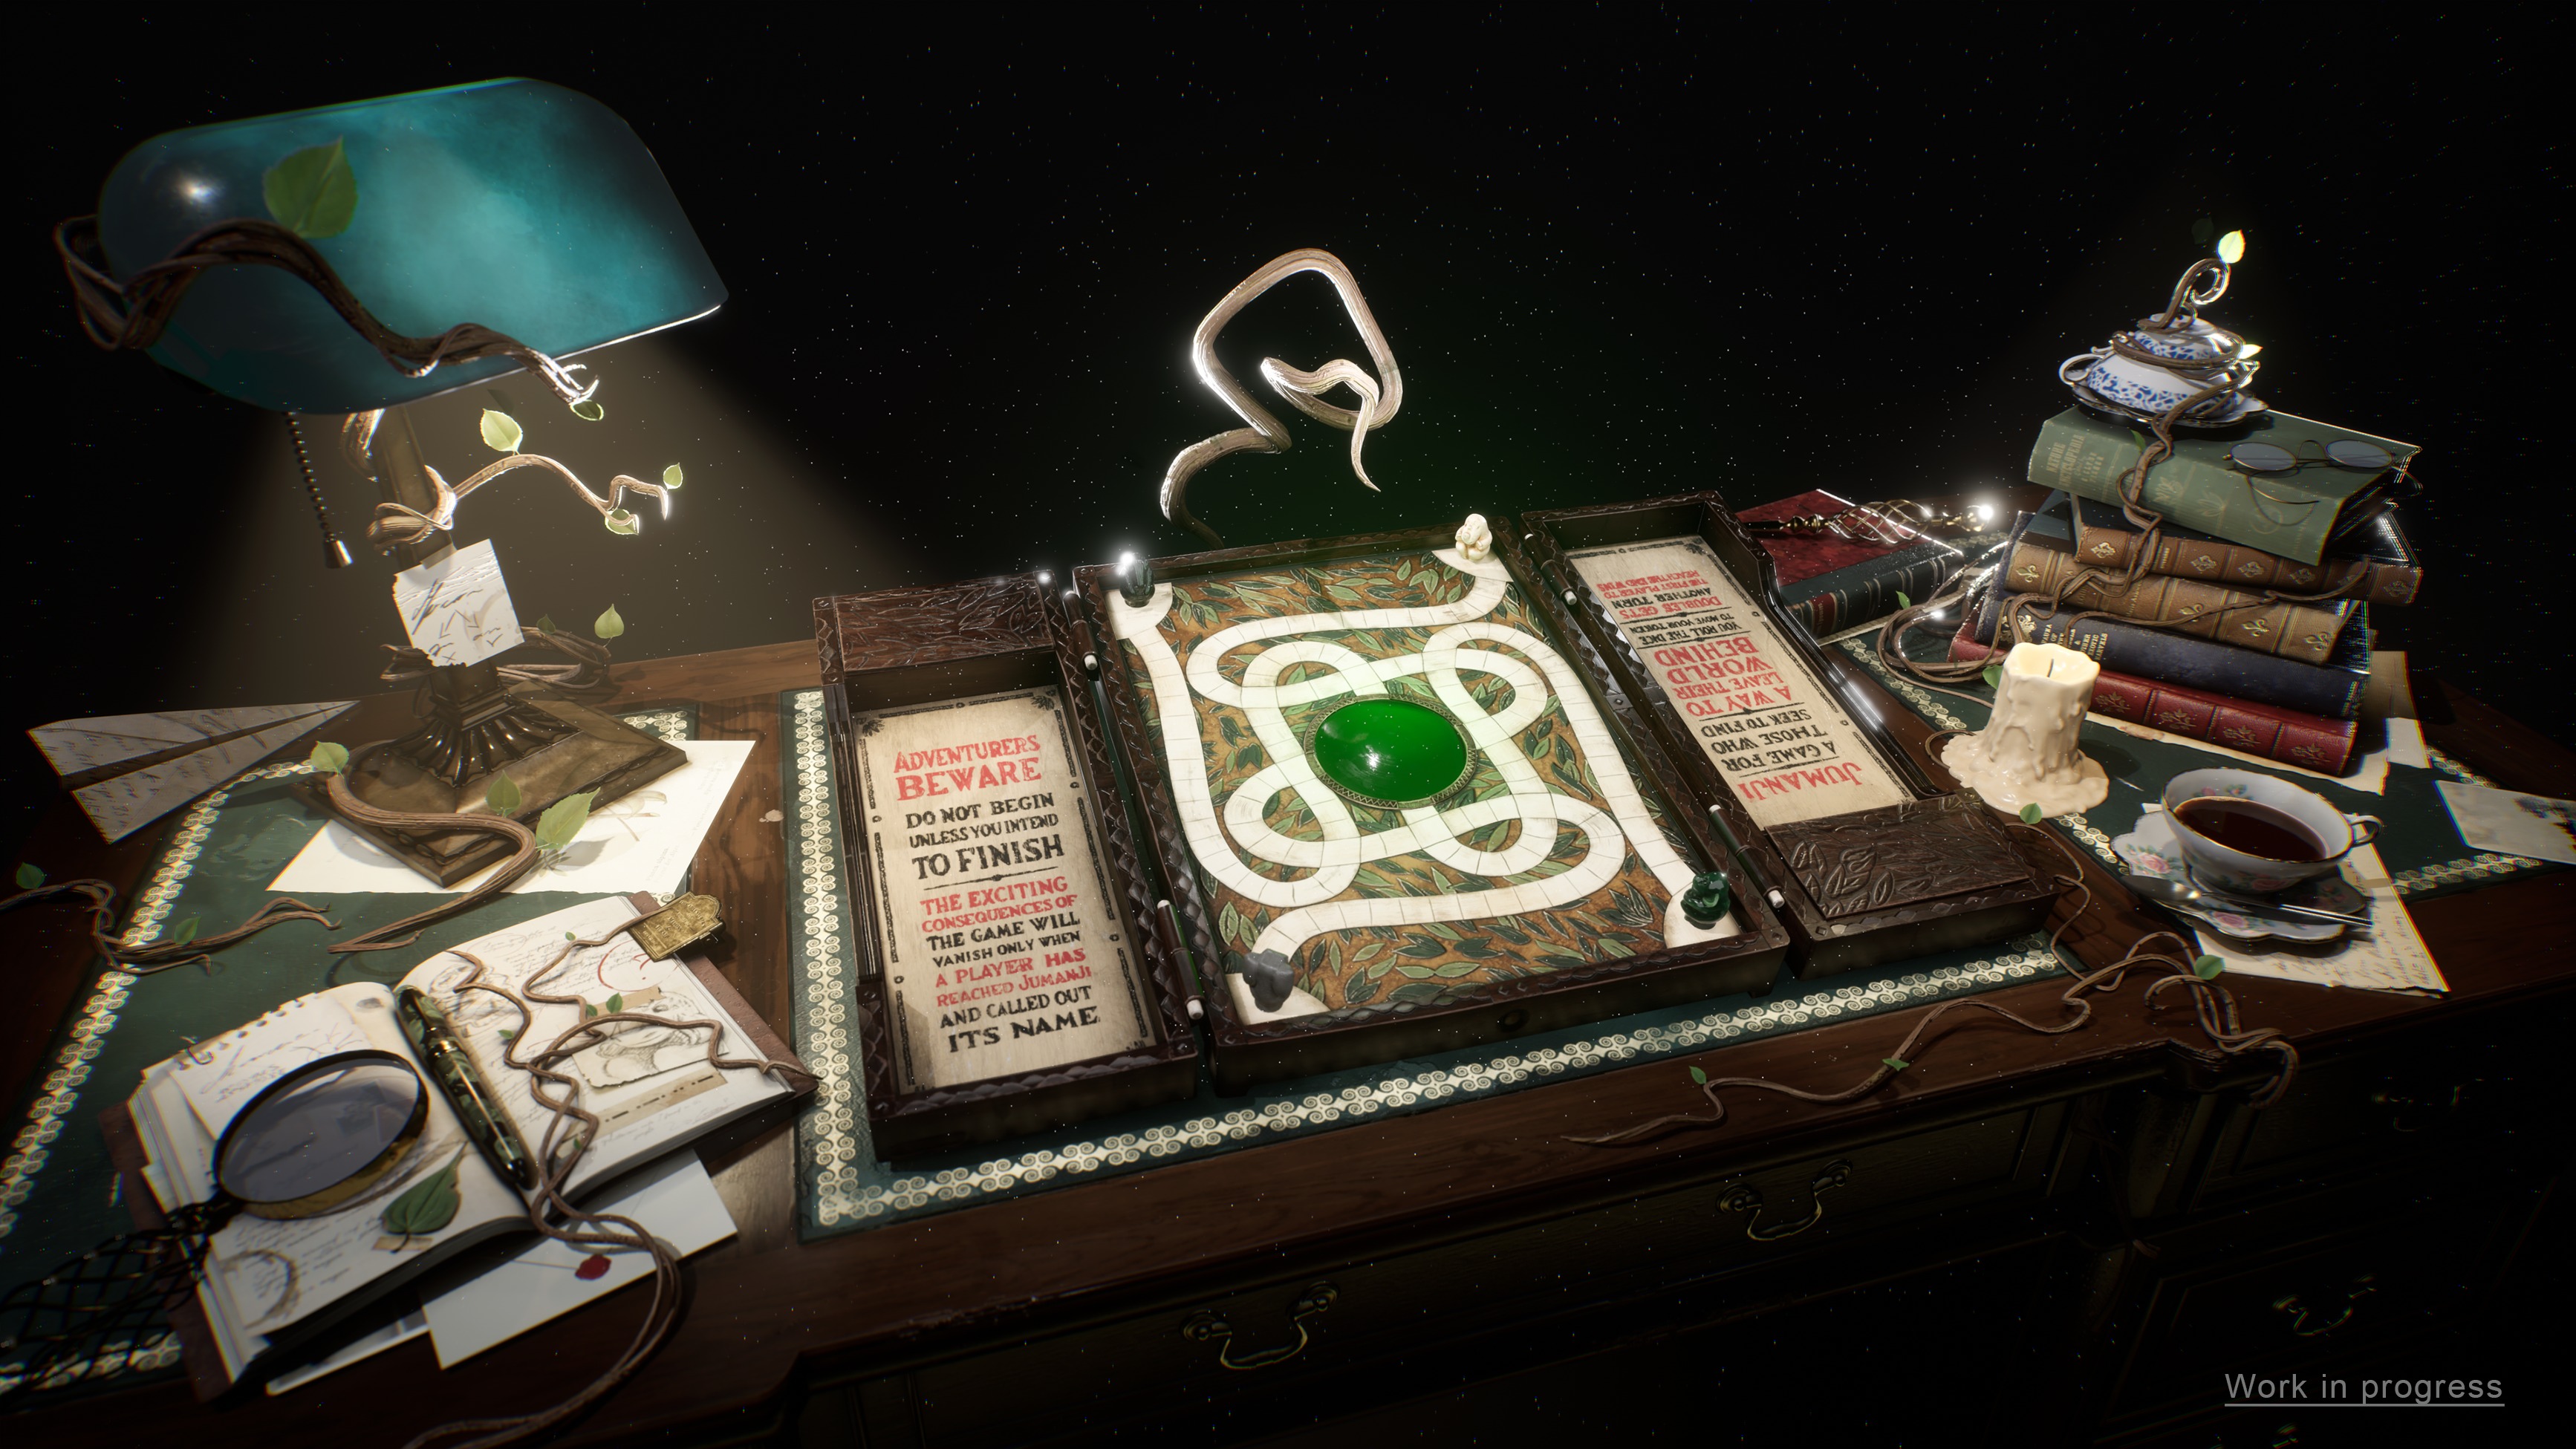
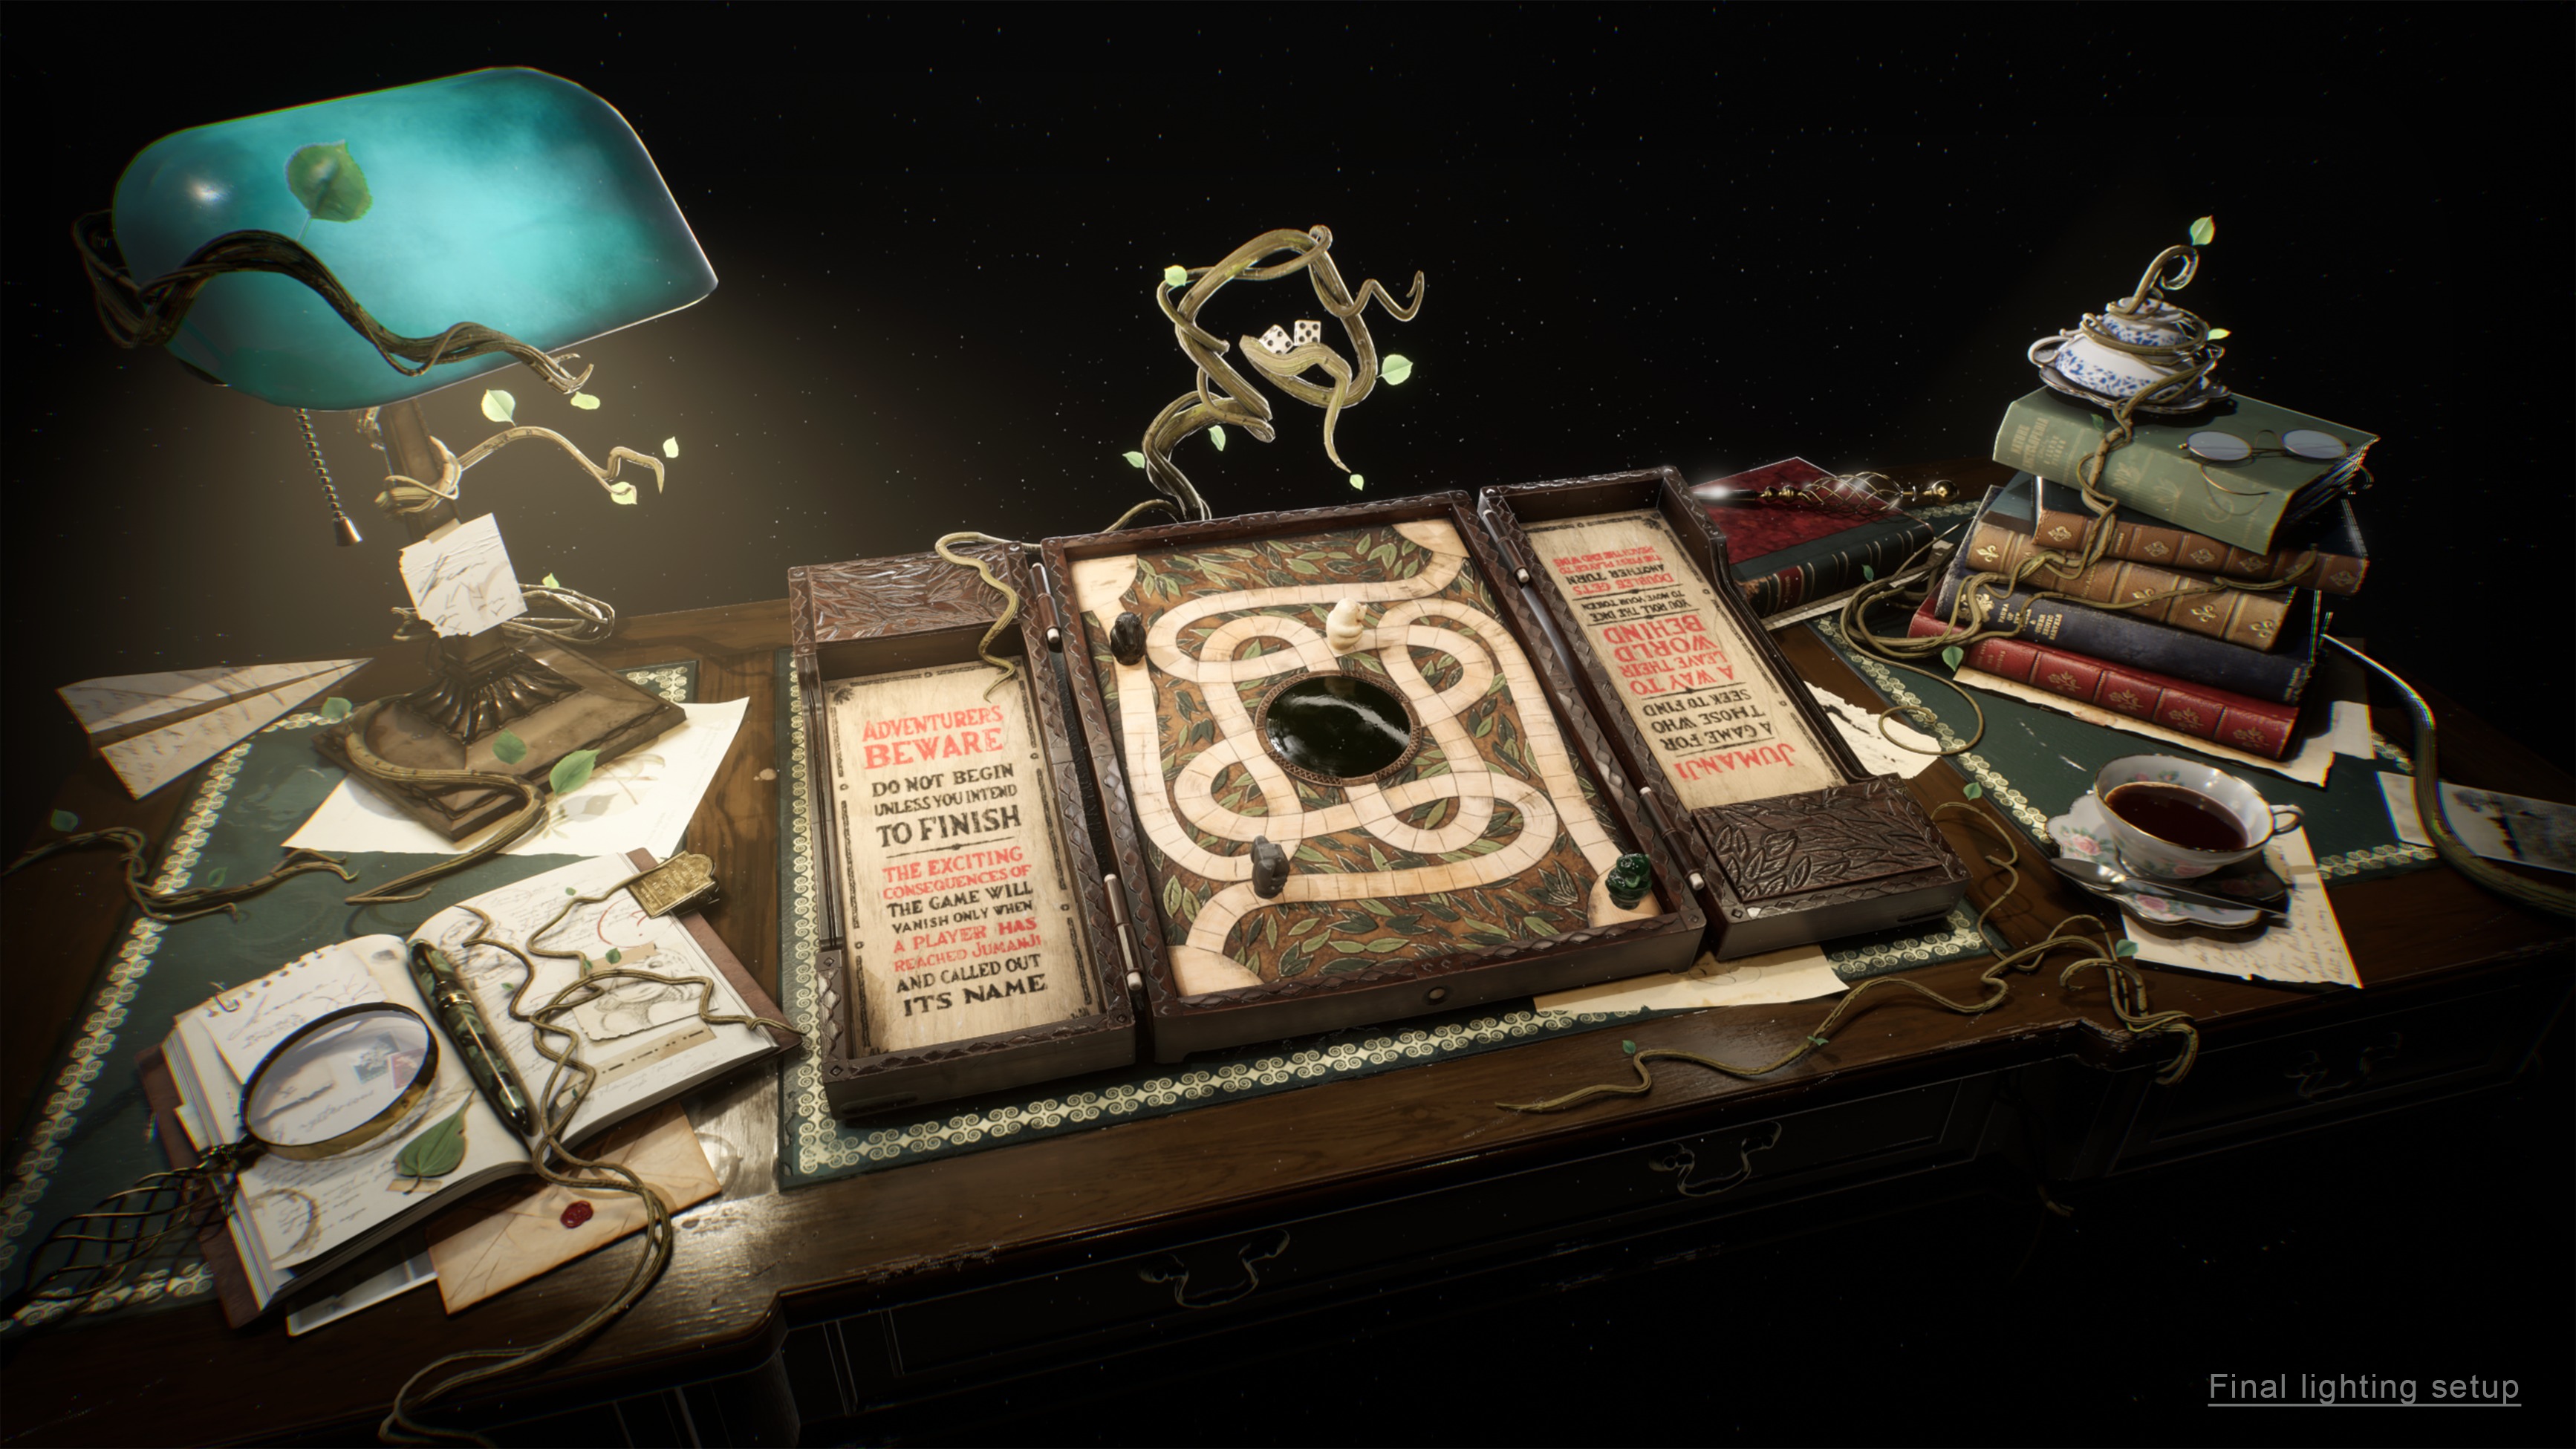
For the former, the original idea was to set up a minimalistic render scene, mimicking a museum archive situation. I was hoping to give the impression that the board was one of those magical artefacts from a distant land, tucked away in a sanitised basement.

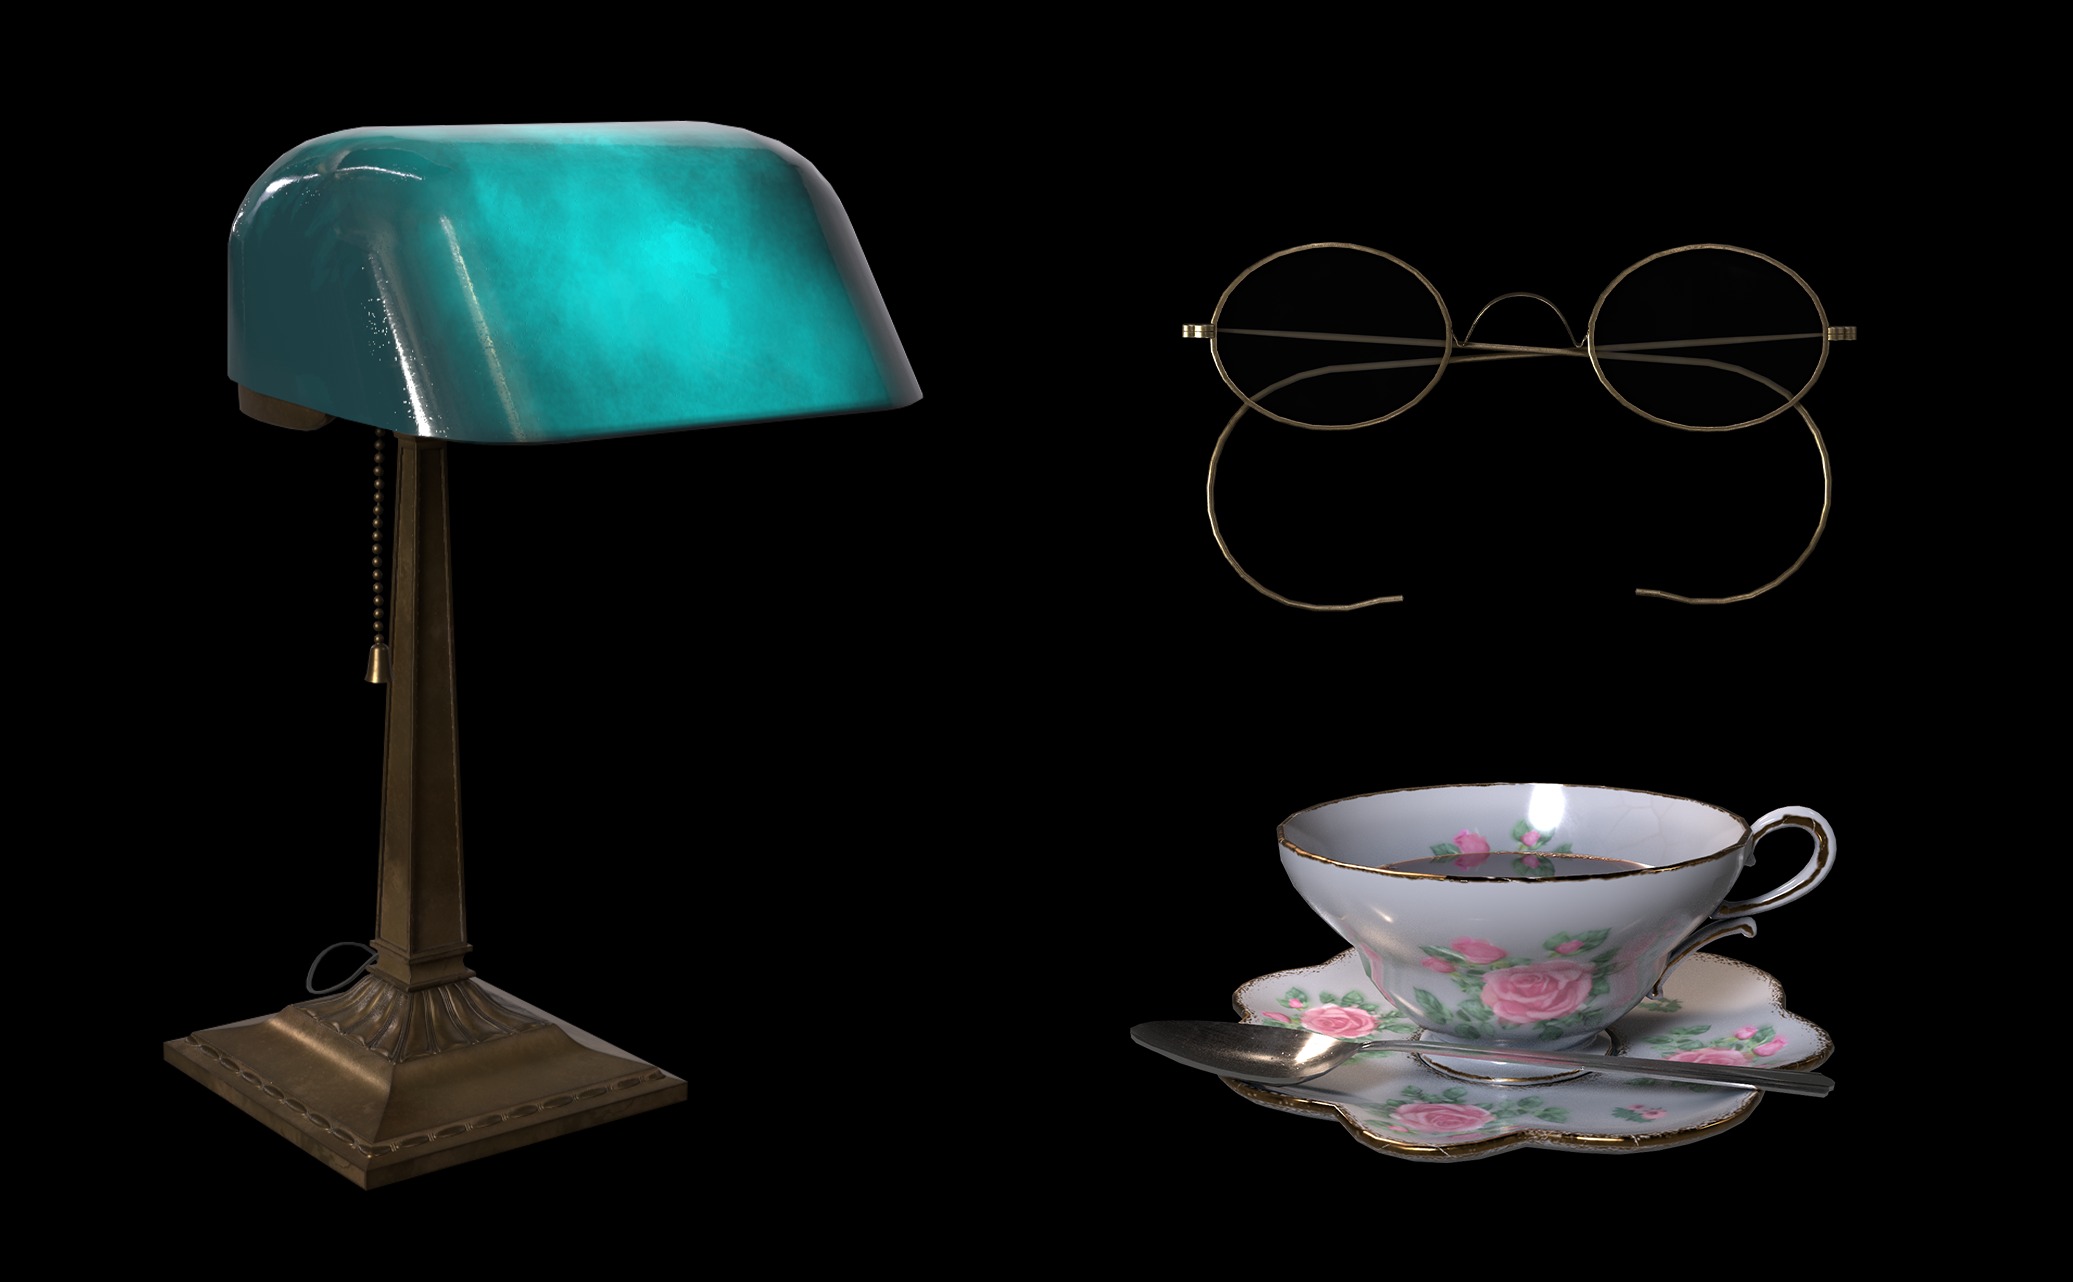
My intention with the latter felt very clear. I wanted to write a piece of the board’s story through the eyes of an adventurer/archeologist (such as Indiana Jones or Lara Croft).
The character would have to research the board’s origin in order to try and free themselves from the curse set off by starting a game of Jumanji.
Thinking up details to give the mystery adventurer personality was incredibly fun. My hope was to set up a credible time period, as well as try to create organic chaos with a human feel to it.
I purposefully chose to exclude any detail beyond the desk in order to give off the claustrophobic feel of the curse closing in on the viewer.
The desk is abandoned, vacant, obviously our mystery adventurer failed to beat Jumanji.
Research
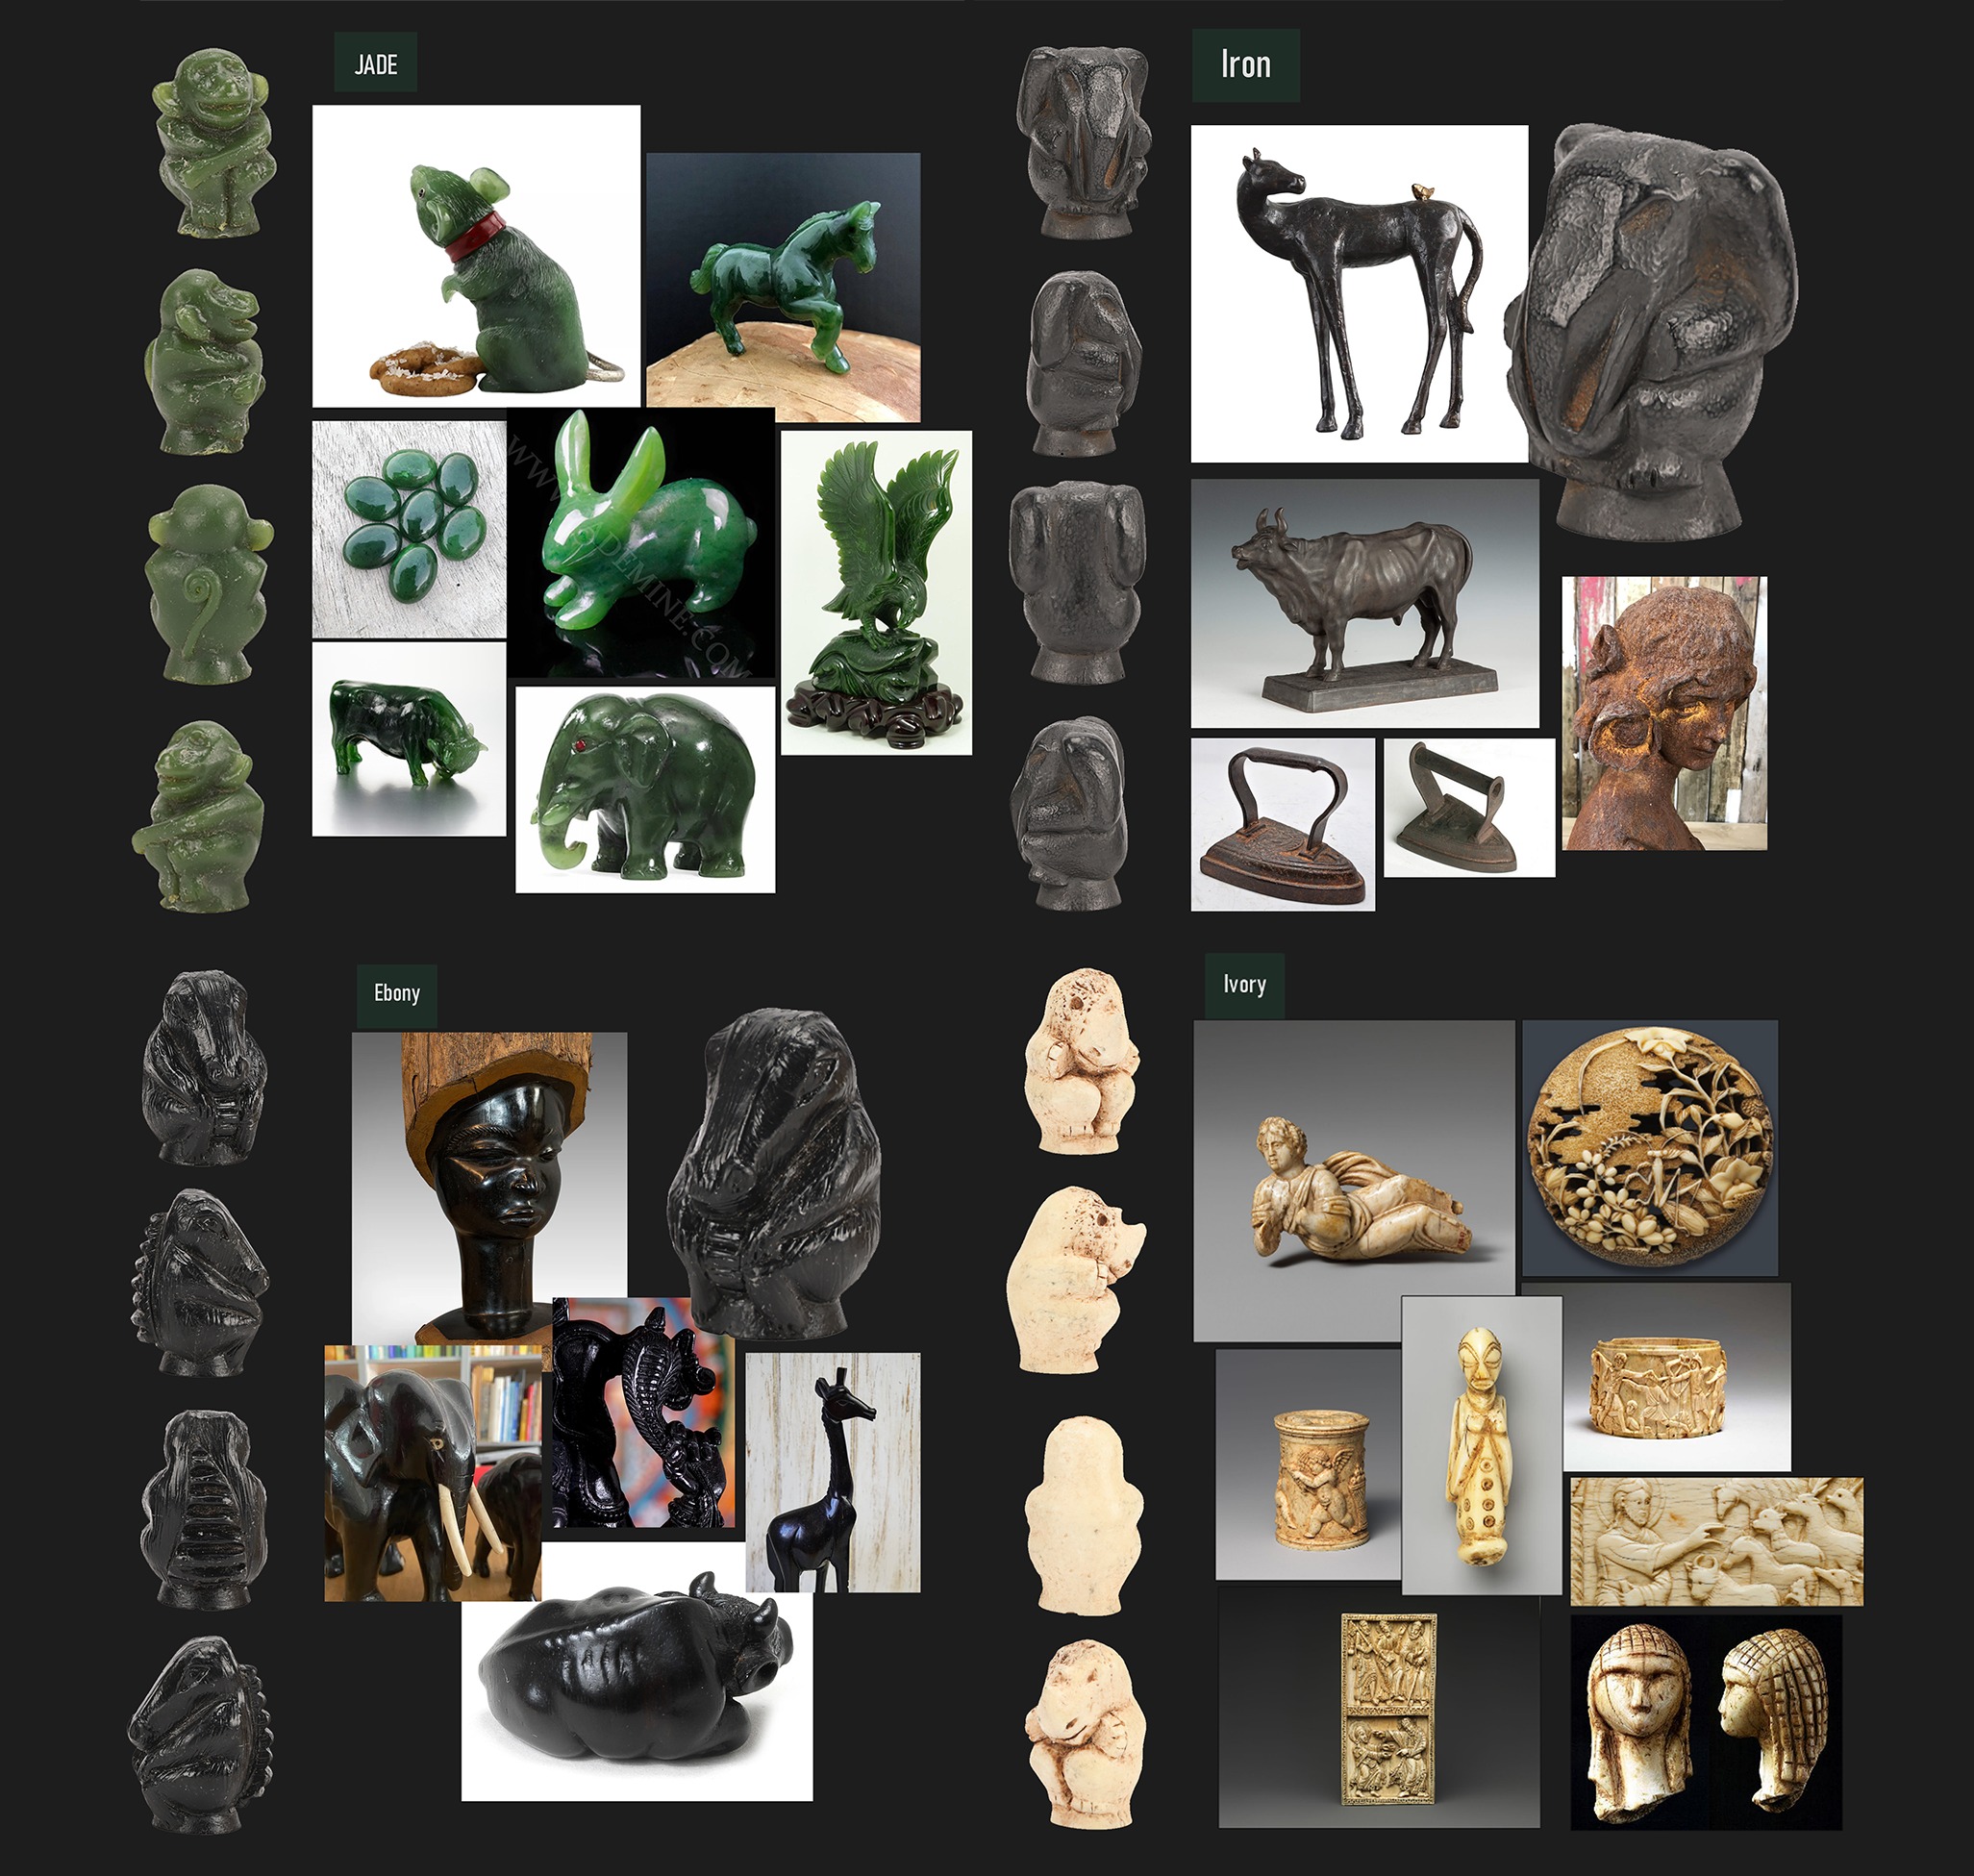
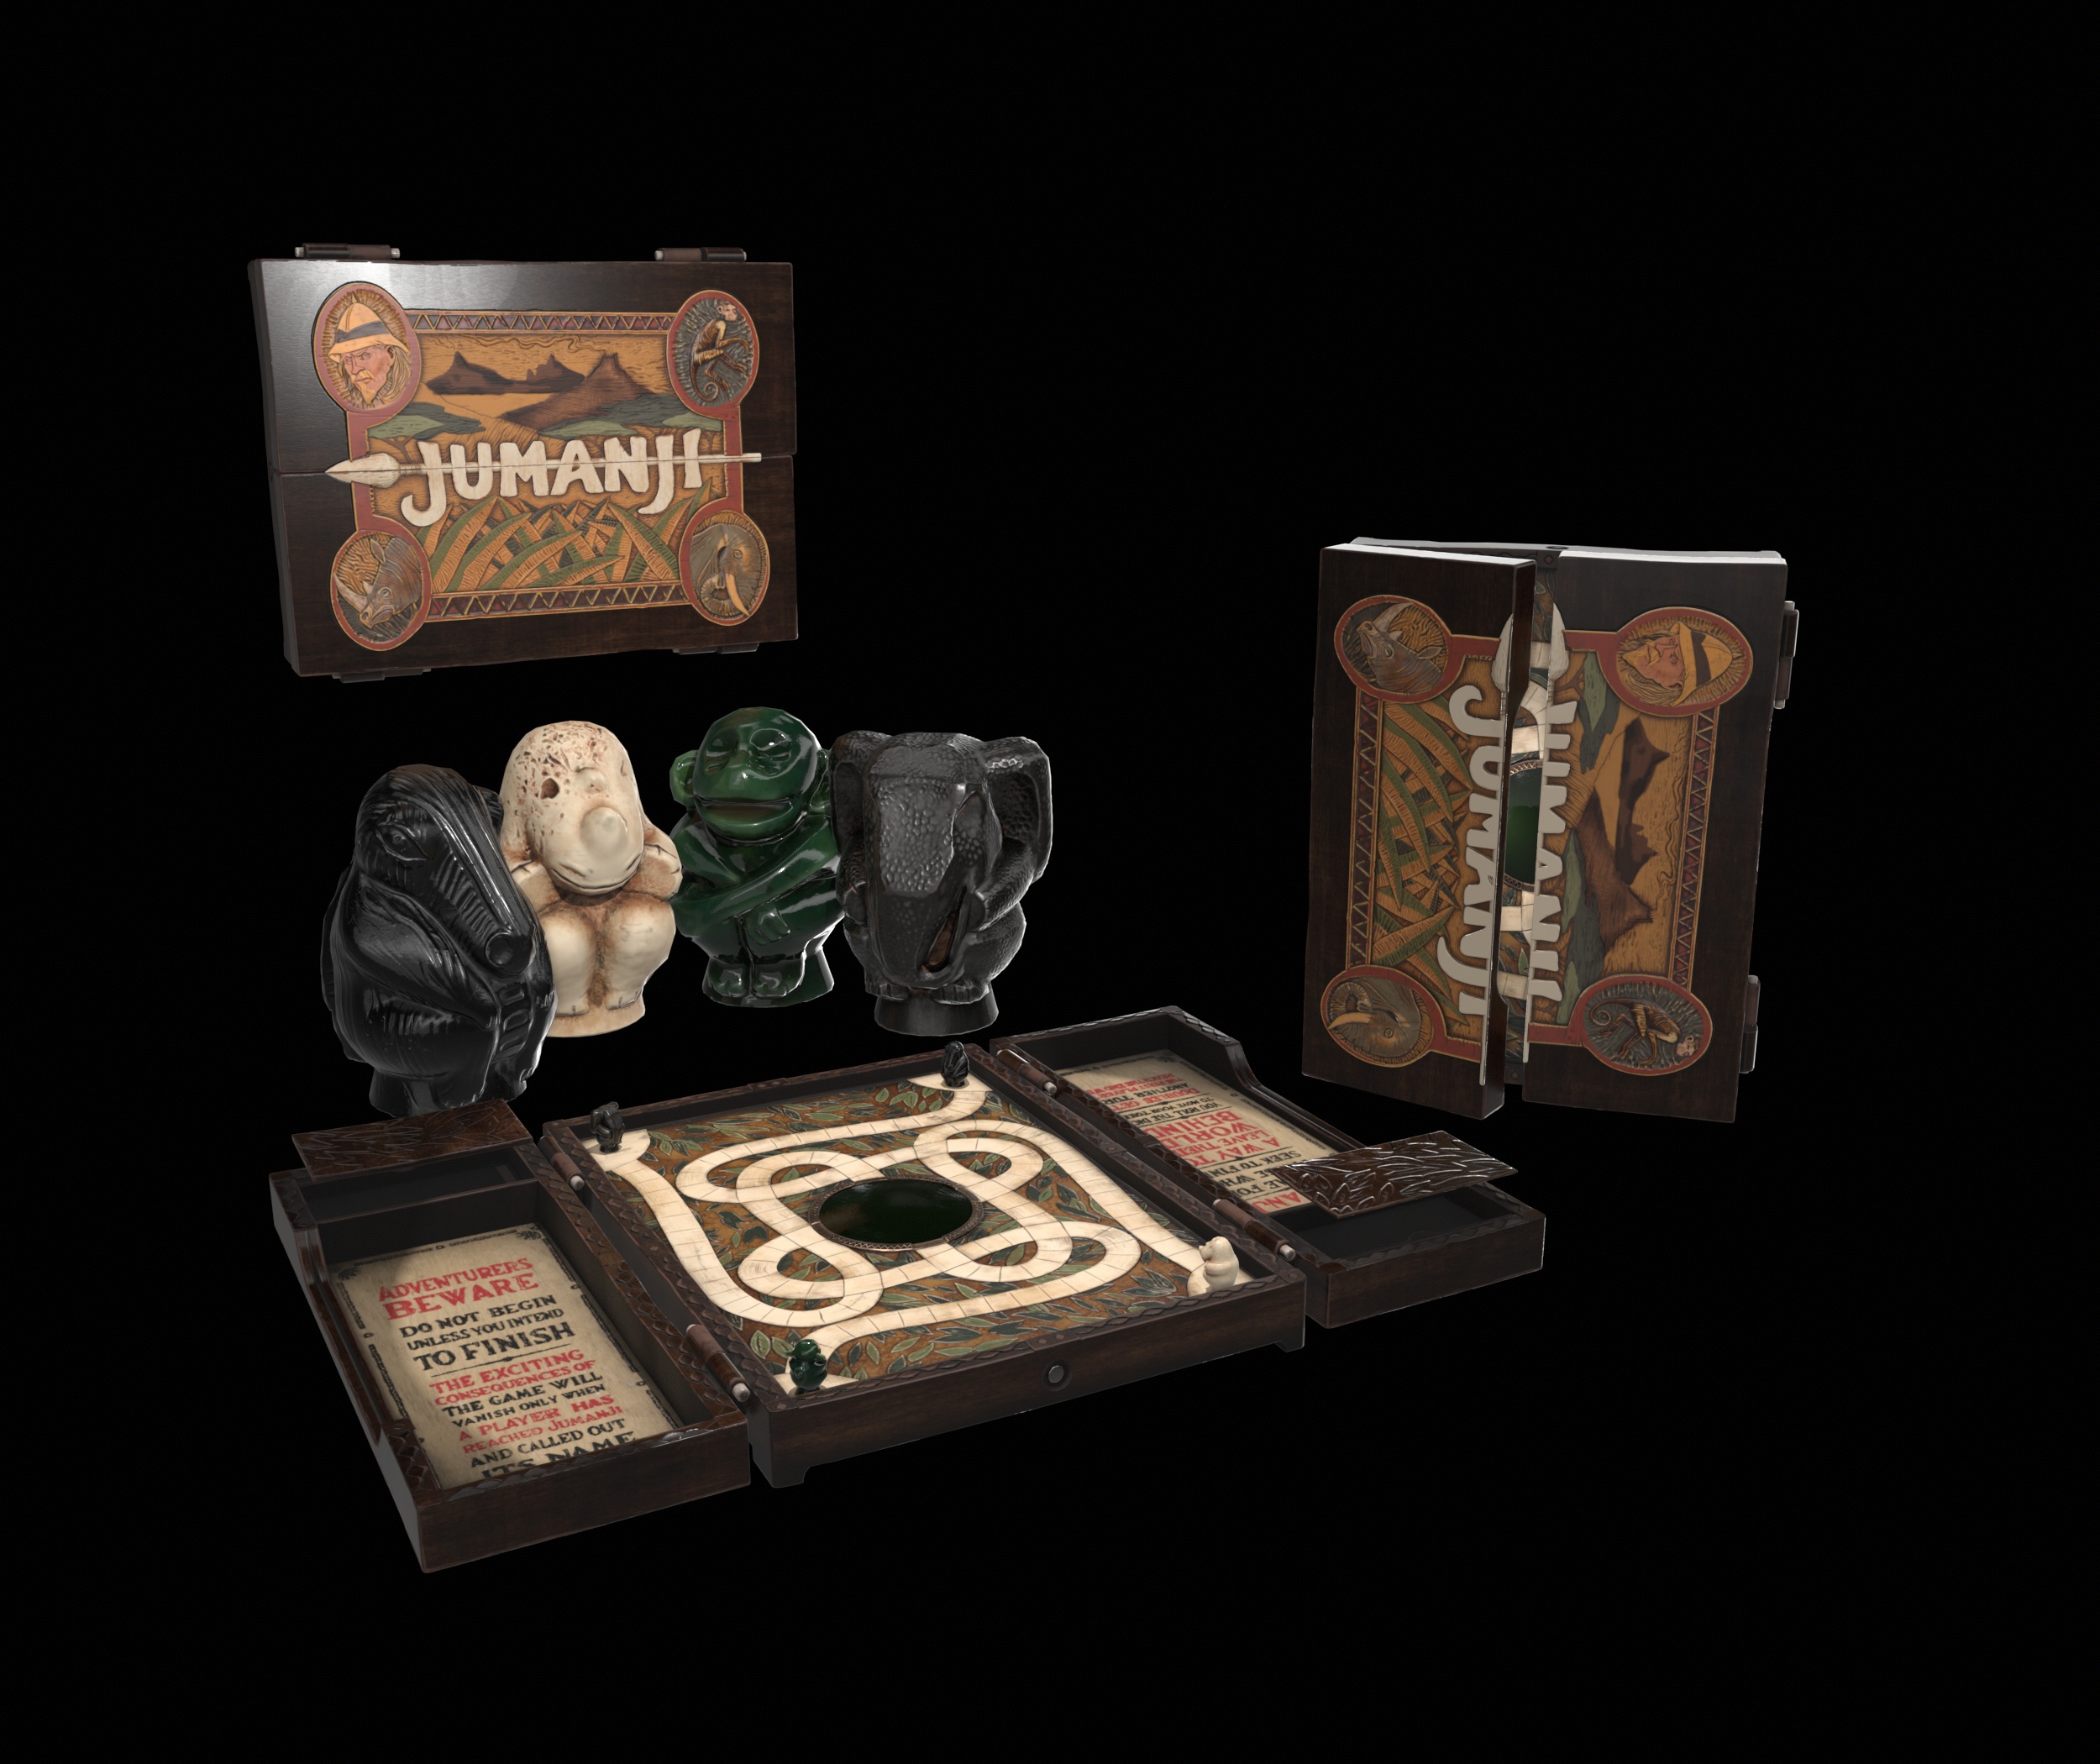
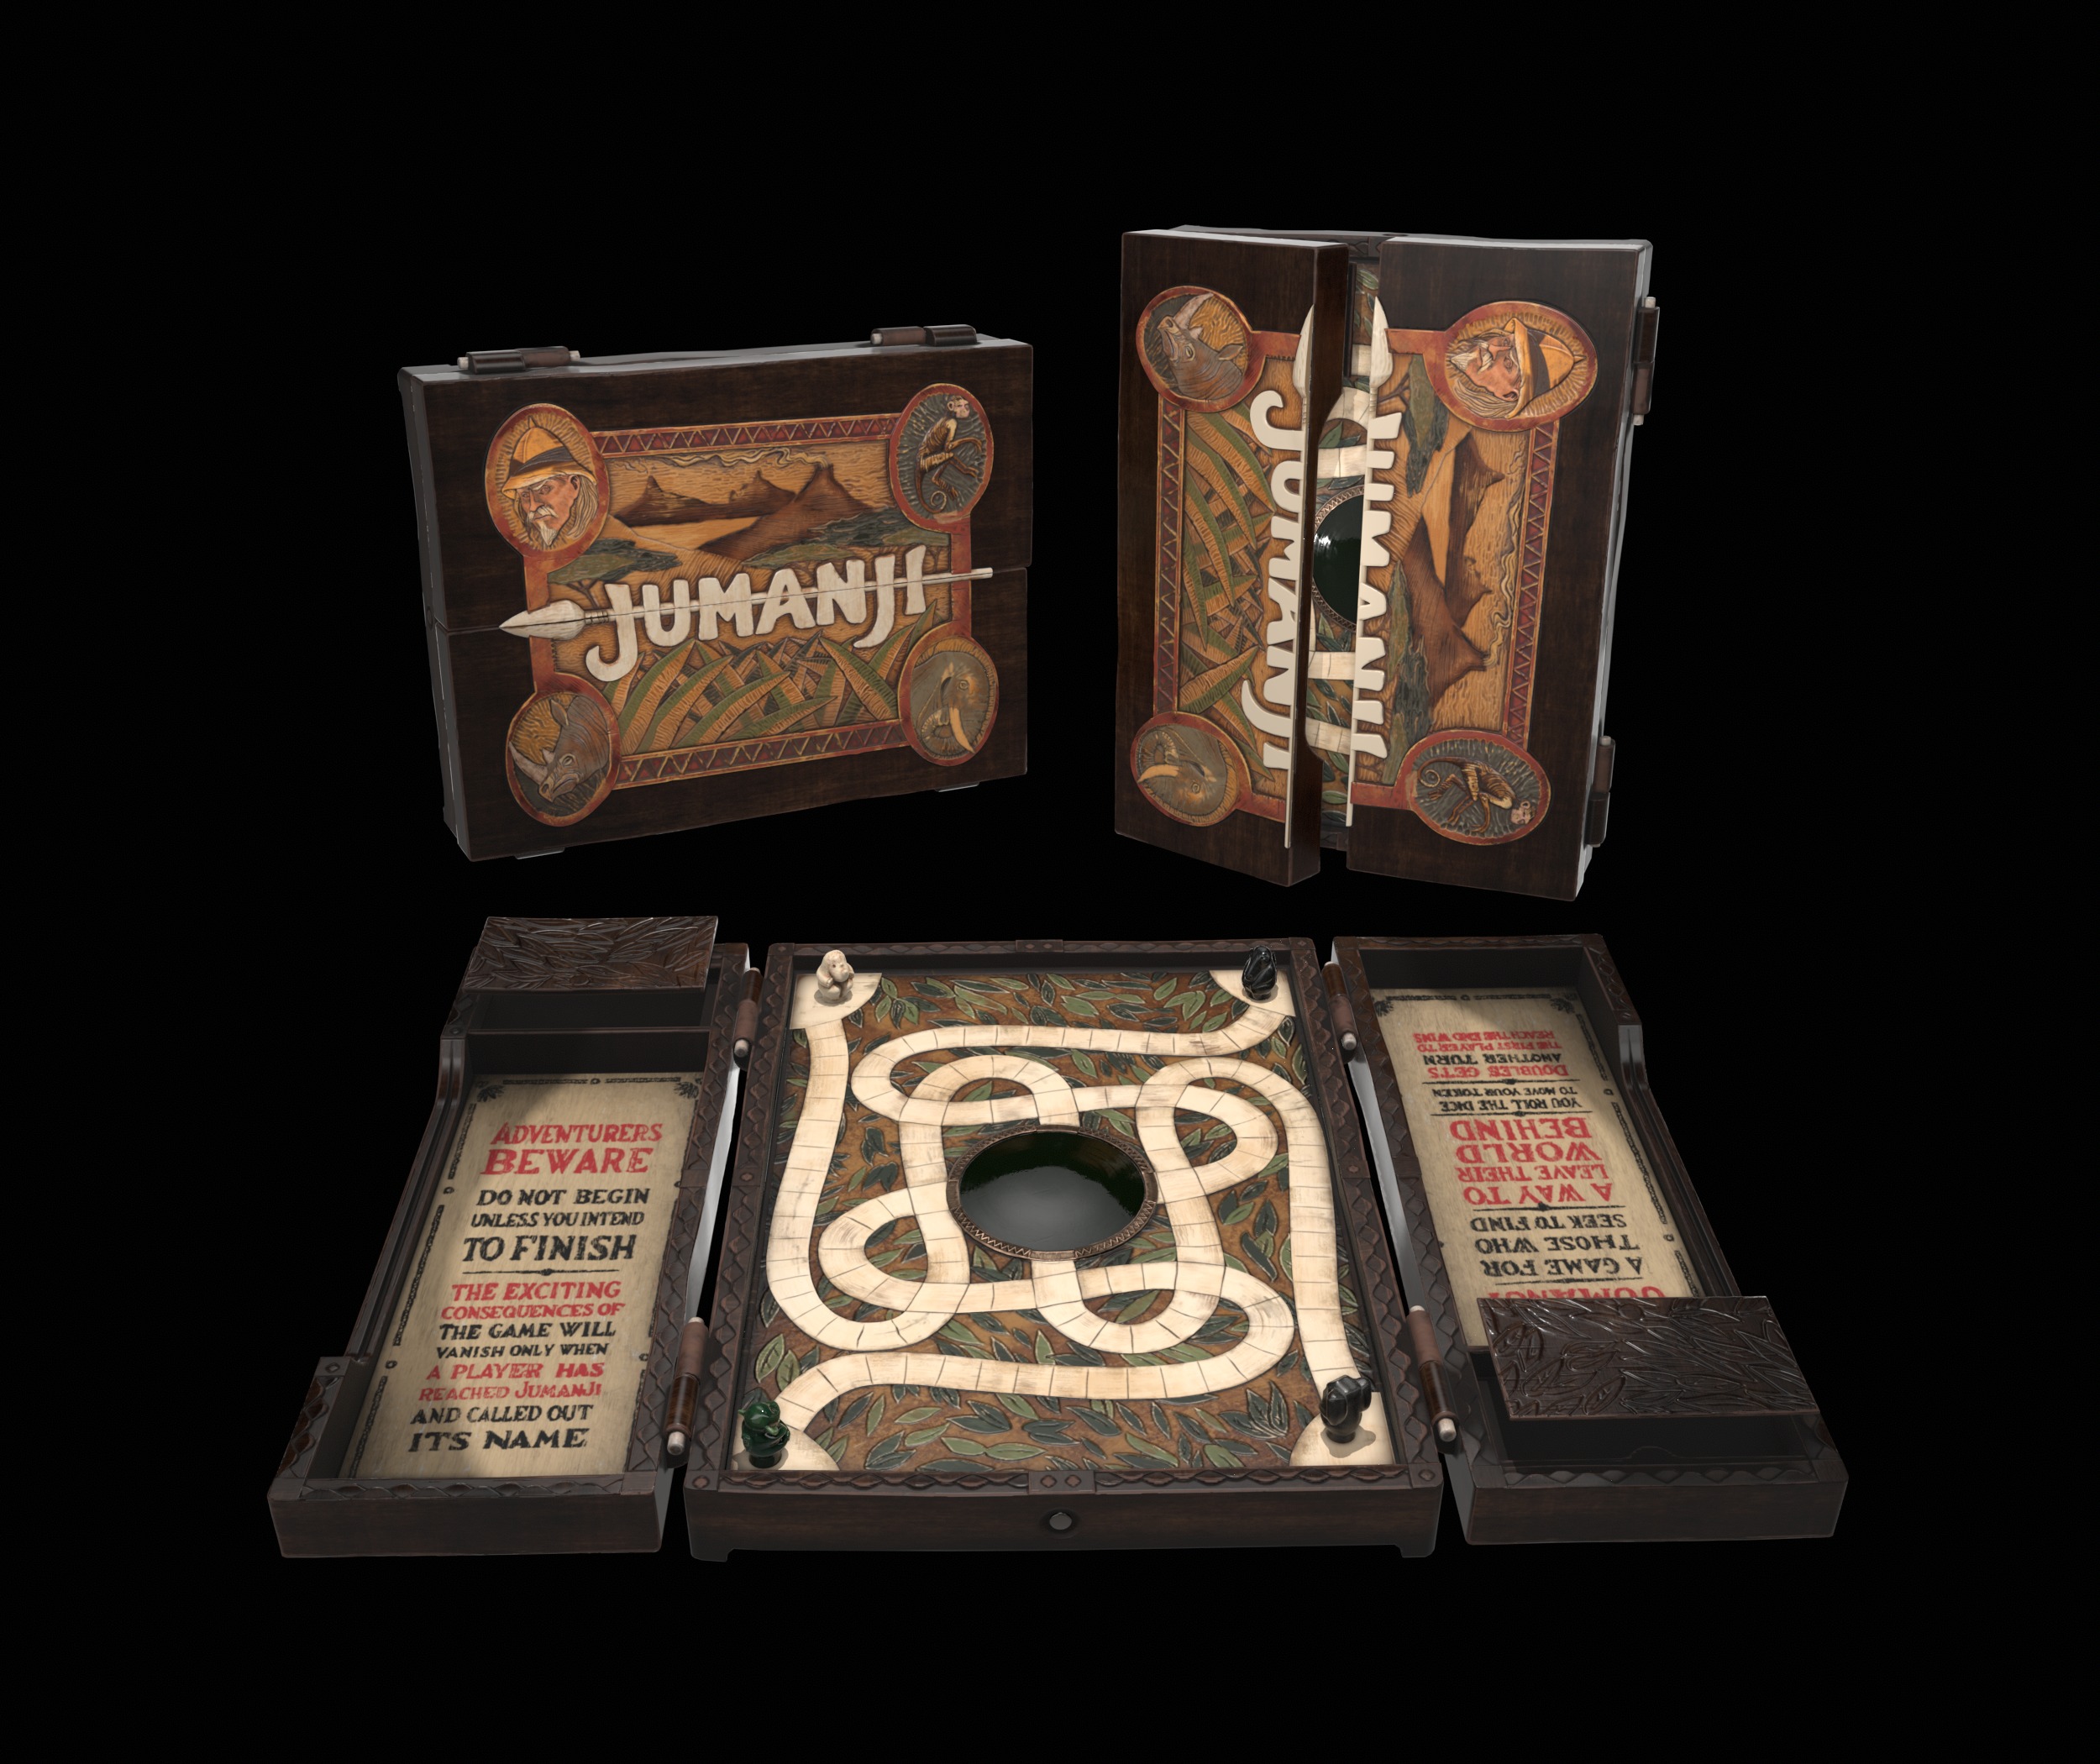
Crucial details about Jumanji’s origin were omitted in the 1995 film. The project started with an intensive research session to determine what the board and pieces could have been made out of, based upon the stylistic choices made by the creators.
I finally landed on Khaya (African Mahogany), ivory, ebony, iron and jade. Although I could be wrong about some of these, it felt important to me to base my work on tangible, detailed materials rather than just copy the original board from the film, which includes parts cast in resin.
This process allowed me to tend toward a more realistic, handcrafted version of the game.
Foreseen Challenges
- Intricate front piece.
- Limited resources in terms of computer capacity.
- Taking a stab at a wide range of textures, some of them new to me.
- Managing to create a lighting setup serving the storytelling angle.
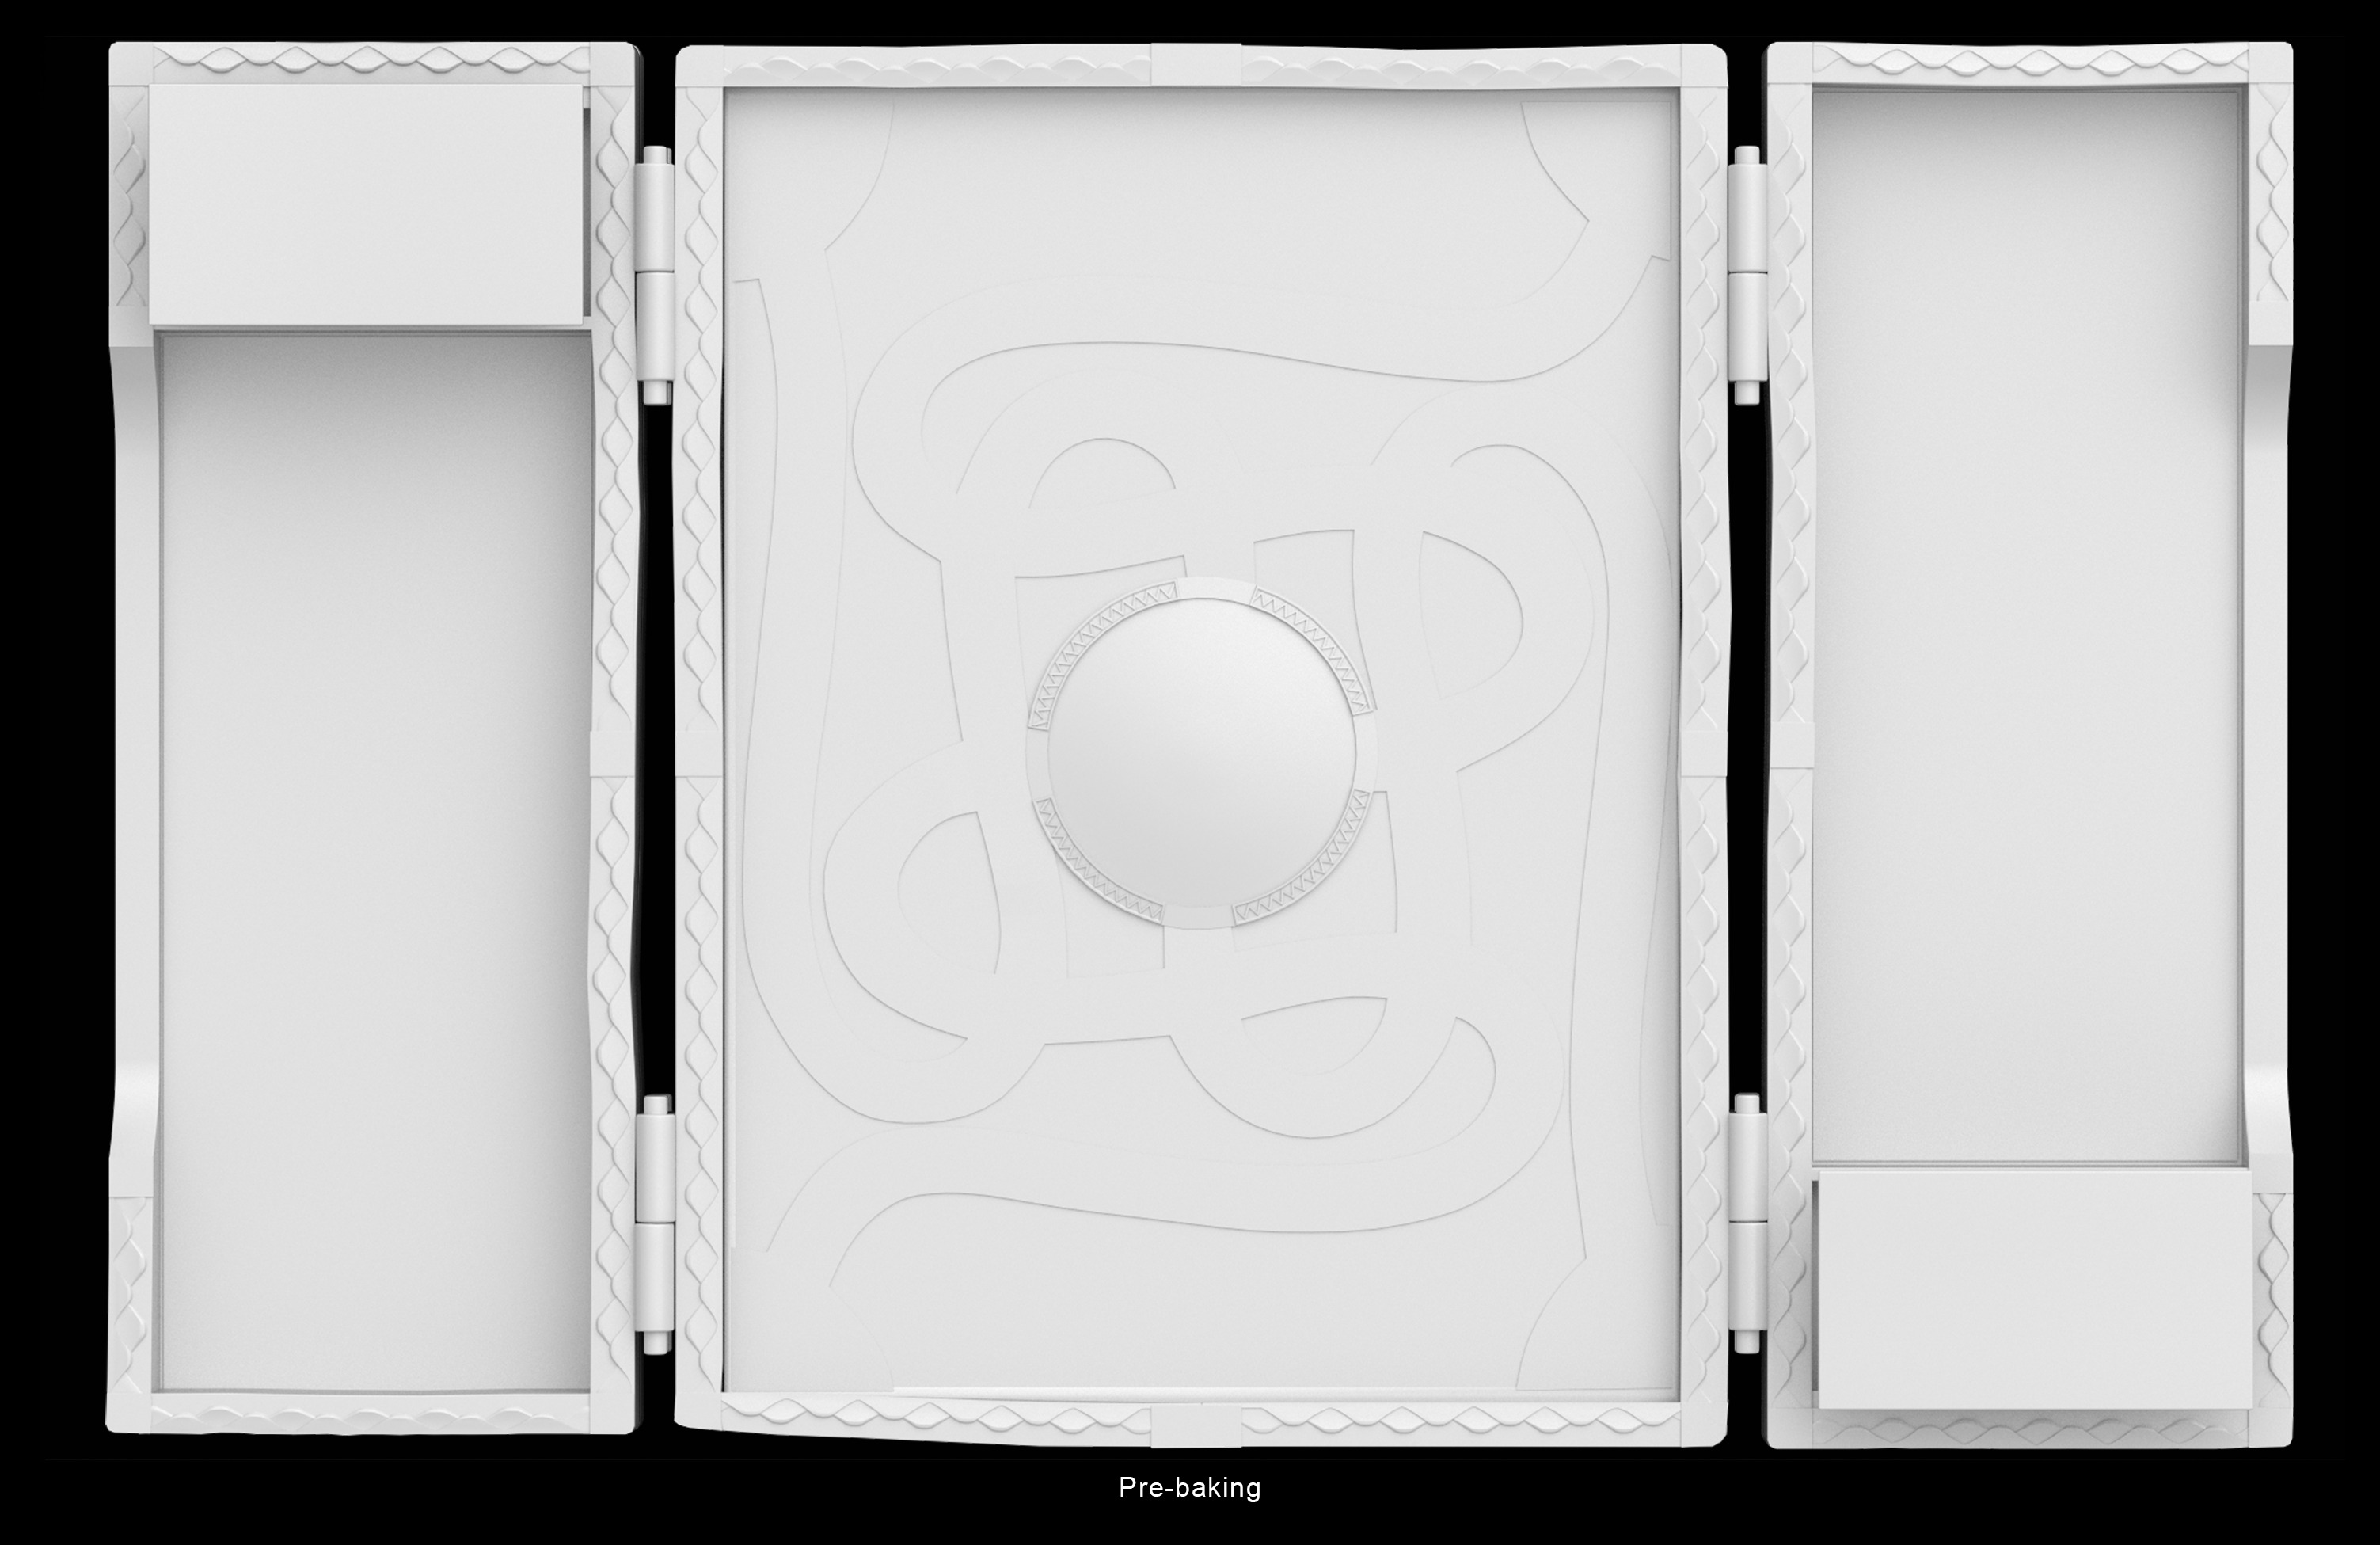
Blockout
The blockout phase was nothing out of the ordinary. I usually take advantage of this stage to determine appropriate proportions as well as which details are to be either modelled or directly baked into the object.
When all details are ironed out, the piece is ready for advanced modelling and sculpting.

Modelling & Sculpting
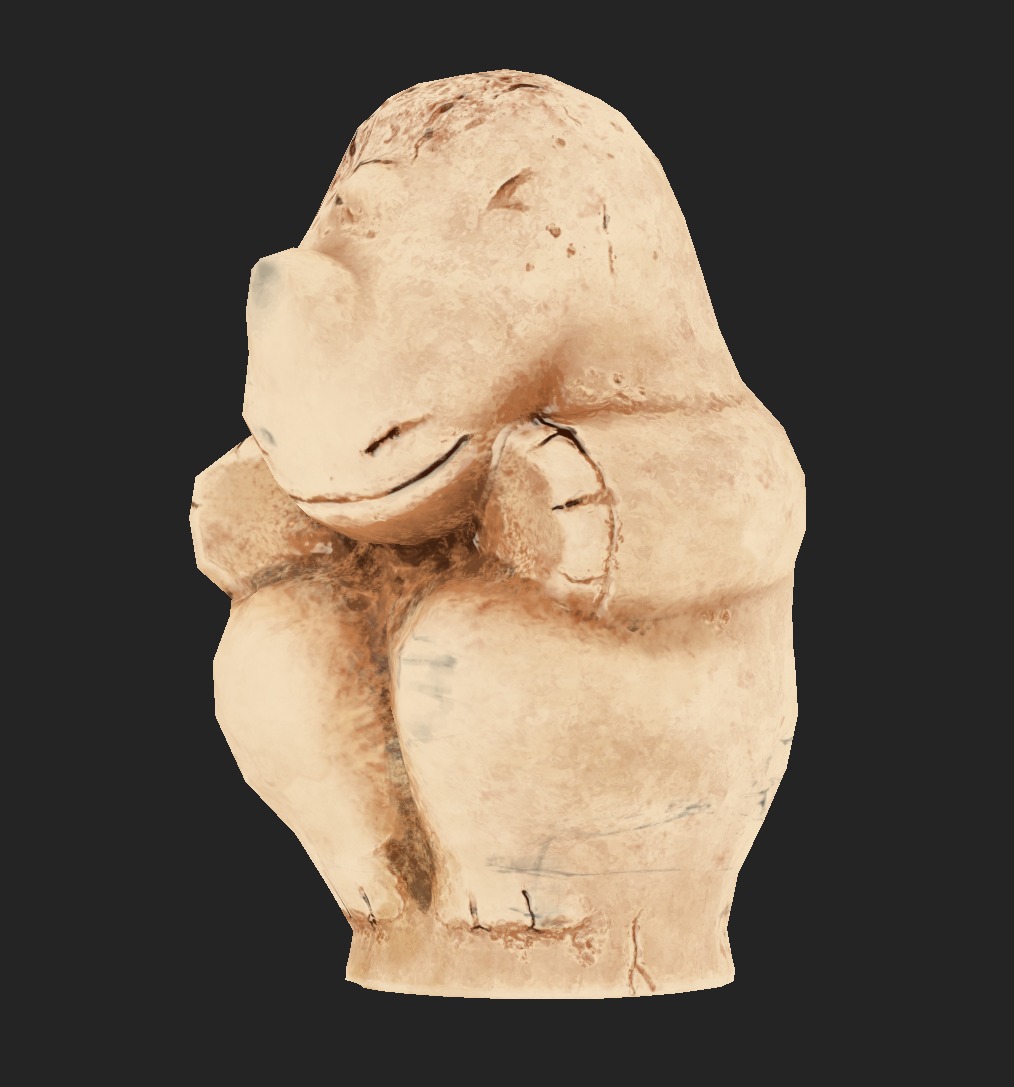
For the pawns, I chose to model an approximation of each character based on consistent references before sending them to ZBrush for detail sculpting.
This method allowed me to maintain a sturdy base and focus on delicate surface details, avoiding the “play-doh” mushy look sculpts can sometimes have.

Pieces like the monkey and rhino were challenging in terms of general shape when the elephant and crocodile required more serious sculpting.
In order to recreate the interesting pattern covering the elephant, I decided to make my own alpha map over on Photoshop. I then applied it carefully all over the piece with different levels of intensity and scales using the DragRect tool.
The crocodile’s sculpt was done in a more classic approach. Brushes like “Slash3”, “clay buildup” and “trimbordsmooth” were used to create the wood carving effect.

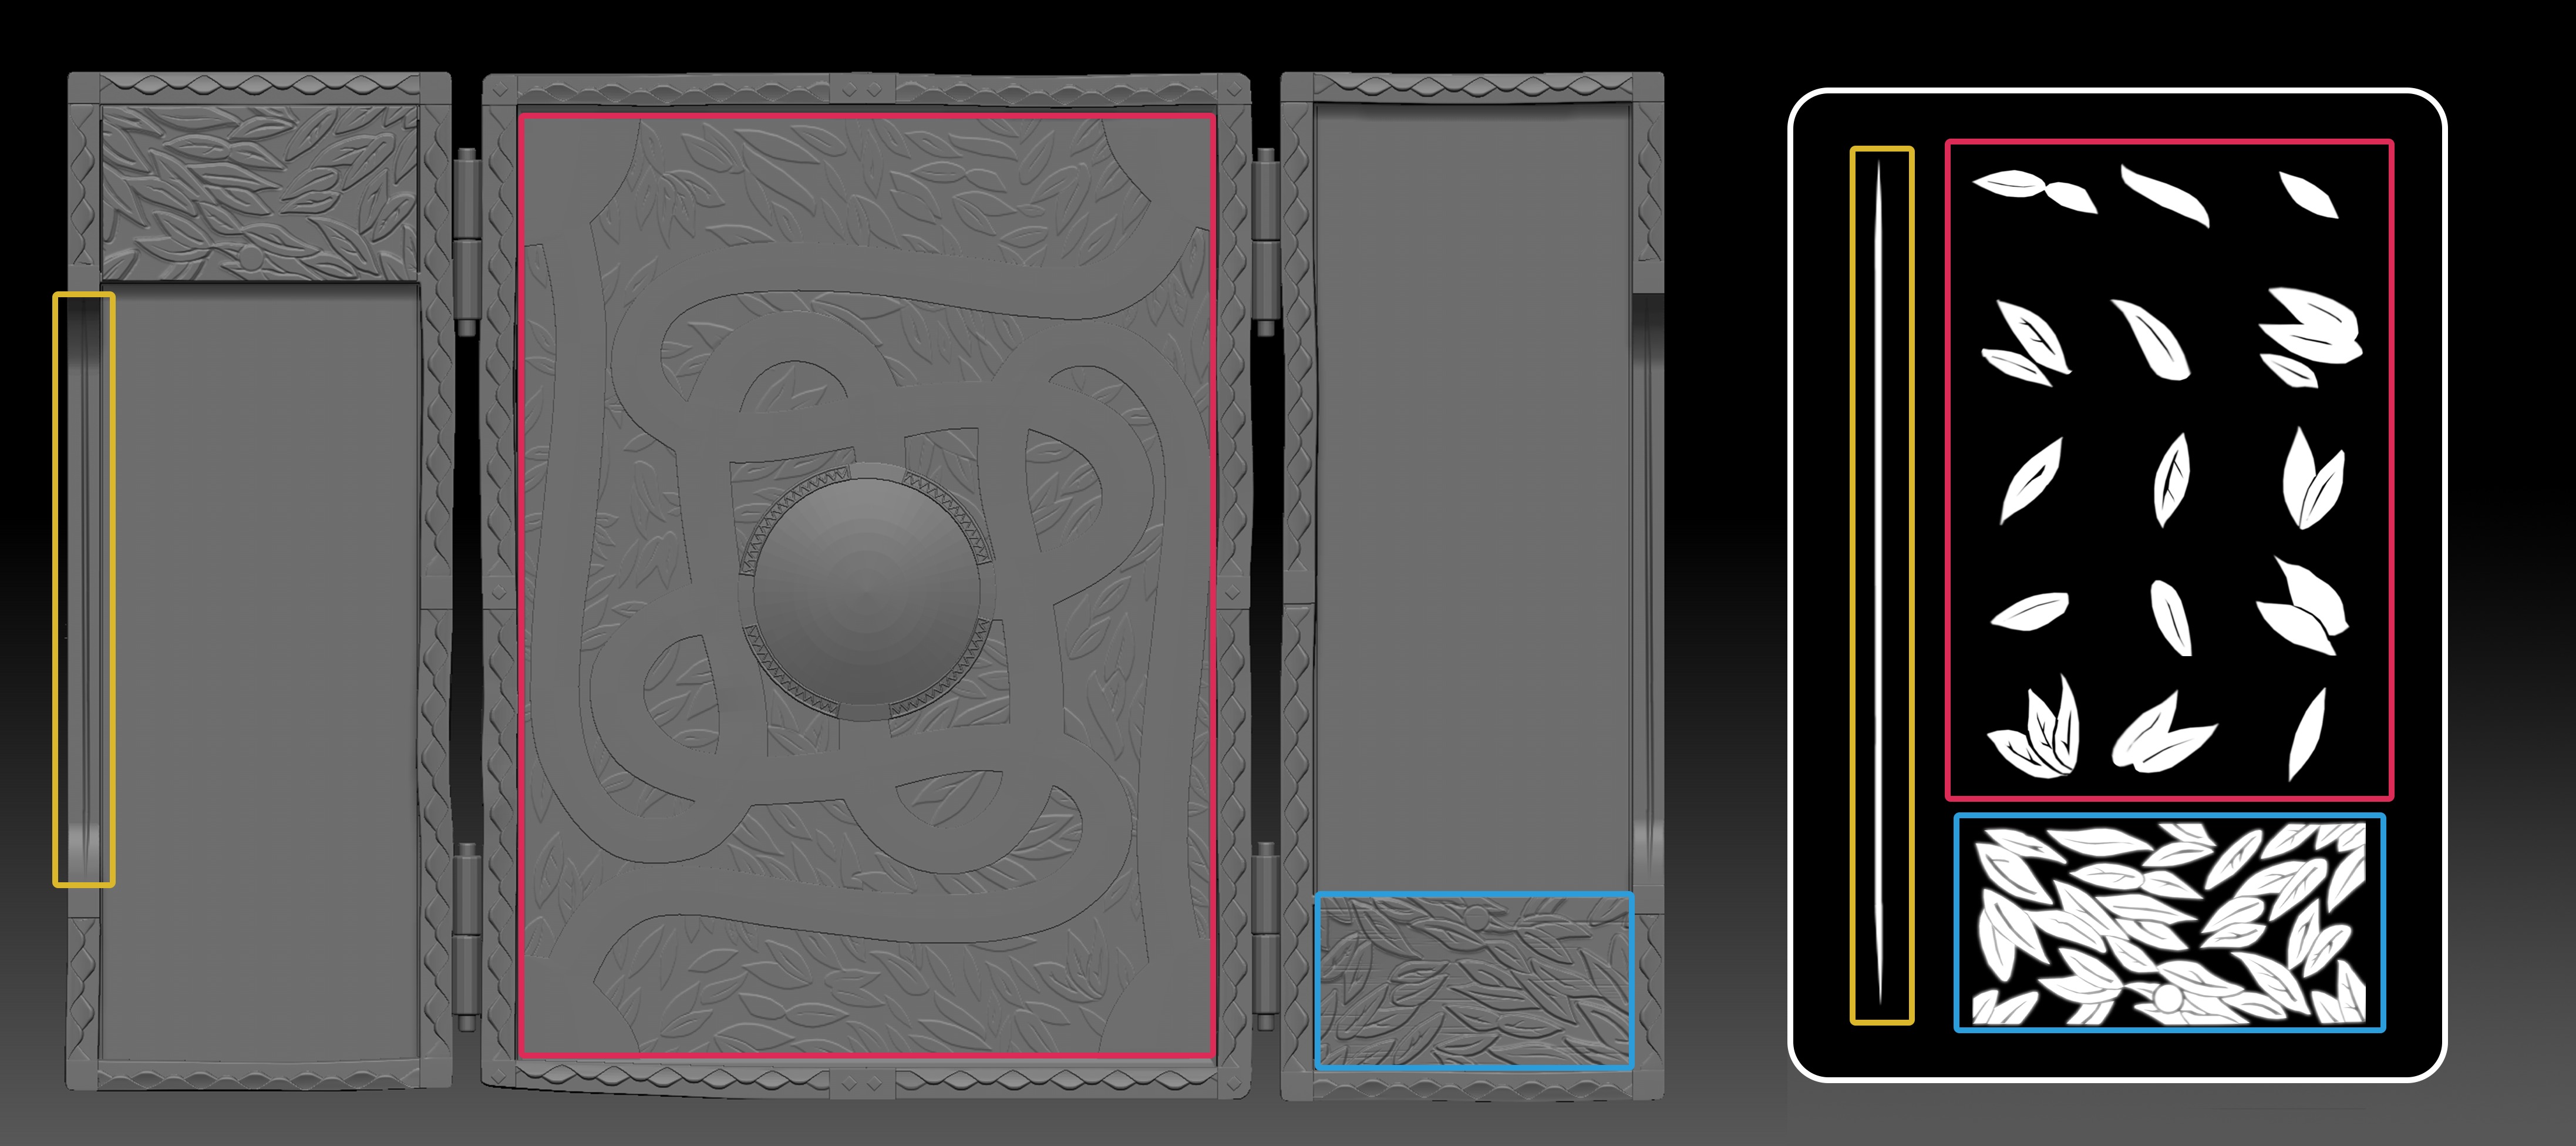
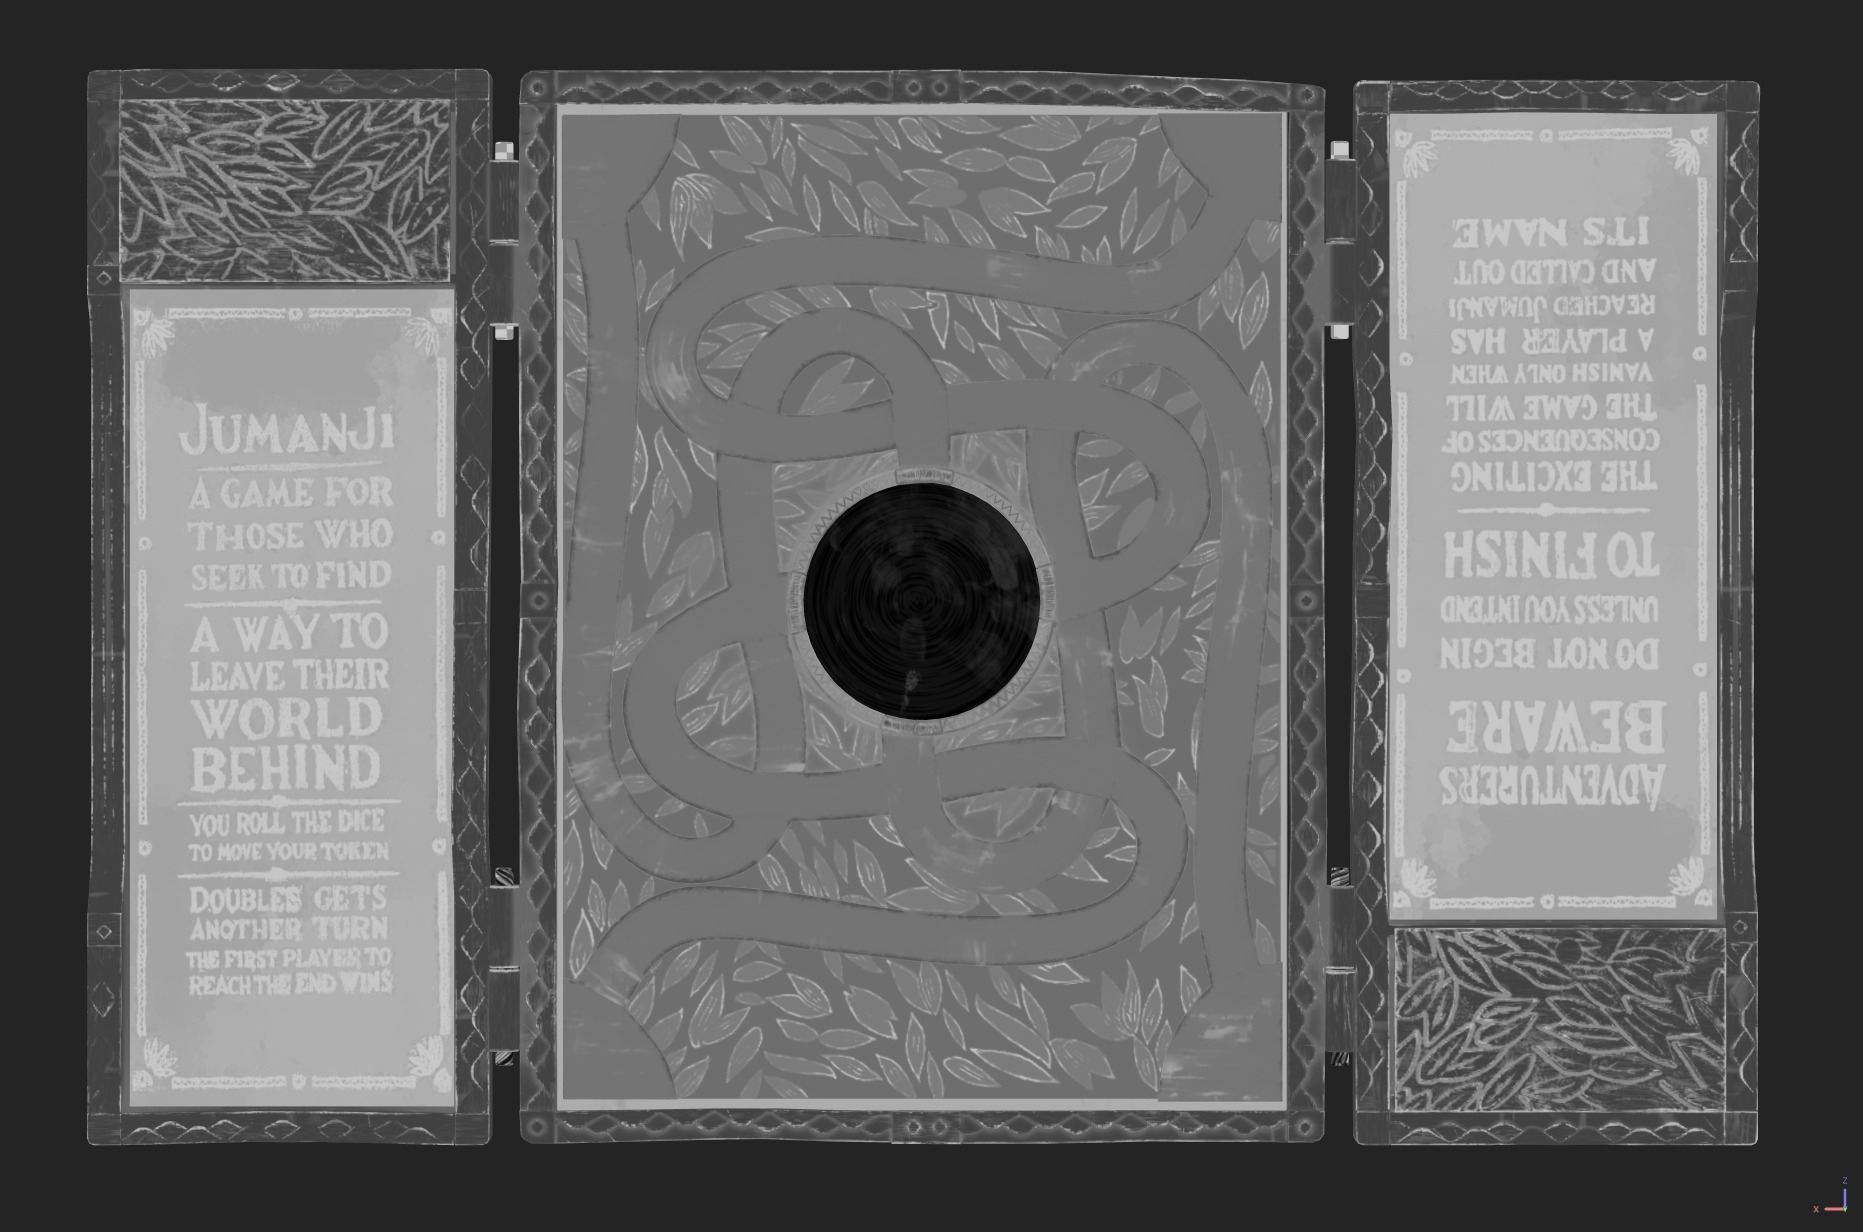
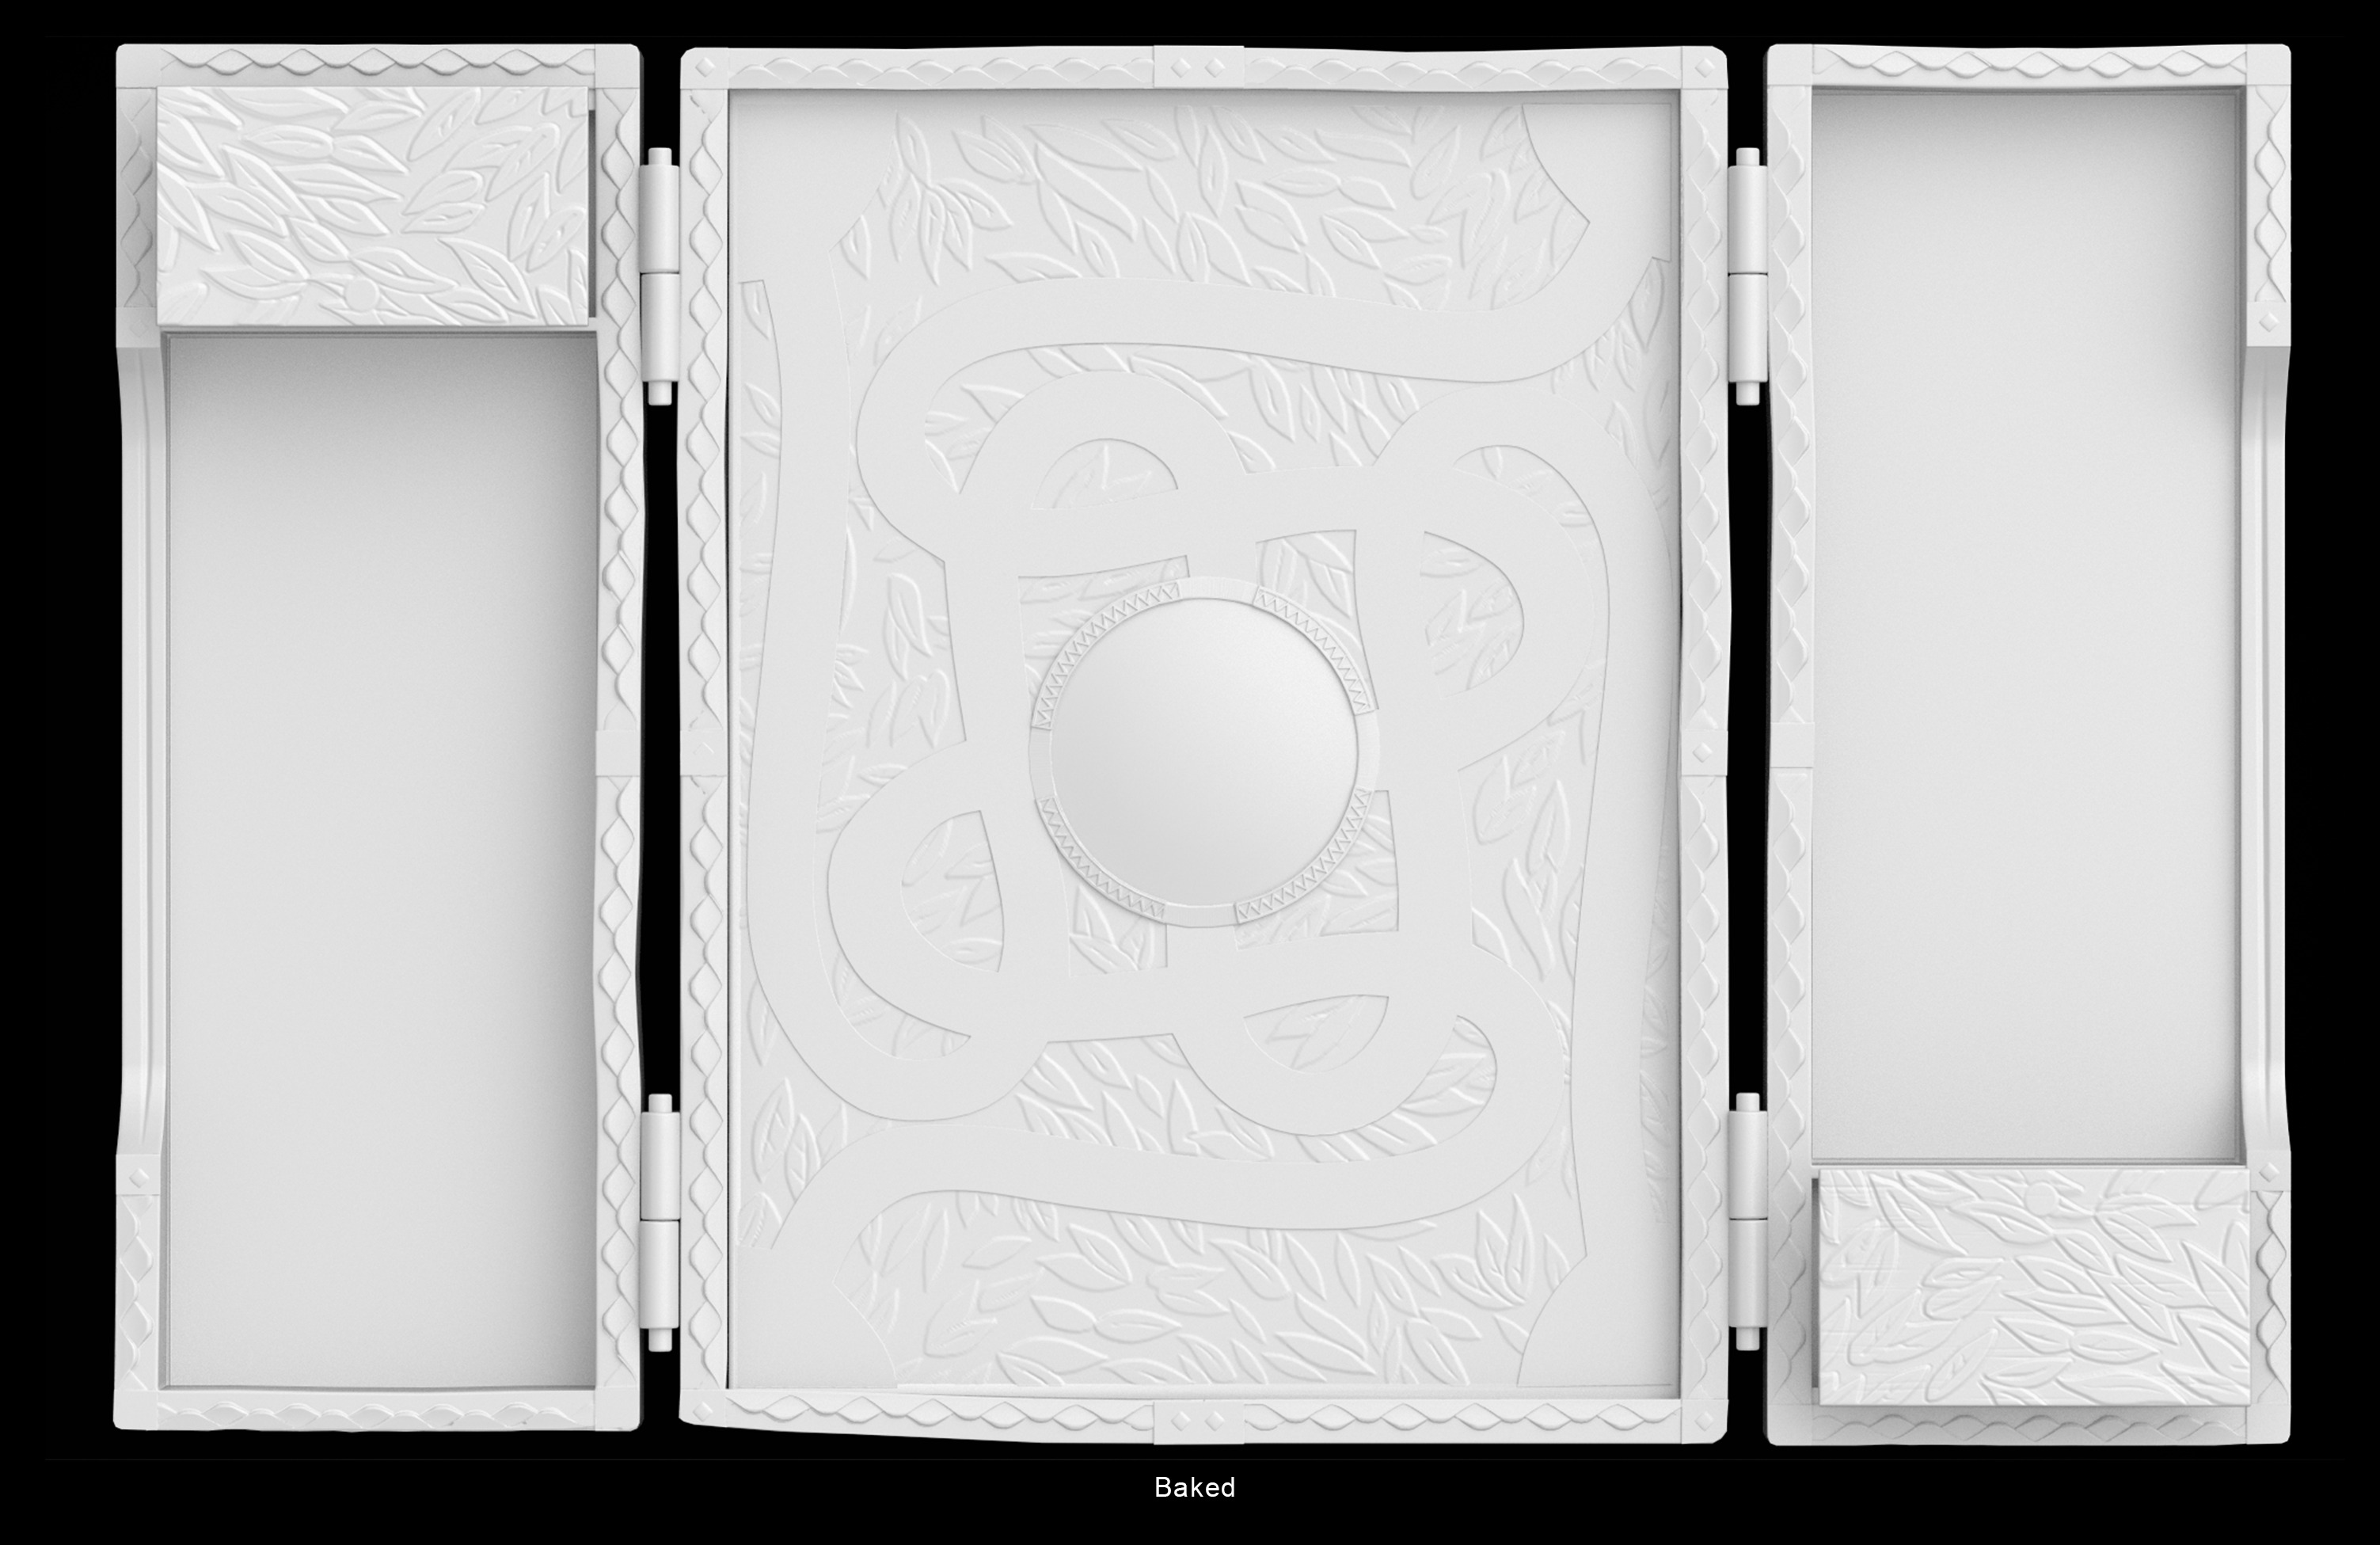
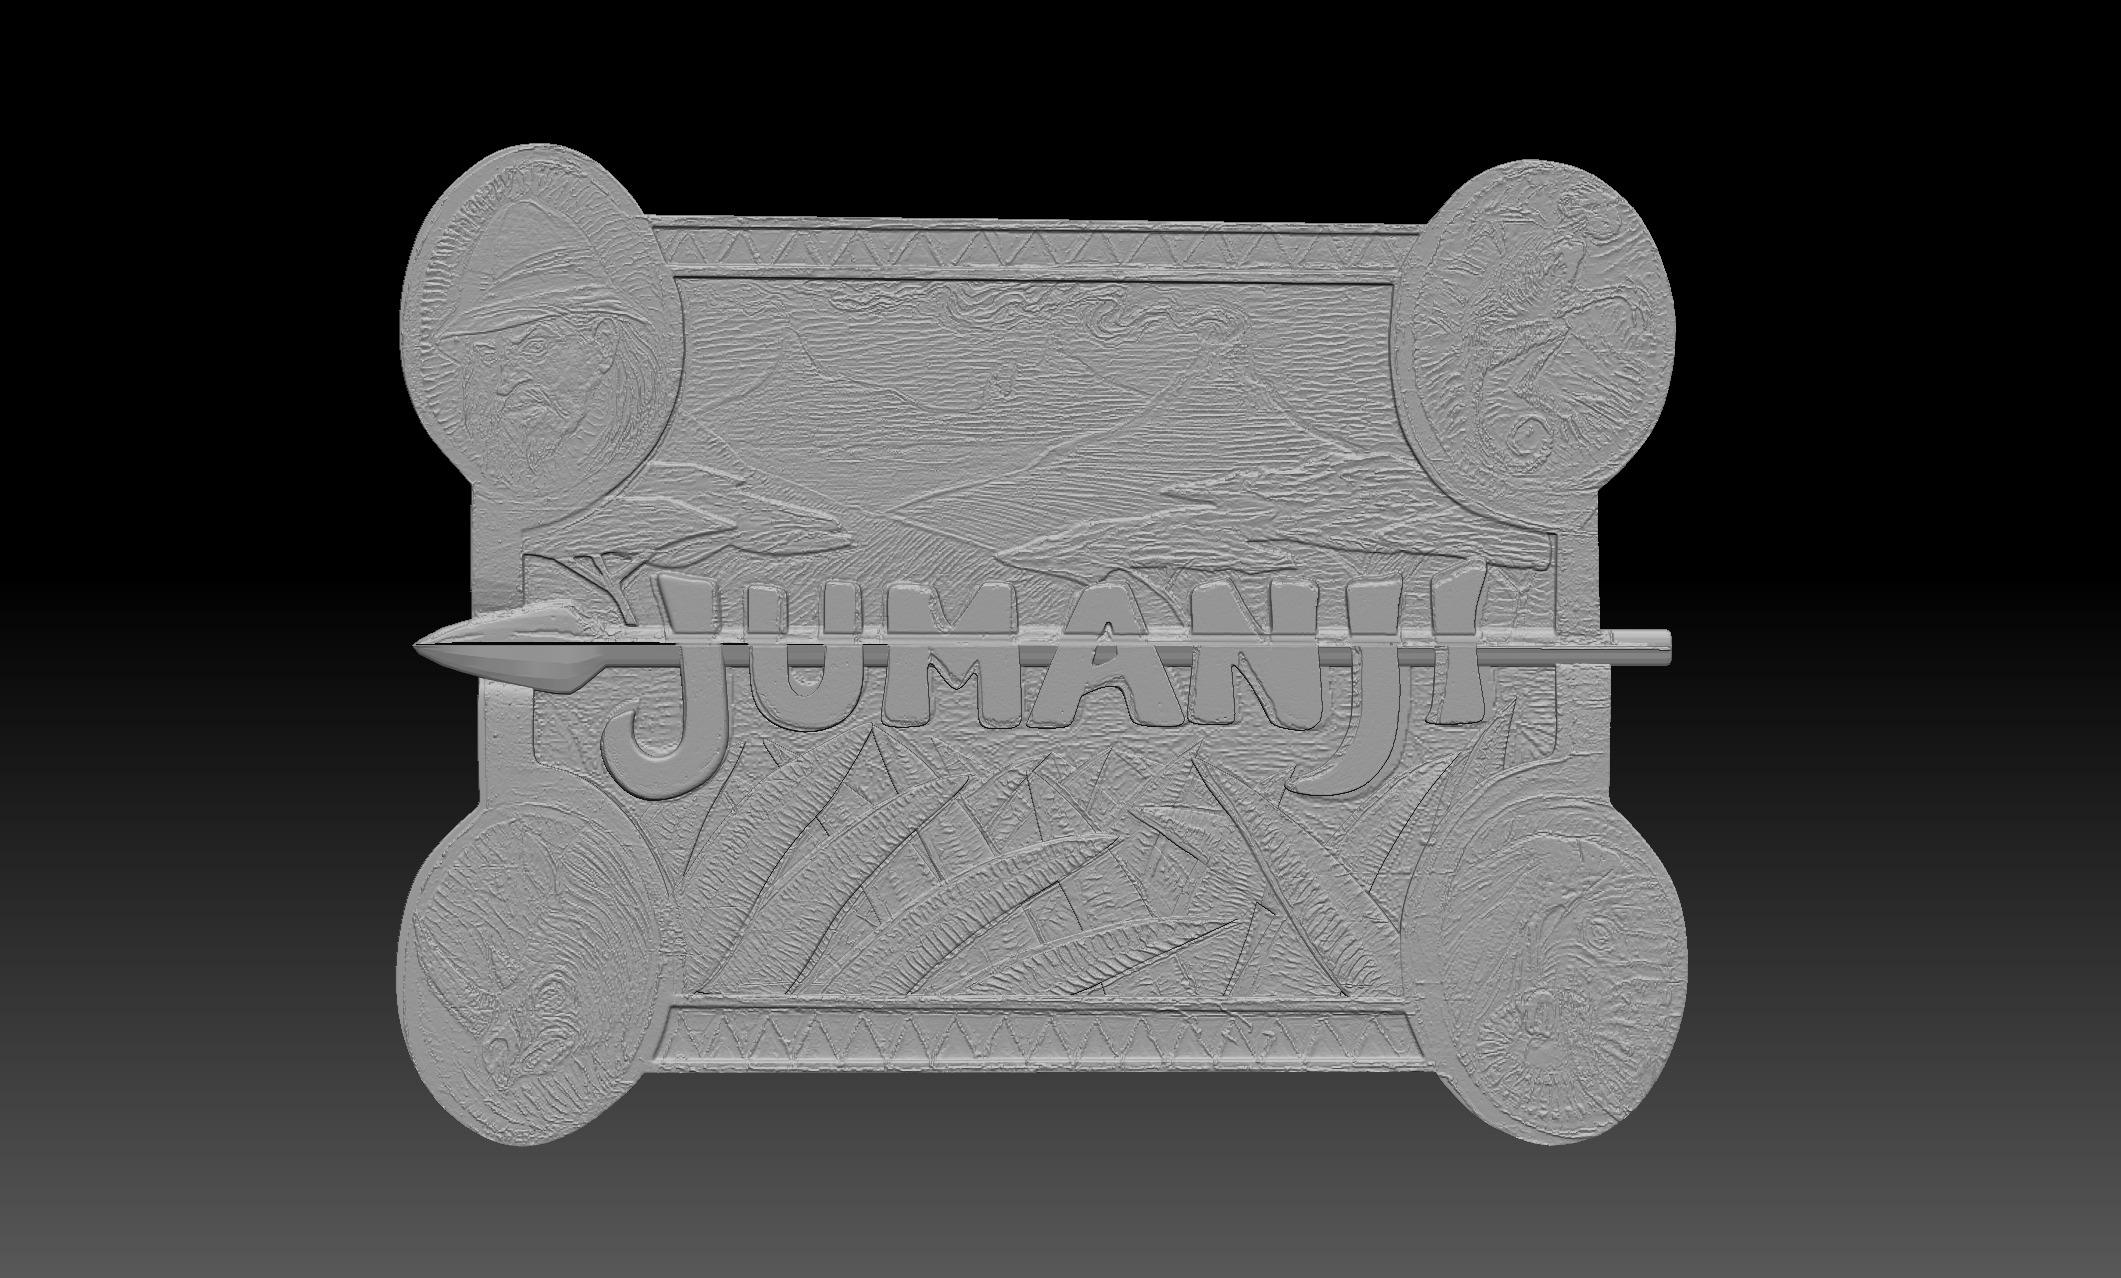
The board was a little bit trickier. Since I had originally decided on a mid-poly piece, most of the leafy details would have to be sculpted in order to be baked onto the model.
Once again, I decided to use my trusty workflow of alpha creation and projection to ensure the cleanest result.
I then proceeded to deconstruct the different sections of detail from the original board and project my homemade alpha onto the mesh, accordingly.
Finer details, like scratches and cracks, were consciously set aside for texturing, as using texture resolution rather than polygons would yield better results.
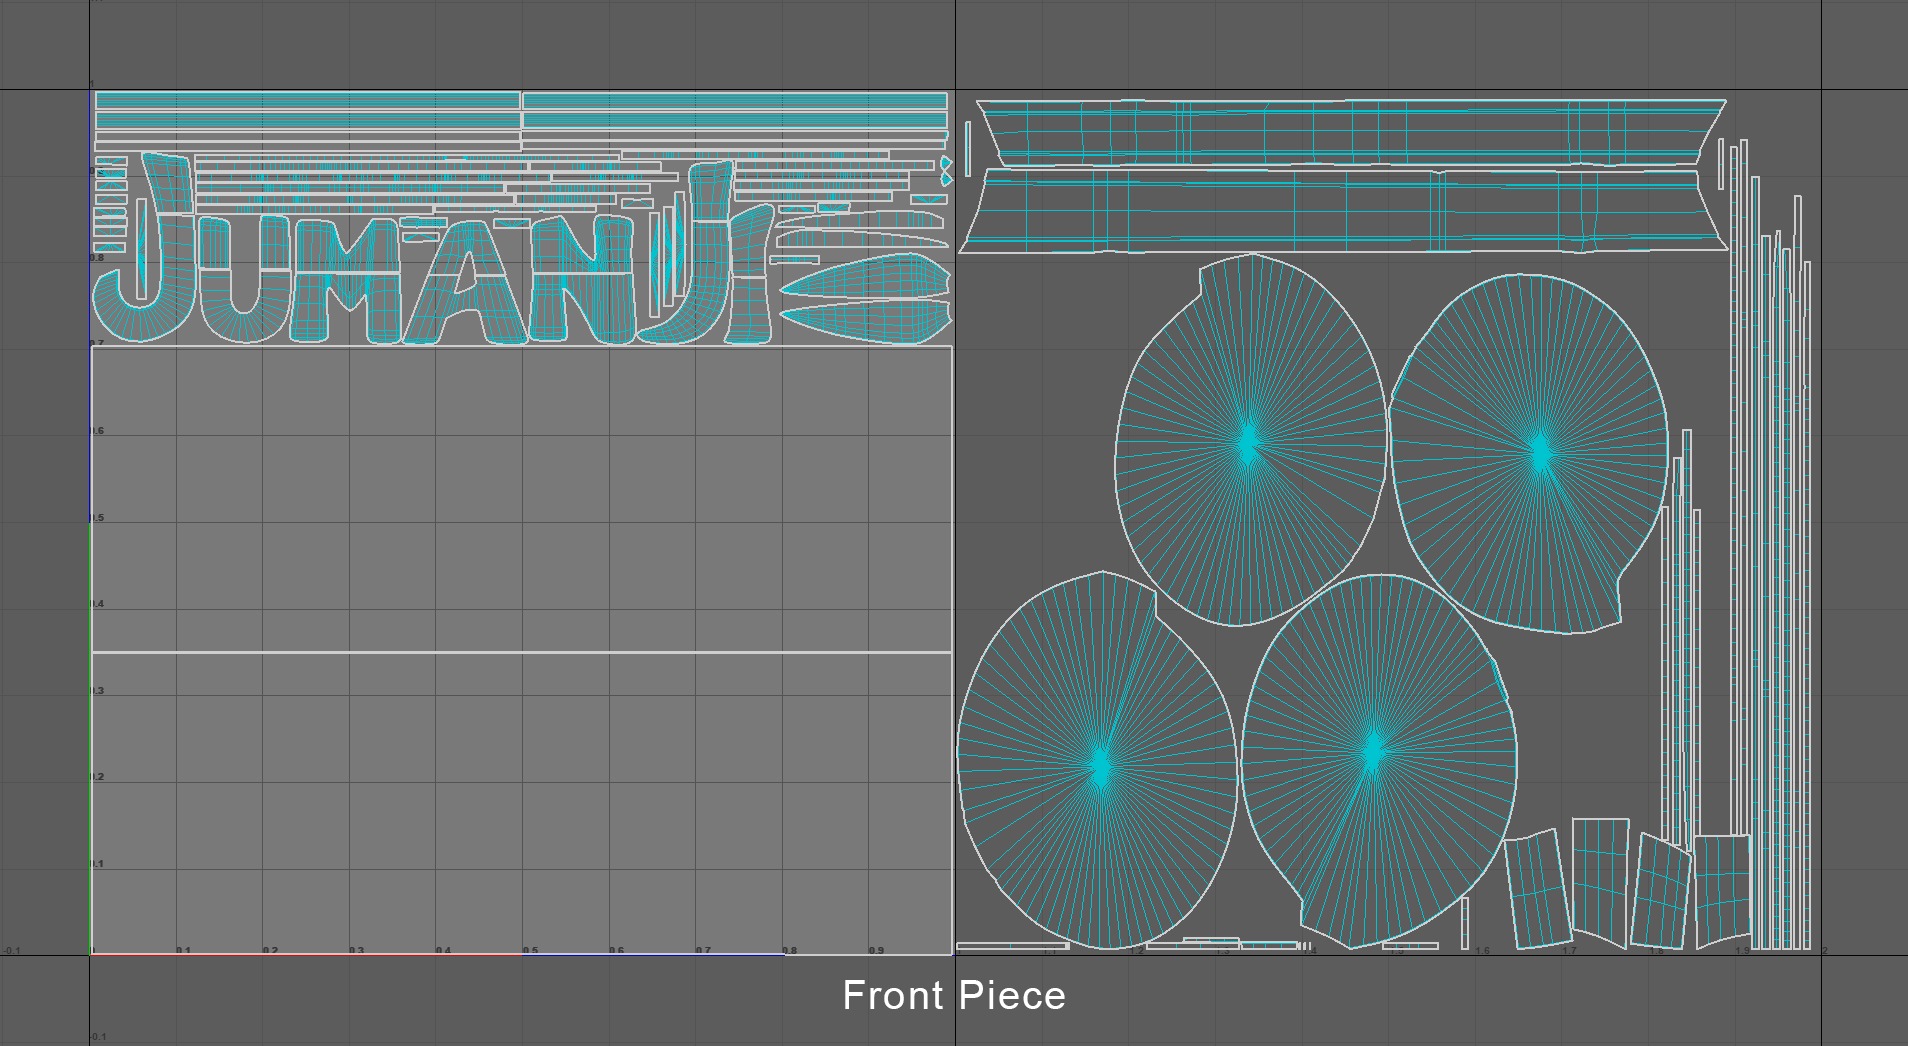
The front piece uses a method very similar to the pawns’. I started by blocking out the various sections and layers of the frame and exported the piece to ZBrush.
Each section was then carefully individually sculpted, just like it would have been done on the real-life board.
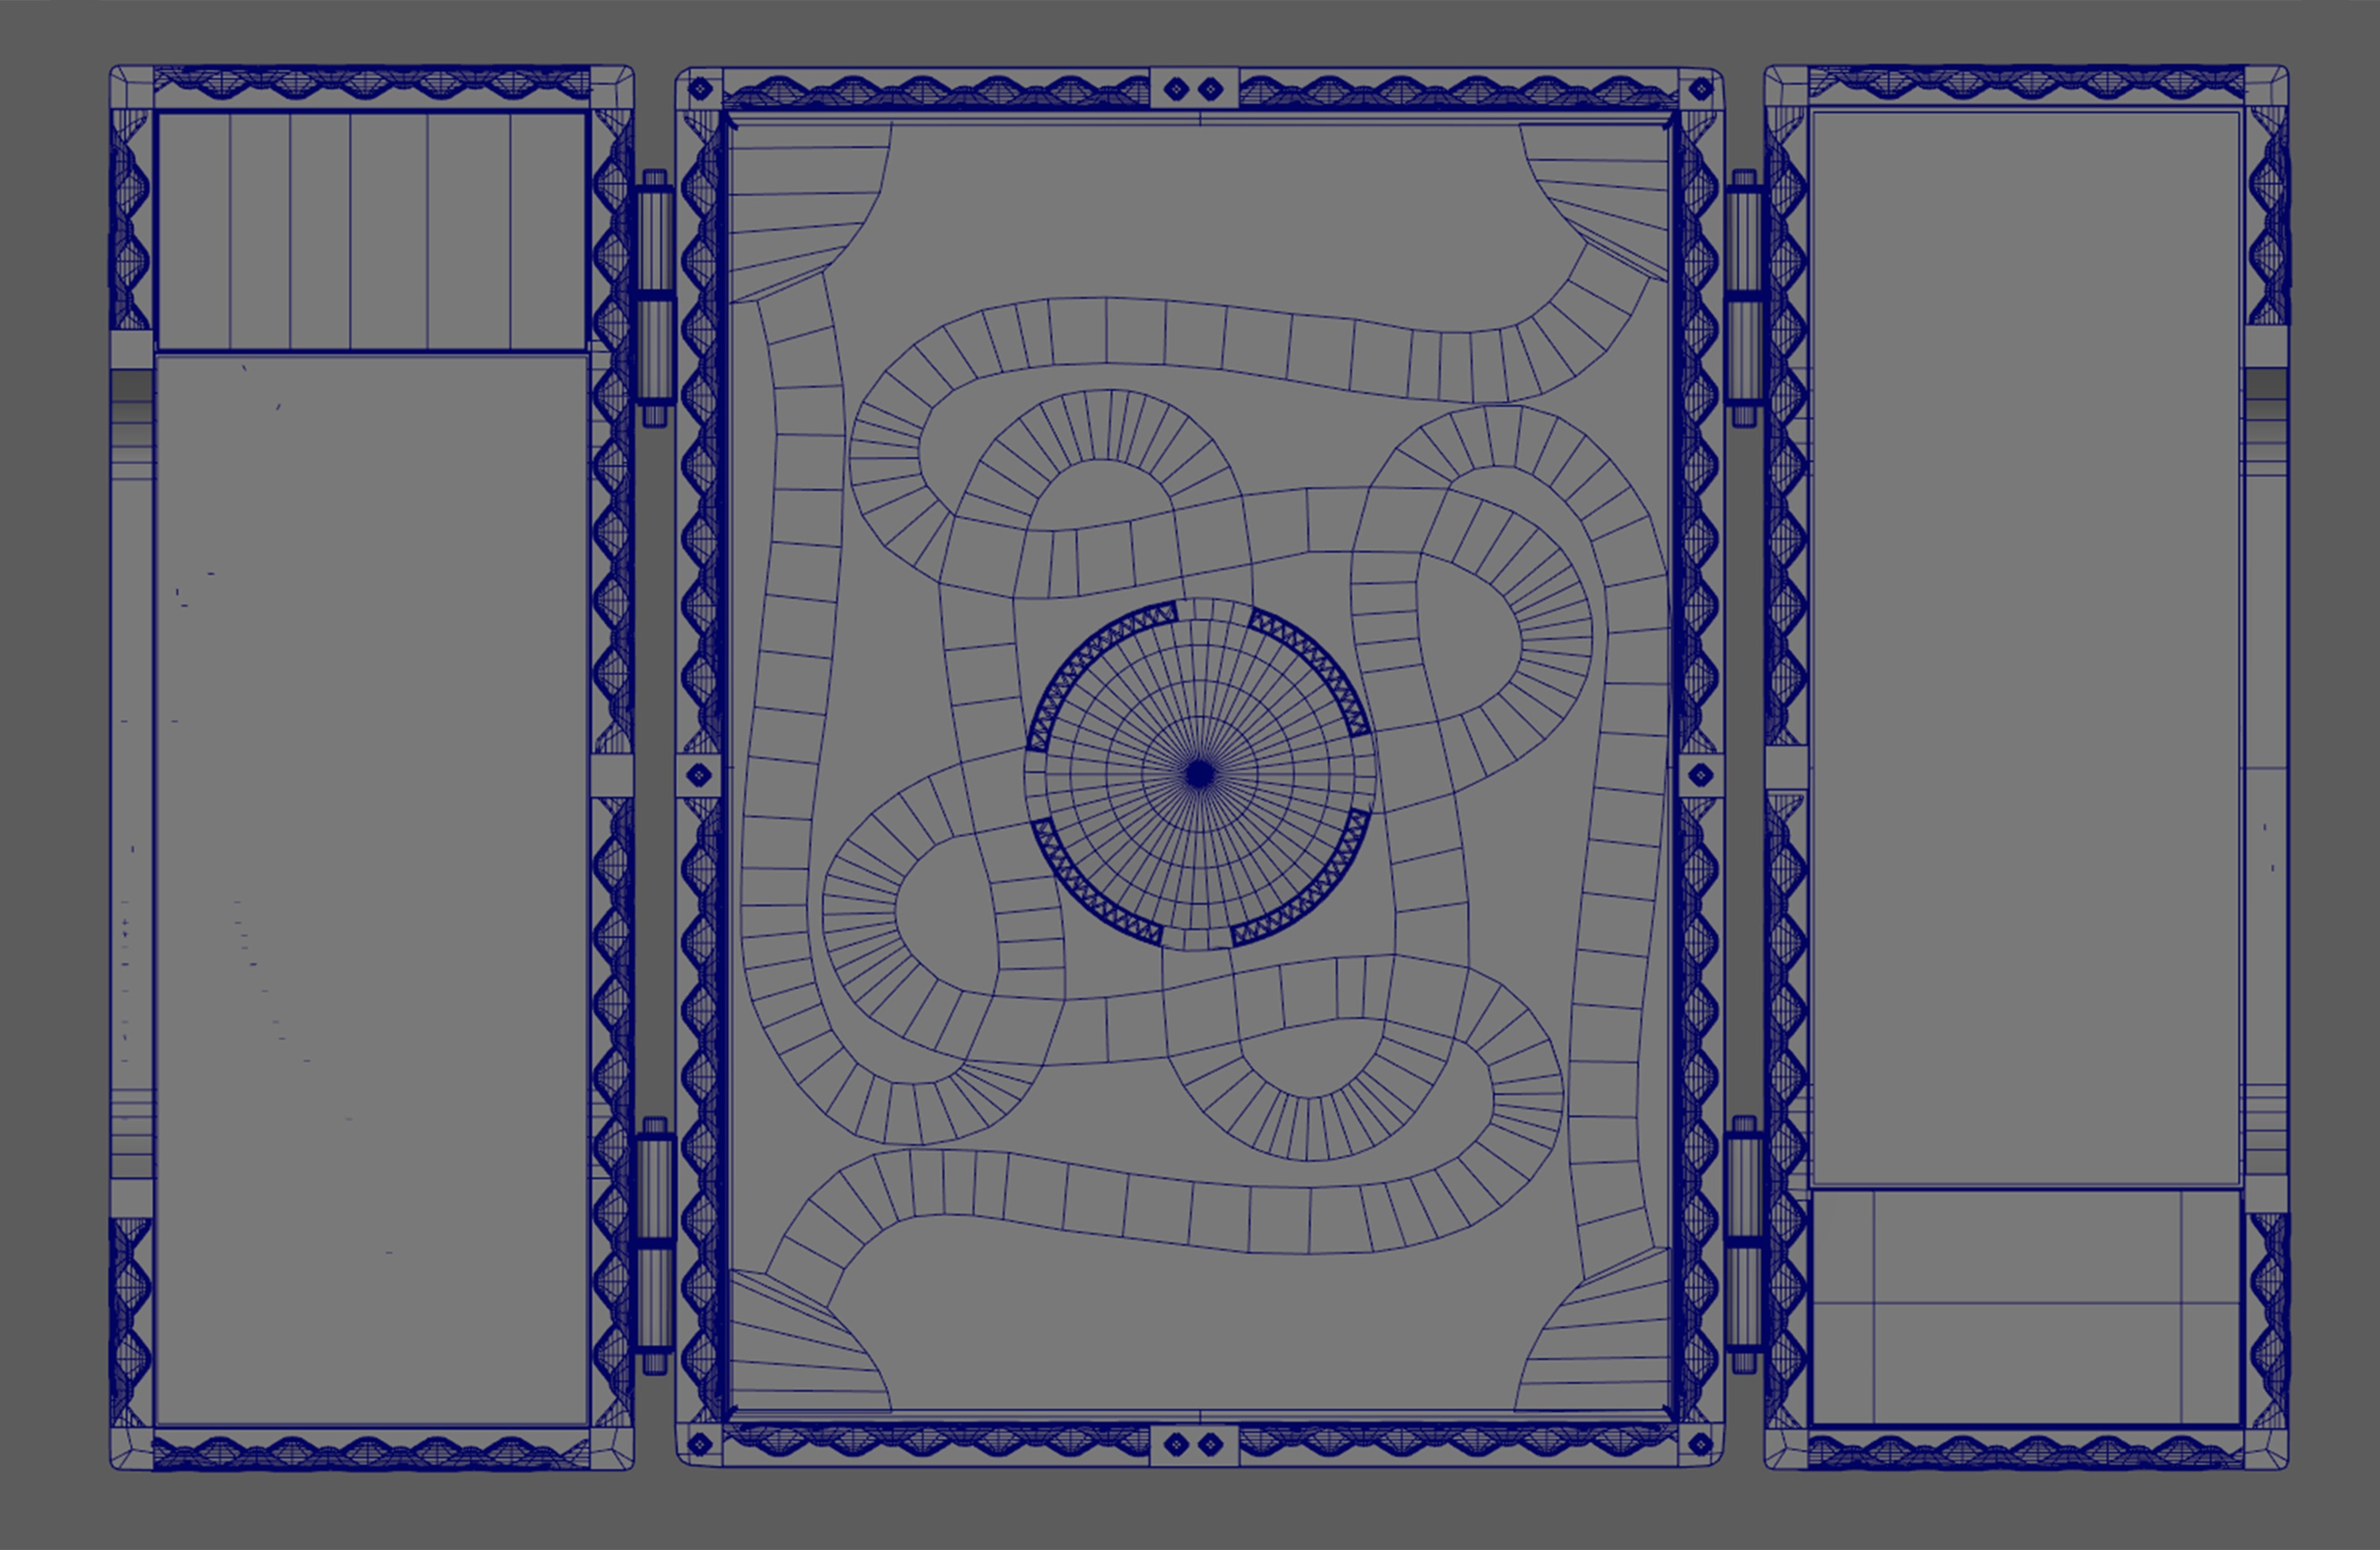
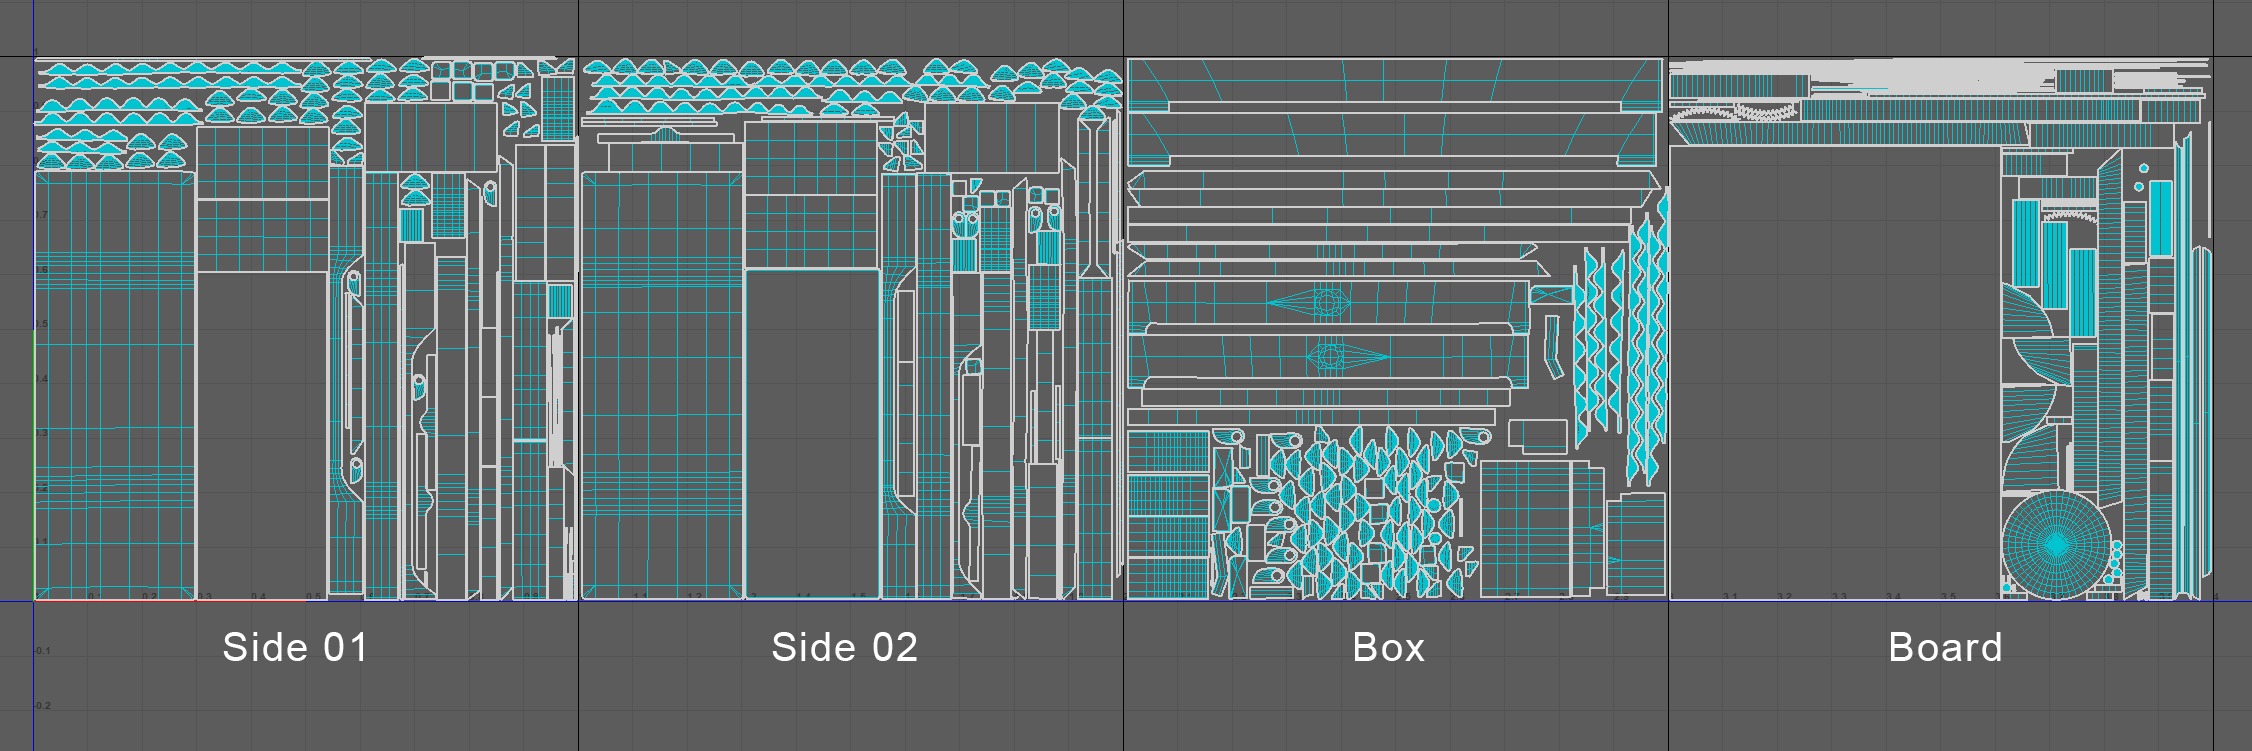
UVing
The UVs were unwrapped in Maya, after a thorough ngon and manifold geometry check.
Uving is easily one of my favorite parts of this process. I find it greatly satisfying to be able to ensure your textures are going to fit onto your model exactly like you imagined.
Proper UVs are crucial for a quality project, as fast-tracking this step will negatively impact your baking and textures.
To make things easier, I like to think of it as a puzzle, and boot up a movie on my computer (like, I don’t know, Jumanji, for example).
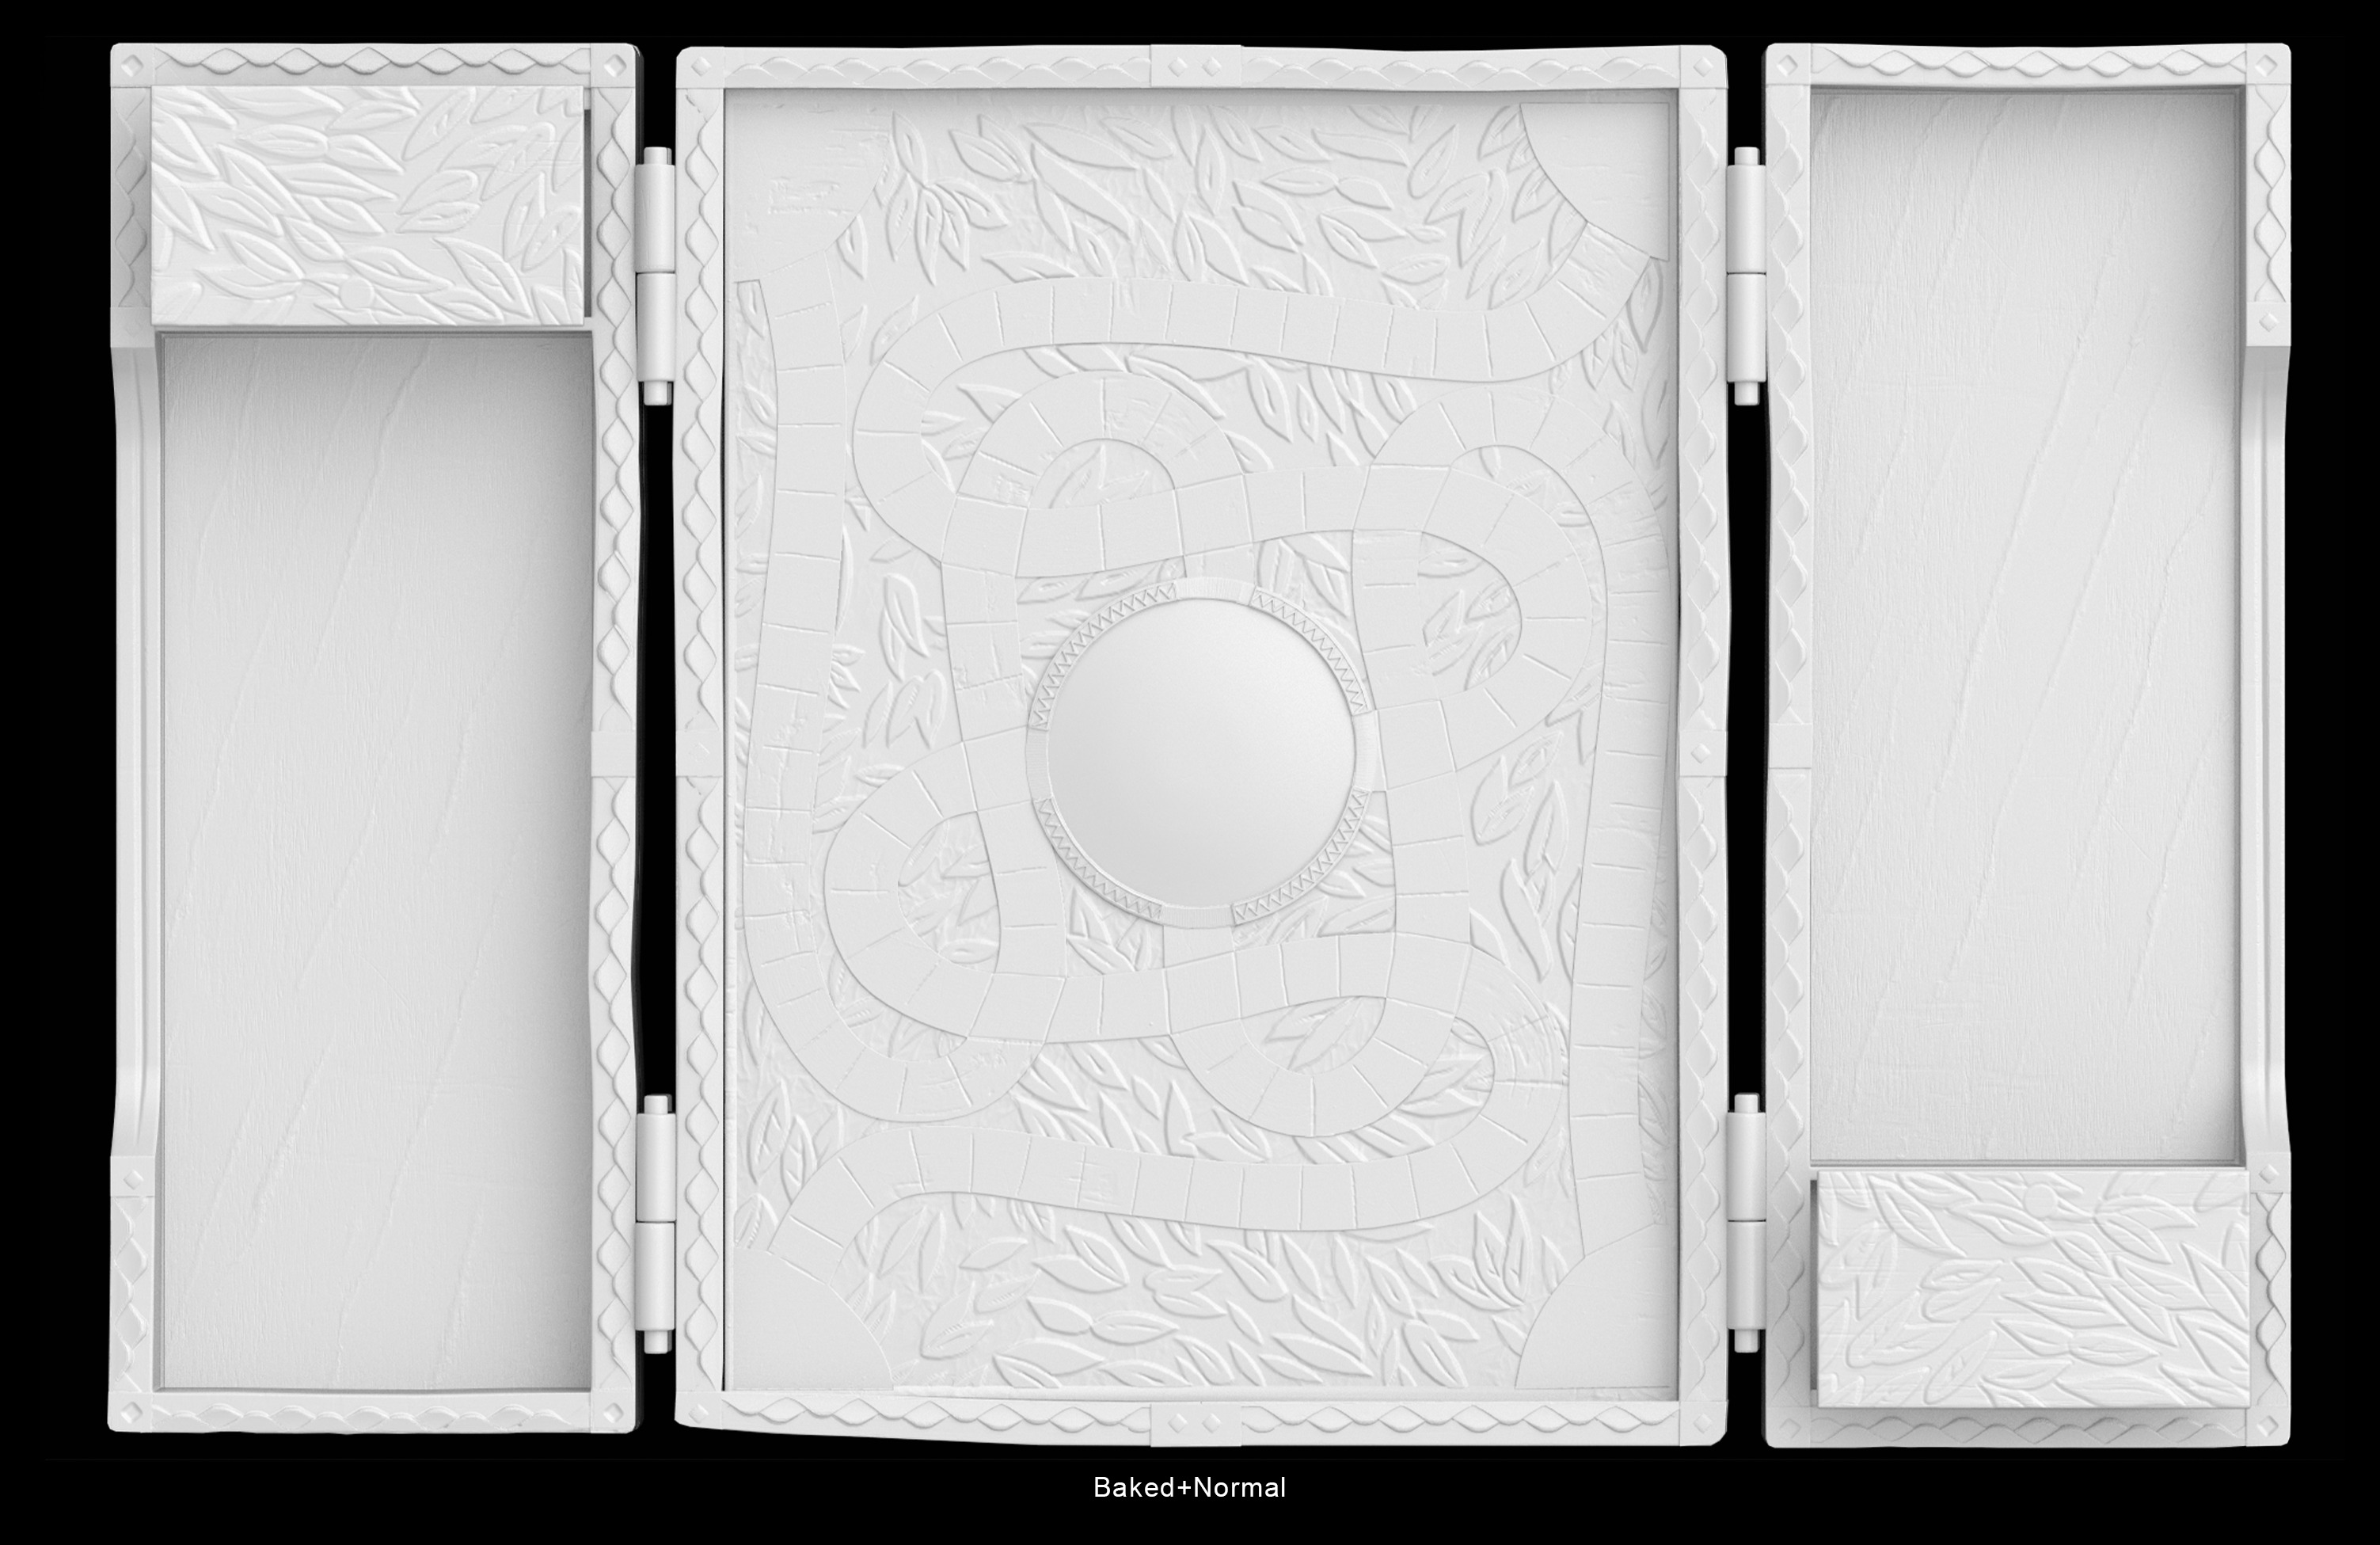
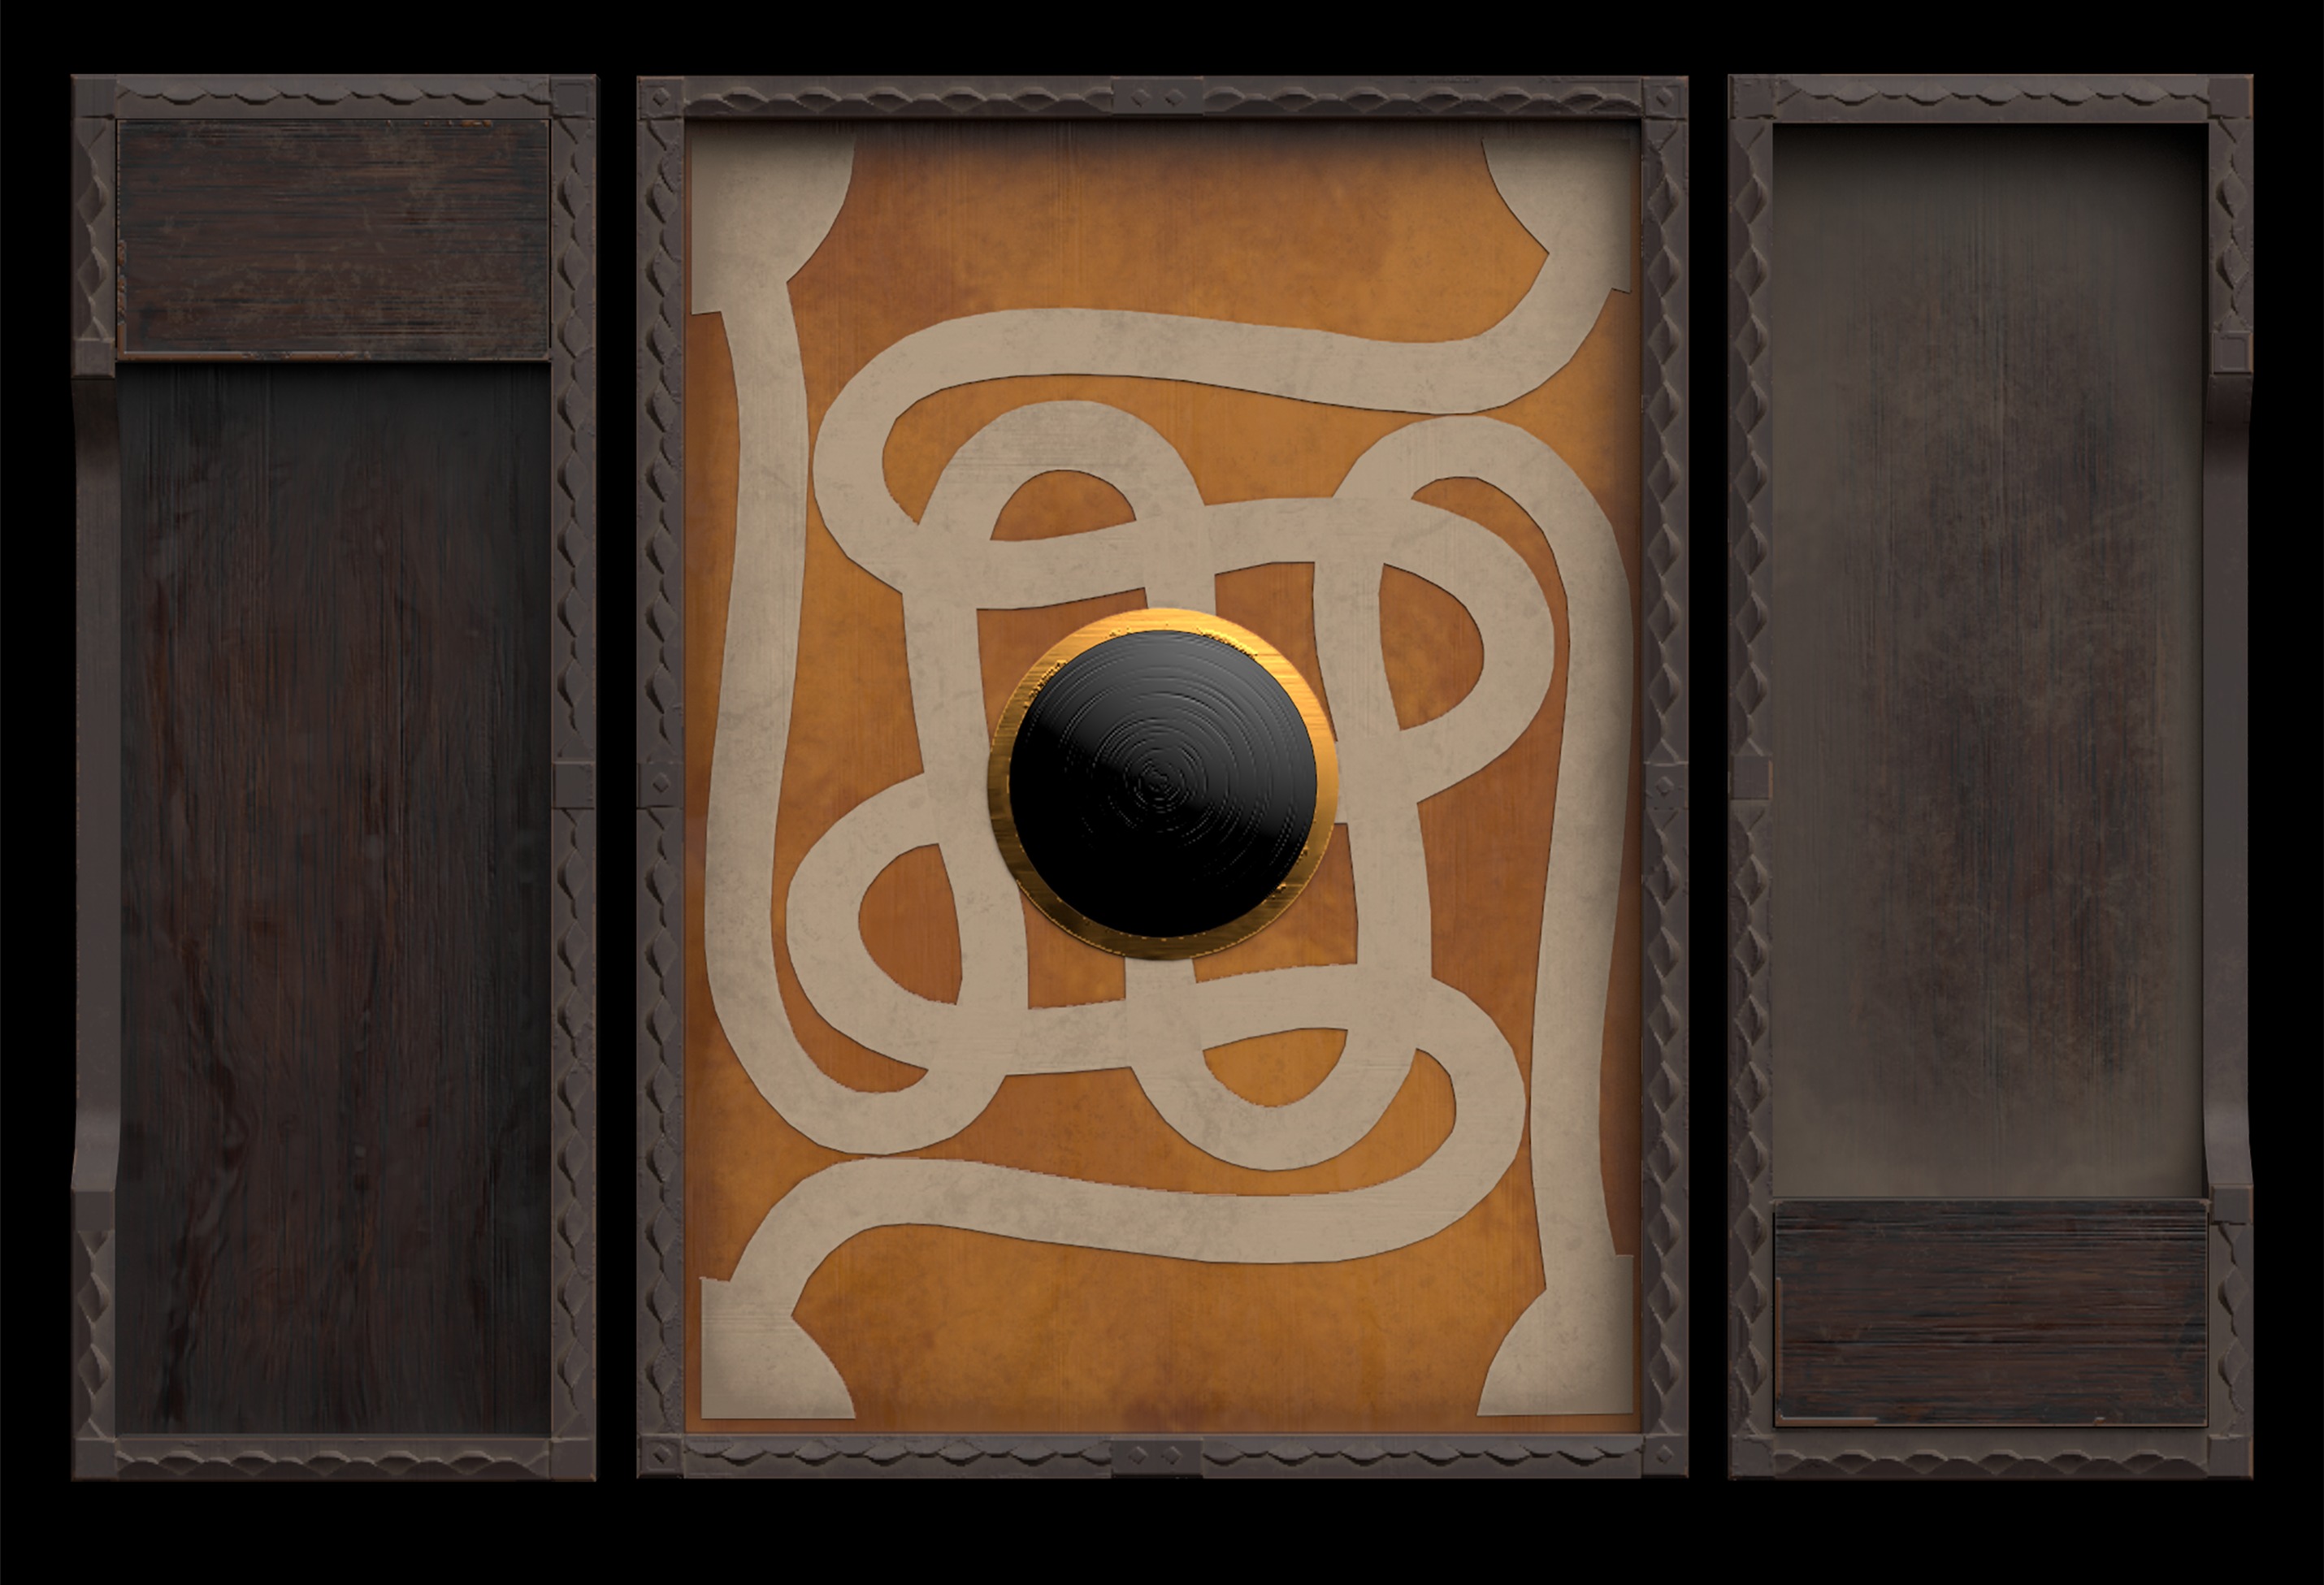
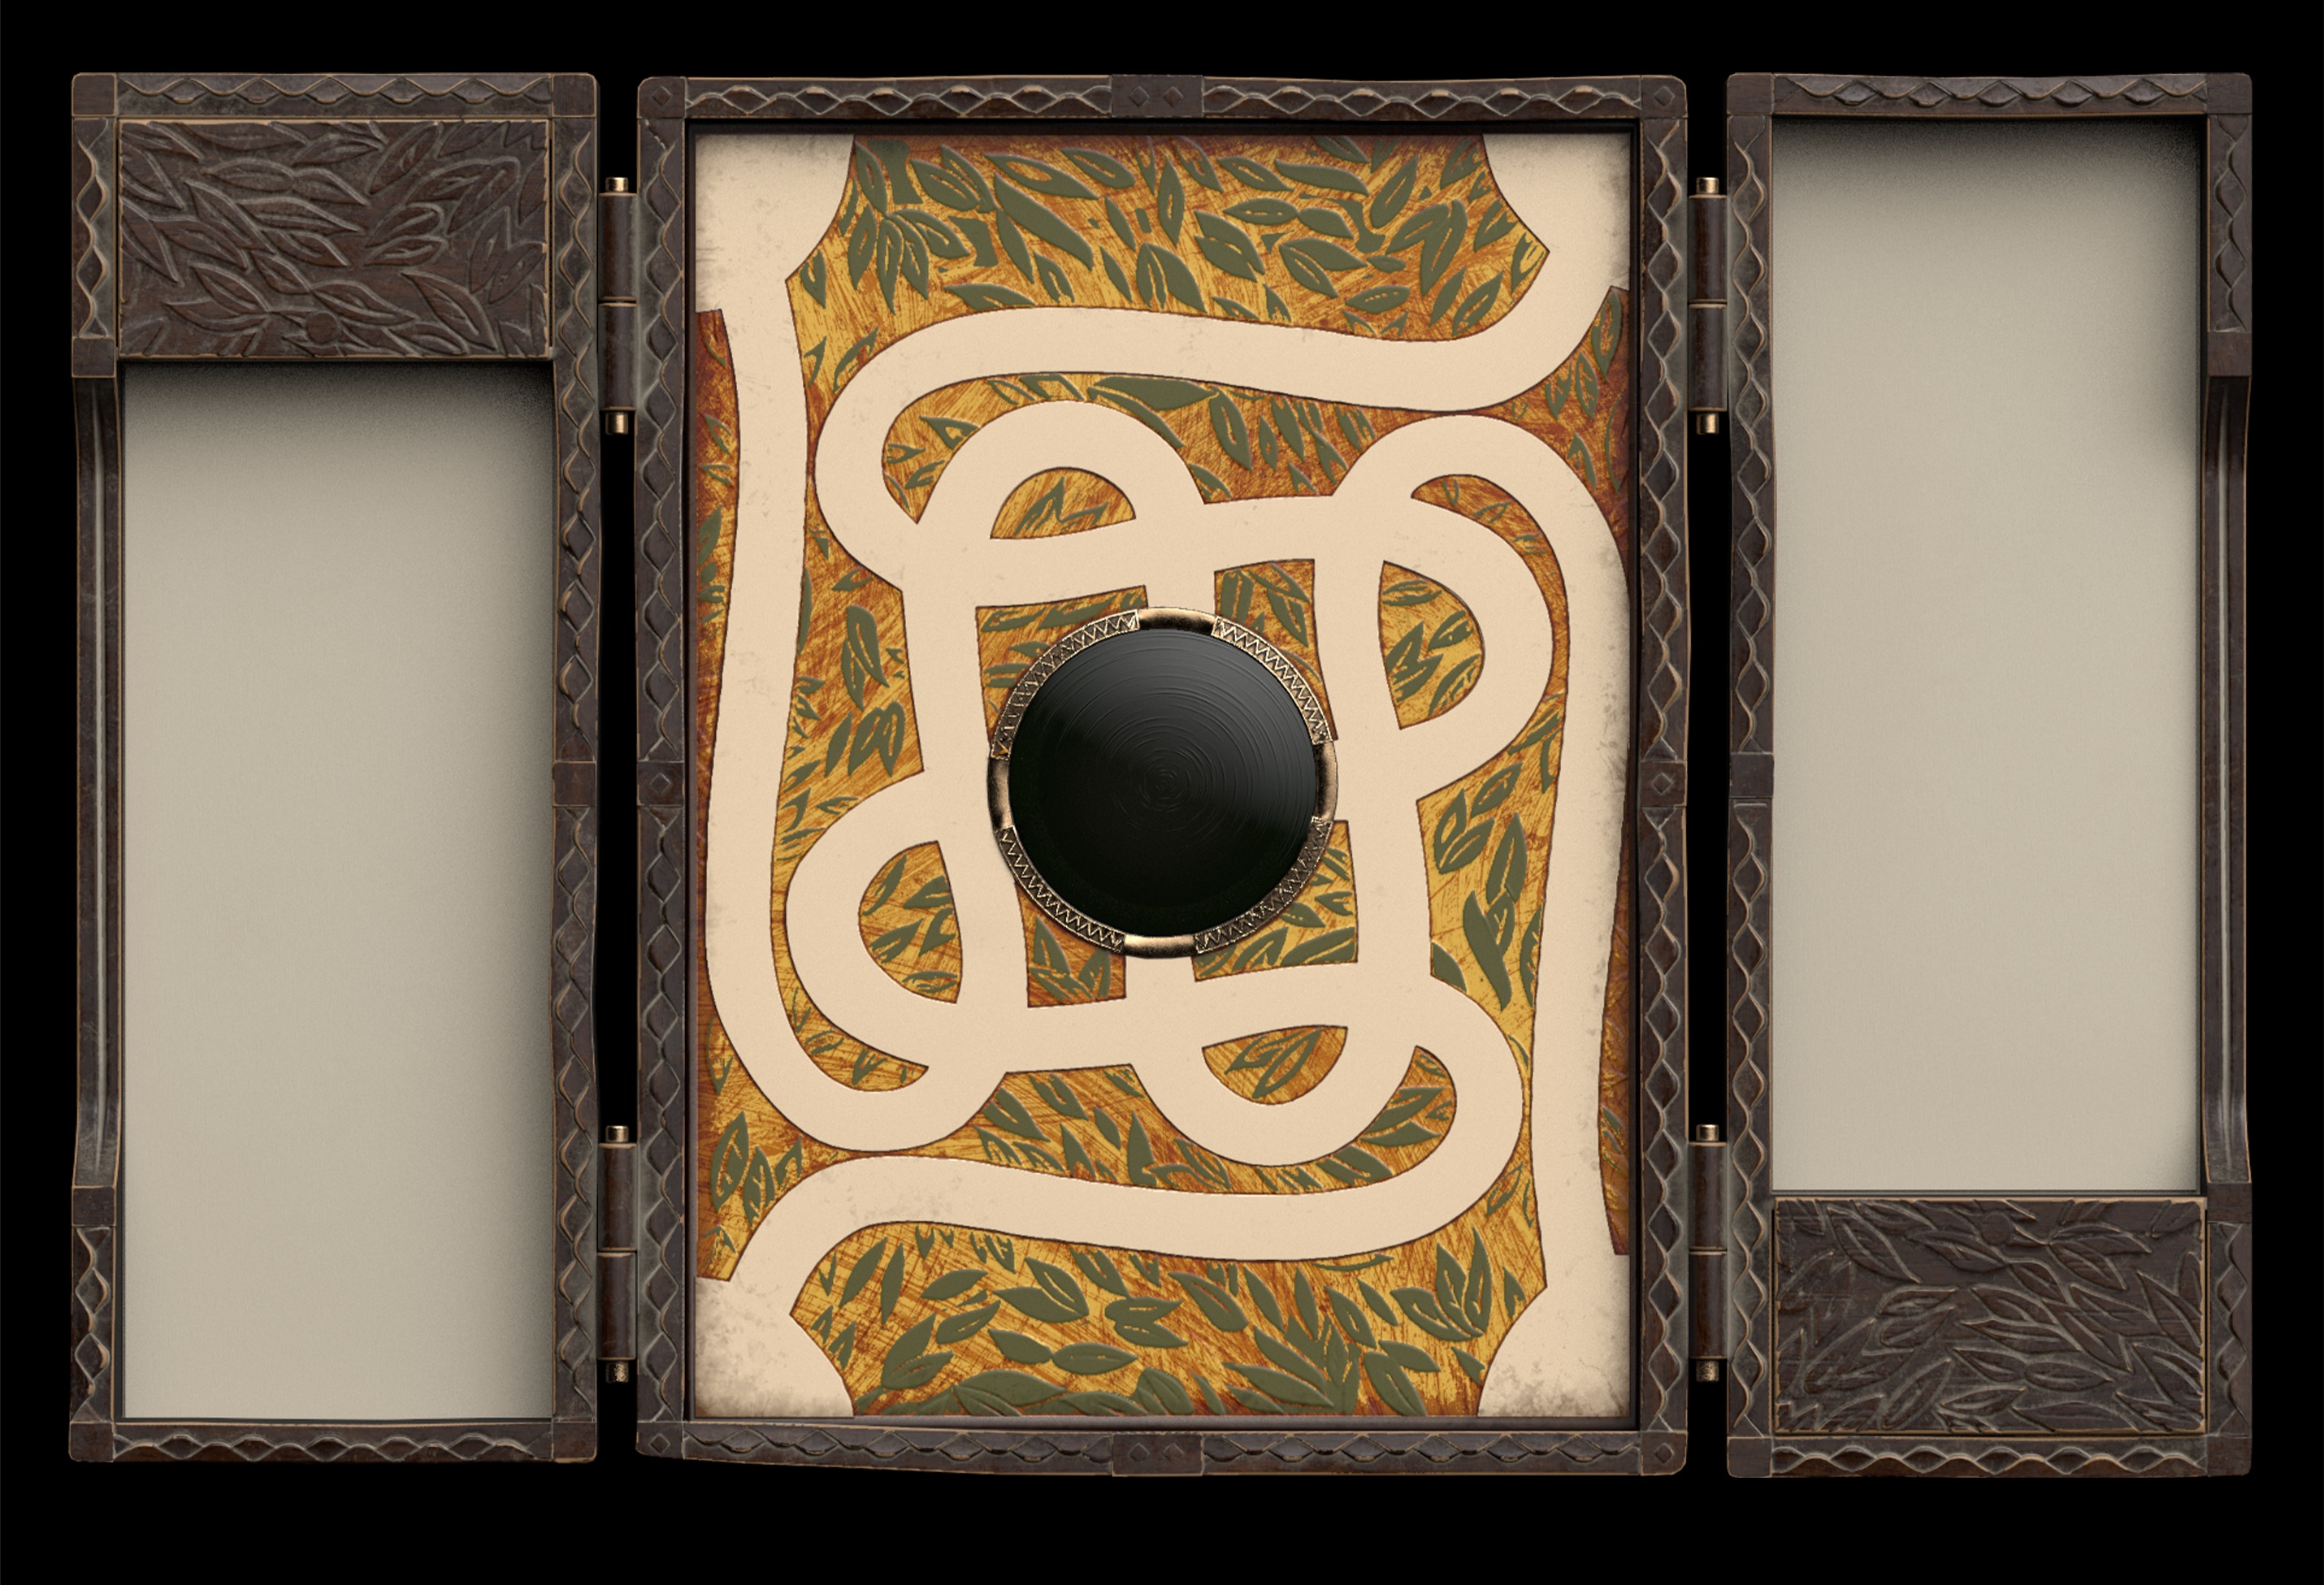
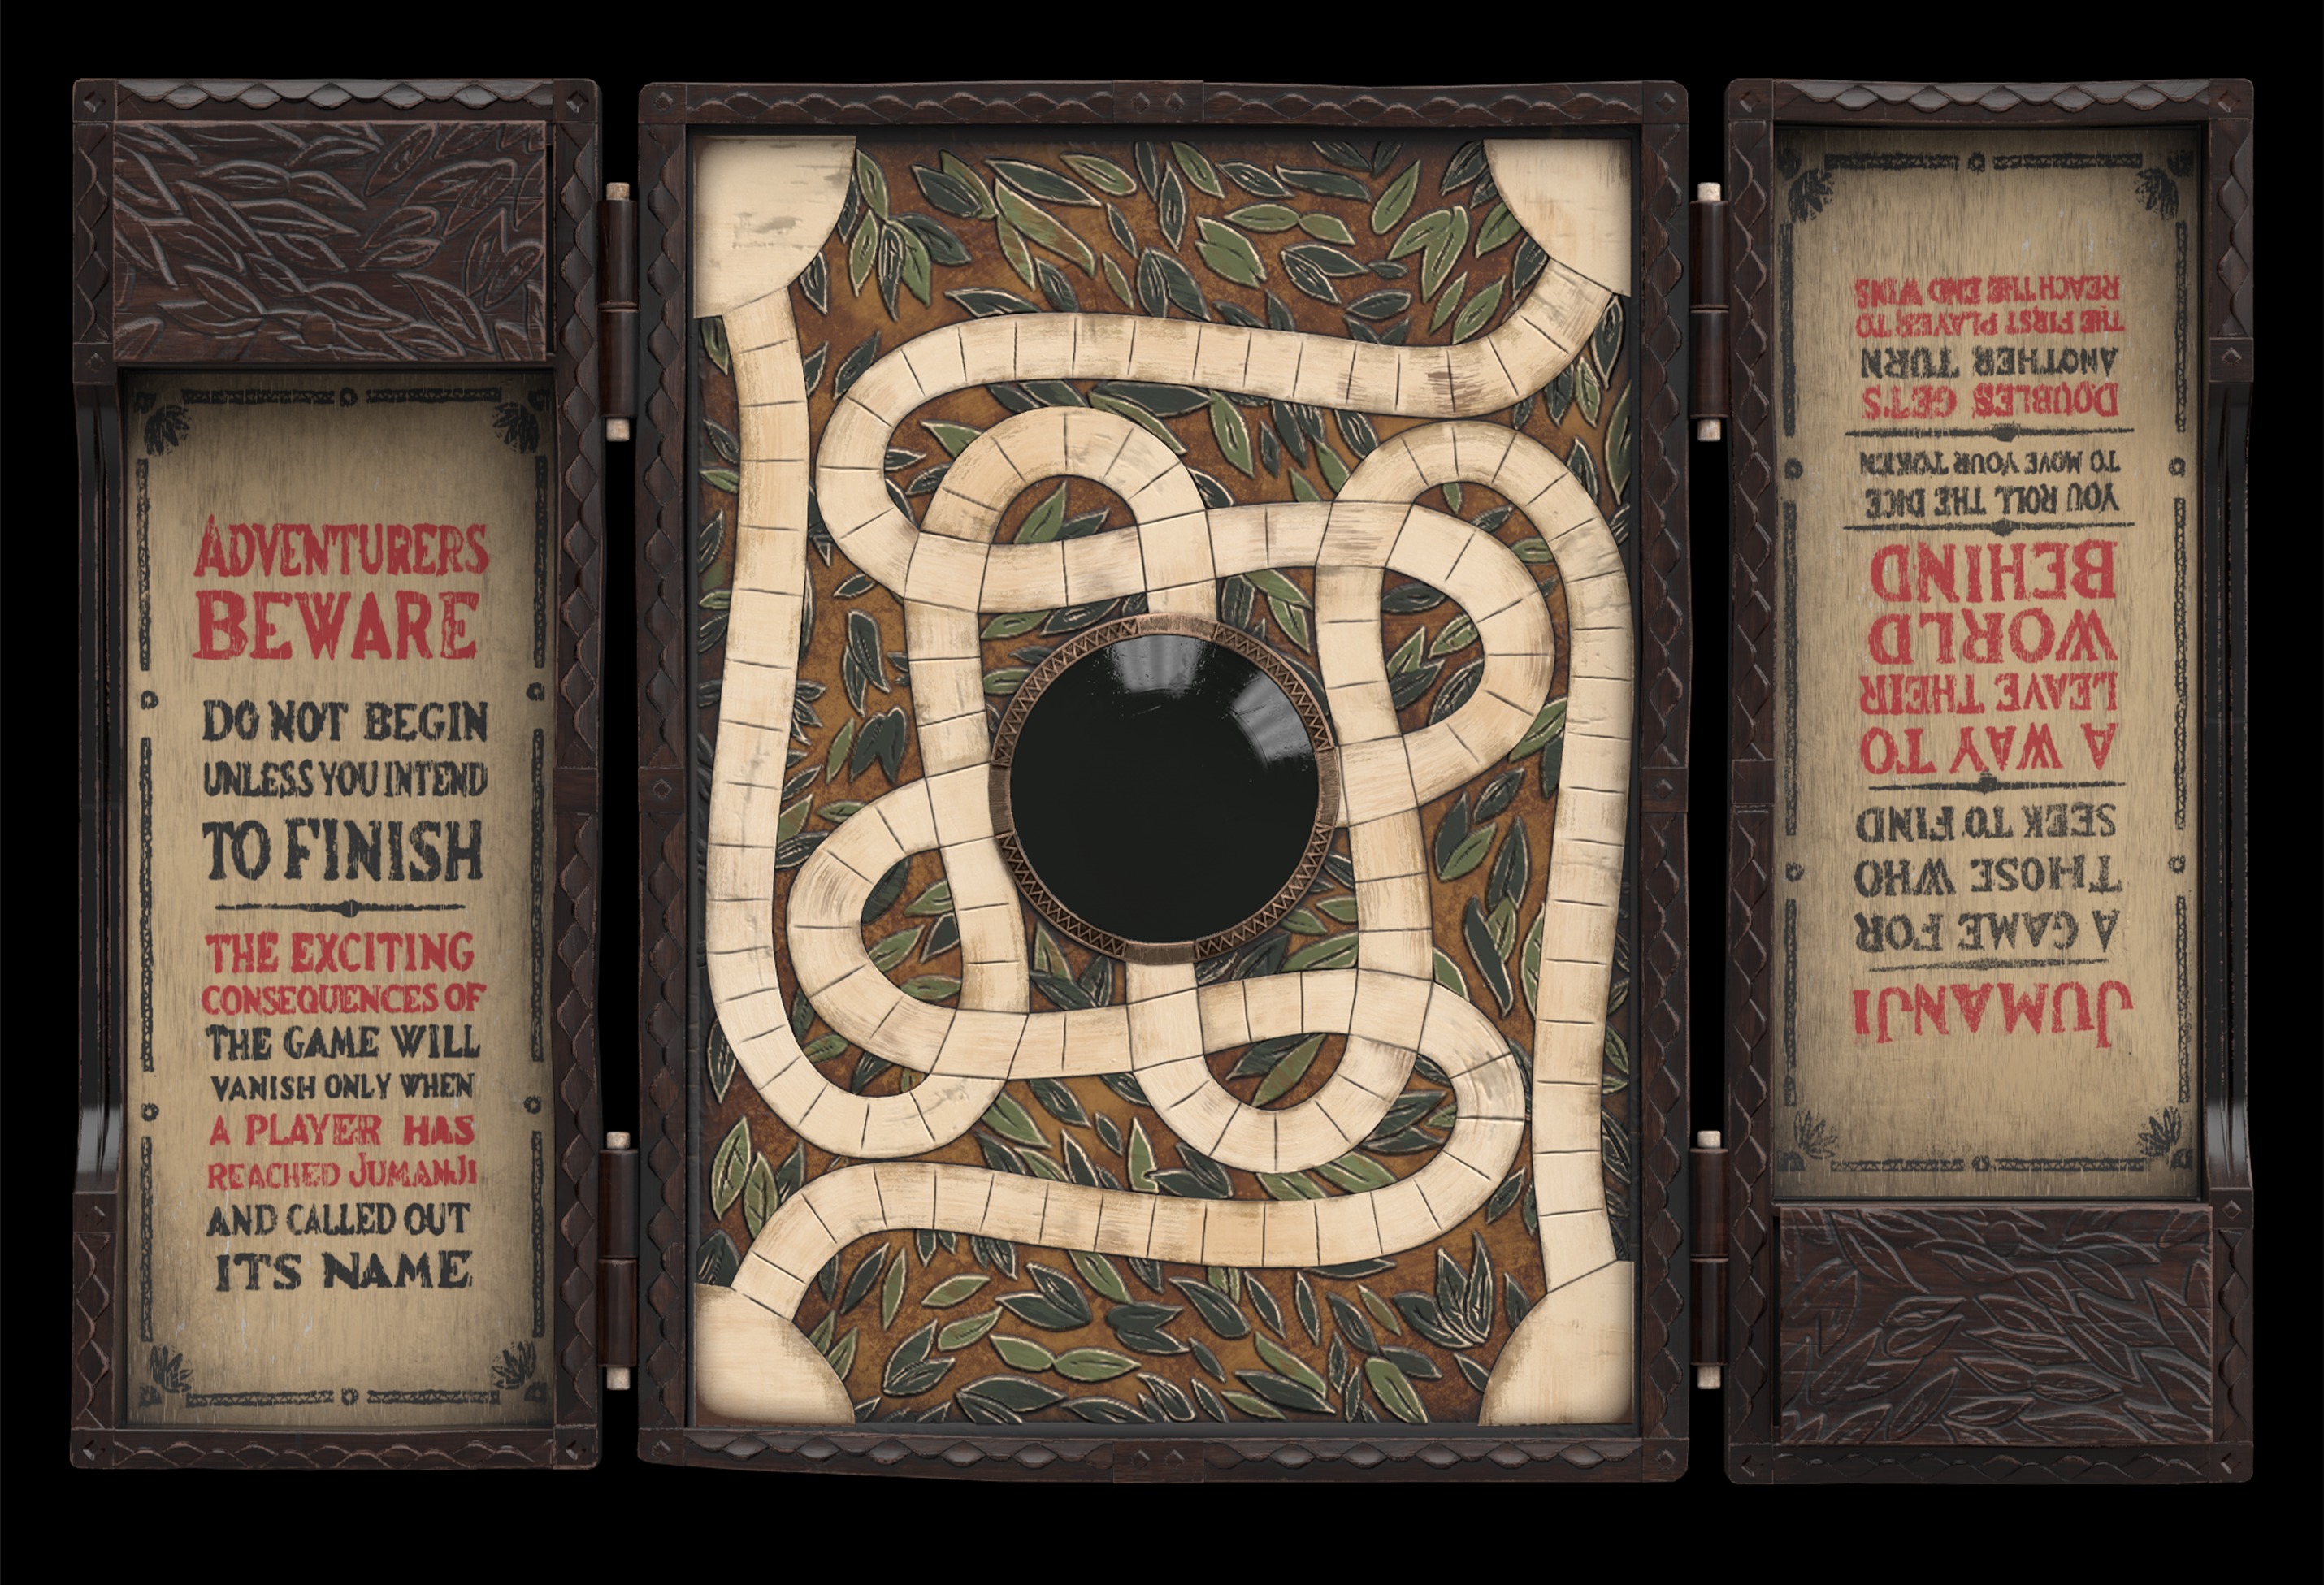
Baking & Texturing
Baking was taken care of in Substance Painter, with a resolution of 2048×2048 with antialiasing super sampling 4x.
The texturing for Jumanji was quite dense, so I’ll try to focus on the general themes and various methods I apply to most of my projects.
Textures such as khaya wood, ebony, ivory, jade and iron are based on a solid database of pictures collected at the start of the project, as well as some references from the movie.
The rest of the board was textured according to various HD screengrabs from the film.
A vast majority of my textures are brought to life procedurally, from scratch.
The way I go about creating my base colors is quite straightforward. I often spend a considerable amount of time observing my references in order to thoroughly break down the different layers of detail.
I then get to work on depth by breaking down continuity. For example, no base color is ever just one color, I’ll duplicate the layer, set it to another blend mode and run it through a noise map with interesting variations.
The same goes for the wooden pattern on the sides. Instead of having just one layer dedicated to this brownish grain, I’ve split it into multiple layers with different intensities and placements to simulate organic variations that often occur in real life.
The frame called for a more organic/painted approach, since the colors weren’t pattern-based. Just like the sculpting, each element had to be individually taken care of.

Roughness around the board is pretty basic as well. Since I’m working on an aged prop, the most intense roughness variations are going to be found where dust settles (crevices, scratches etc.).
I’ll often reuse the patterns I’ve created during the base color process to guide simple roughness variations, in order to create a more complex base roughness.
Last but not least, I like to create organic variations using alpha maps of smudges, fingerprints or any other shapes suggesting human-made wear, as those anomalies are usually what catches the eye best.

Finally, the normal information. As mentioned previously, I’ll wait for the texturing to begin in order to get to work on the finer wear and tear.
I’ve tried my best to create organic, random scratches, bumps, grain and many other variations. Those few extra details, in my eyes, are what make props go from “realistic looking” to a real-life object.
Trial & Error
Trying, failing and starting again is the foundation of success. I thought it’d be fun to take a moment to showcase everything that didn’t work out, and ultimately led to the polished result.
- My first instinct for the front piece was to create another alpha map and project the details onto a plane, but that looked awful. Then came a realisation I had dreaded: the solution was actually to sculpt every single detail piece by piece.And, against all expectations, it wasn’t all that bad. In retrospect, I’m so glad I decided to go the extra mile, as the front piece became my favorite part of the board.
- I like to step aside and test mesh/baking viability when I have time. Here’s what the board looked like in (very) early stages of the project.
- I really struggled with lighting the different scenes. Having a specific idea of what you want your project to look like means learning to let that go when it doesn’t work out.I tried, tried again and again to reach something that felt satisfying to me. I ended up developing incredibly useful techniques to light my pieces, as well as real lighting skills. Worth it!
- The same goes for render compositions. Many things ended up looking terrible once set up. The idea of wasting quality work had my hair falling out in clumps. I finally decided to call up my former environment art teacher and expose the issues I was facing.Having fresh pairs of eyes to look at my work was incredibly cathartic; it gave me the confidence to finish this project and actually look back on it with a bit of pride.In hindsight, getting out of my own way and asking for feedback might have been one of the best decisions made during this project.

- The pawn path animation started out as a simple spline animation setup in blueprints and integrated into the Unreal Engine timeline.I ended up having to animate it key by key after discovering at the eighth of an eleven-hour render that the animation from the viewport greatly differed from the render one. (Deep breaths).
Conclusion
Thank you to everyone who took the time to read the article!!
Working on this piece was incredibly fun, bumps, mistakes and all. It reminded me of why I do this in the first place, and of how much passion makes daily life that much sweeter.
Thank you Game artist for allowing me to share my process, and for giving me the chance to have my work displayed alongside incredibly talented fellow artists.
Special thanks Morgan, Leigh and Elodie for the endless support and constructive criticism you’ve provided during this project.
I’d like to dedicate this piece to Dan Sissons and all others who worked on creating the board. What an incredible testament to human creativity.
And if you’re looking for an environment/props artist, I might know a girl.
Artstation: https://www.artstation.com/marieboisnard
Read more articles
You might also like these articles.