

Introduction
Hello, I’m Silvia Raponi! I’m currently a student at Digital Arts & Entertainment in Belgium.
I'll soon be entering my last year and start looking for an internship, I am passionate about stylized games and textures and would love to work as a stylized environment artist in the future.
Project
After changing countries to study game art I found my hands full quite quickly, so I only had time to do smaller, projects to test and learn new techniques. The goal of this piece was to create a completed stylized piece in Unreal Engine for my portfolio.
I found this gorgeous concept on Artstation and asked the artist for permission, I really liked the truck coupled with more organic things like the wooden structure and the grass and it was just too cute to pass on it.
The concept: https://www.artstation.com/artwork/Ar0xkm
The Artist’s Portfolio: https://www.artstation.com/mtf

Planning/Inspiration
Like a lot of artists I am inspired by animated movies from Japan, especially the ones from Ghibli with more soft muted colors and that kind of cozy feeling was what I wanted to capture in this environment. Another inspiration was the recent Airborn showcase for its lighting and colors. I created a Miro board with some references and inspirations and used it to keep track of my progress during the making of this piece.
Software Used
- Maya
- ZBrush
- Marmoset Toolbag
- Substance Painter
- Photoshop
- Substance Designer
- Unreal Engine
Modeling
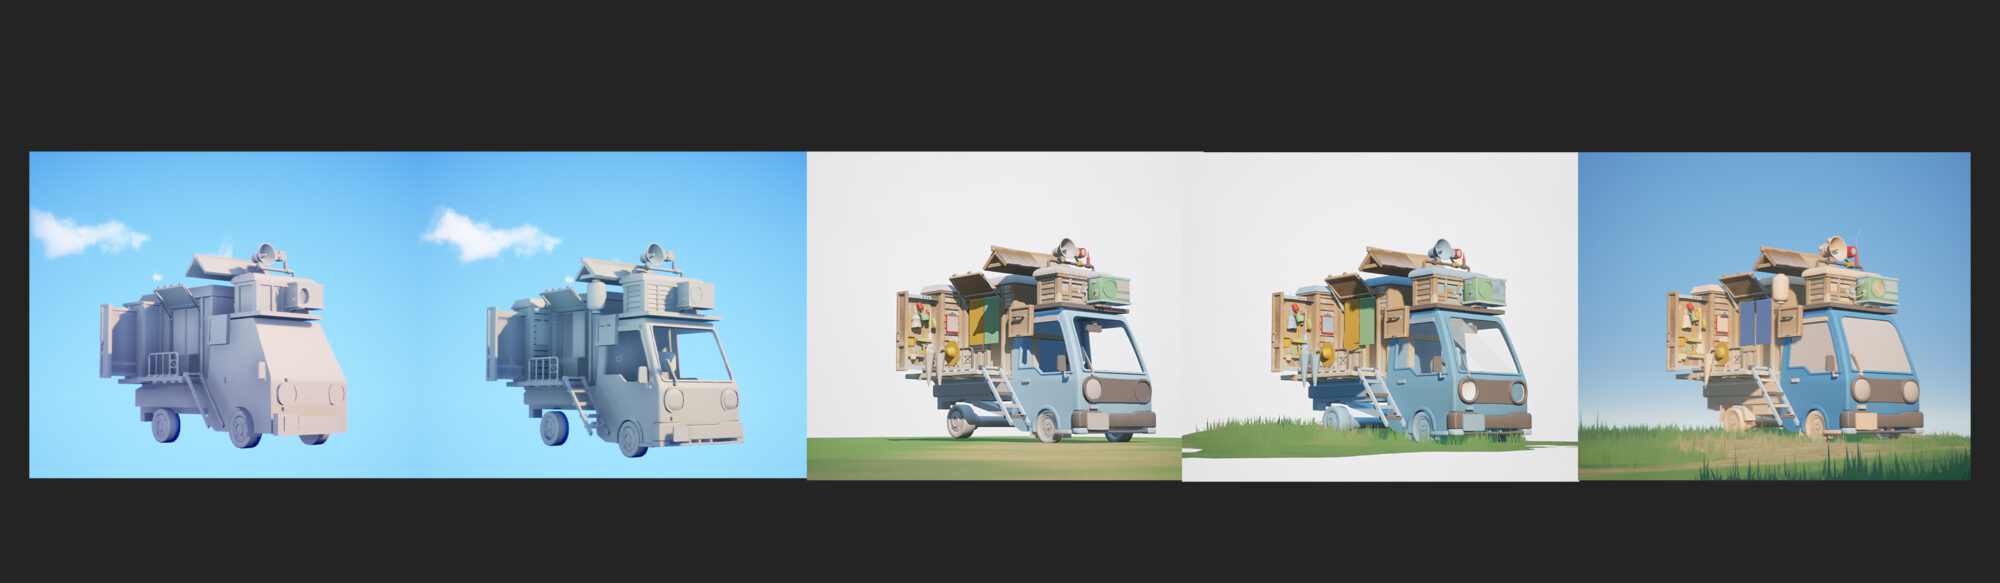
To create the different parts I followed a low-poly to high-poly workflow, I modeled in Maya and baked the maps in Marmoset Toolbag. I tried to keep the polycount as low as I could without losing the nice roundness I wanted some assets to have. Here you can see how I split the different parts into groups, to have better texture quality.
I kept importing the models into Unreal every time I changed something, trying to match the concept as closely as I could. This took a lot of experimenting with the camera’s field of view and position but I was eventually able to get it to a place I liked.
Sculpting and Baking
I did a sculpting pass in ZBrush on some of the wooden planks to have some exciting variations on the surface for the Curvature Bake to pick up. I used the Trim Dynamic/Adaptive and the Orb Cracks brush from Michael Vicente.
After adding these details, I baked Normal, Curvature, Position and AO maps for all my meshes in Marmoset Toolbag.

Texturing
All the assets were textured in Substance Painter, mostly making use of generators and noise maps. And only hand-painting when I needed to add specific details.
Below are the steps I followed for texturing all of the props. It’s important to check your textures in Unreal as you work on them, and not wait until the end. As they can look different in Unreal versus Painter, checking often makes it easier to have a unified look for the assets.


Because I was aiming for a softer look, I often added a Blur Slope filter on my grunge masks.
For some of the more minor details, I painted separate alphas inside Photoshop, which I then imported and applied to the meshes in Substance Painter.

Adding Animations
Something very fun to add was the small moving flags on the AC unit.

-add gif named “07_Flags.gif”
For those I used Unreal’s Cloth simulation, imported the flag pieces as static meshes, then applied cloth paint on the parts I wanted to move and put a directional wind source in the scene and those were done! I made a small video to show how quick it is to set up.
For more details, l recommend this more extended tutorial, which is where I learned it from.
While Cloth Simulation worked well for these smaller parts, I quickly discovered it wouldn’t work for the bigger curtains, so I had to use a different method for those.

In Maya, I gave the meshes enough geometry to move smoothly once distorted, then applied red vertex painting to the part I wanted to move.
In the material, I lerped “SimpleGrassWind” with a constant 0 using the red vertex color as the alpha and plugged the result into World Position offset.

Foliage and Landscape
To populate the terrain I used fully modelled grass and RVT blending so the grass would pick up the color of the landscape underneath it. There are plenty of useful tutorials about RVT blending, but this one from PrismaticaDev is the first one I ever watched and the one I always go back to.
The landscape was textured with very plain textures I made in Substance Designer, due to the viewing angle of the final shot, I found adding too much color variation made the ground too noisy so I kept it simple. The only one where I kept a bit more detail was the dirt texture.


The ivy and the clovers on top of the truck follow the same logic as the grass, picking up the colors from the landscape while the flower has their own base color in the material.
For the movement of the grass, I recommend this really well-done tutorial.


Clouds
The clouds are just curved planes with a texture that I painted in Photoshop, I then added some warping to it inside the material. With this method you can get very interesting variations from just creating material instances and changing the parameters.

Here is the distortion in action:
Below I exaggerated the effect to show that thanks to the speed parameter is possible to have fluffy moving clouds!

Lighting and Post Processing
As I was nearing the finishing line, the overall contrast of the piece was still too harsh for my taste. I wanted the colors to be more muted and soft, and no amount of tweaking the lights was getting me where I wanted. So I did a post processing pass to correct that.

What changed the visuals of the project massively were the Slope and Blur values in the Film tab, they really helped me achieve what I was after and soften the overall look of the image.

A more subtle but still important change I did, was tweaking the Gamma values as well.

I also increased the saturation of the red and blue channels while lowering the green channel a bit.
Here is a final overview of all the post-processing settings I ended up using.

The final lighting consists only of a Skylight, two directional lights with one having “Cast Shadows” turned off and a few smaller point lights to brighten some darker areas.

And here’s an overview of the whole process condensed into a small gif!
Conclusion
This project ended up taking around 2 weeks and a half, it taught me a lot and I hope to carry what I learned into my future works.
I’m extremely grateful to get the oppurtunity to write this article, I’ve picked up so much from those made by other artists and I wouldn’t be here if it wasn’t for the knowledge they freely shared. Hopefully I managed to add a bit to it as well.
I would like to encourage everyone to keep going in their 3D journey. Finishing a project it’s something that takes a long time, with multiple steps involved. As you could see it took me almost till the very end to get to a result that I liked. Don’t be afraid to scale down the scope of what you’re working on, if you find it too overwhelming. And for personal projects always try to choose a subject you’re passionate about, ’cause it will help carry you through the difficult parts of the process.
Thank you so much for reading!
Read more articles
You might also like these articles.


