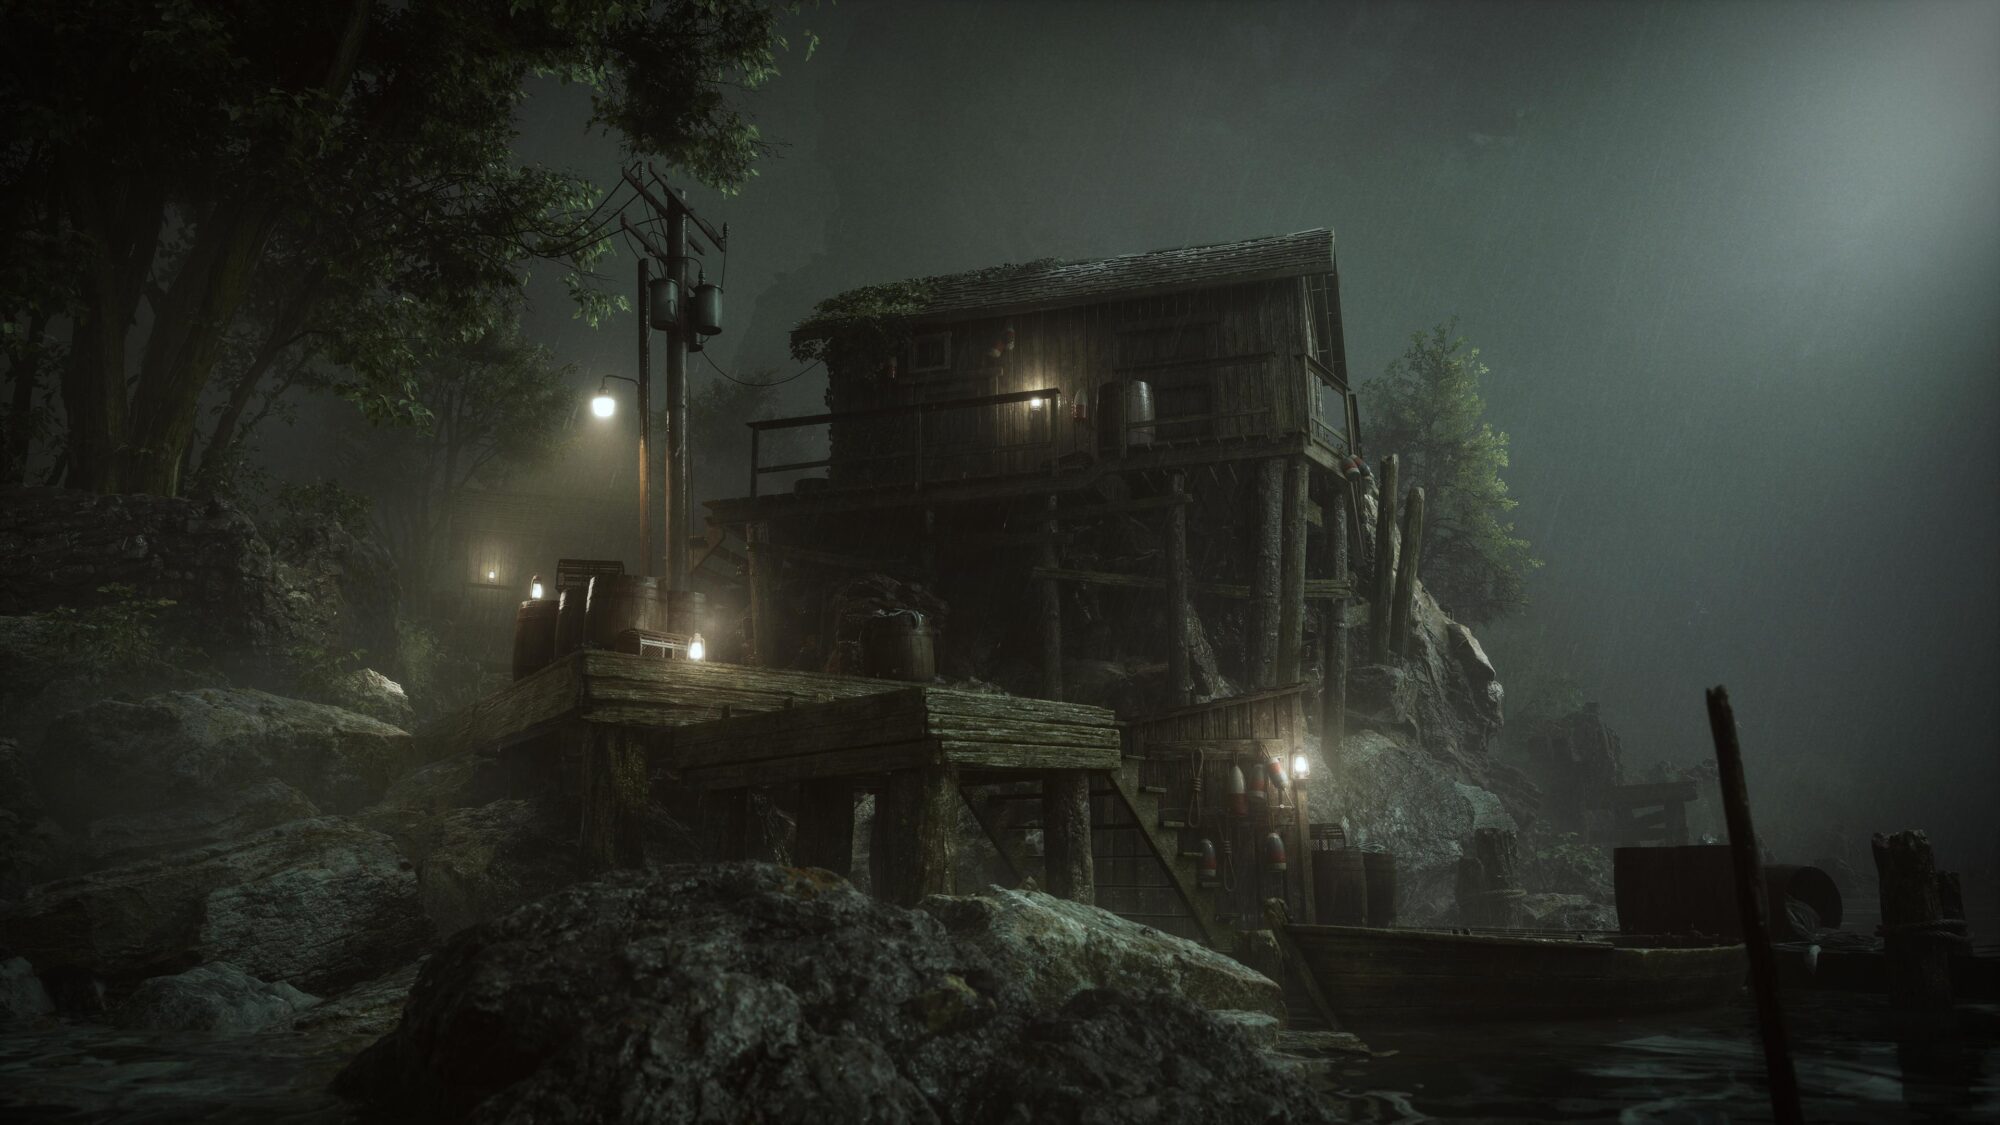
Fisherman House


Introduction
Hi! I’m Franek Leszczynski, a self-taught 3D Environment Artist from Poland.
I’ve been into games for as long as I can remember, and I was always curious about how they were made and what goes into bringing them to life.
I’ve been doing 3D for more than 6 years already, starting at the age of 13.
Goals
My goal for this project was to improve on making wood assets and get comfortable with complex composition and scene structure.
Software
Here is the list of the main software used for the project:
- Blender – modelling all of the assets
- ZBrush – sculpting
- Substance 3D Designer – tileable material creation
- Substance 3D Painter – texturing unique assets and creating masks
- Marmoset Toolbag 5 – baking and presentation
- Unreal Engine 5
- DaVinci Resolve – post production
References
After taking a bit of a break from personal work over the last year, I wanted to dive into something that would really push me out of my comfort zone.
The inspiration came from a concept created by Lucas LEGER.
Since the concept leaned heavily on wood and had a complex composition, which I wasn’t comfortable with at the time, I saw it as the right challenge.

I kicked things off by collecting references and building an asset list.
This step helps me track the scene’s progress, makes asset creation more efficient, and keeps me motivated and organized during the project.

Blockout
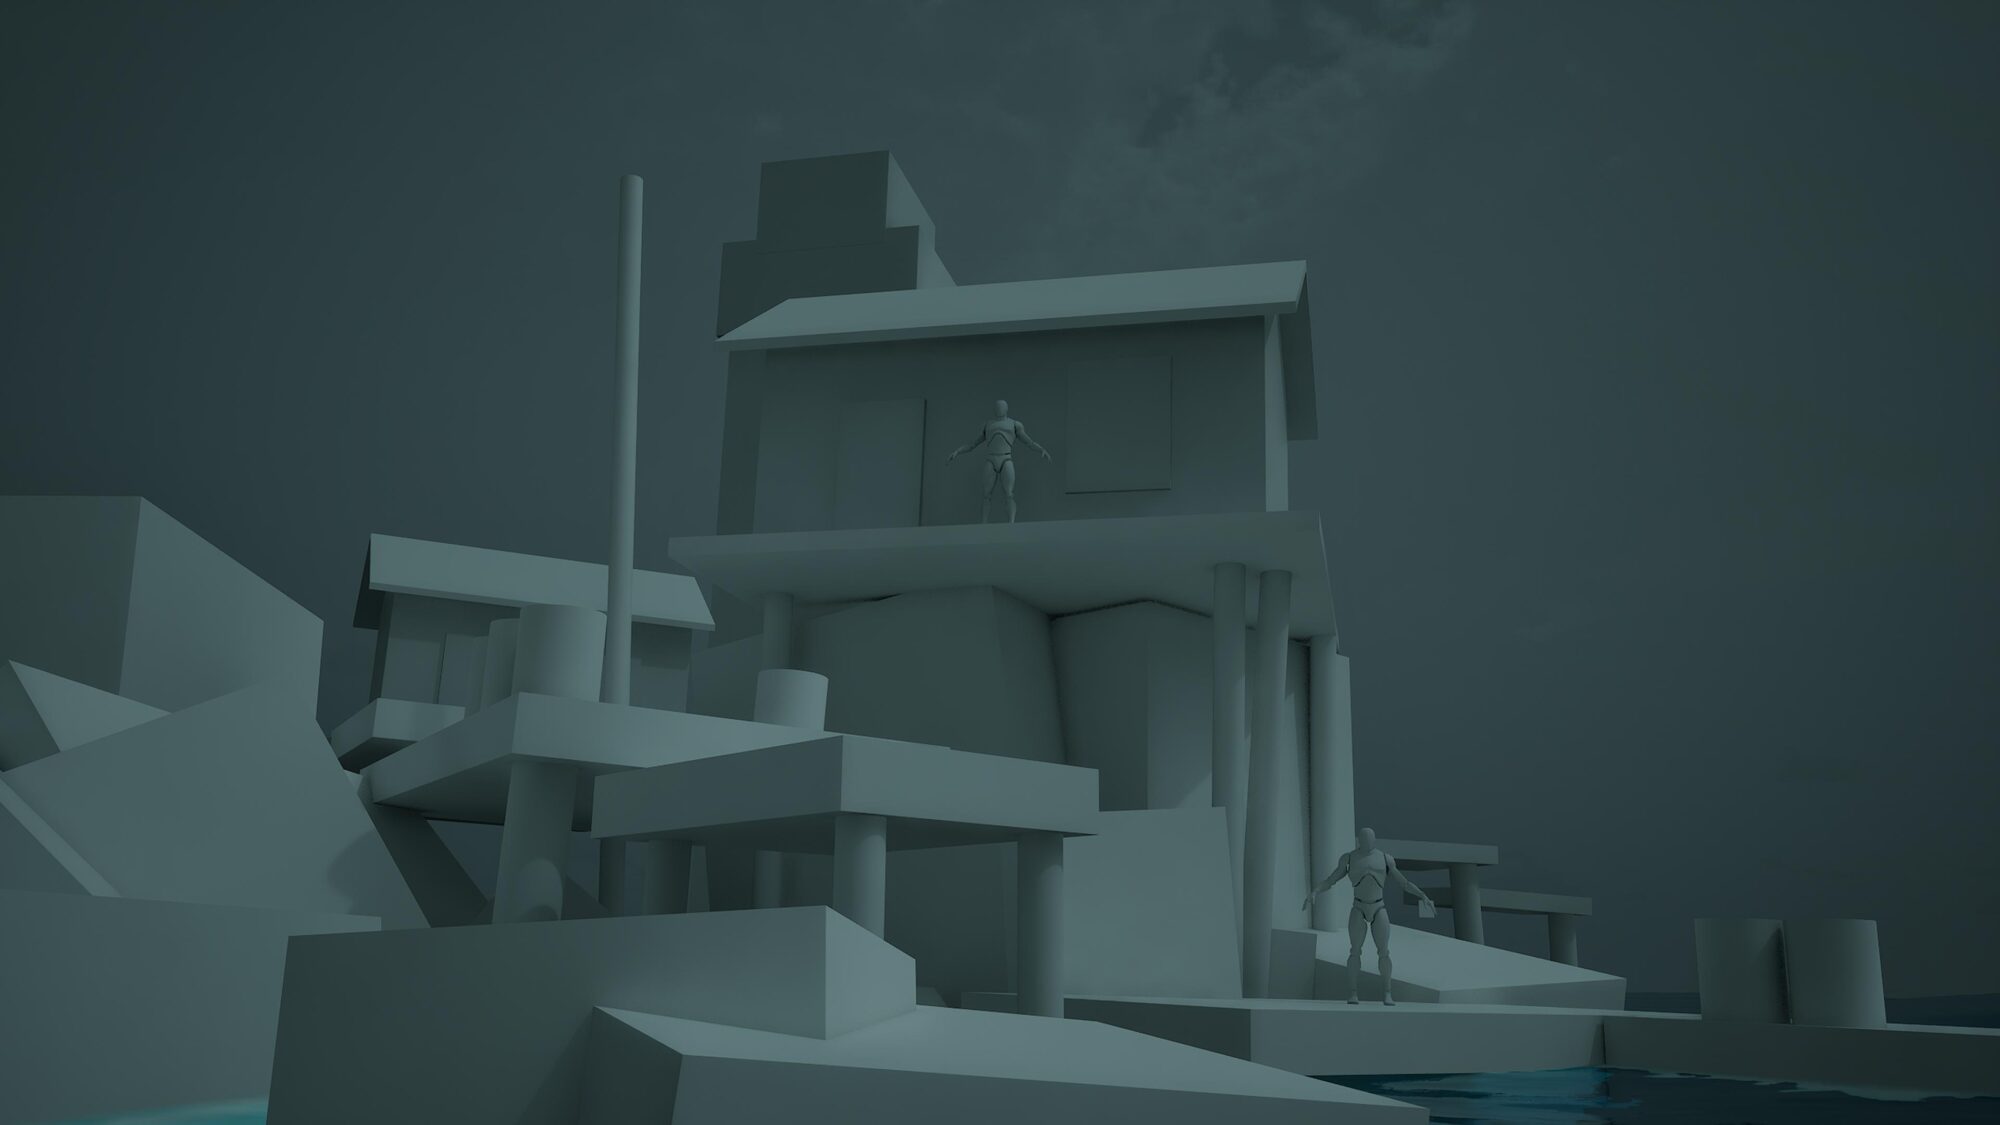
After planning things out, I blocked out the scene to figure out the main camera angle and overall composition.
I kept it super simple at first, just dropping in scaled cubes and cylinders inside Unreal Engine 5.
This stage took a lot of trial and error before I landed on something I liked.

Once the base and camera were locked, I switched over to Blender to block out the key structures from my asset list.

Workflow
For modeling, I leaned on Nanite, which meant I could keep assets highly detailed in geometry without worrying about poly counts.
On assets that didn’t need that much detail, I kept them mid or low poly instead.
Here’s what the workflow looked like for most of the assets:

Modularity
I used a small modular kit to put together the scene’s structures.

To speed things up, I made a small plank kit instead of sculpting every straight board separately.
This way I could quickly build assets with straight and basic planks without having to sculpt them individually for each asset.

For example, it allowed me to quickly assemble the house’s walls.
This approach not only saved time, but also gave me more flexibility and room for making tweaks later on if necessary.

Texturing & Shaders
Most assets were textured using a tileable wood material I built in Substance Designer.
Since I didn’t have much experience with procedural wood textures, I followed a tutorial by Derk Elshof as a starting point and then adjusted it to match my needs.

For variation, I used an RGB mask workflow.
It gave me a lot of control over where I wanted the variation to happen and allowed for quick iteration.
I built the masks in Substance Painter and reused them across assets, making tweaks when necessary.
This approach worked especially well for modular pieces like planks and walls. Here’s an example and breakdown:

Then in Unreal, I set up a layered shader that read the RGB masks to control variation.
It let me control the mask inside the engine as well. That way assets felt unique, even if they shared the same base material.
Base Material Layer:
- Texture maps: Base Color and ORMH (Ambient Occlusion, Roughness, Metallic, Height/Displacement) and a Normal map
- Controls for tint, brightness, and saturation of the Base Color
- Roughness and displacement intensity/contrast controls for the ORMH
- Blending between the tileable texture normal map, baked normal, and a detail normal, with parameters to adjust their intensity
- Tiling controls
I also used multiple UV channels for the baked normal map.
This worked especially well for the plank kit assets, since it let me dedicate one channel to the masks while keeping a separate channel for baked normals.

Material Blend for RGB Masks:
- An RGB mask texture map
- Mask channel selection
- Controls for the intensity and contrast of the mask
- An overall blend intensity parameter

In addition, I added a simple mask breakup by sharpening the mask with a grunge texture.

This was especially handy for lower-resolution masks, since it made them look sharper and less blurry.
I also used Nanite Displacement to add surface detail to the meshes.
Even the low poly assets gained more depth without the need for extra sculpting.
The best example is the stone wall mesh. It added definition and made it feel more detailed, while the silhouette sculpt itself stayed very simple.
Props
I modeled the barrel and boat as mid poly meshes and gave them a sculpt pass in ZBrush.
The barrel stayed mid poly since the wear could be baked, while the boat was decimated after sculpting.
The lamp was modeled and polished in ZBrush using DynaMesh, Polish, and Live Booleans for the cutouts.
The crab cage stayed mid poly and didn’t need a high poly version.
After UV unwrapping, I baked the assets from high poly in Marmoset Toolbag 5.
The process was pretty straightforward. Then I went and textured everything in Substance Painter.
Here’s an example with the barrel showing my approach:
I also created some extra background props, like the buoys, a rope knot, and the nail used to hang the props.

The master material for the props in Unreal was pretty much a cut-down version of the Base Material layer shader I’ve shown earlier, with the only addition being an emissive texture setup.

Populating the Scene For natural elements like trees and rocks, I used the Megascans library.
This sped up the set dressing process and made it easier to iterate on the design quickly.
Here’s an early WIP shot I took after placing the nature assets:

I also created a simple fish model by converting a photo texture into PBR with Substance Sampler.
The piles of fish were placed by hand in Blender, and I added variation using Proportional Editing.

Lighting & VFX
The lighting setup was fairly simple.
I used a low-intensity Directional Light together with a stronger Sky Light as the base, and adjusted the Sky Atmosphere to get an overcast, stormy mood.
I added a few Rect Lights as fill lights to bring out highlights and emphasize more detail.
I also placed the lights coming from the lamps.

For the rain and fog, I used William Faucher’s Easy Rain and Easy Fog.
Both were quick to set up and worked right out of the box.
The rain tool also came with a material function for adding a wet look to surfaces, including leaks and droplets, and the particle system was highly customizable and easy to work with.
Rendering & Post Production
After wrapping up the scene in Unreal, I exported the video through Movie Render Queue as an .EXR image sequence.
This way I didn’t lose any color information and had full control during the color grading process.
For the color correction, I used DaVinci Resolve. It was my first time working with it, and I’ve gotta say, it’s amazing!
Here’s the before & after:
Conclusion
The project took me around three months to finish.
Throughout the process I learned a lot and became much more confident with complex compositions, planning, and especially working with wood and sculpting.
It was very fun and I’m extremely happy how it turned out.
I hope the article was interesting and helpful. Thank you for reading!


