Coffee Grinder

Introduction
Hi everyone. My name is Vlad Krupnov, and I am a 3D Artist with two years of experience, specializing in environment props.
I have worked on several projects, including AAA productions. In my work, I aim for photorealism and pay close attention to small details.
Project Goal
The goal of this project was to expand my portfolio with a piece that combines multiple materials and invites close inspection. Vintage objects are perfect for this purpose, as they carry a visible history of use that can be expressed through texturing.
While browsing Pinterest, I came across an unusual coffee grinder made of metal and wood, featuring an interesting ornament on the front panel.
Another objective was to improve my skills in wood sculpting, metal texturing, and ornament creation.


Tools
- References — PureRef
- Modeling — Blender
- Sculpting — ZBrush
- UVs — RizomUV
- Baking — Normal, Curvature, Height, and AO maps were baked in Marmoset; the remaining maps were baked in Substance Painter
- Ornament alpha creation — Photoshop
- Texturing — Substance Painter
- Rendering — Marmoset, with post-processing in Photoshop
References
Collecting references is one of the most important stages when creating a high-quality prop. Beginners often underestimate this step, limiting themselves to a small number of images without a clear history of use.
It was important for me to find high-quality images of similar coffee grinders with interesting details in different areas. It is almost impossible to find a single reference that contains everything you need, so I gathered distinctive elements from multiple sources.
My main sources were Google and antique marketplaces. eBay was also useful, as sellers often upload detailed photos of old items.

For this project, I identified several key focal points: rust stains on the lid, greenish paint near the handle and ornament, darkening from oil and dirt where wood meets metal, and various damages on the back panel.


Modelling
After collecting references, I started building the base forms. First, I defined the approximate dimensions of the object. Then I blocked out the large shapes, using front and side views whenever possible. If those were not available, I relied on visual estimation while maintaining correct proportions.
After establishing the main volumes, I moved on to medium and small details. Once the blockout was complete, I began slightly breaking the perfect geometry. According to the concept, this coffee grinder was meant to look handmade, assembled from available materials, so the parts should not fit together perfectly.
For example, the back wooden panel is slightly bent toward the center and tilted forward. The side panels have a small gap and do not align perfectly. The front coffee drawer is also slightly uneven. These subtle imperfections already add realism at the blockout stage.


High Poly
After finishing the blockout, I moved to ZBrush to create the high poly model. The main focus was on wood damage along edges, around holes, and at contact points.
I used brushes such as ClayBuildup, Morph, MalletFast, and TrimDynamic. For cut surfaces, I applied wood alphas to achieve a more natural look.

I also continued deforming certain parts, slightly bending the threaded metal piece and some wooden elements.

The ornament was created using a black-and-white alpha prepared in Photoshop. Additional depth and surface irregularities were refined directly in ZBrush.
Low Poly
When creating the low poly model, my primary goal was to match the high poly forms as closely as possible to ensure a clean bake. Topology was not the main priority since this is a portfolio piece without strict limitations, so the mesh would require further optimization.
I always remove invisible polygons to save UV space.
UV & Baking
There was nothing unusual at the UV stage. I try to straighten shells into rectangular shapes to achieve more efficient packing.
For baking, I use both Marmoset and Substance Painter. In general, the specific software is less important than achieving a correct result.
In Marmoset, I baked Normal, Curvature, Cavity, and AO maps. I also baked a Height map for the ornament. The remaining maps were prepared in Substance Painter.
Texturing
In reality, any surface — even a brand-new one — has subtle color variation. I always begin texturing with a base layer and introduce soft color variation. For this, I typically use Grunge Clouds 1, 2, and 3, slightly adjusting both color and roughness. Transitions should remain soft and barely noticeable.
After that, I add larger dirt patterns to increase variation.
Once the base is ready, I move on to accent details taken from references. Each stain is built using multiple layers and subtle color variation, since dirt in the real world is never uniform in color.
It is also important to separate neighboring elements in terms of color and roughness, even if they are made of the same material. These subtle differences significantly affect the overall perception.
At the final stage, I often add black-and-white gradients to certain parts. I usually apply them in Multiply blending mode with around 30–50% opacity.
For example, the side panels are slightly darker at the bottom. This may not be immediately noticeable, but such nuances make the model more convincing.
While working on the rust stains on the lid, I tried to match the reference exactly but couldn’t understand what was missing.
After closer inspection, I noticed that the rust had a slight shift toward a bluish tint. Adding this detail made the texture more interesting. Small adjustments like this across the entire model significantly improve the final result.
Render
Rendering is one of the most underestimated stages of the process. It can either enhance your work or weaken it.
I prefer placing the model in an environment to better convey its story. However, after finishing texturing, there is often little energy left for building a strong composition, which can negatively affect the presentation.
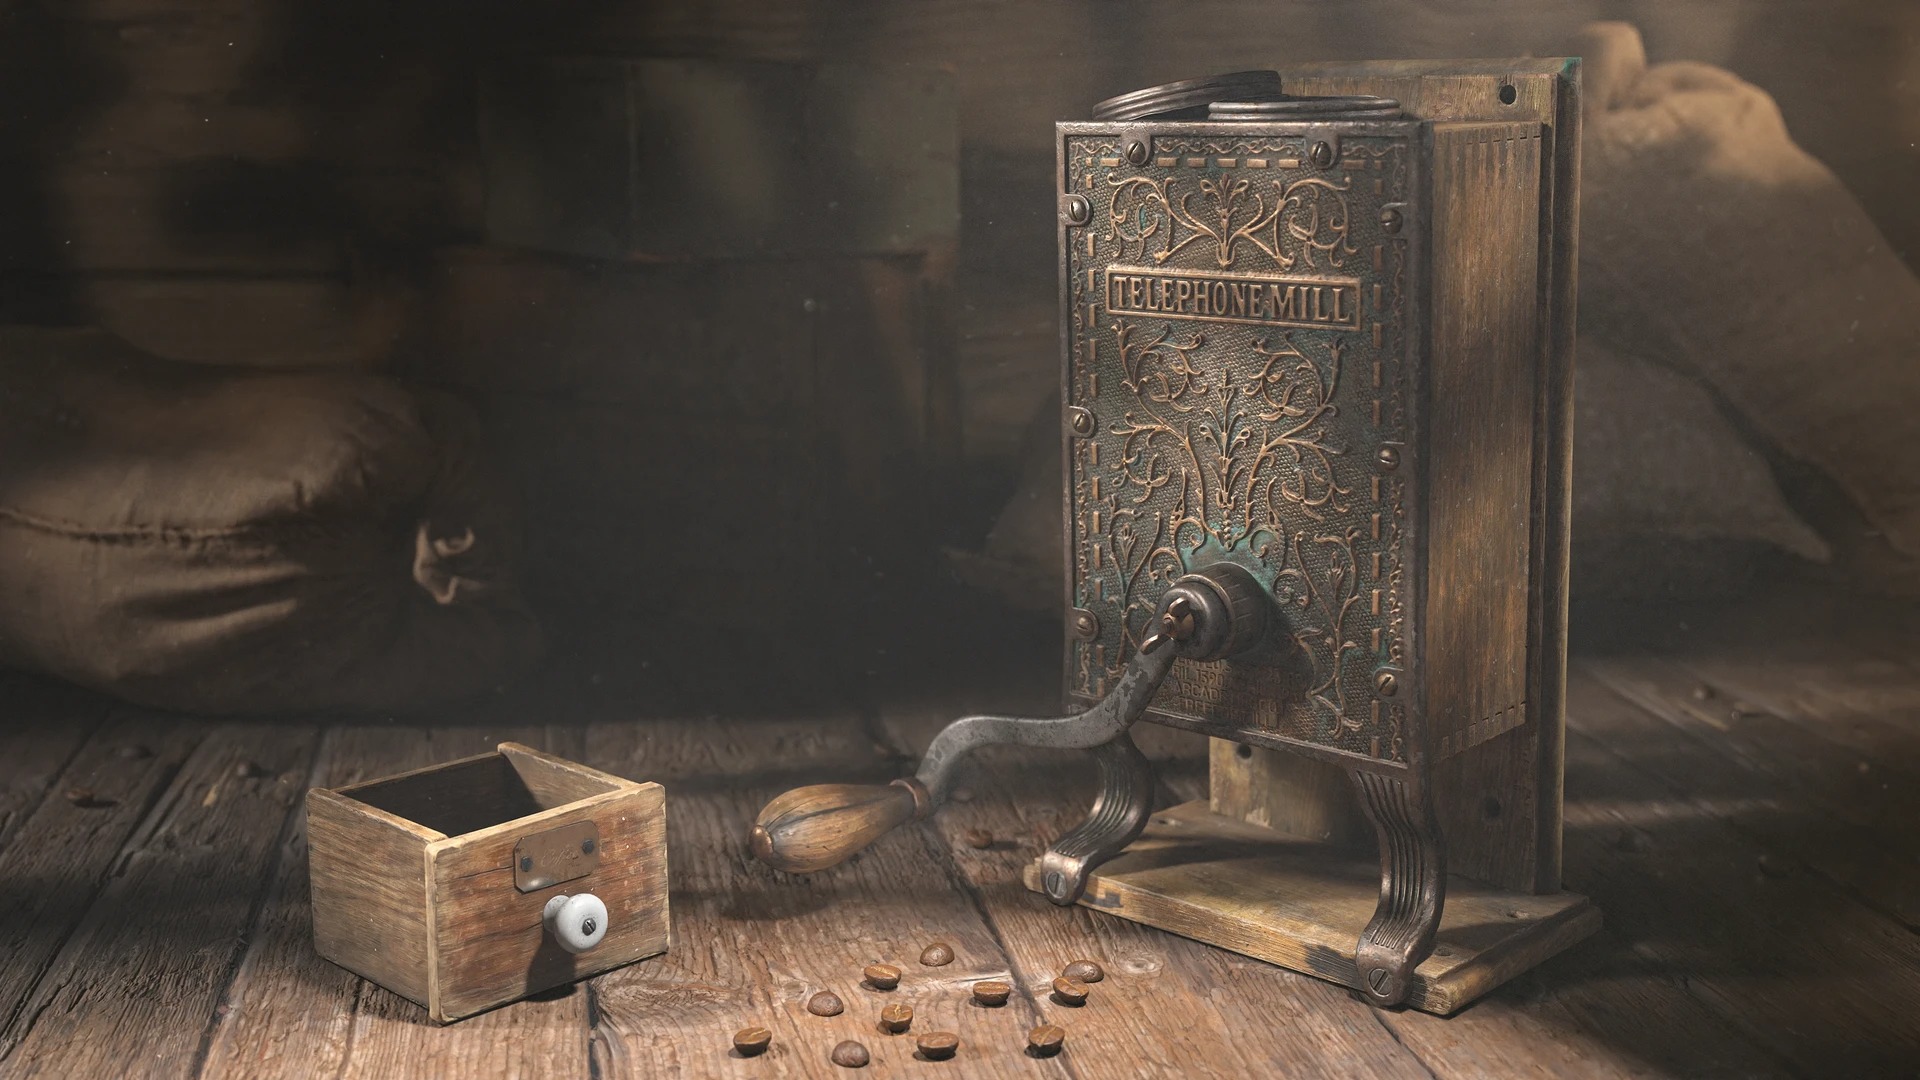
For this scene, I used Marmoset. The coffee grinder is placed on the floor in a dusty room resembling an old garage. To achieve realistic lighting, I built walls on three sides and added window openings to simulate sunlight entering the space. This helped create strong, natural shadows.
In the background, I added sacks and boxes from Quixel Megascans.

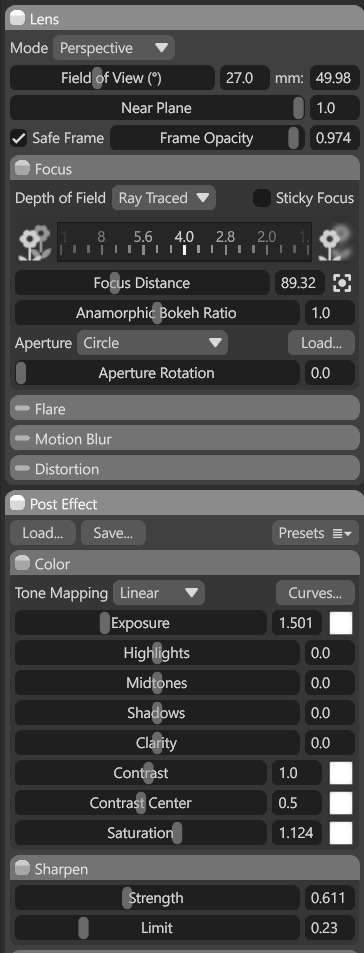
Camera settings remained mostly unchanged. I slightly increased saturation, added a bit of sharpening, and applied subtle depth of field.
I also used light projection with a gobo mask to simulate light passing through obstacles such as window frames or tree branches. This technique helped introduce lighting variation on the side panels, back panel, and ornament.
One projected light was placed on the wall, and another on the floor behind the coffee grinder.

Finally, I added a subtle fog effect to enhance the atmosphere.

Post-processing
After rendering, I used Photoshop for minor adjustments. I enhanced the brightness of light spots to avoid a flat look, added subtle sun rays in the right corner, and applied a light dust overlay. I also locally increased contrast and slightly brightened areas that felt too dark.
Conclusion
This project was a valuable experience. I improved my skills in sculpting, texturing, and lighting. I would like to thank GamesArtist for the opportunity to share my work.
I hope you found something useful in this breakdown.
Read more articles
You might also like these articles.


