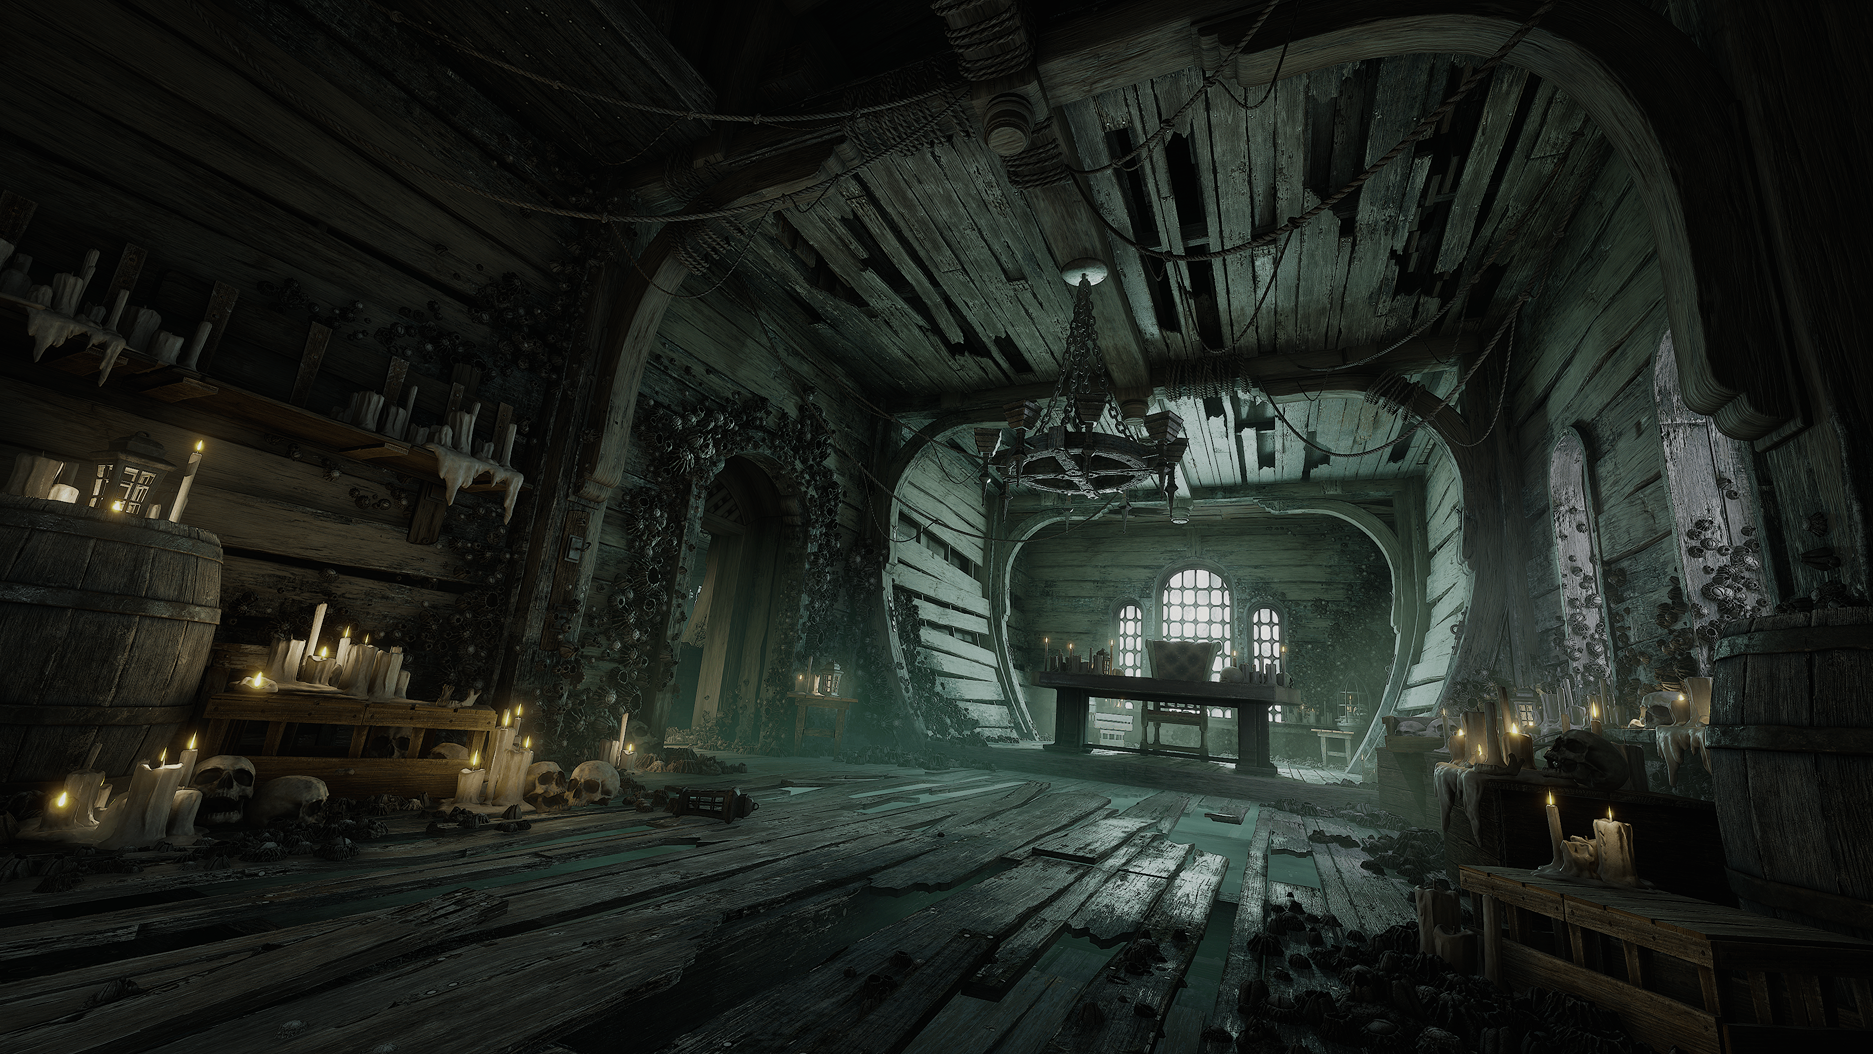
Captain’s Ship

Introduction
Hi ! My name is Margaux. I'm a freelancer and have been working independently for a few months after spending four years at Appeal Studio. I really enjoy working on personal projects in my free time.
I graduated from a four-year program in video game and decided to follow my dream of working in the same industry.

Goals
My goal for this project was to practice using tools in Unreal Engine 5, like Lumen and Nanite, which I hadn’t explored yet. I also wanted to improve my composition skills and create a large project that could potentially be sold on the Epic Games Marketplace.
It was challenging for me, as it had been a long time since I dedicated myself to such a big project.
Project
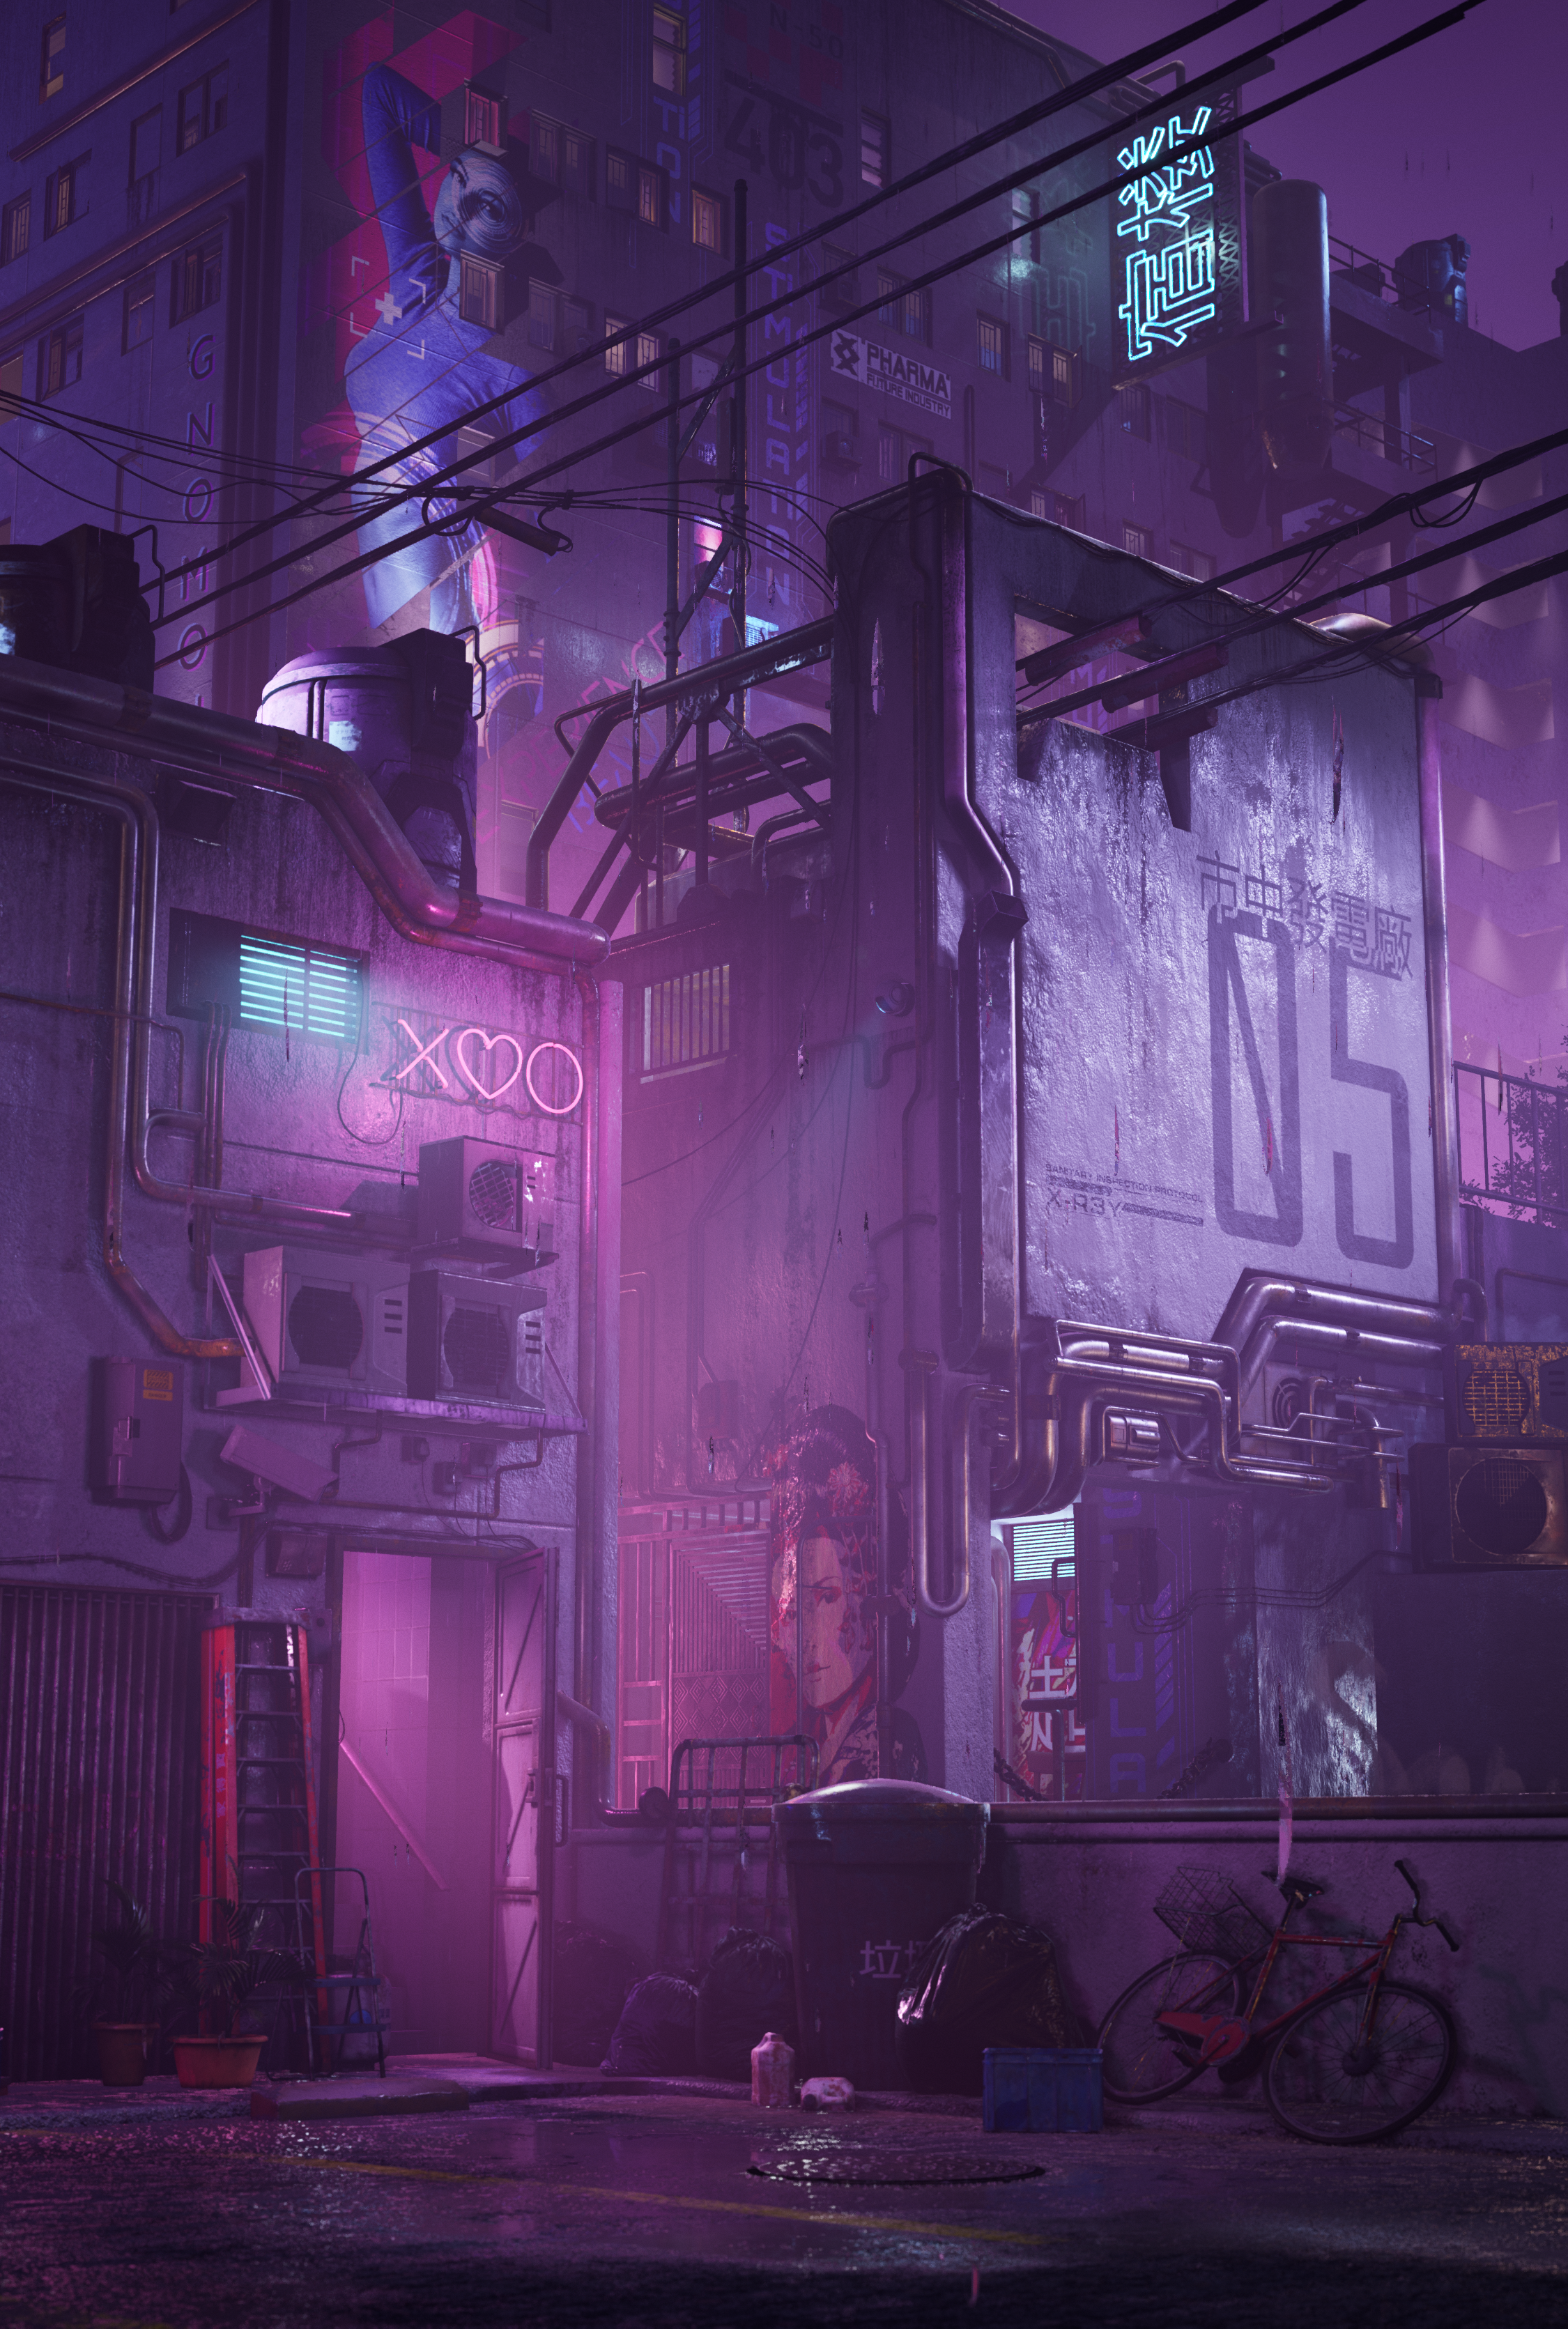
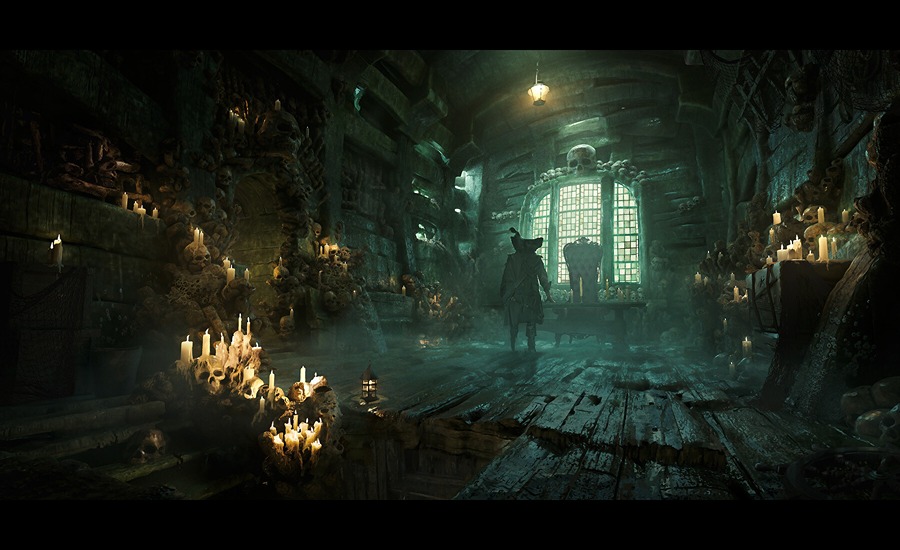
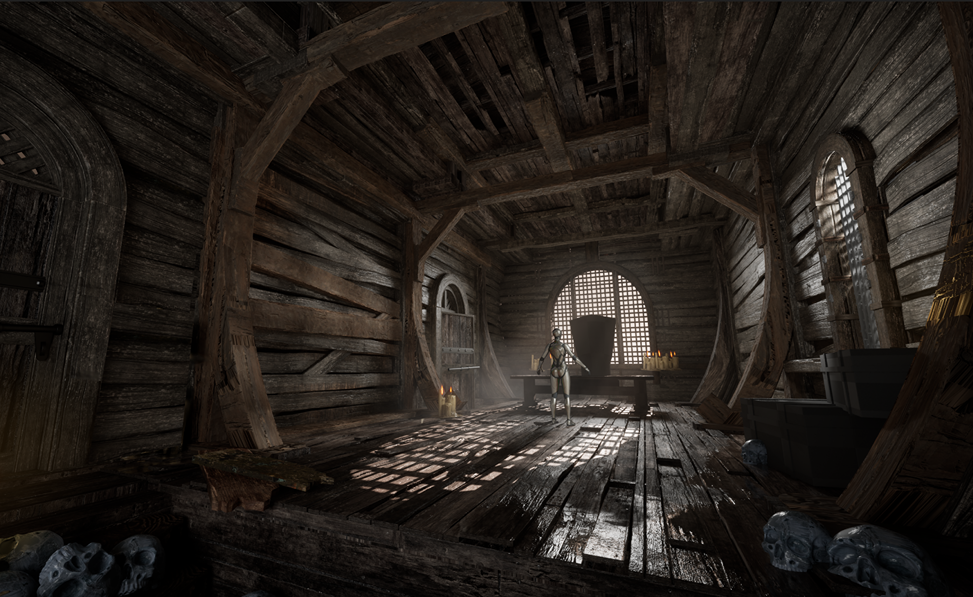
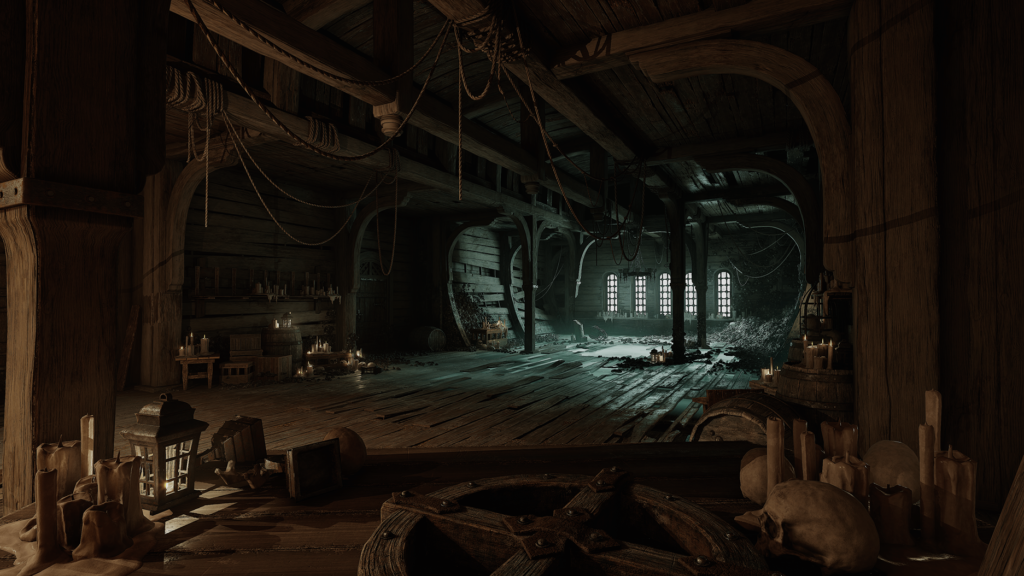
For this project, my references revolved around a “Pirates of the Caribbean” vibe, featuring a ghostly ship. I fell in love with Andy Walsh’s concept for the Captain’s Quarters and decided to recreate its atmosphere.
To help me better understand the design, I used MidJourney to generate some variations of the concept, giving me a basic guideline.
I often struggle with creating environments without a solid concept, so this approach really helped.

Tools
For this project, I mainly used:
- Blender
- ZBrush
- Substance Painter
- Unreal Engine 5
- Photoshop
Blockout
In Unreal, I first placed a camera on an empty level and arranged some primitives to match the concept. I exported the blockout and continued refining it in Blender, separating all the assets into modular pieces while keeping the same 4×4-meter measurements for all pieces at the start.
I really wanted to have basic modular meshes that were easy to use.
Once I was satisfied with the proportions, I blocked out the lighting and imported Megascans textures to quickly achieve a decent look for the lighting and colors in my scene.
Then, I started blocking out all the props I would need. For the lighting, I tried to keep it as neutral as possible in the beginning to get a clear vision and calibrate the base colors of my assets without any visual interference.
At this point, I knew how many assets I wanted to create for the modular meshes.
Modelling & Texturing
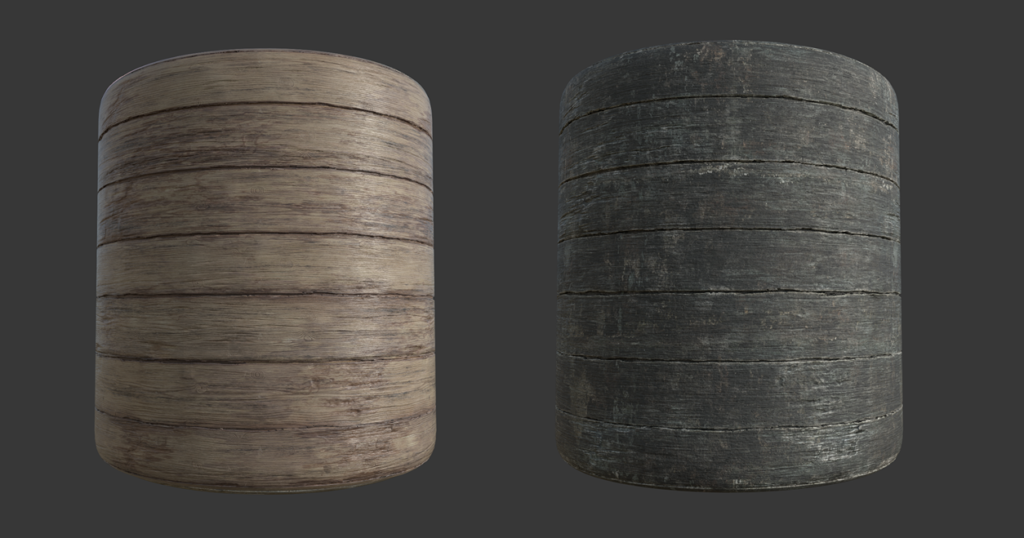
To model the modular parts of the project, I planned all my UVs to match the vertex density, using trim sheets for the walls and tileable textures for the floor. This workflow is simple and quick to apply, offering good texture density.
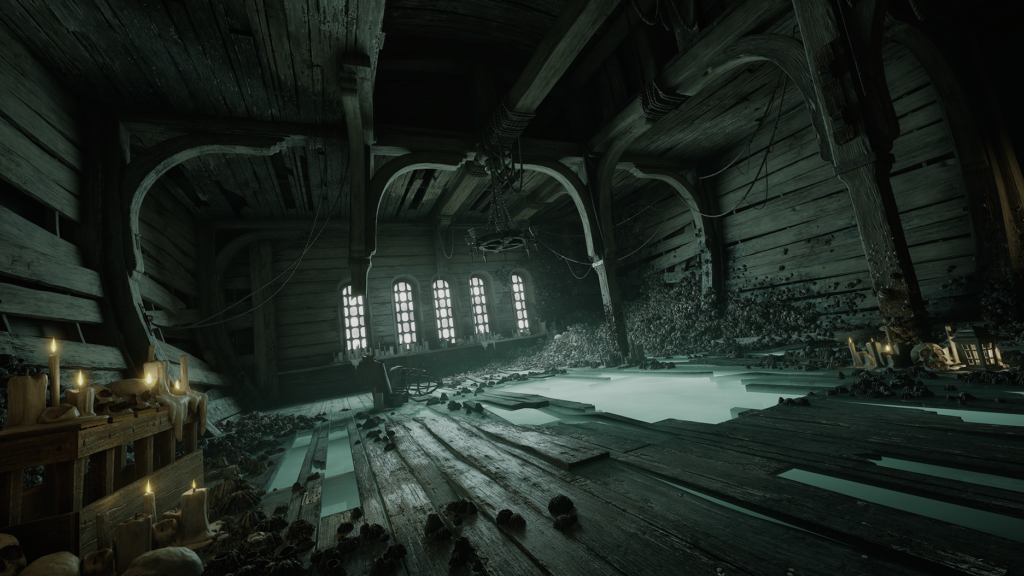
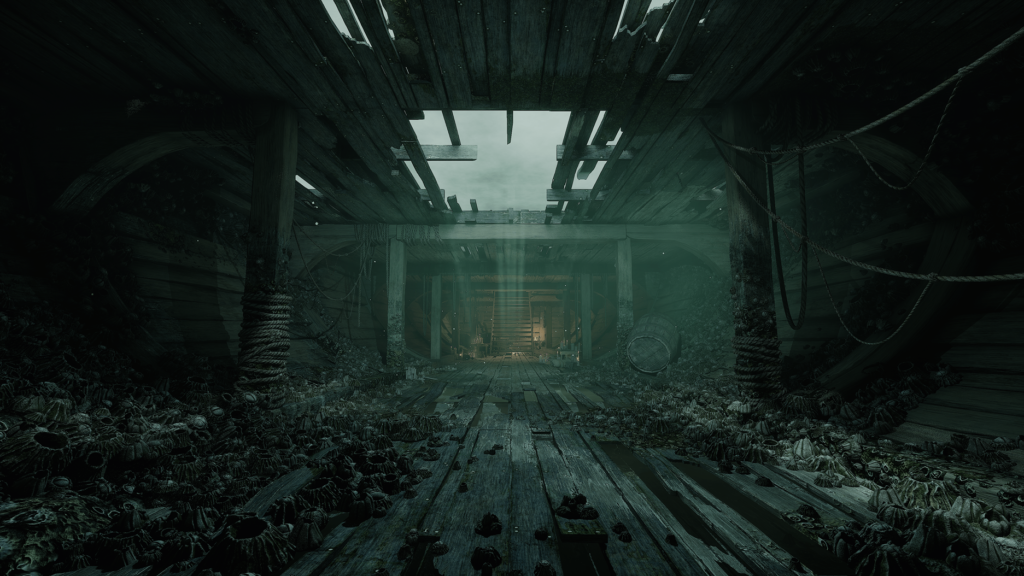
The most challenging part of this modular project was creating the floor meshes in a modular way, with wooden planks arranged in a chaotic manner.
To keep the tiling consistent between meshes, I used the tileable texture as a trim for the floor to create the first mesh and used it to generate variants. For the broken floor, I cut into the meshes and remapped the new geometry on the texture.
After that, I needed to produce my own textures and remove the Megascans ones quickly. I sculpted a base wood texture in ZBrush and brought it into Substance Painter for texturing.
I chose Substance Painter because I am more familiar with it than Substance Designer, which saved me a lot of time.

In Unreal, I used the vertex paint workflow to blend all my textures.
Each texture had a normal map, base color, and texture masks containing Ambient Occlusion, roughness, metalness, and height map information, which helped blend the textures together.
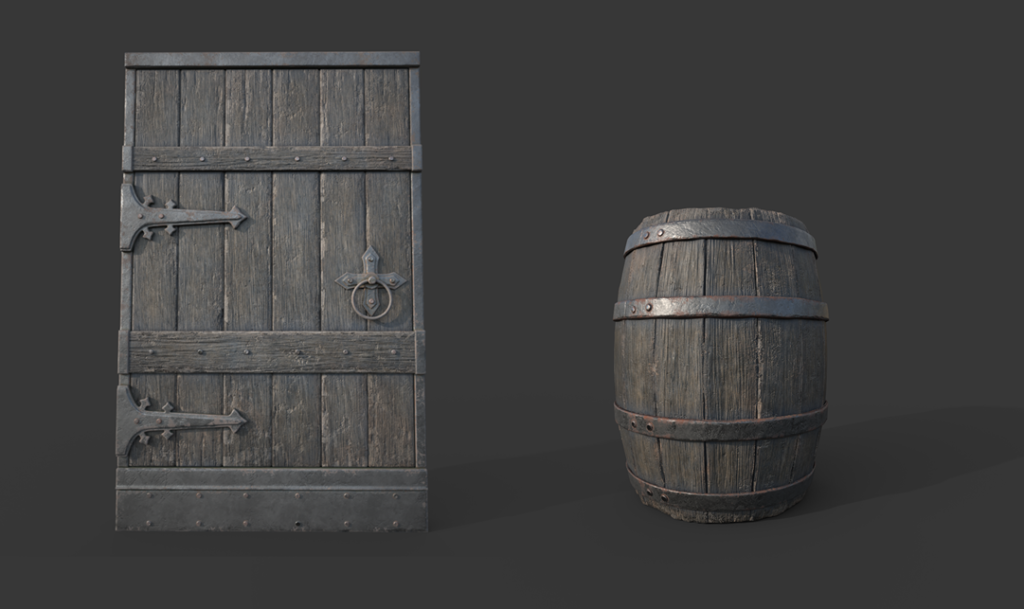
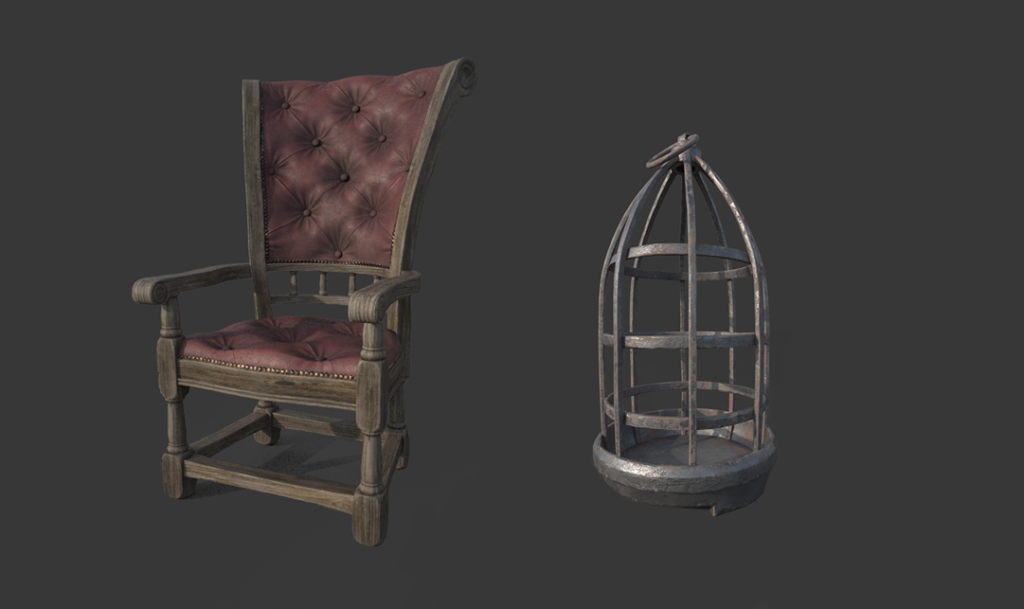
All the props were sculpted in ZBrush and textured in Substance Painter.
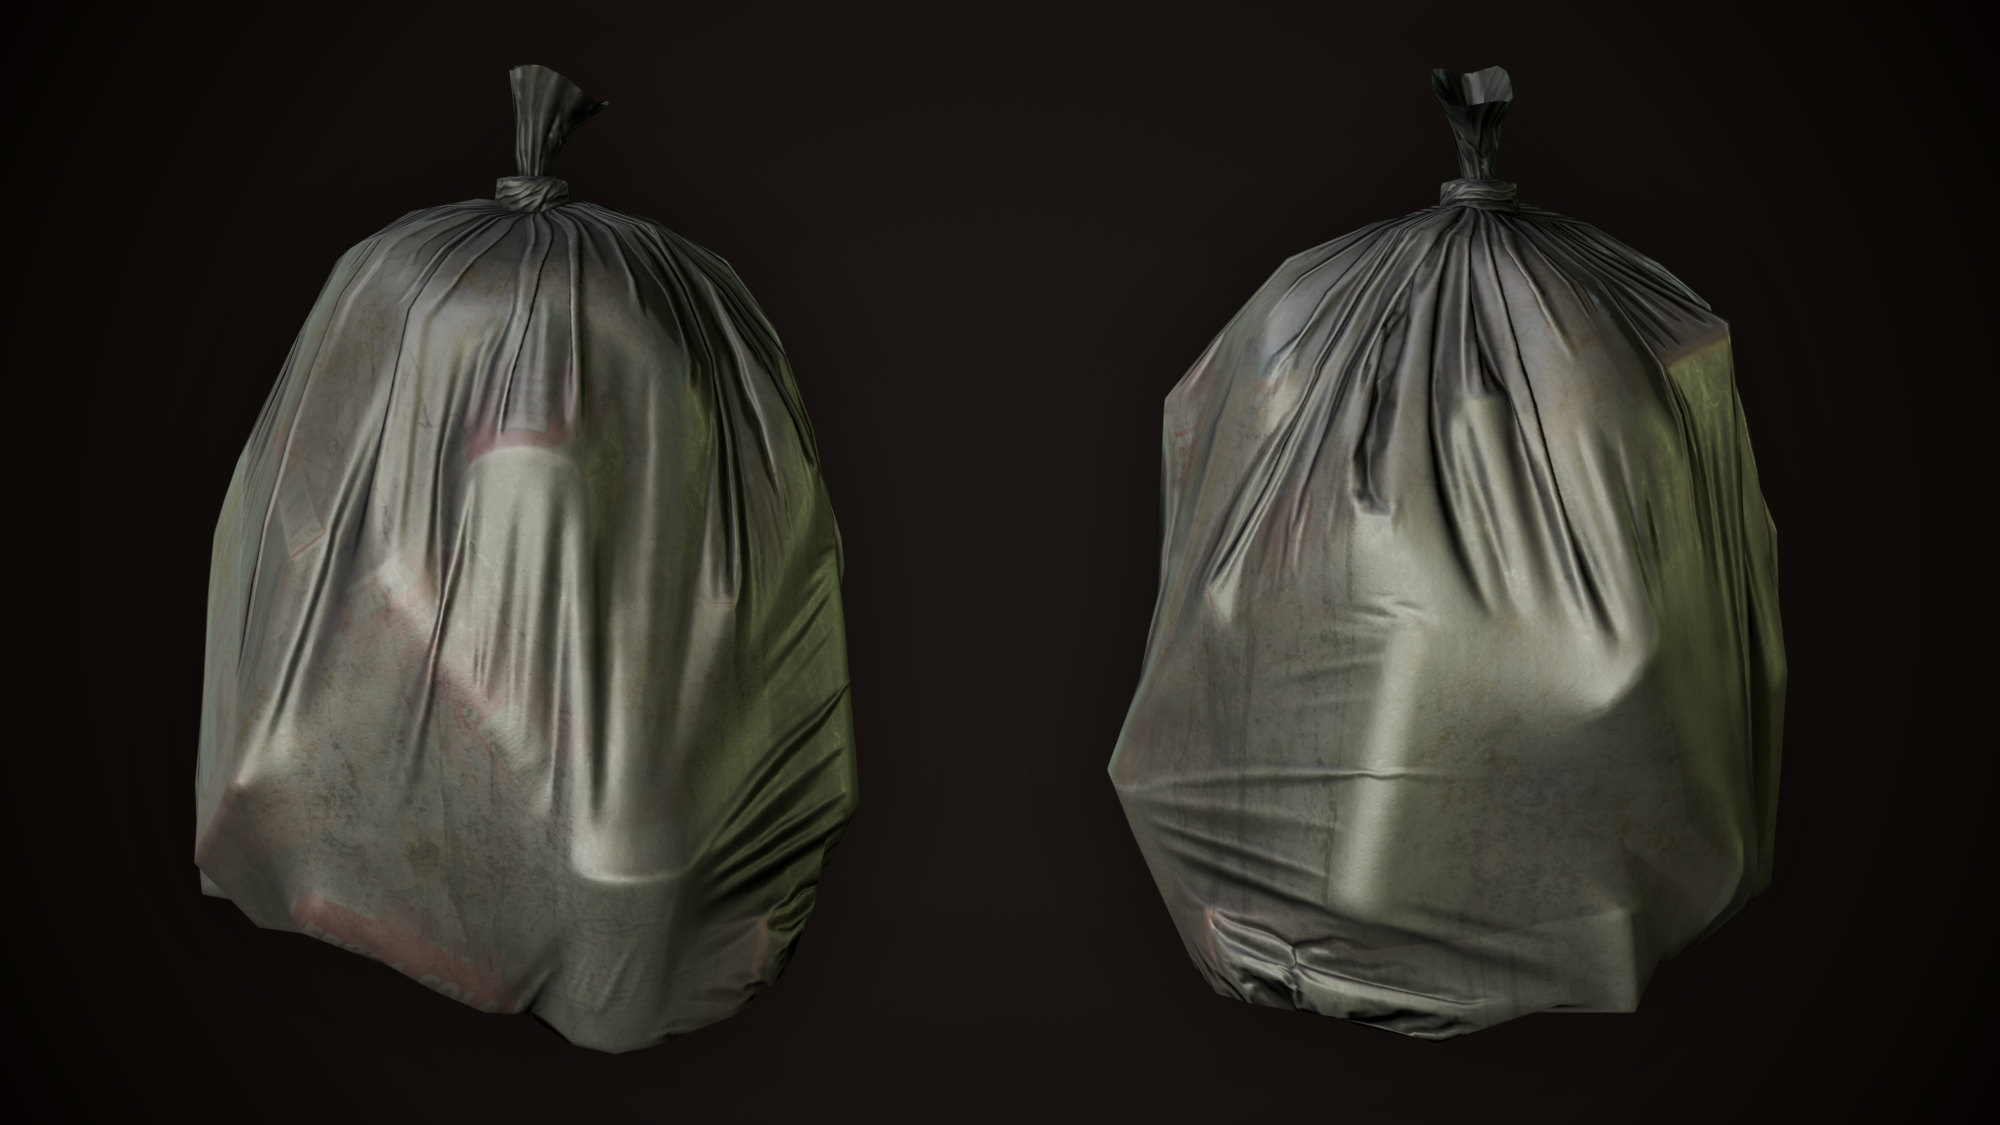
For the barnacles, I created a high-poly version based on my references, adding enough detail without overdoing it since the assets are small and the details wouldn’t be very visible.
I used these to create variant meshes and composed them to use as static meshes.

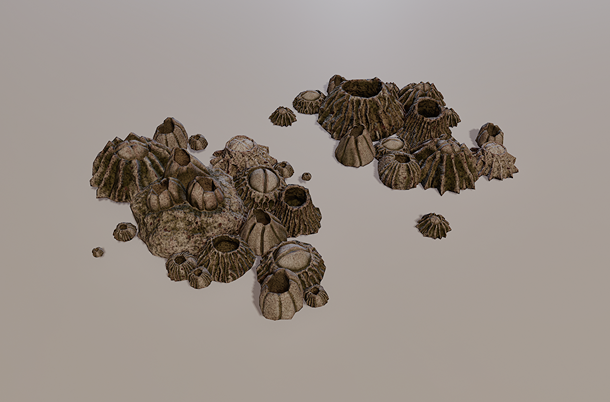
I then used them with the foliage tool in Unreal to paint all my barnacles in the engine.
To paint them, I like to create several brushes with different sizes and orientations to add variety without manually changing the size of each barnacle.
For the Marketplace, I created both low-poly and Nanite versions of each asset. For the barnacles, I used the low-poly mesh I created earlier and applied the ShrinkWrap modifier in Blender with additional subdivision levels.
This snapped the mesh onto the high-poly surface, allowing subdivision without breaking the UVs or requiring separate textures, so I could keep the same texture without needing to bake again or create different baking/texturing for the same asset.
Lighting
Lighting a scene is crucial and can make or break your project. Lumen simplifies achieving good results, though lighting remains both challenging and rewarding for me.
The beauty of the scene depends on the quality of its lighting.
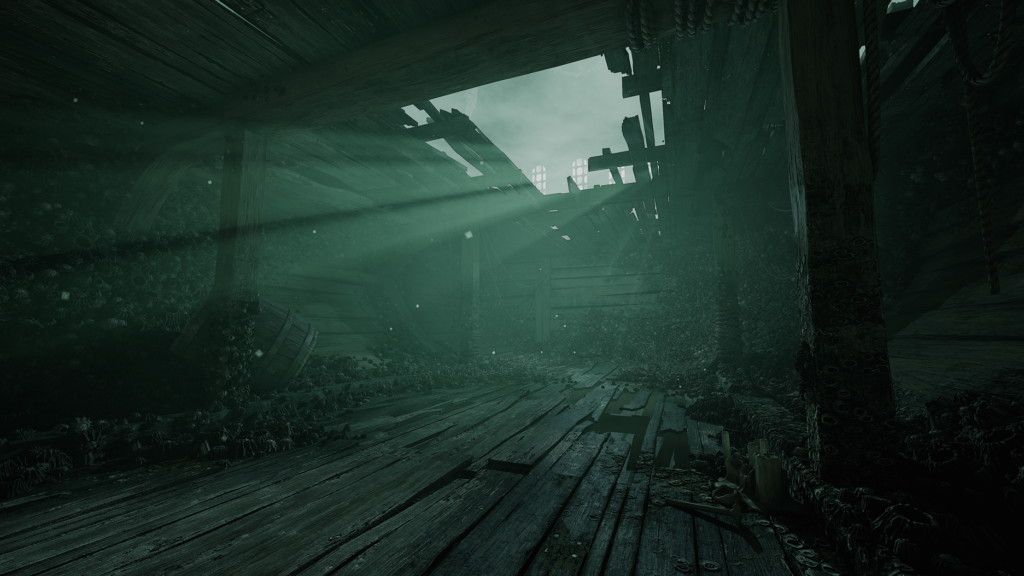
I started by blocking out the lighting to match the concept, aiming for a spooky atmosphere that felt natural. Using two complementary colors, I highlighted the center of the environment with a primary light near the window to draw attention.
Softer blues and neutral greens added subtle variations, while warmer tones in the foreground added detail.

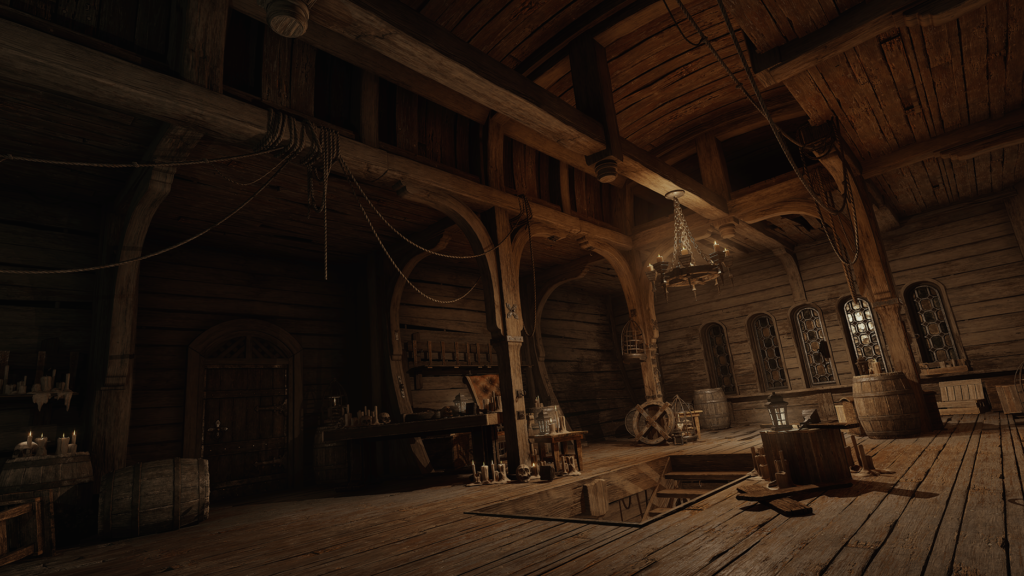
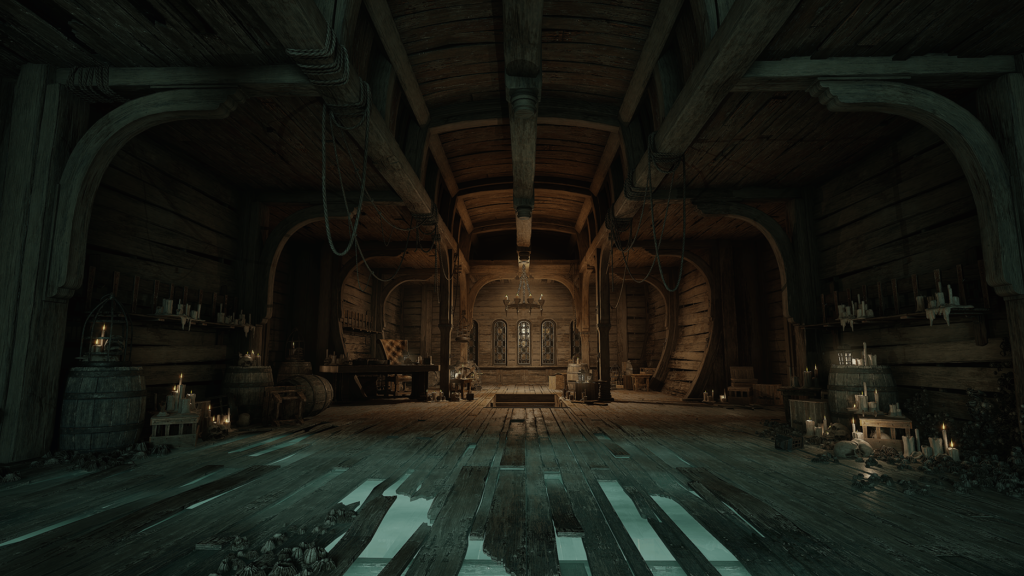
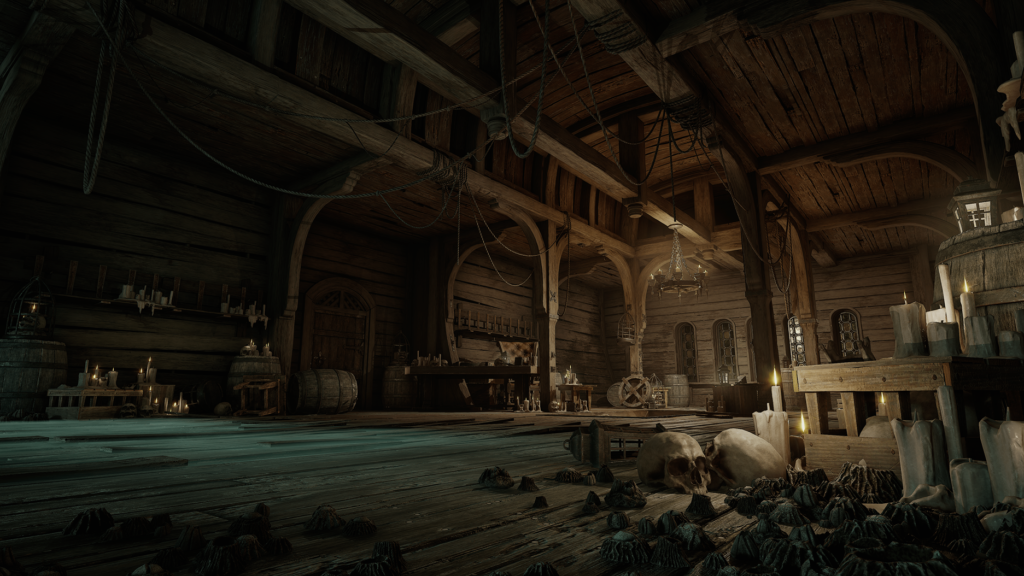
The candlelights have a soft yellow hue to maintain balance and avoid excessive contrast. After finalizing the first atmosphere, I created a second lighting setup, keeping the center of the room as the focal point.
Strong ambient contrasts helped distinguish the two lighting styles, and I was very pleased with the results.
Post-Process
For VFX, I kept it simple, using fog planes around the windows and floors, along with a cube volumetric fog that had adjustable settings.
By tweaking the Volumetric Scattering Intensity, I created localized fog effects, like around the candles.
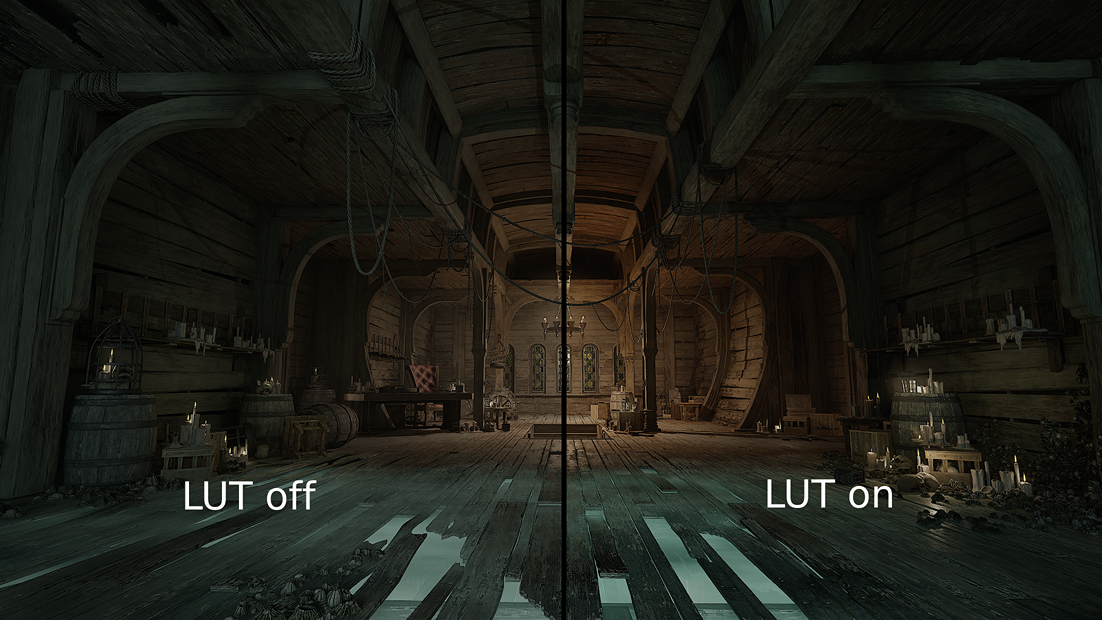
After finalizing the lighting, I created a LUT in Photoshop to fine-tune the colors and give the scene a cinematic look.
The color correction was straightforward and allowed me to apply a consistent filter across all atmospheres, which was a bit tricky but rewarding.
Conclusion
Creating this scene from scratch and preparing it for the marketplace was a rewarding experience. Over three months, I improved my knowledge of Unreal shaders, as well as my composition and lighting skills.
Feedback is invaluable—keeping it visible on my PureRef board helped maintain a clear vision, though it could feel overwhelming at times.
Long projects can drain your motivation and critical eye, so don’t hesitate to take breaks for a fresh perspective.
Start with a clear, simple plan, stay organized, and be patient with yourself. Mistakes are part of the process, and refining your work will elevate your project.
Thanks for reading, and I hope this was helpful to anyone interested in 3D art!
Read more articles
You might also like these articles.