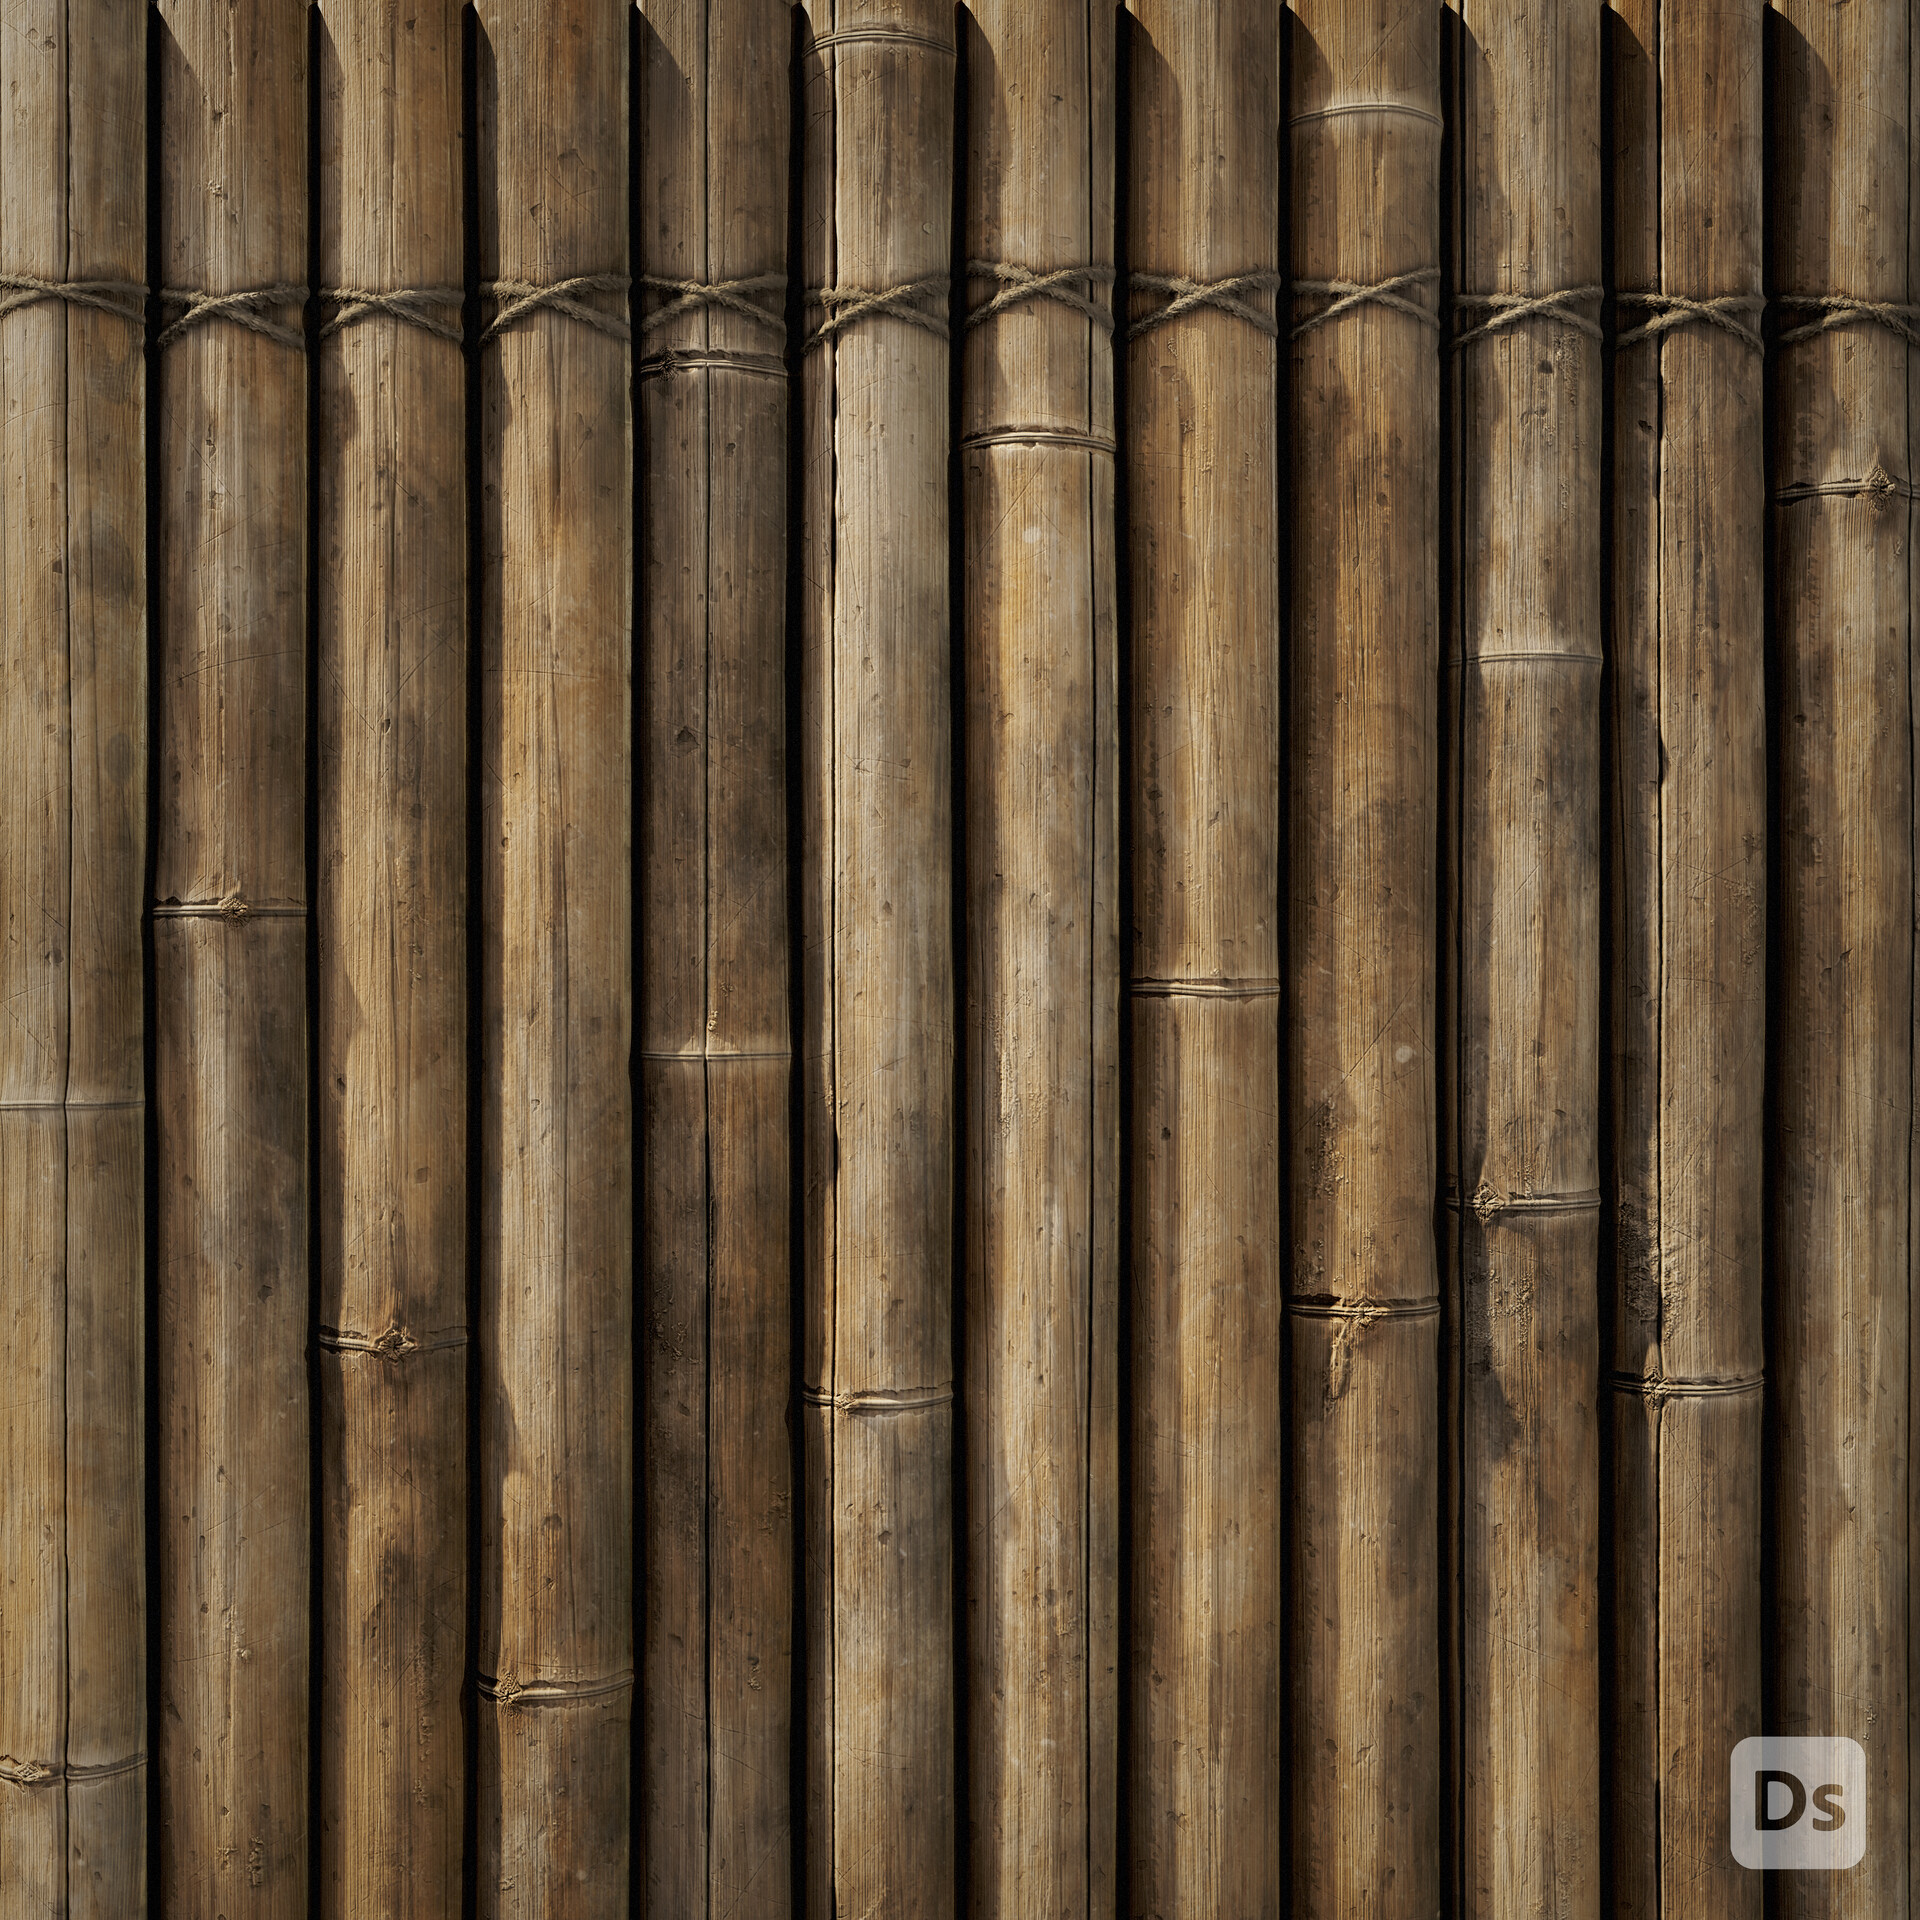
Bamboo Wall

Introduction
Hello dear Game Artist community, I am Eymen Akmaz.
I have been working as an Artist in the game industry for about two years and I am continually striving to improve myself in the field of 3D Environment Art.
Currently, I am employed as a 3D Environment Artist at an indie studio.
Project
Firstly, I would like to extend my gratitude to the Game Artist community for providing me with this platform to share my work.
In this article, I will detail the process of creating a bamboo wall material. I hope you enjoy reading it.


Goals
This project was inspired by an image of a bamboo wall that I found while searching for references. My primary objective was to practice and enhance my skills during my free time, without any stress.
Thus, I aimed to create a bamboo wall material by experimenting with various techniques.
Software
- Substance Designer
- Marmoset Toolbag
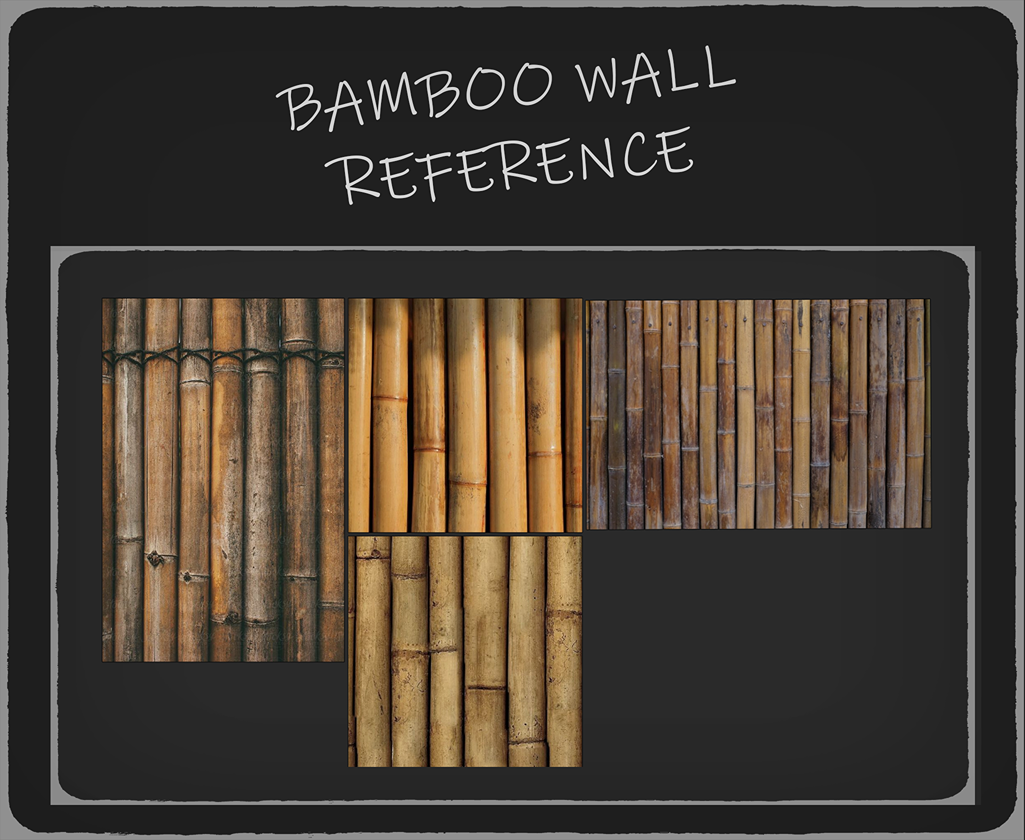
References
In this project, I did not rely heavily on numerous references; instead, I improvised to a certain extent. The image featuring the rope was my primary reference, but my goal was not to replicate it exactly.
Rather, I wanted to improvise and enjoy the process.
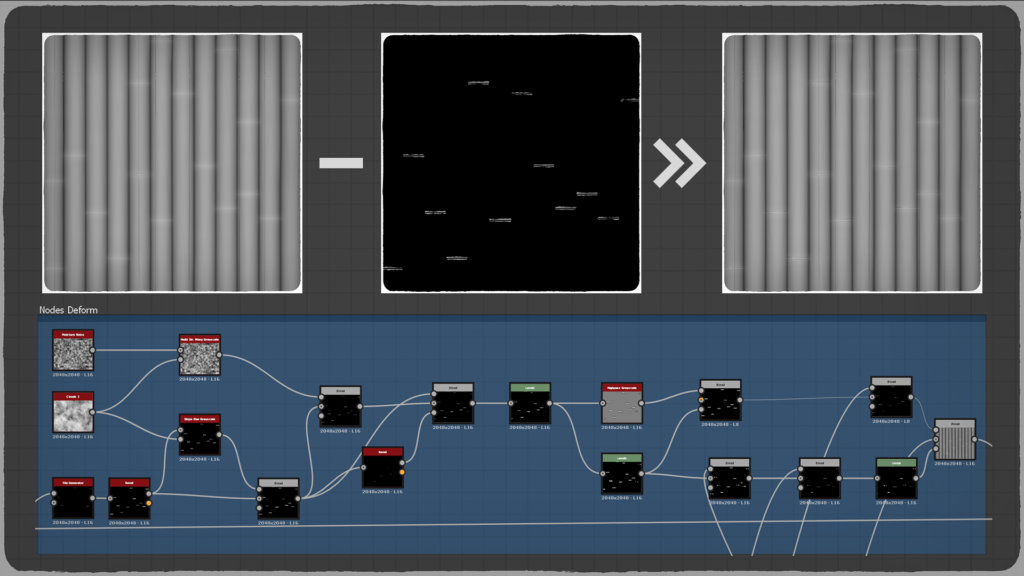
Material Breakdown Layers
At the beginning of this project, I followed the usual procedure of progressing according to the level of detail. Initially, I created the main shape and then gradually developed the material in order of priority.
However, upon reflection, I realized that I occasionally confused the order of priority.
Although it is generally necessary to adhere to the order of priority, there were instances where I added elements out of sequence to ensure they were affected by specific warp nodes.
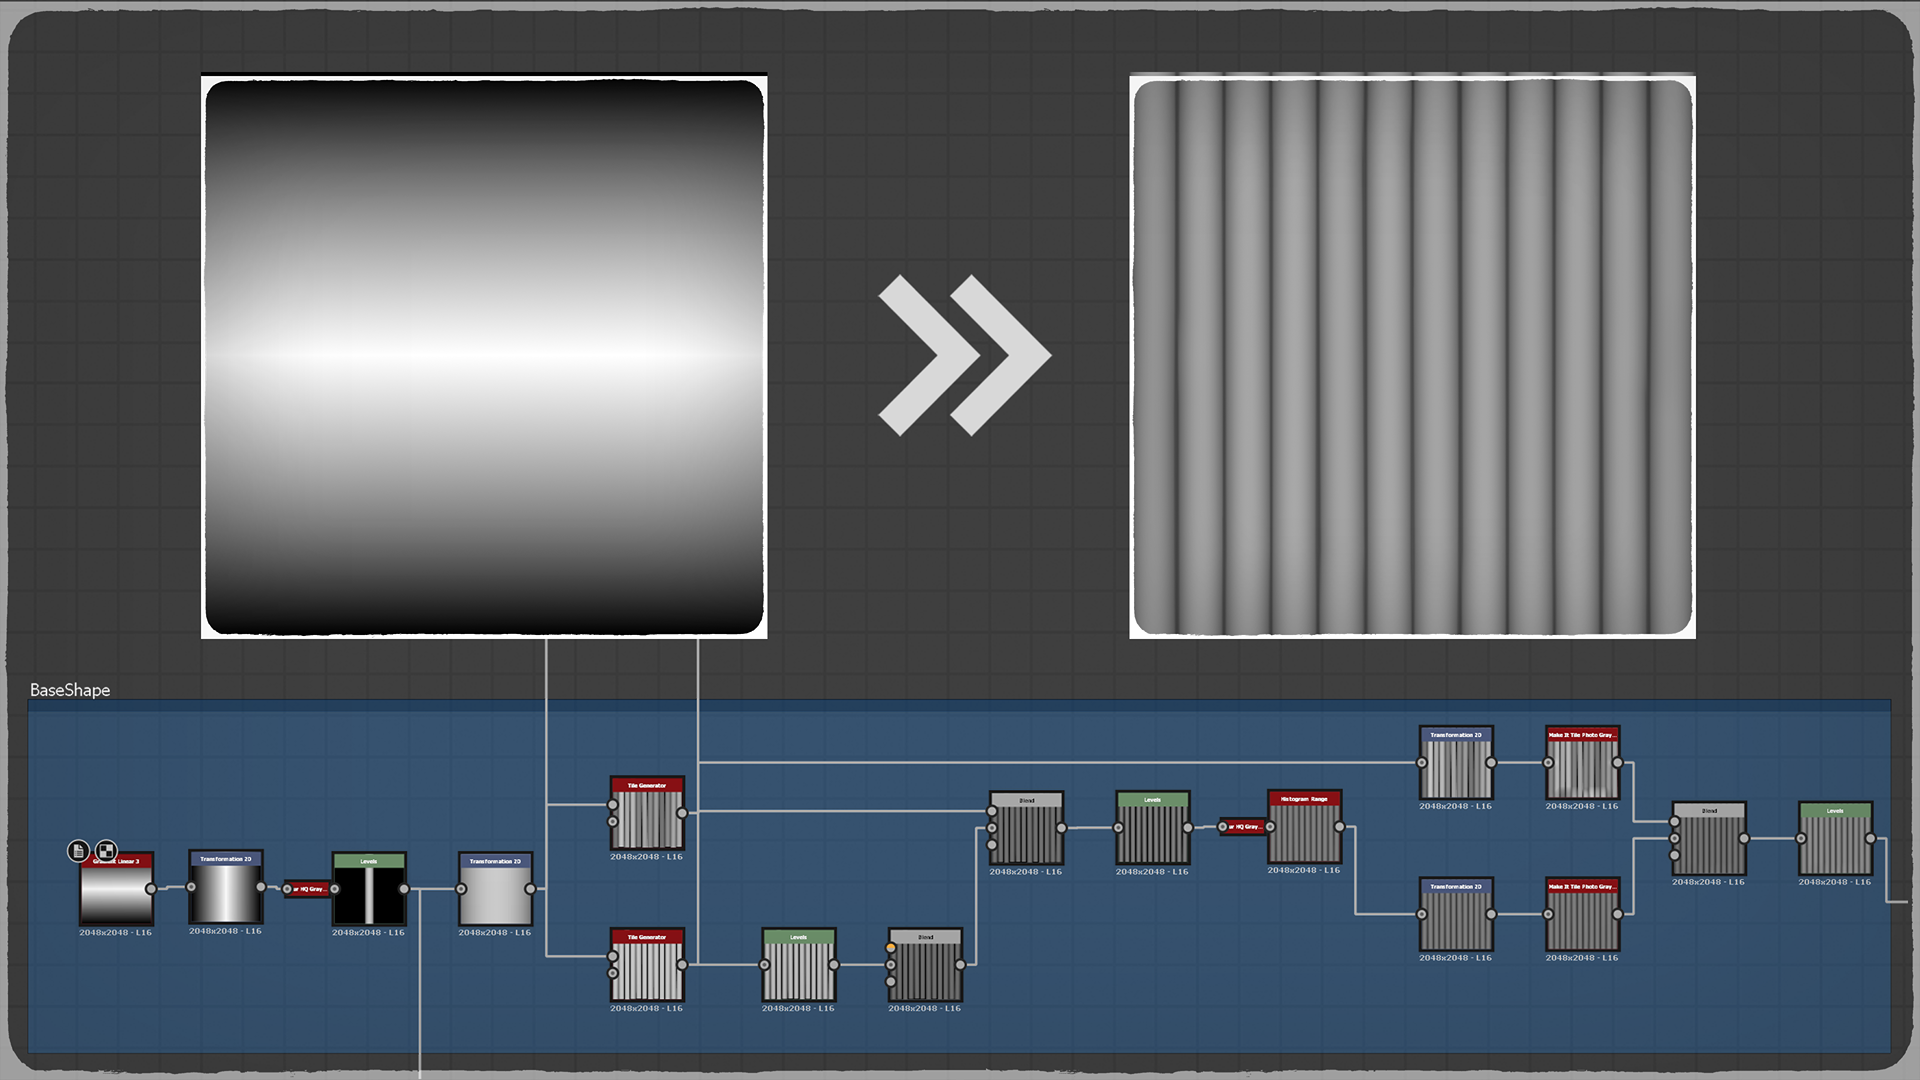
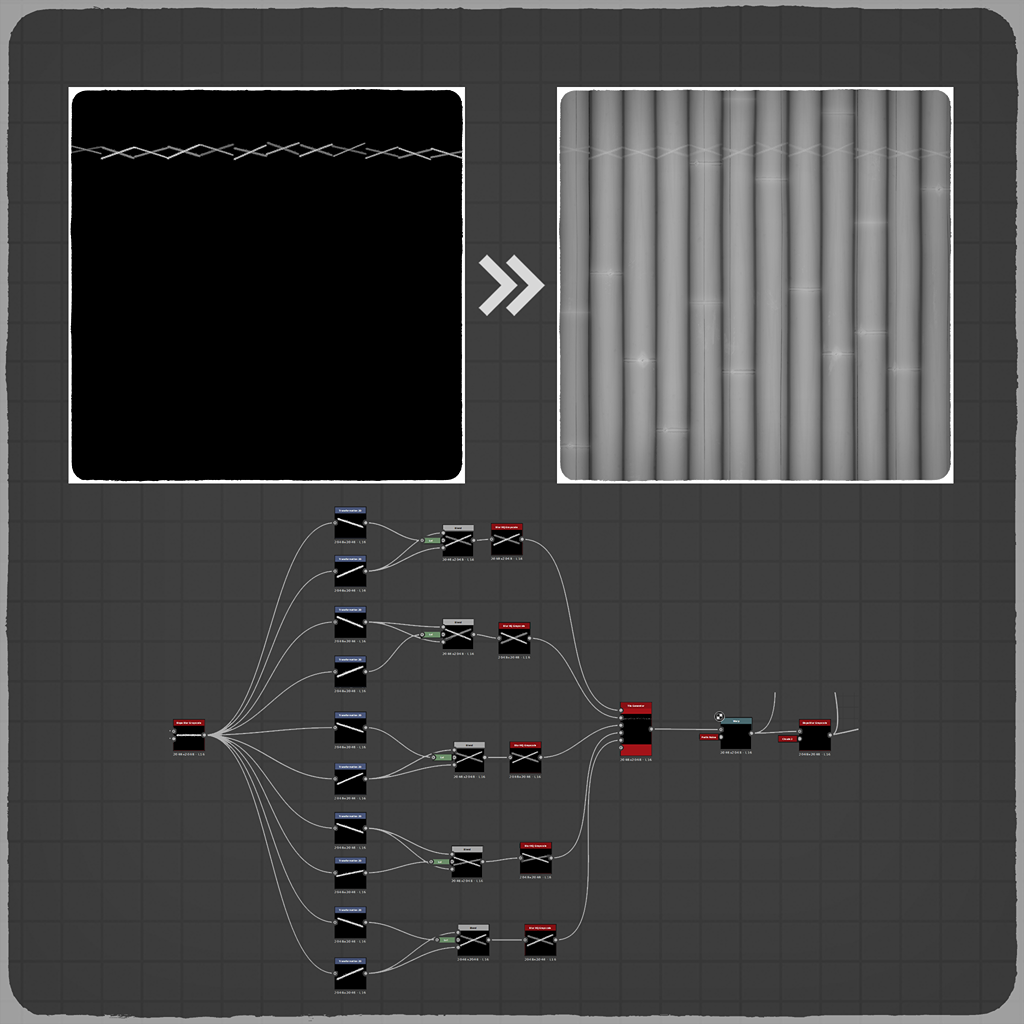
Base Shape
To start, I created the base shape using the “Gradient Linear 3” node, shaped it into a single bamboo piece with the “Transformation 2D” node, and then formed the bamboo wall using the “Tile Generator” node.
Slits
Next, I created the slits and lines on the bamboo. Observing my references, I noted that some bamboo pieces had splits, which I incorporated into my design.
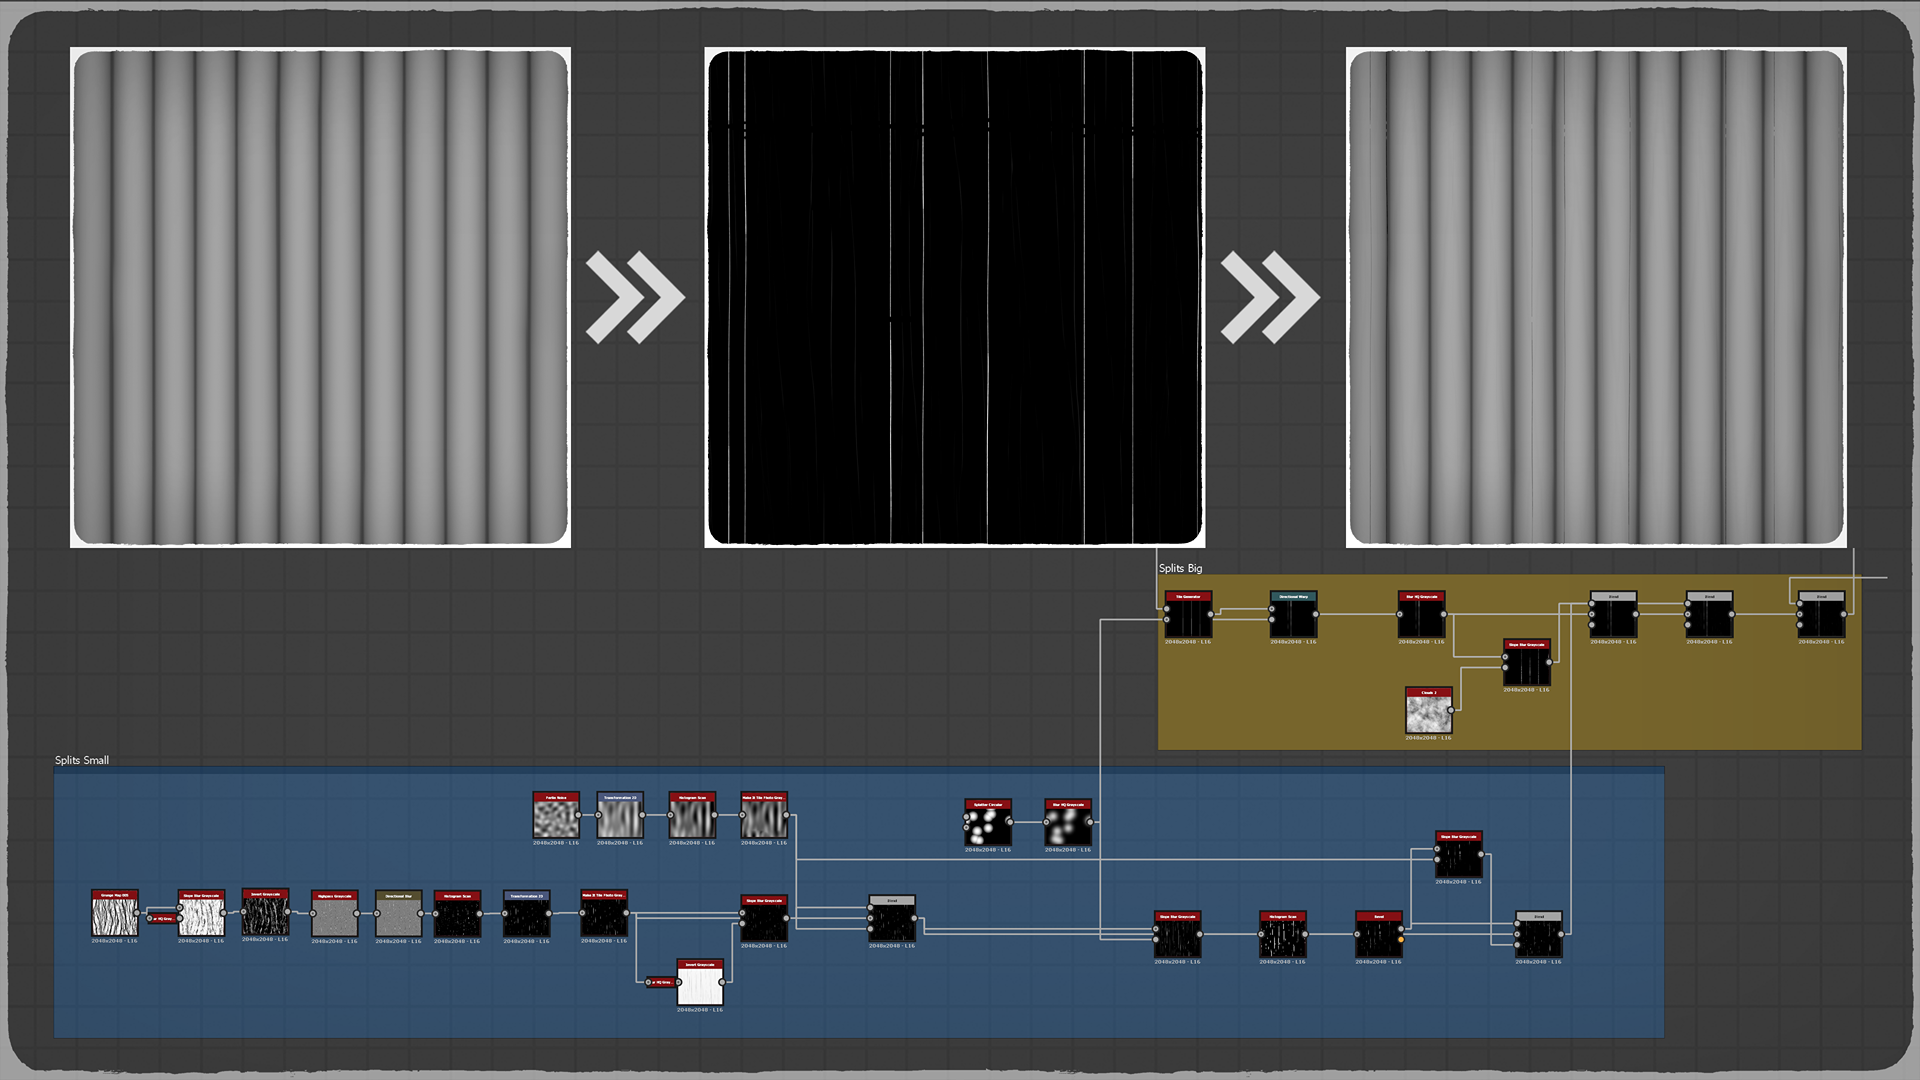
Nodes
Subsequently, I randomly added nodes to certain parts of the bamboo trunk and deformed these areas.
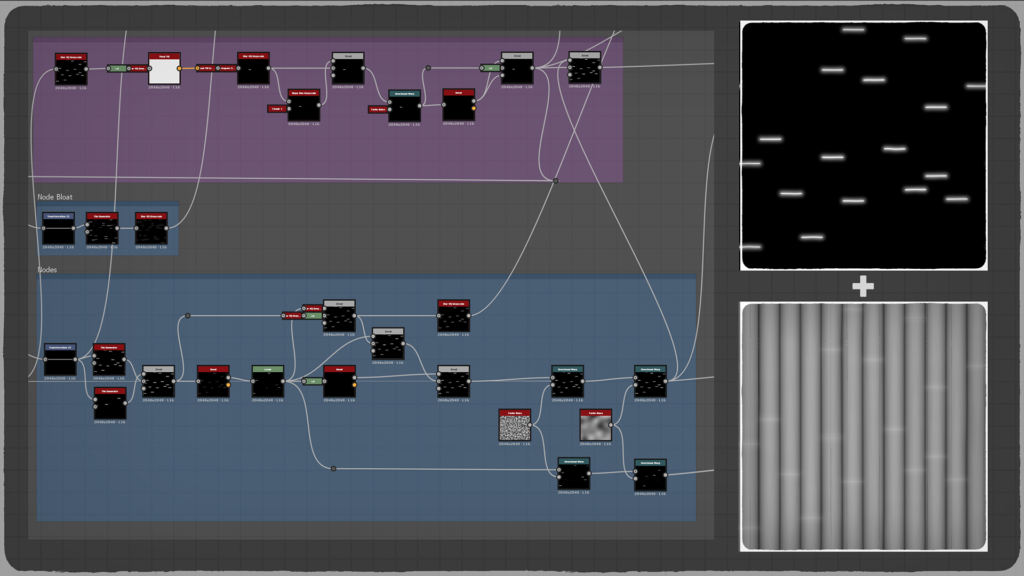
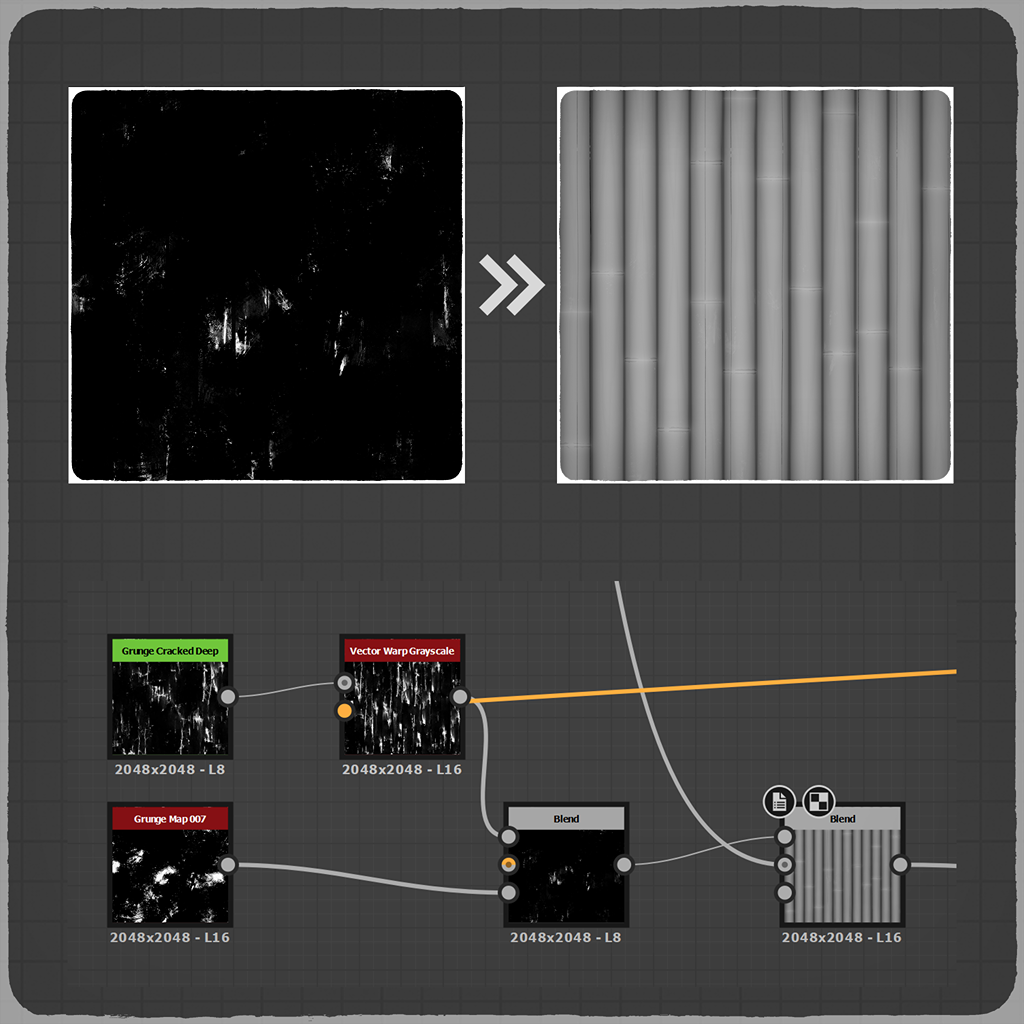
Wear On Bamboo
I then used the “Grunge Crack Deep” node to introduce random deformations, giving the bamboo a more interesting appearance.
Warp
Multiple warp nodes are used to add a slight warp and enhance the natural look.

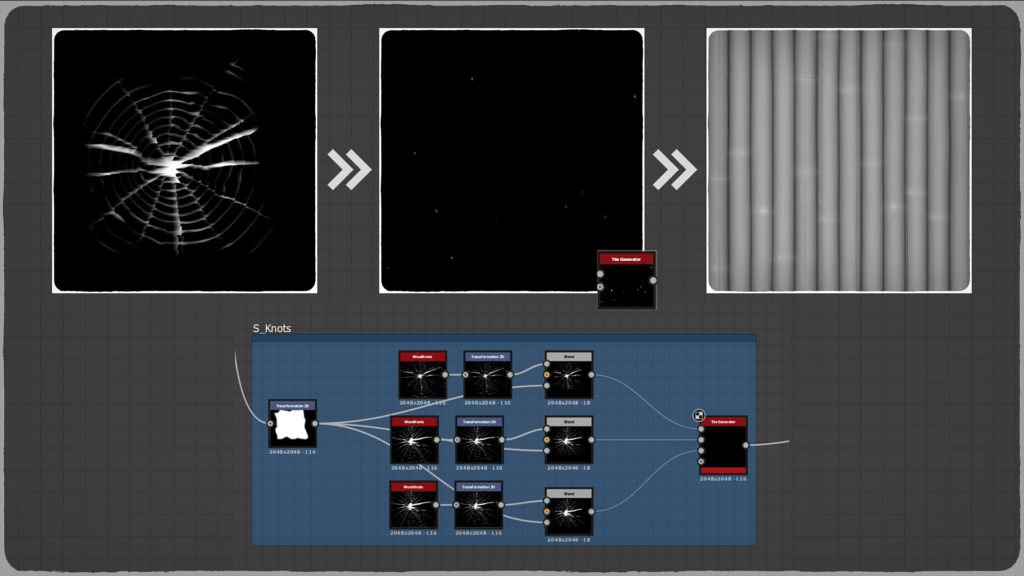
Knots
For the next section, I added knots. I must admit that I’ve been improvising a lot here.

Fibers
I added small fibers to create a noisier surface and to add to the naturalness of the bamboo.

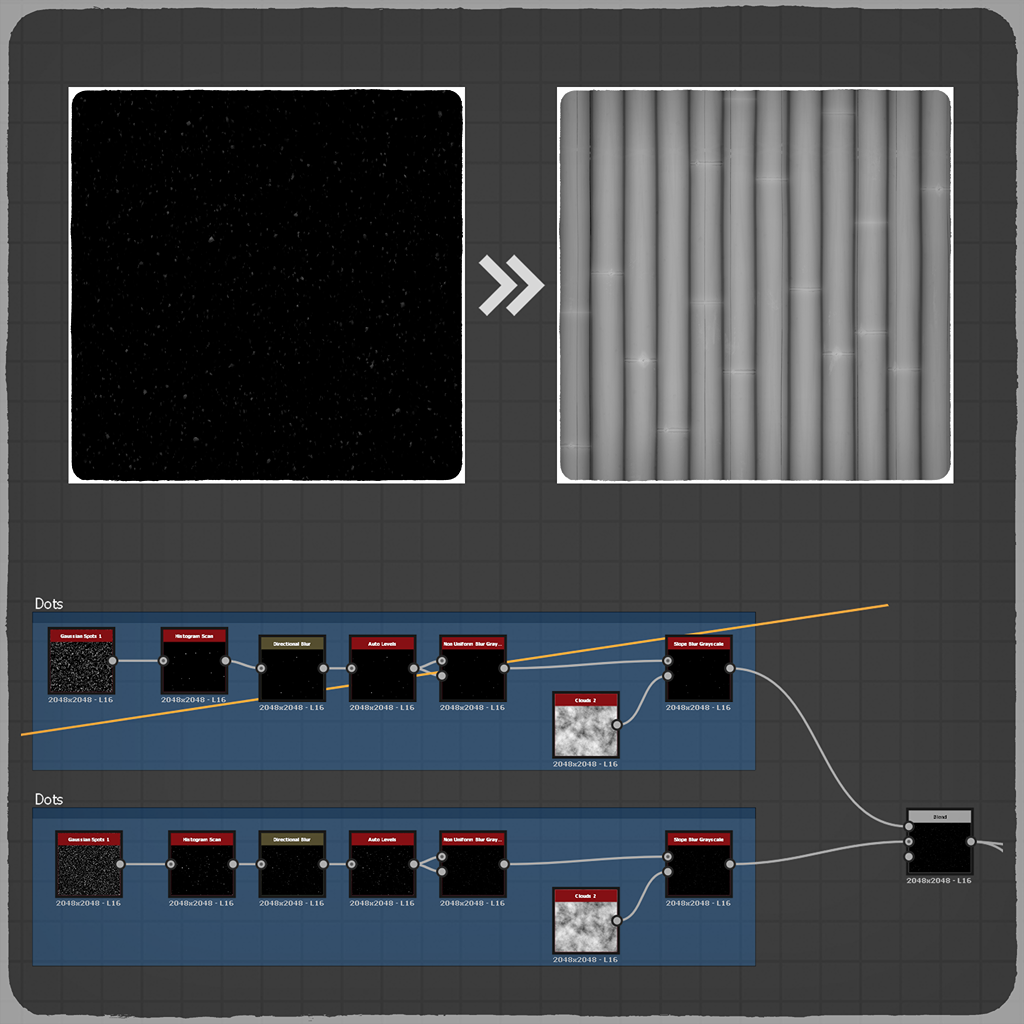
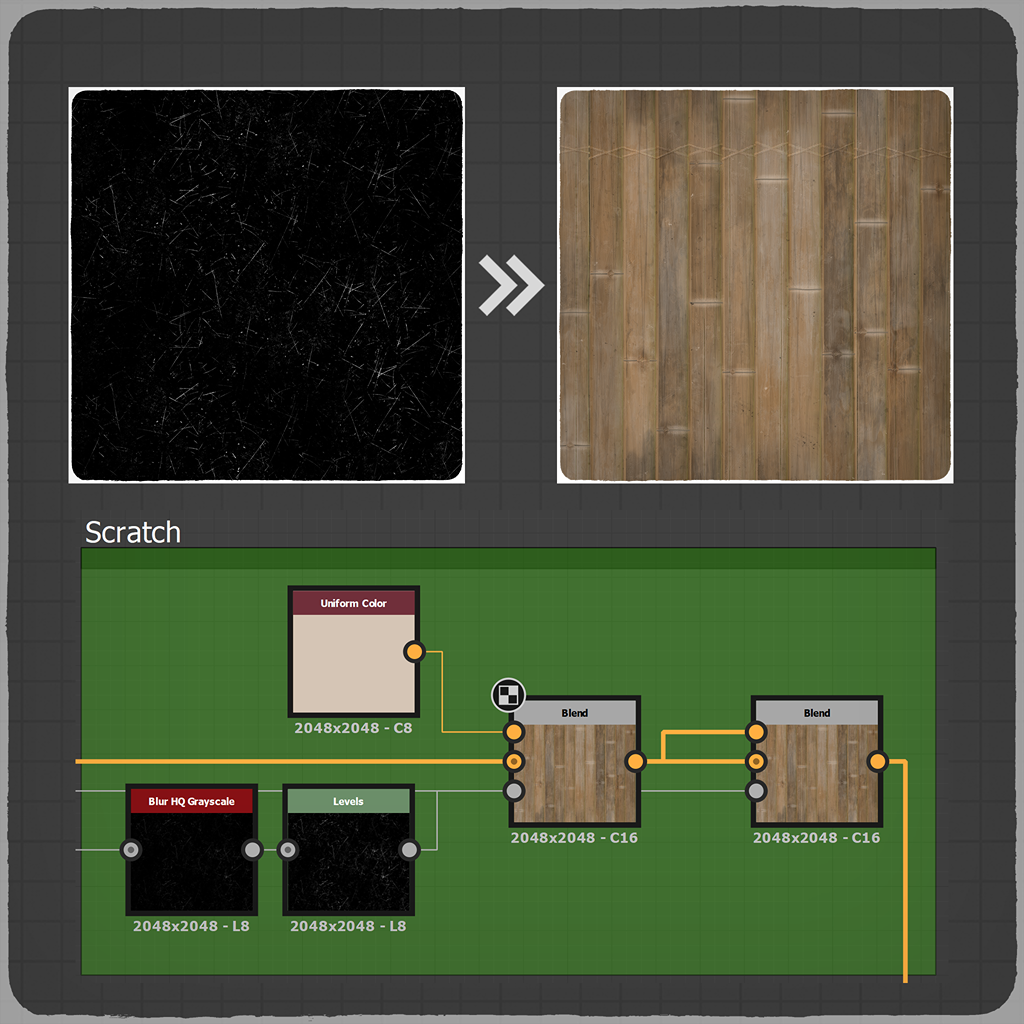
Scratches And Damages
I then introduced small scratches to emphasize aging, followed by random dot damages to further depict wear and tear on the bamboo surfaces.

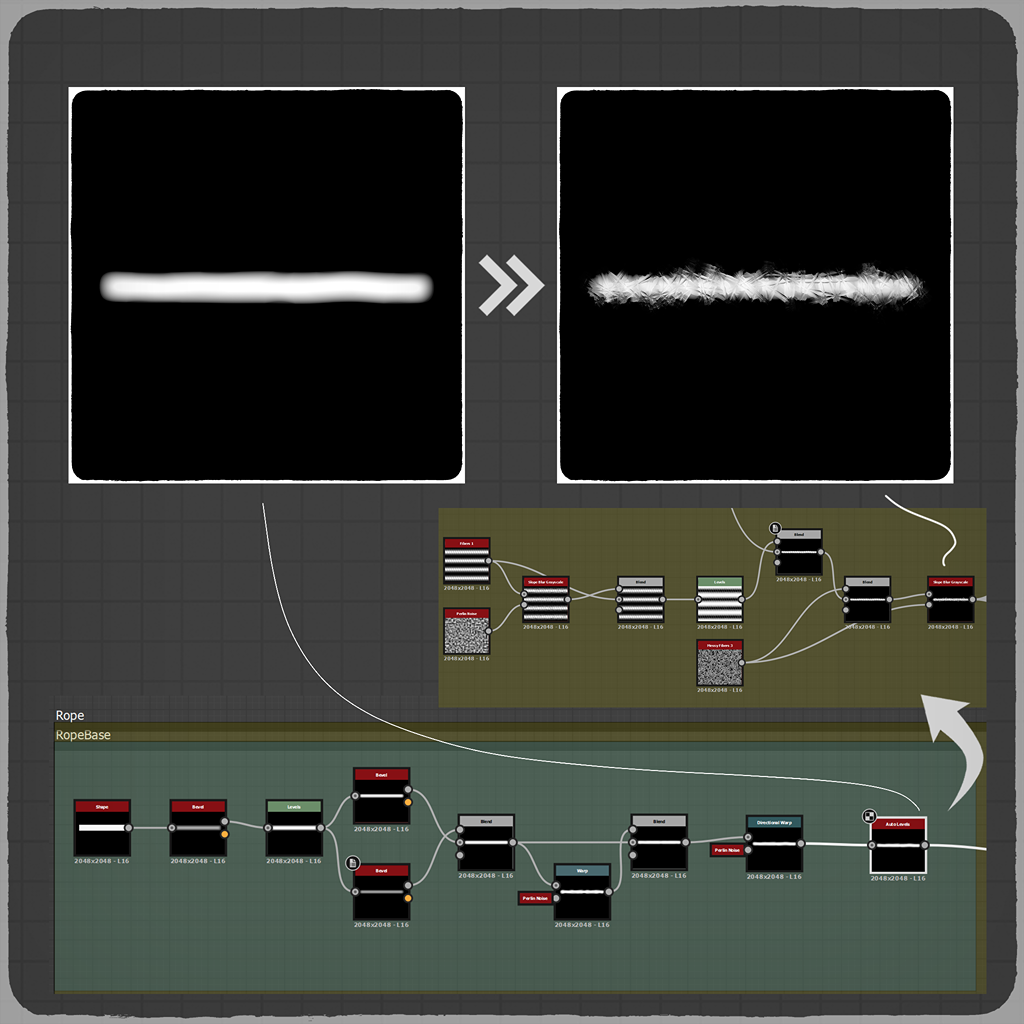
Rope
To create the rope, I started with a simple shape and added details using fibers.
I tied the ropes to a few random nodes and placed them on the bamboo using the “Tile Generator” node, similar to how I tiled the bamboo.
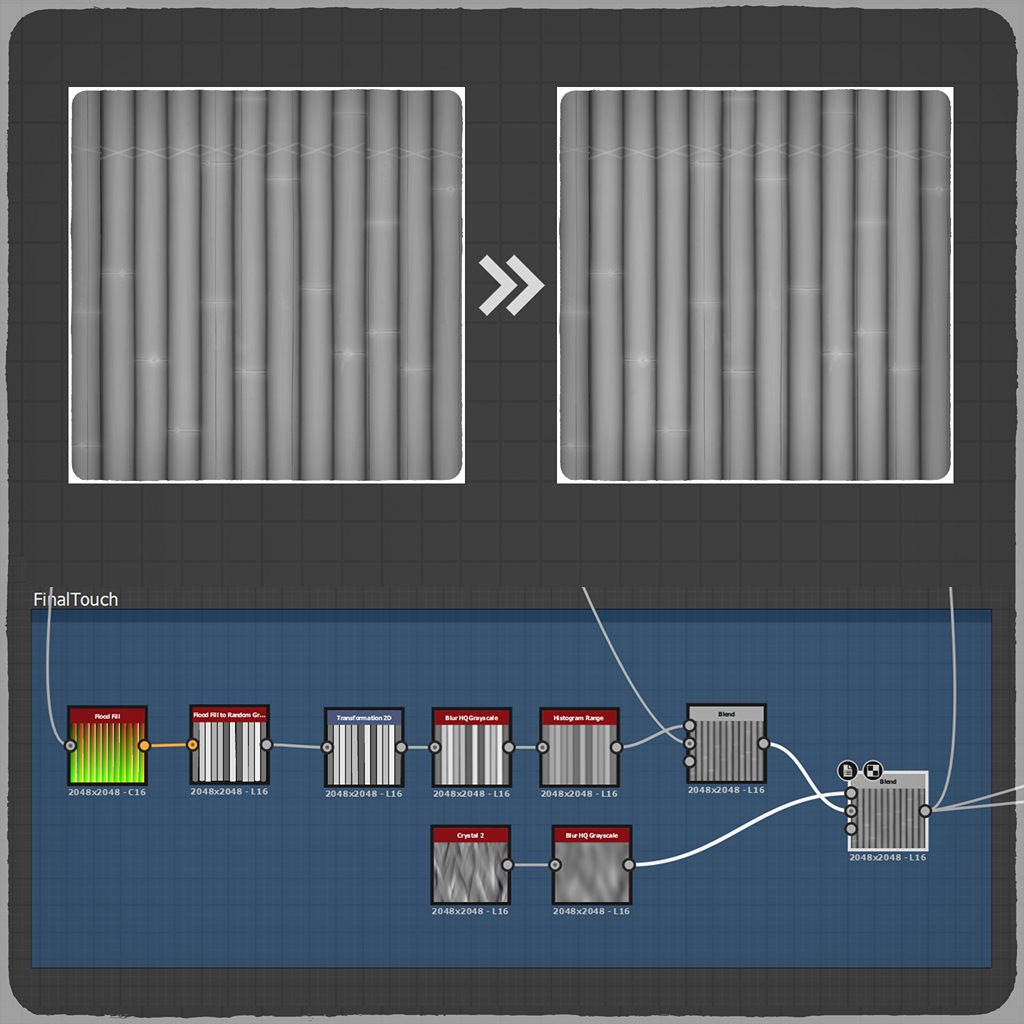
Final Touch
The final touch involved combining the bamboo texture with other nodes to affect random positions and heights using the “Flood Fill” node.
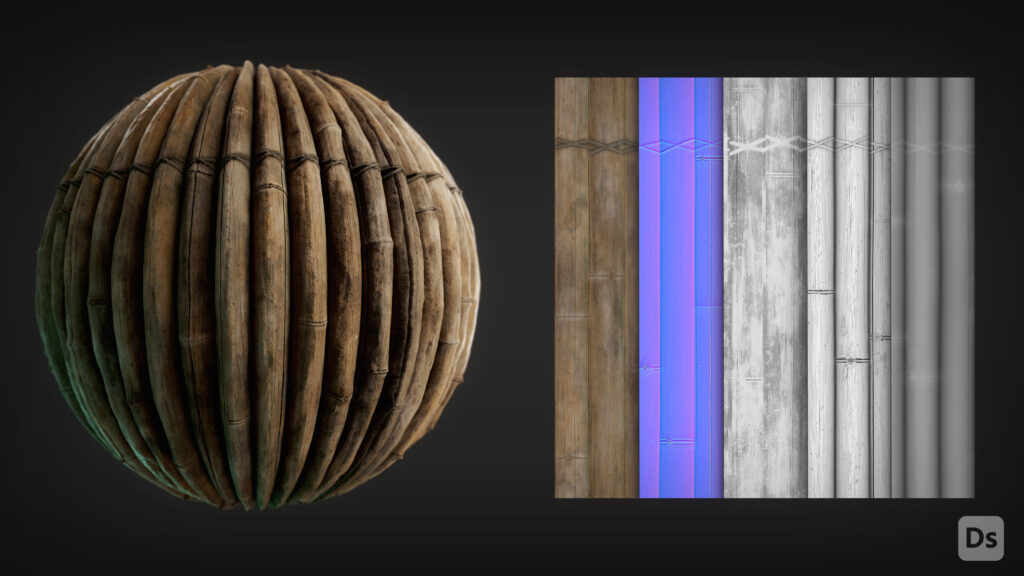
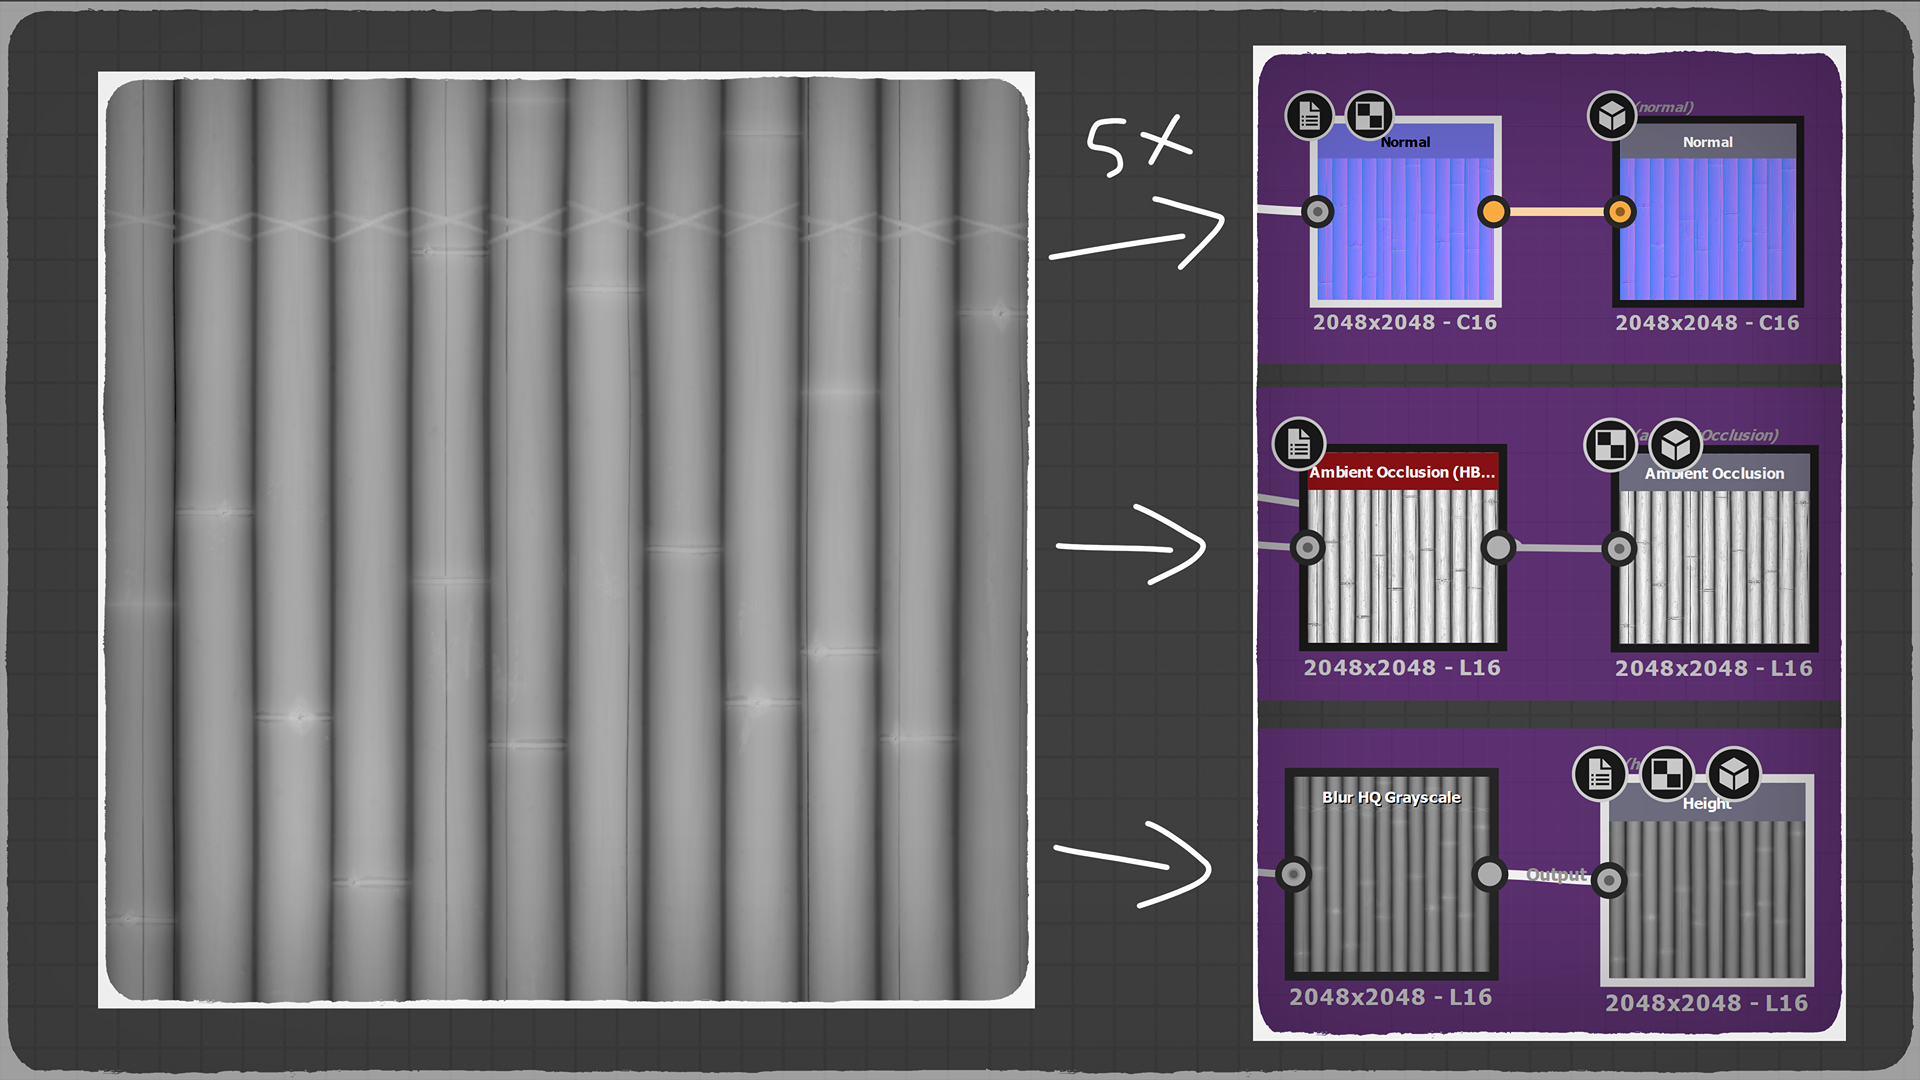
Normal-Ao-Height
The normal node was linked to the texture and given 5x strength. I created my height map by blurring unnecessary details with the “Blur HQ Grayscale” node.
The texture was then linked to the “Ambient Occlusion HBO” node.
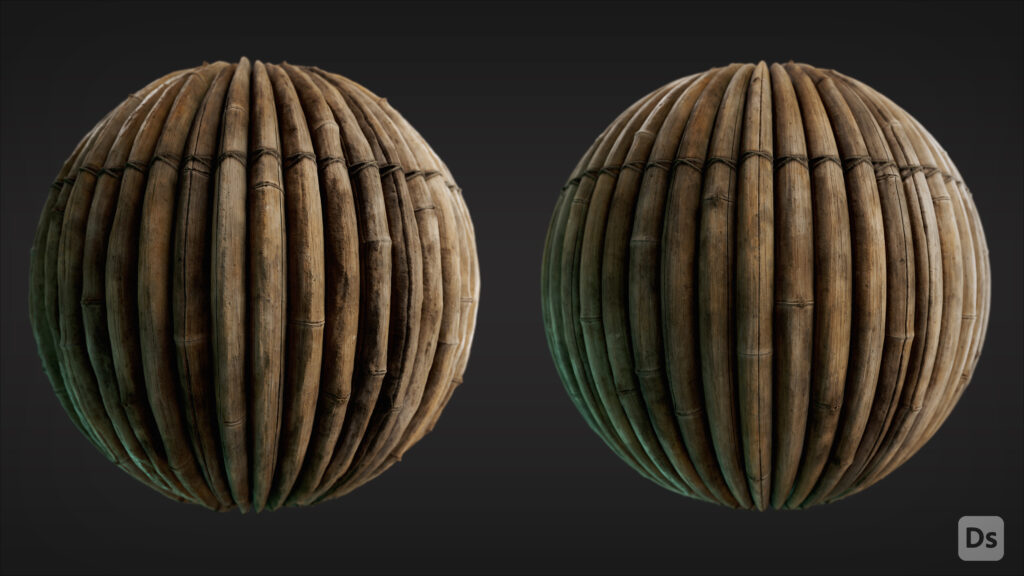
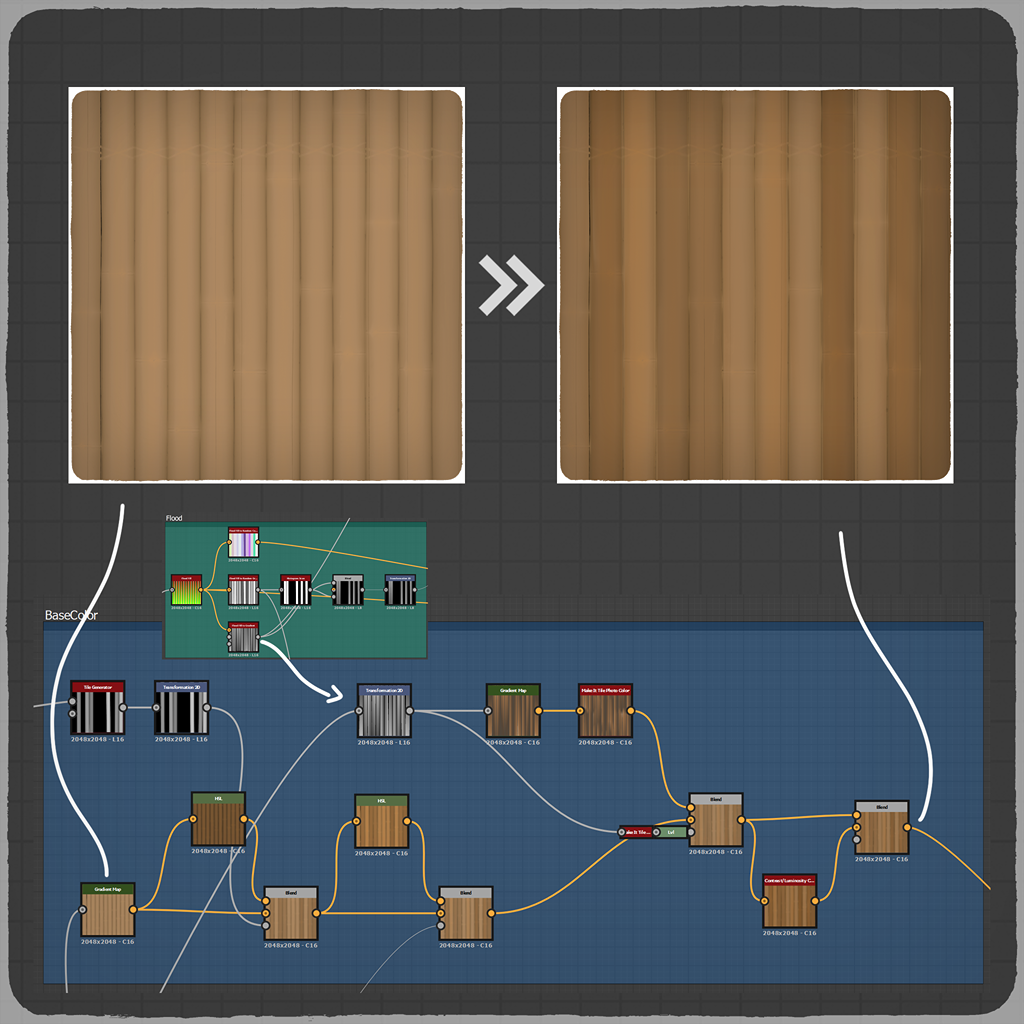
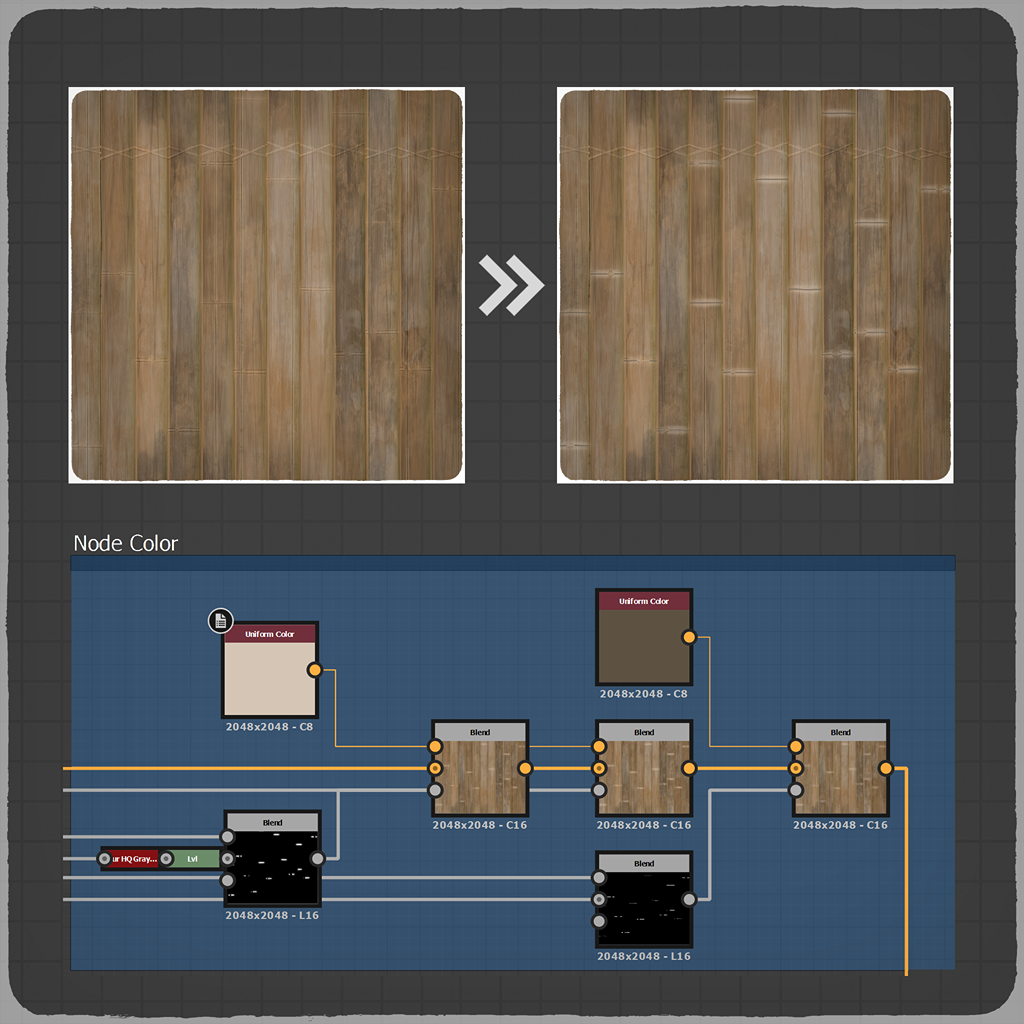
Base Color
I combined the texture prepared for height with the “Gradient Map” node, selected two colors, and then added color variation using the “Flood Fill To Random Grayscale” node.
My goal was to ensure each bamboo had a different color.
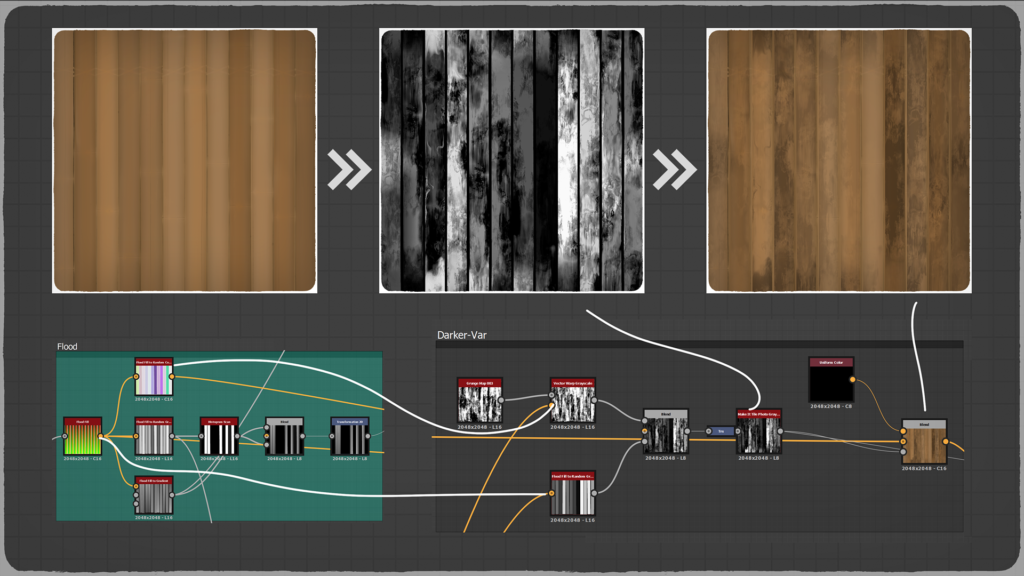
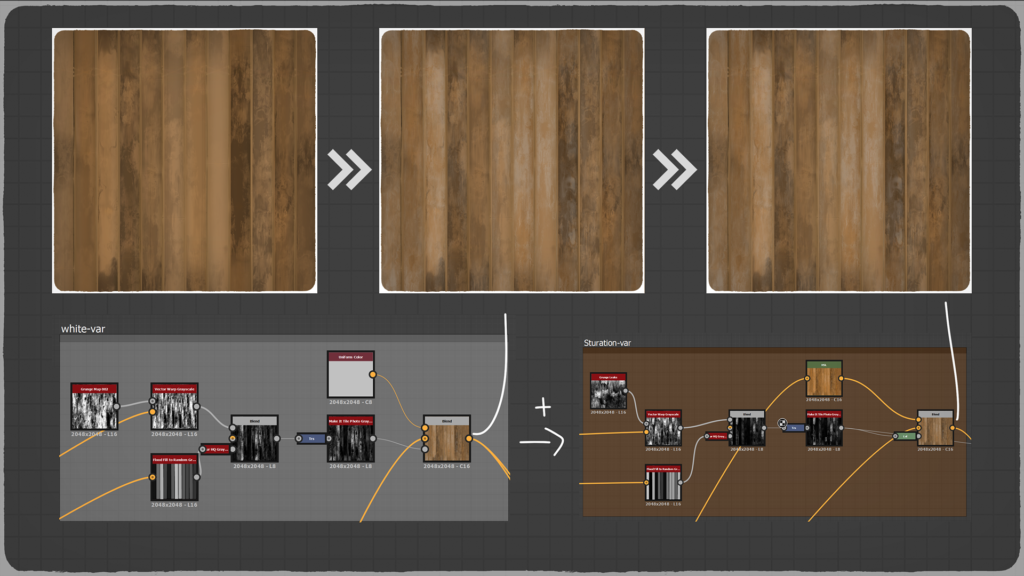
Color Variation
To add color variation, I used “Flood Fill + Flood Fill To Random Color + Vector Warp Grayscale” to randomize some grunge elements, making the bamboo pieces darker, whiter, and more saturated.
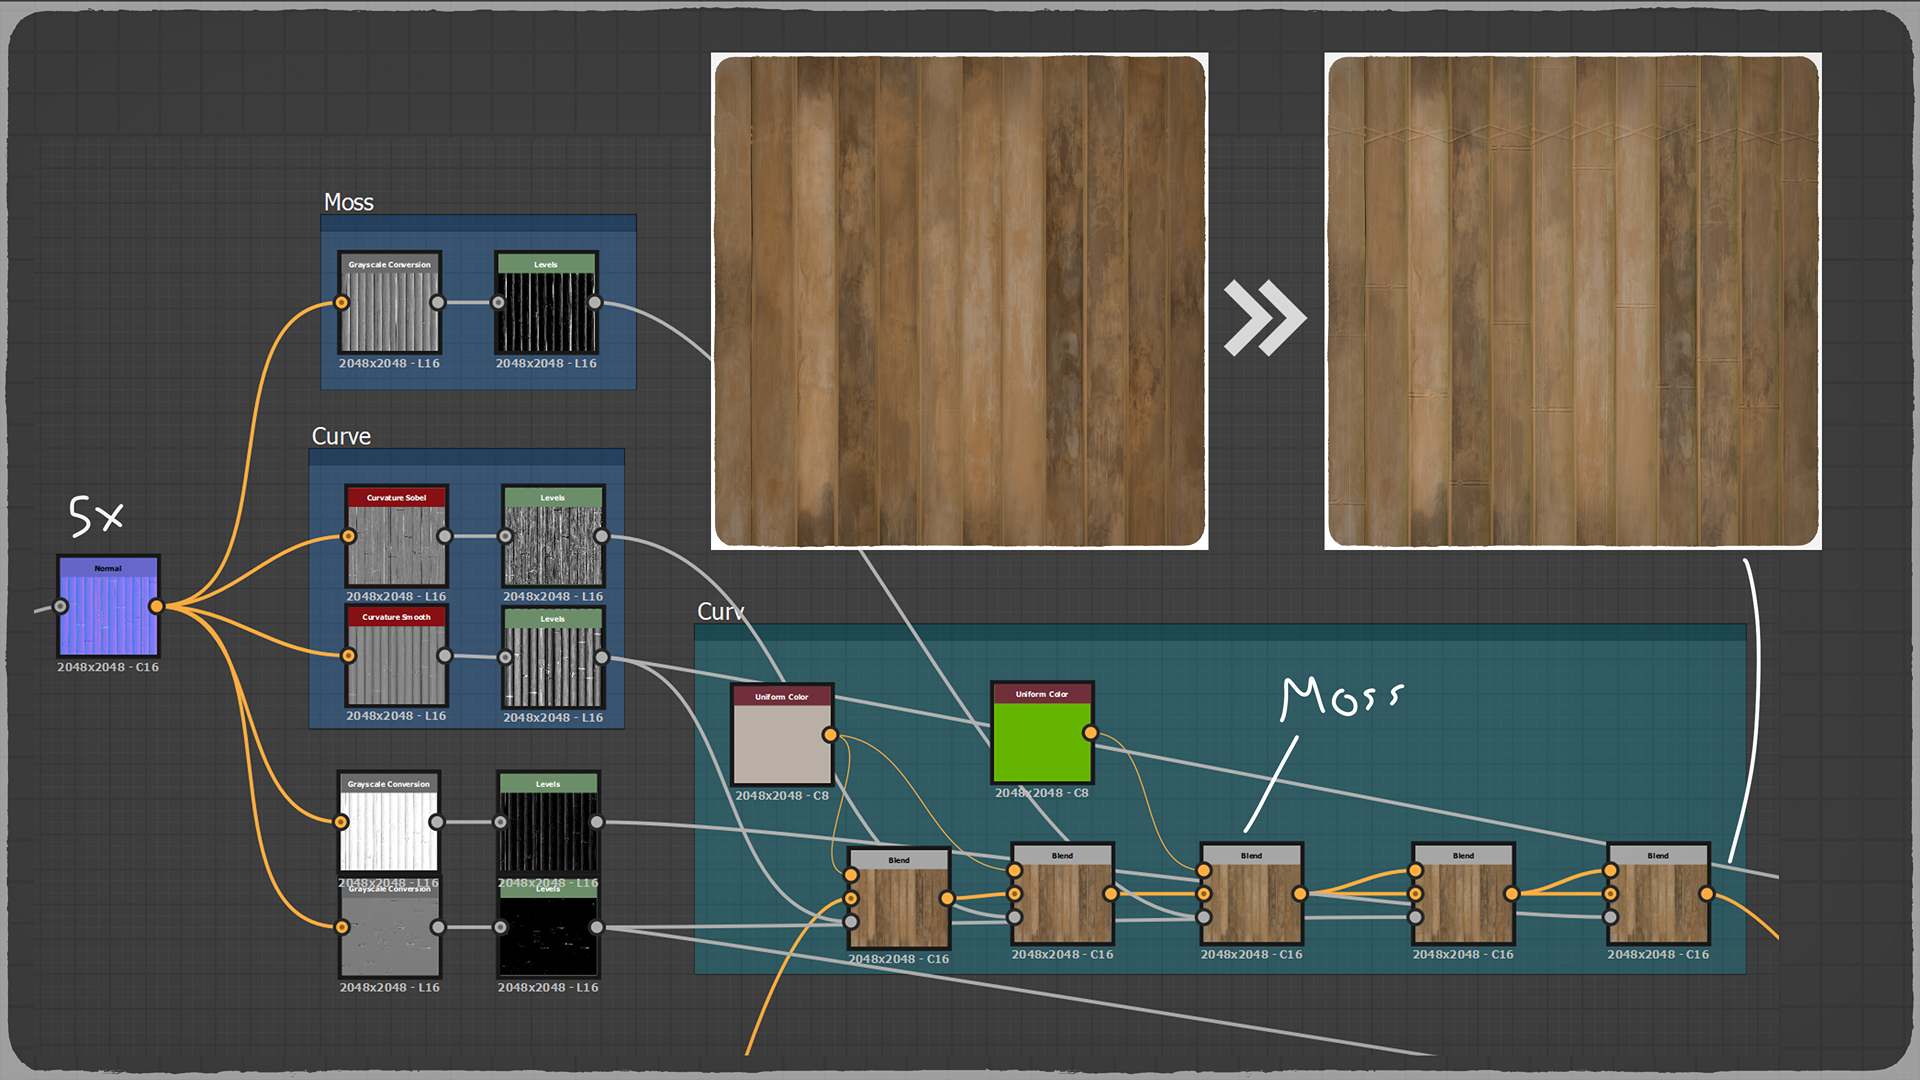
Curvature and Moss
In this section, I linked the “Normal” node with the “Curvature” node and added it to the base color.
I also created a mossy effect using the “Grayscale” nodes.
Splits and Fibers
Following my reference, I colored the splits, lines, and fibers on the bamboo with a lighter color on the outer parts.
Nodes And Knots Color
I colored the nodes on the bamboo, ensuring the outer part was lighter, as per my reference, and aimed to create contrast in the knots by painting them a darker color.
Polish
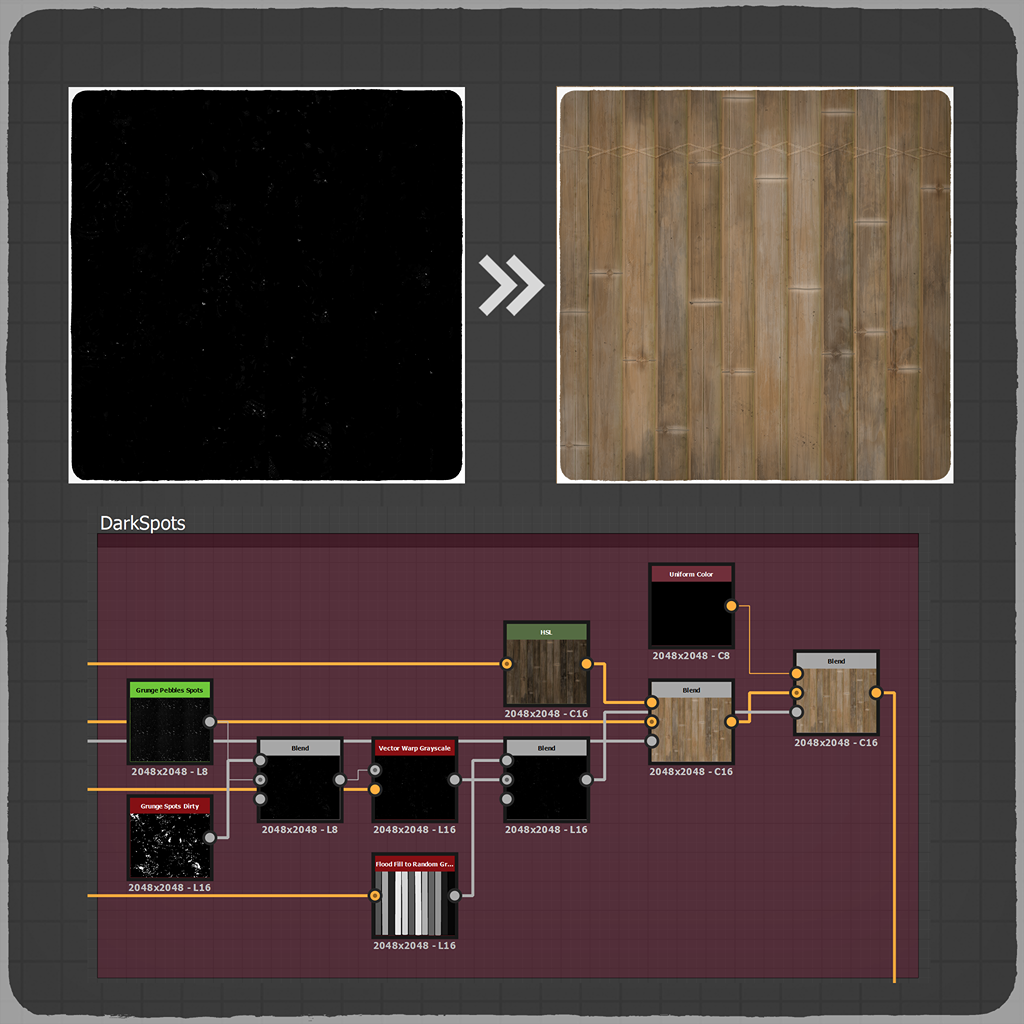
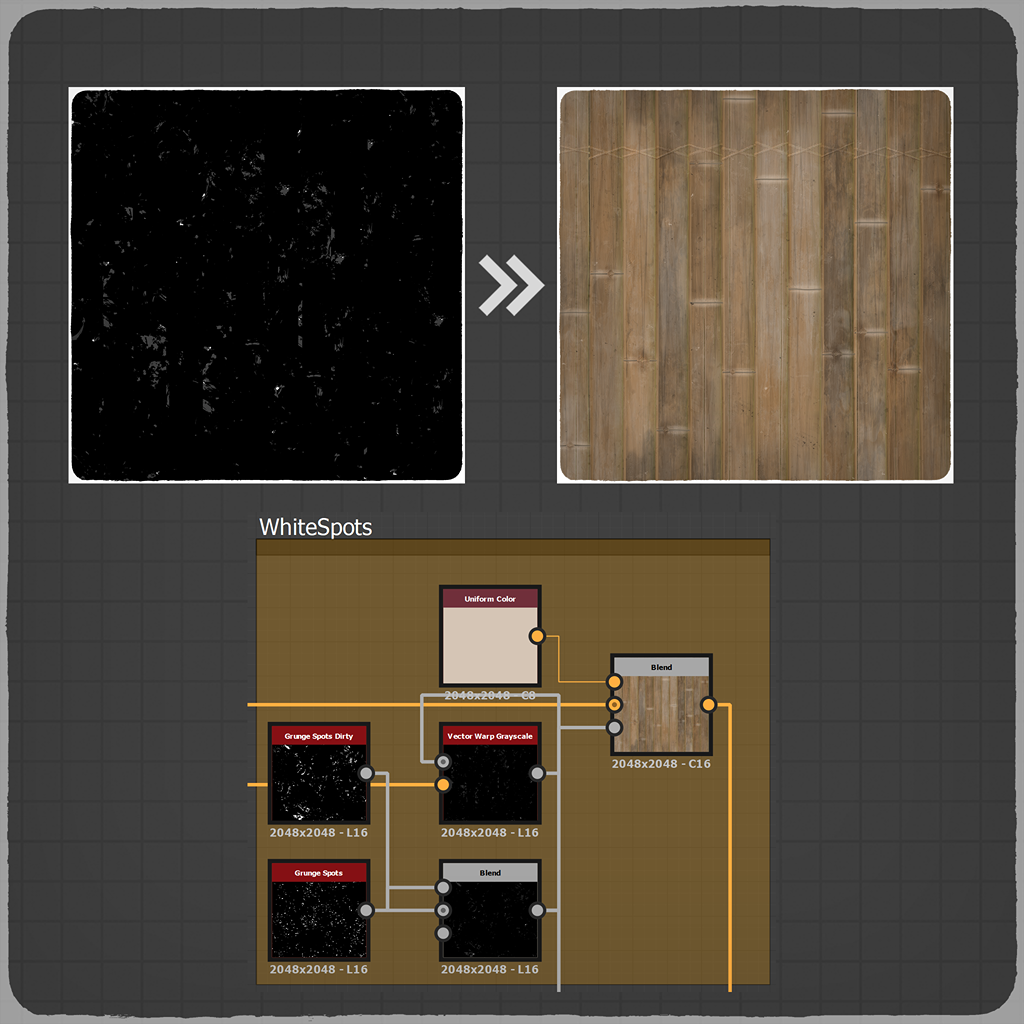
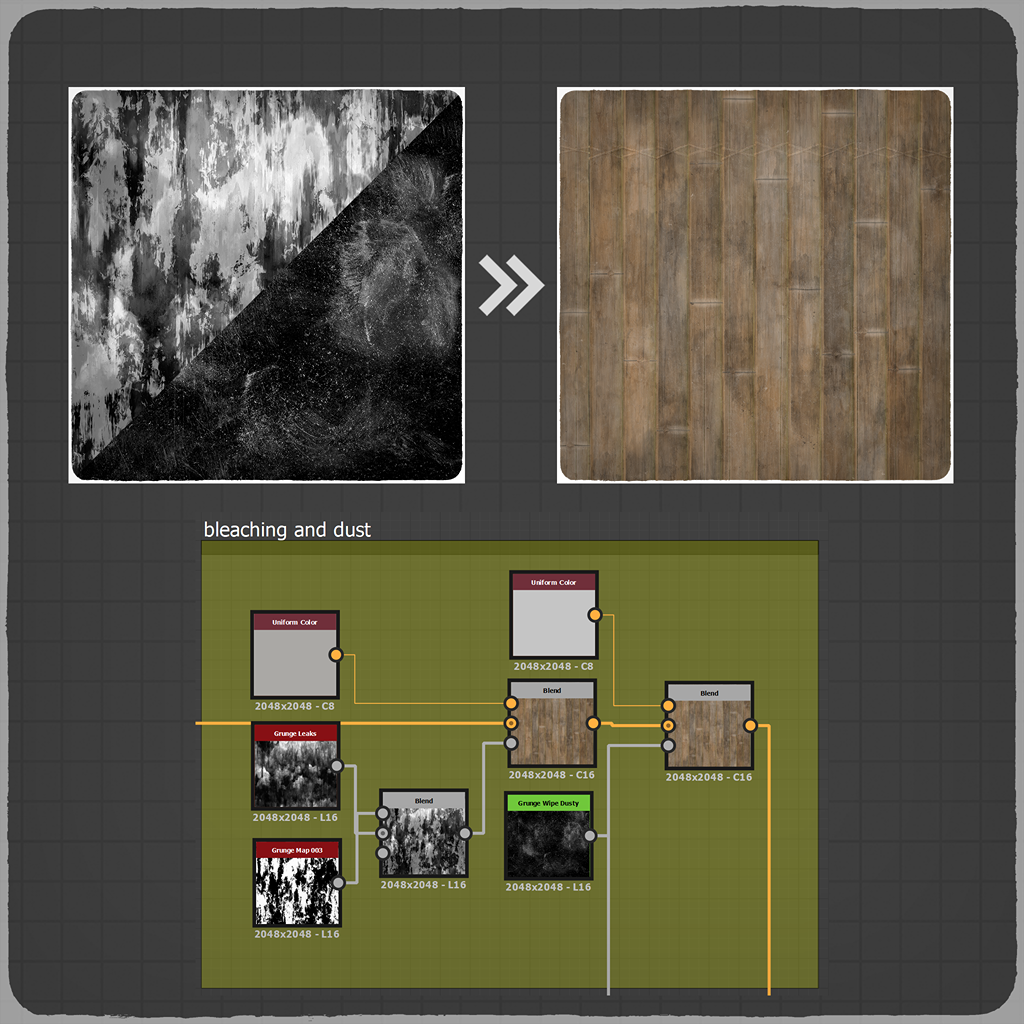
Dark and White Spots, Scratch Color, Dirt, Natural Bleaching and Dust
To enhance the realism of the bamboo material, I added black and white color variations in certain areas, mimicking my reference.
To further emphasize aging, I darkened the outer parts of the scratches and colored the scratch areas.
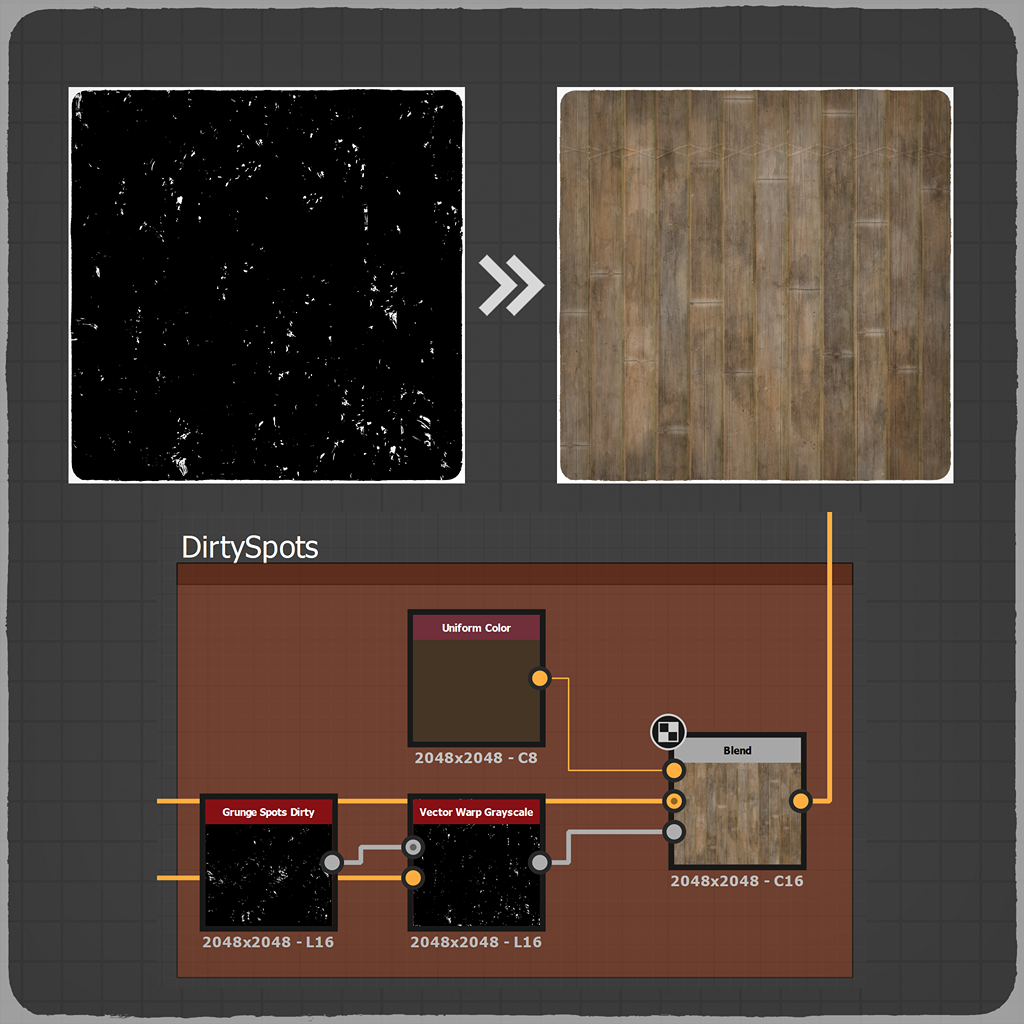
I introduced a bit of dirt to give the bamboo the appearance of being affected by natural elements. Additionally, I emphasized naturally occurring bleaching and dust accumulation.
Lastly, I randomly added dirt to specific spots to make them more noticeable and to depict dirt accumulation in small areas.

Rope Traces and Rope Base Color
To indicate that the ropes had been there for an extended period, I darkened the bamboo parts under the rope.
For the rope itself, I used a base color, added color from the Curvature node, and aged it using various grunge elements.

Final Base Color
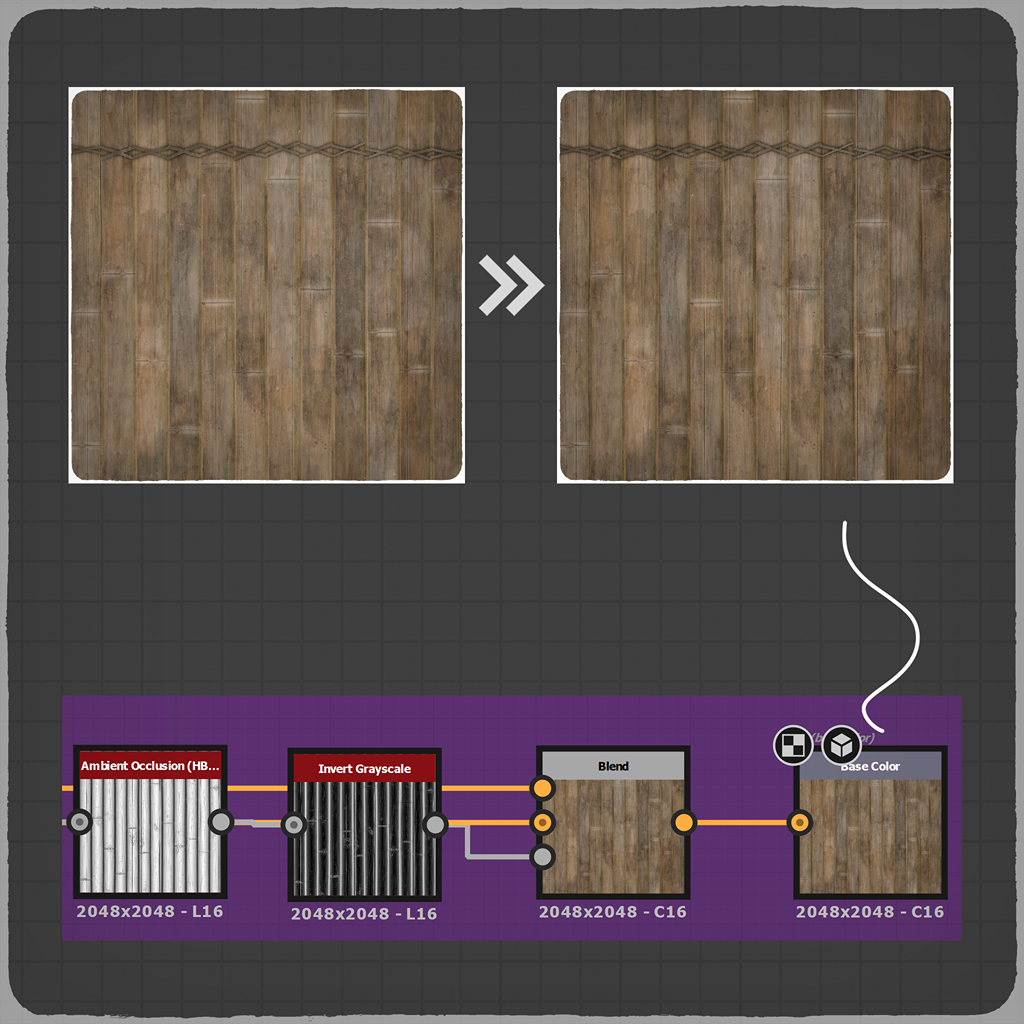
Finally, I multiplied the base color by inverting the Ambient Occlusion.
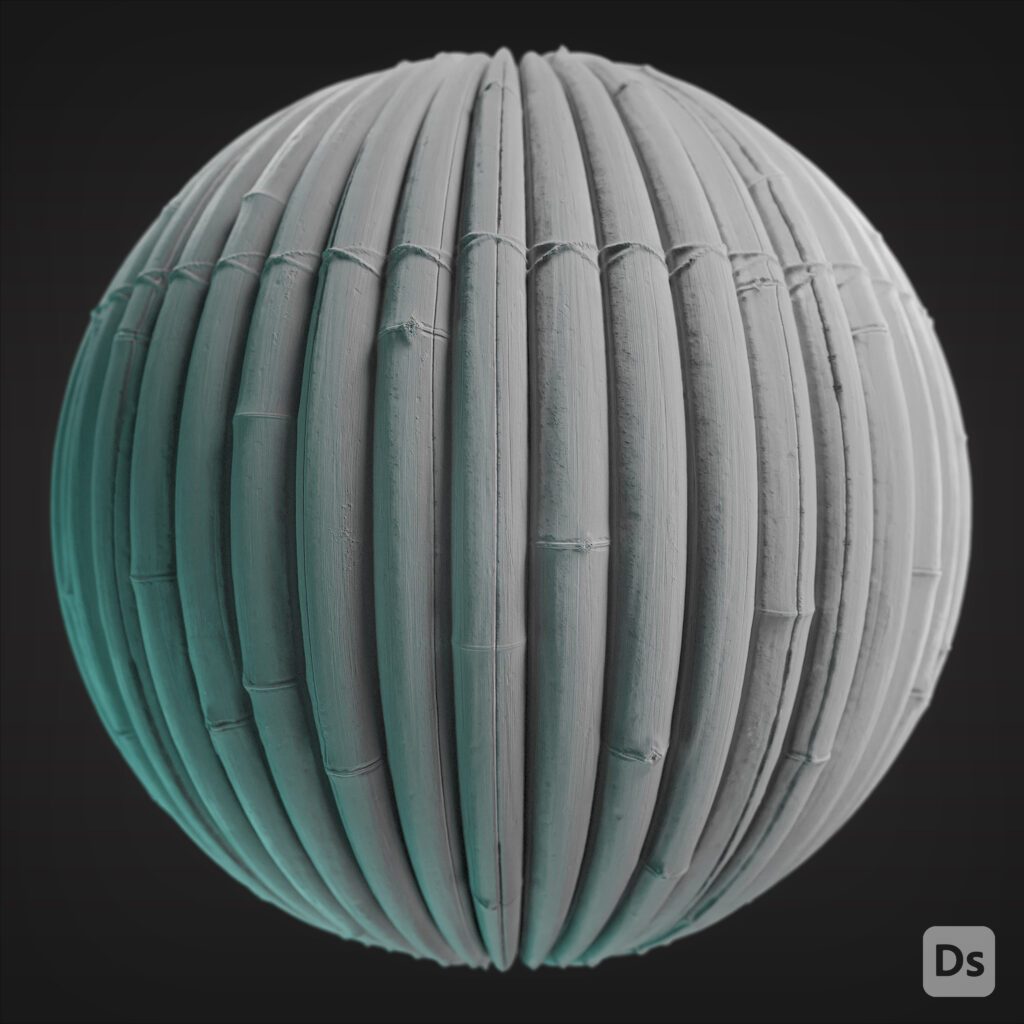
Roughness
For the roughness part, I created variations using the “Grunge” nodes prepared for color variations in the base color.
The final “Ambient Occlusion” was inverted and adjusted using the “Contrast/Lum” node.

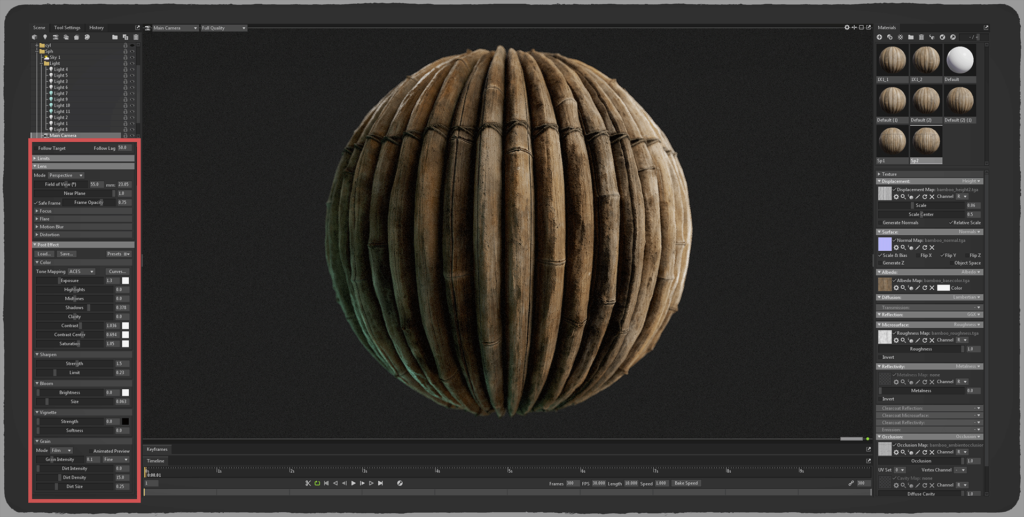
Lighting and Rendering
I used different lighting and camera settings for each render. I did not follow a specific technique or method. First, I used Skylight to illuminate the scene, and then I added different lights to enhance the feel.
I usually adjust the lighting until it looks good to me. I try to achieve the best result I can. Additionally, I prefer using different colored lights to add a unique atmosphere to the scene.
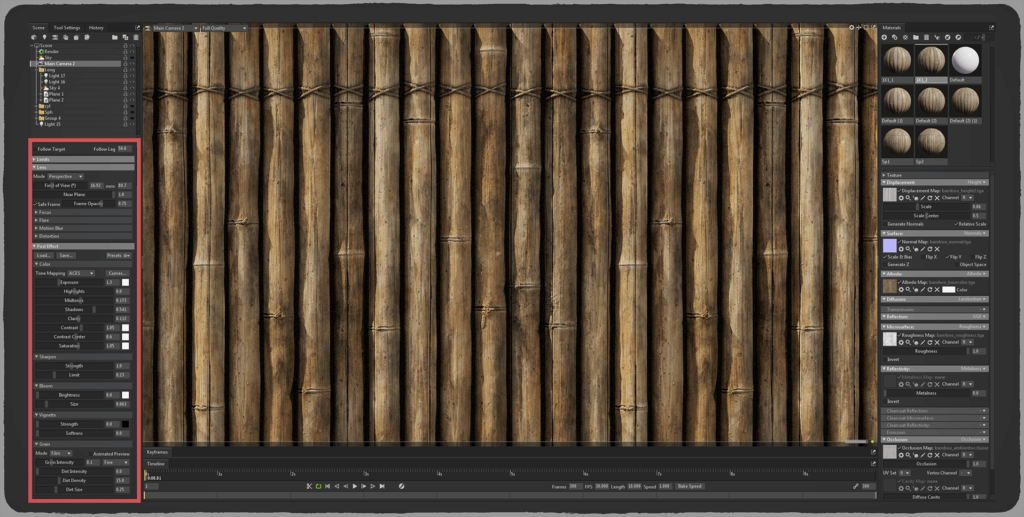
Here, you can see the camera settings I used for this render.
Conclusion
In this article, I have explained how I created my bamboo wall material to the best of my ability. I initially started this material out of boredom and for practice, and I am delighted with the positive outcome.
Thank you for reading. I hope this article has been helpful to you, and please feel free to reach out if you have any questions.
Artstation: https://www.artstation.com/eymenakmaz
Read more articles
You might also like these articles.