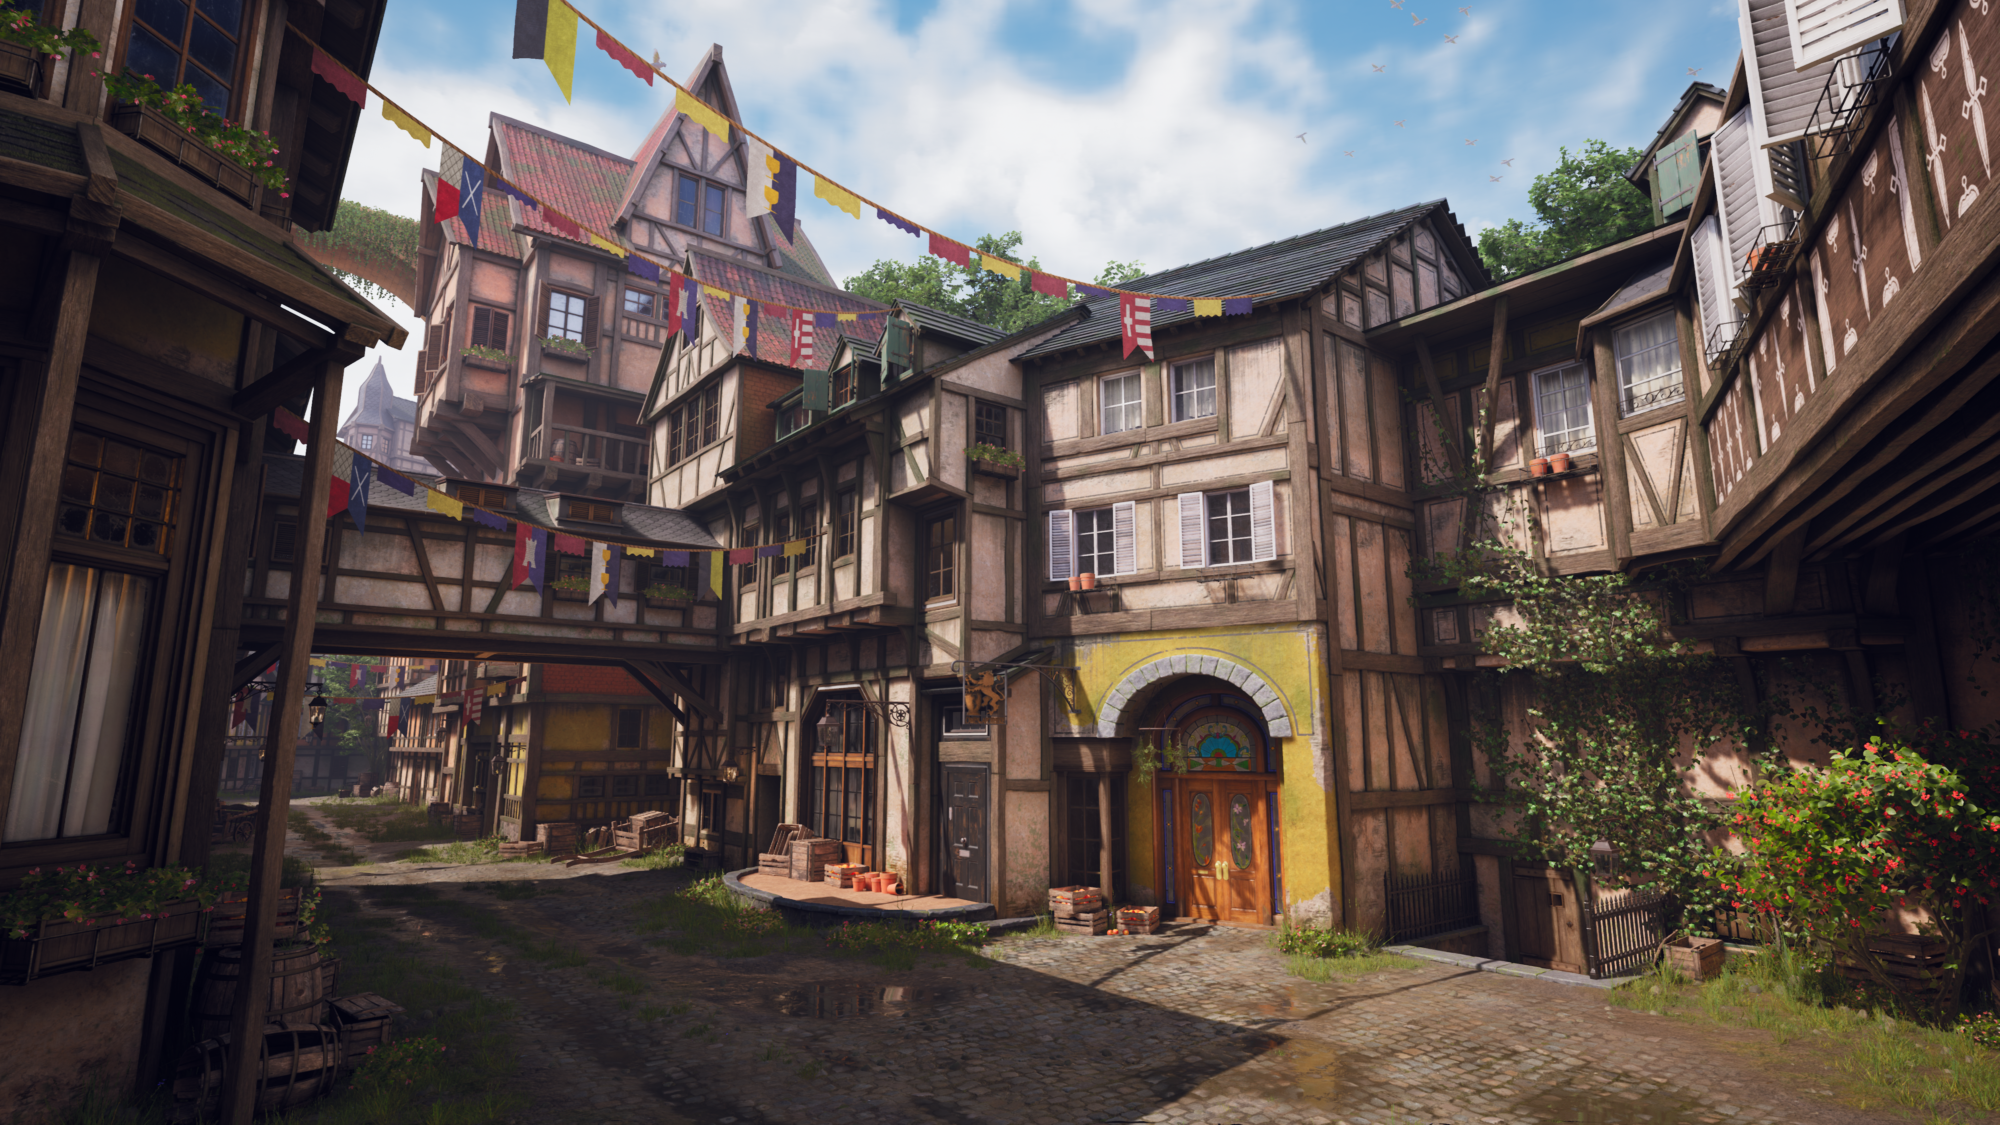
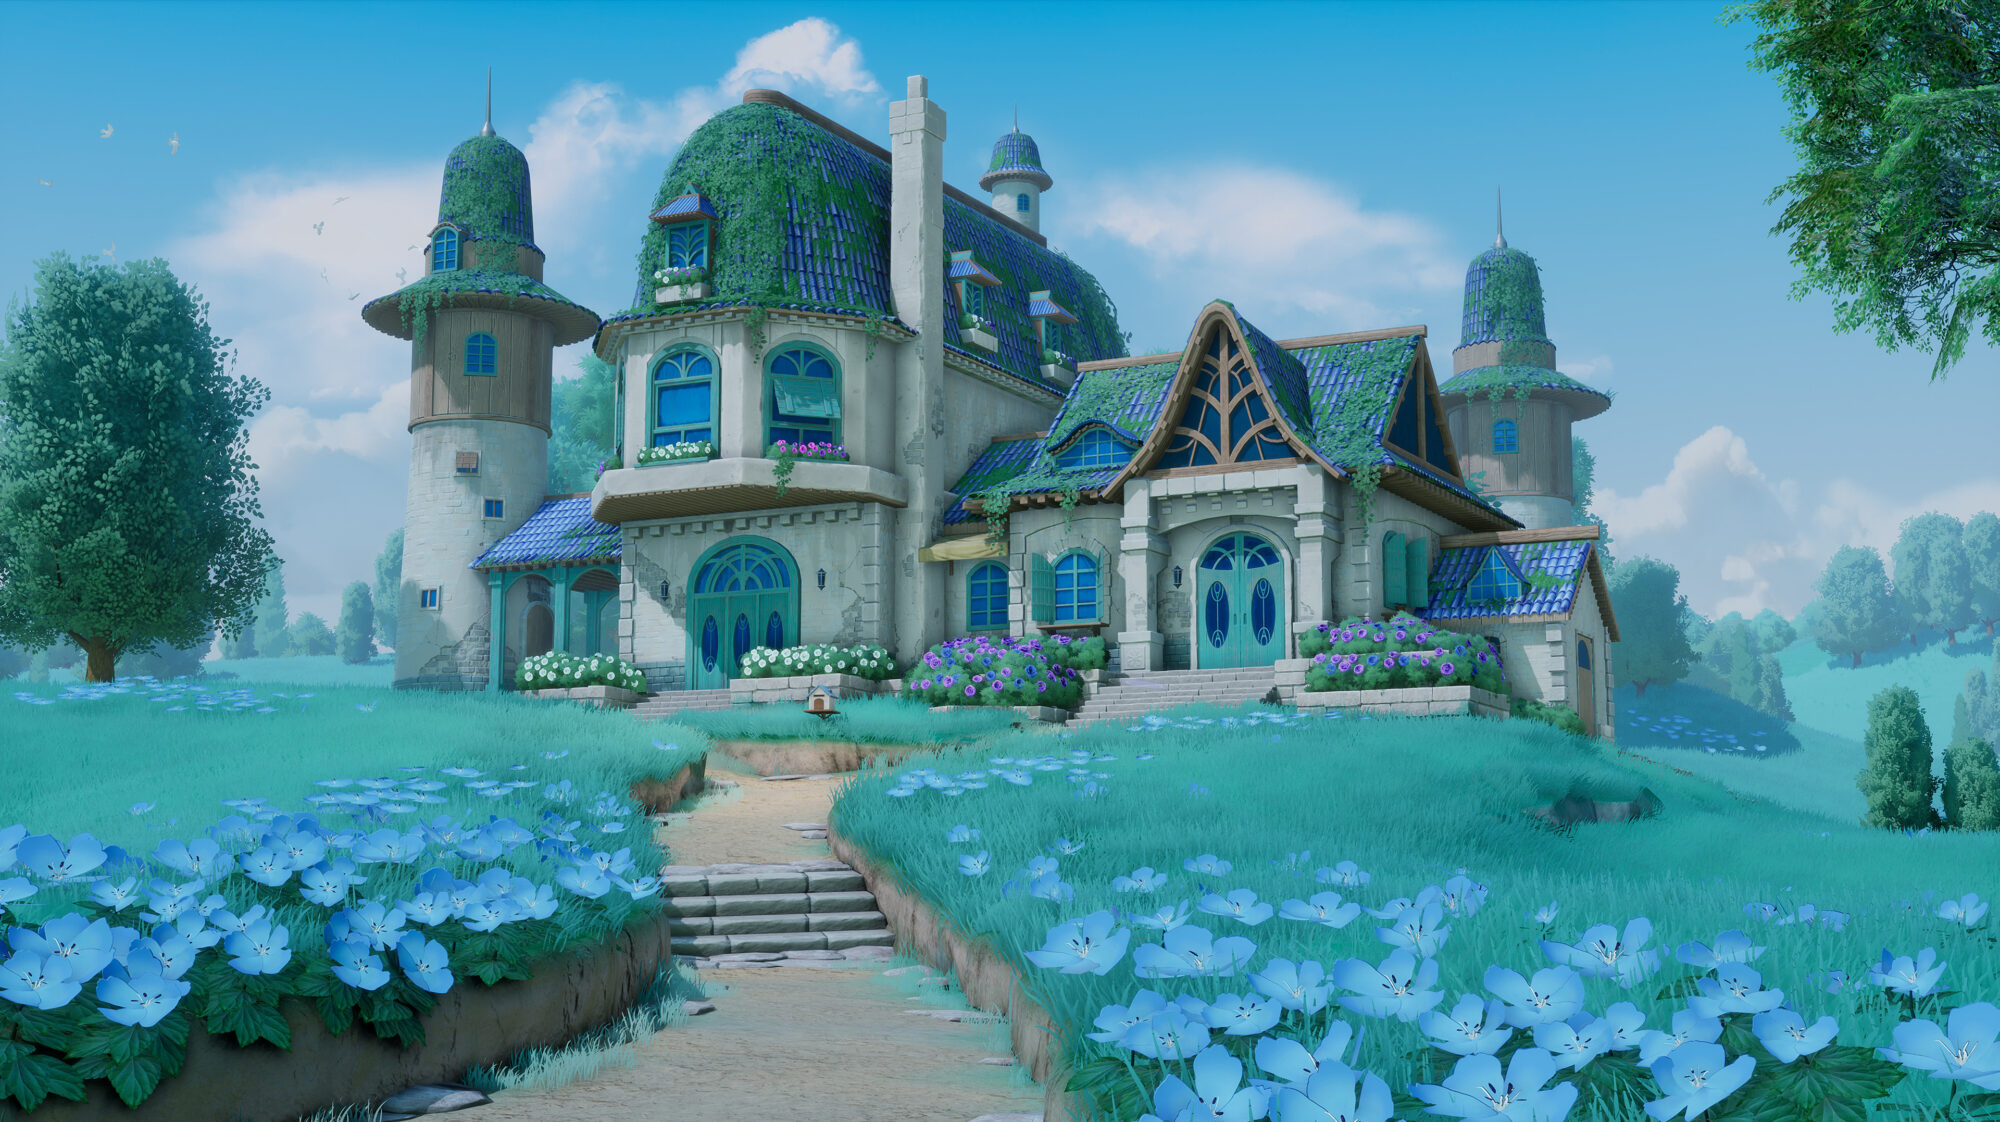
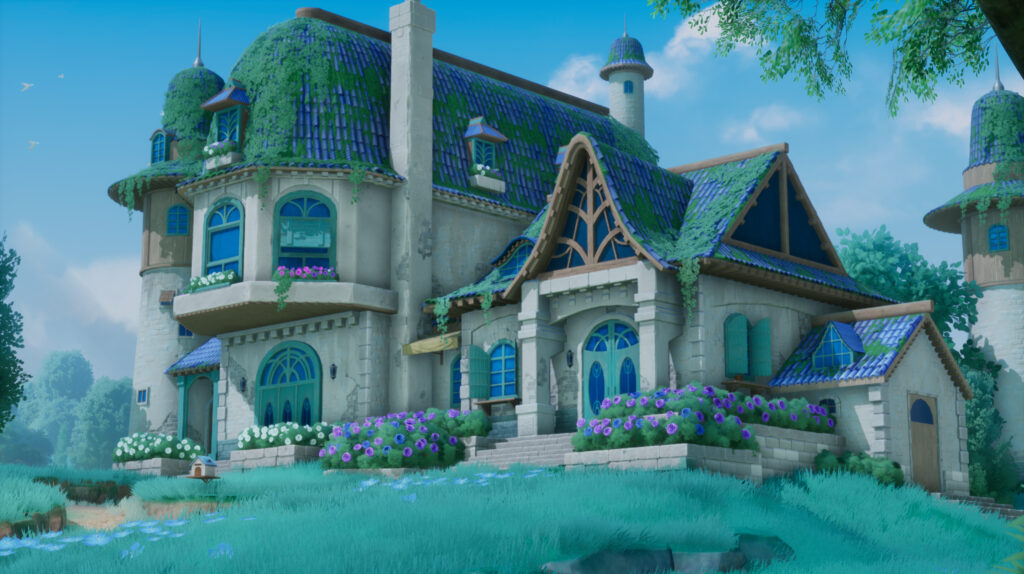
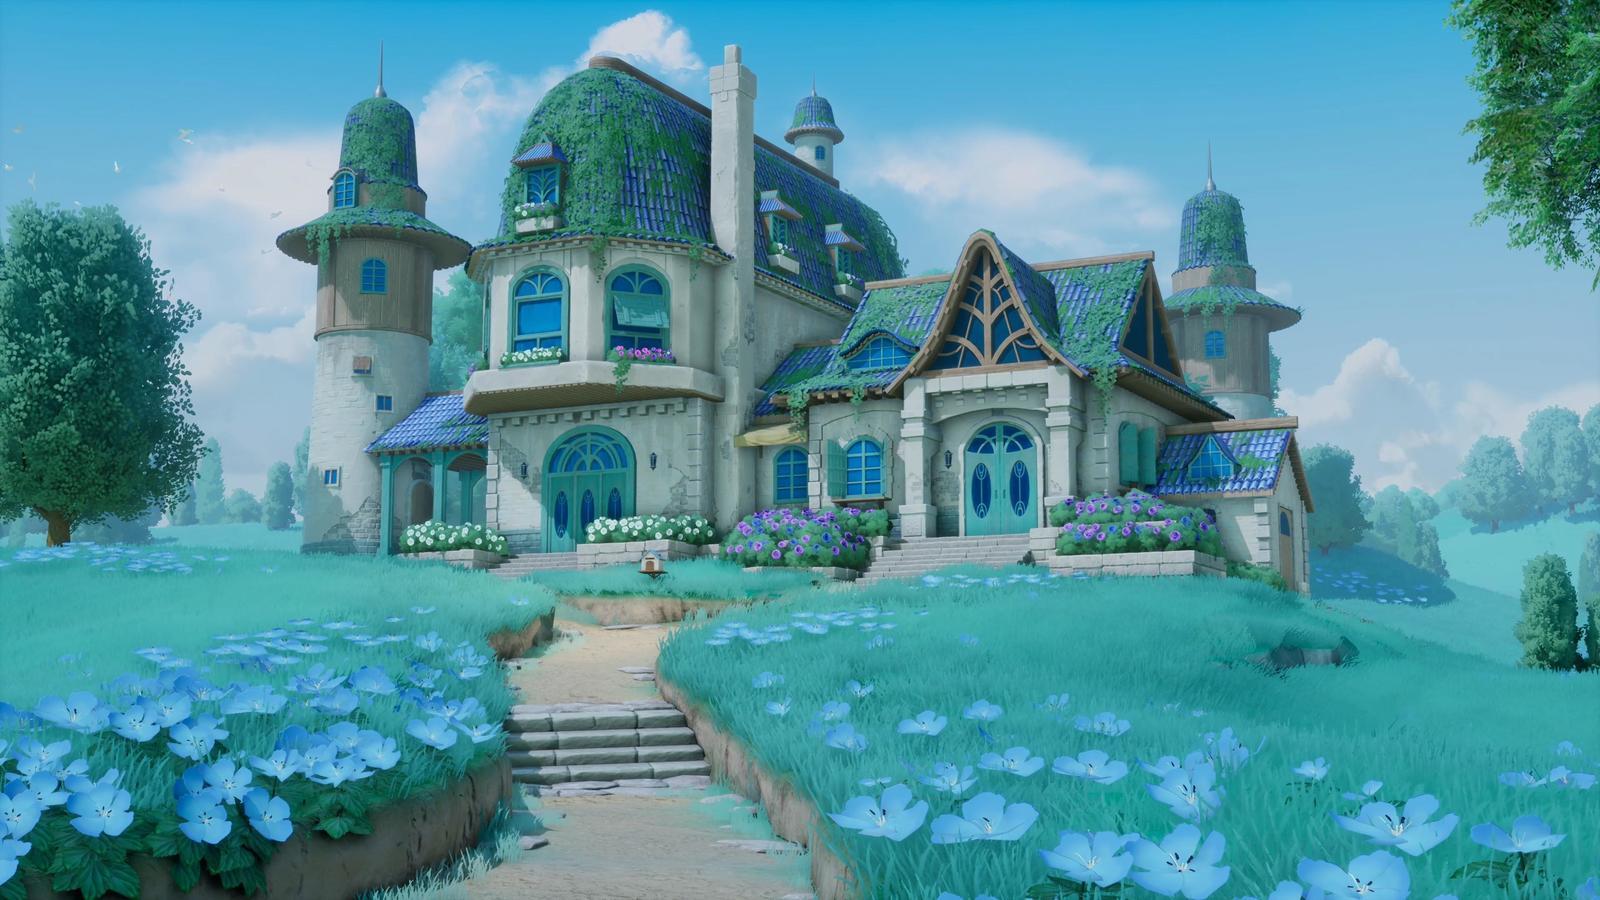
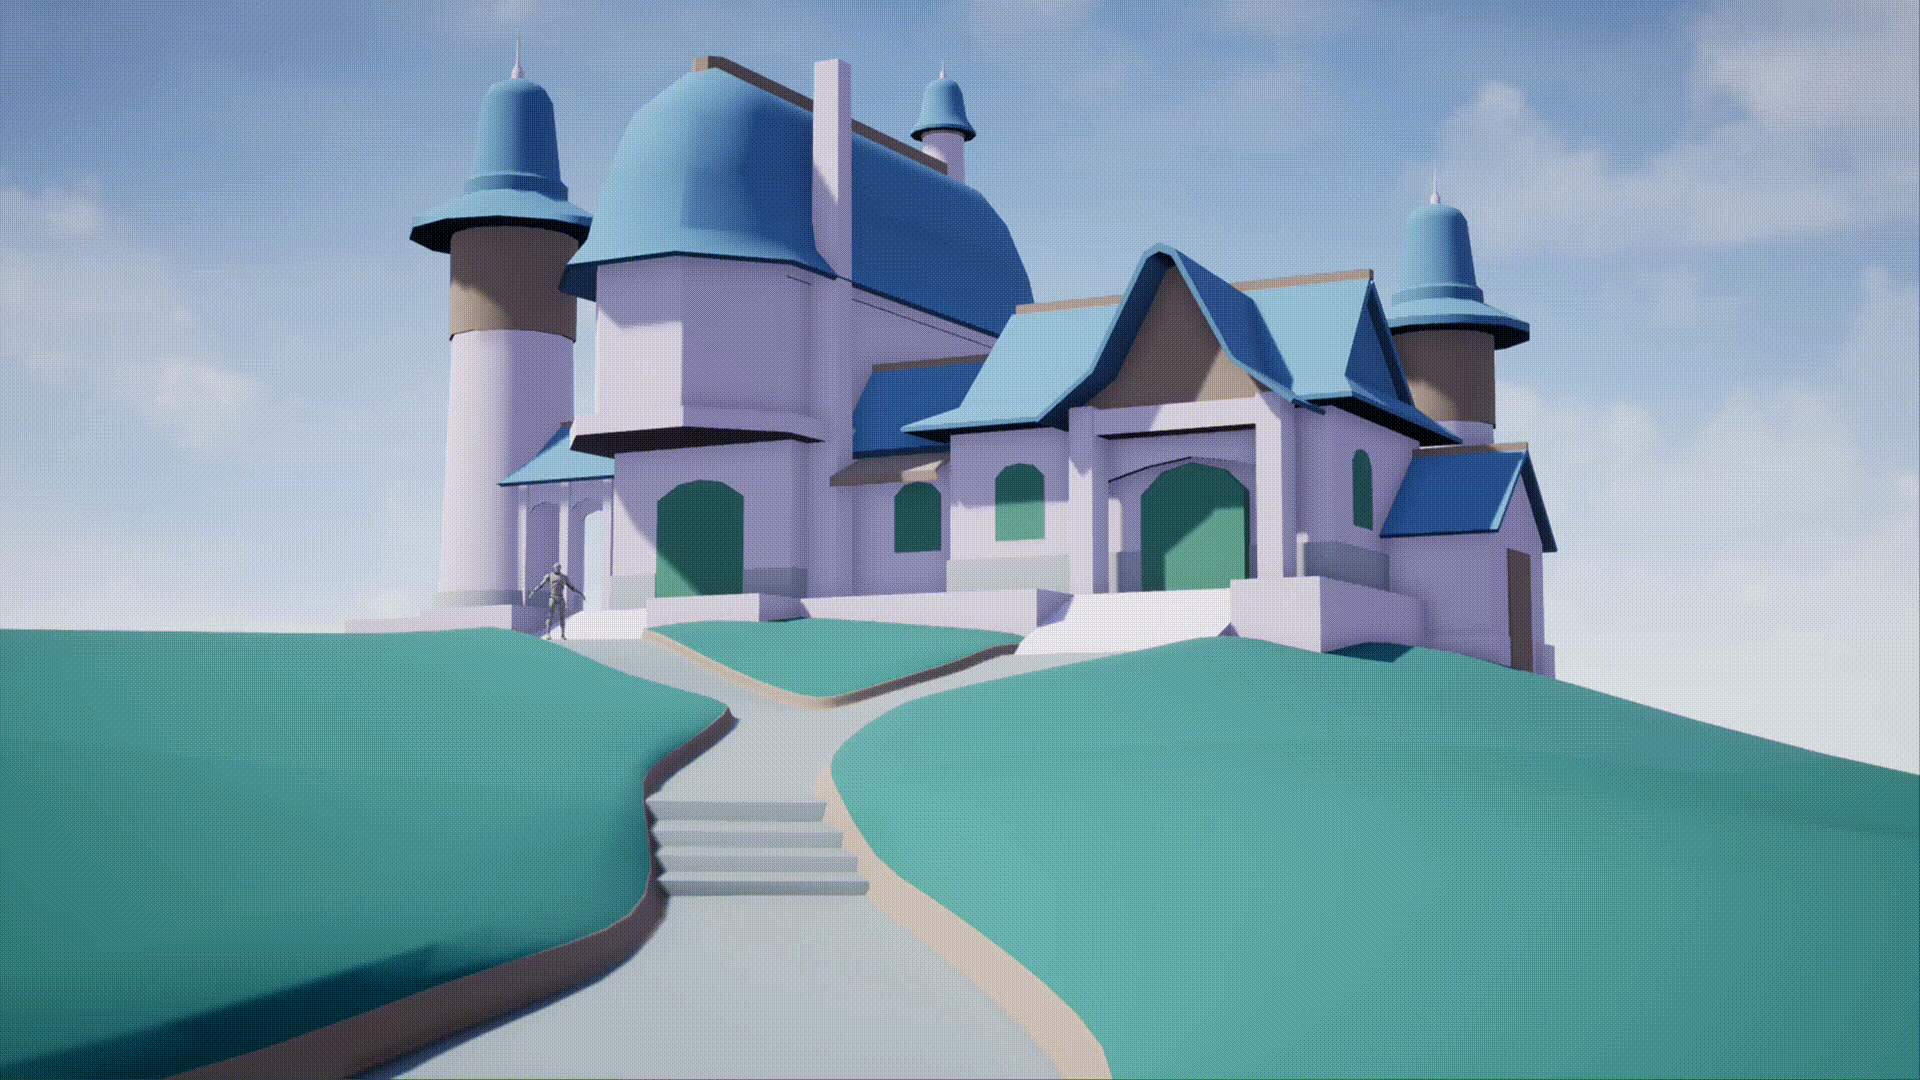
Azure Hillside

Introduction
My name is Zhang Jinlong (Rayson). I am 34 years old and have been engaged in 3D scene design-related work for more than 10 years. Right now I work for a metaverse technology company in Shenzhen, China.
Goals
I wanted to learn Unreal Engine and learn to create scenes there. So recently I signed up for a Bootcamp for Environment Artists held by Modeng (魔灯) and completed the “Azure Hillside Home” Unreal Engine project. The boot camp was very helpful in mastering the whole process of Unreal Engine asset creation, texture creation and in-engine environment art-related work.
I love this profession very much, and I hope to continue to develop and cultivate in this field in the days to come!
(The boot camp of Modeng is on CCtalk Platform link:https://www.cctalk.com/m/group/90493187)
Software
- 3DS Max
- ZBrush
- Substance Painter
- Substance Designer
- Speedtree
- Photoshop
- UE4
Starting Point
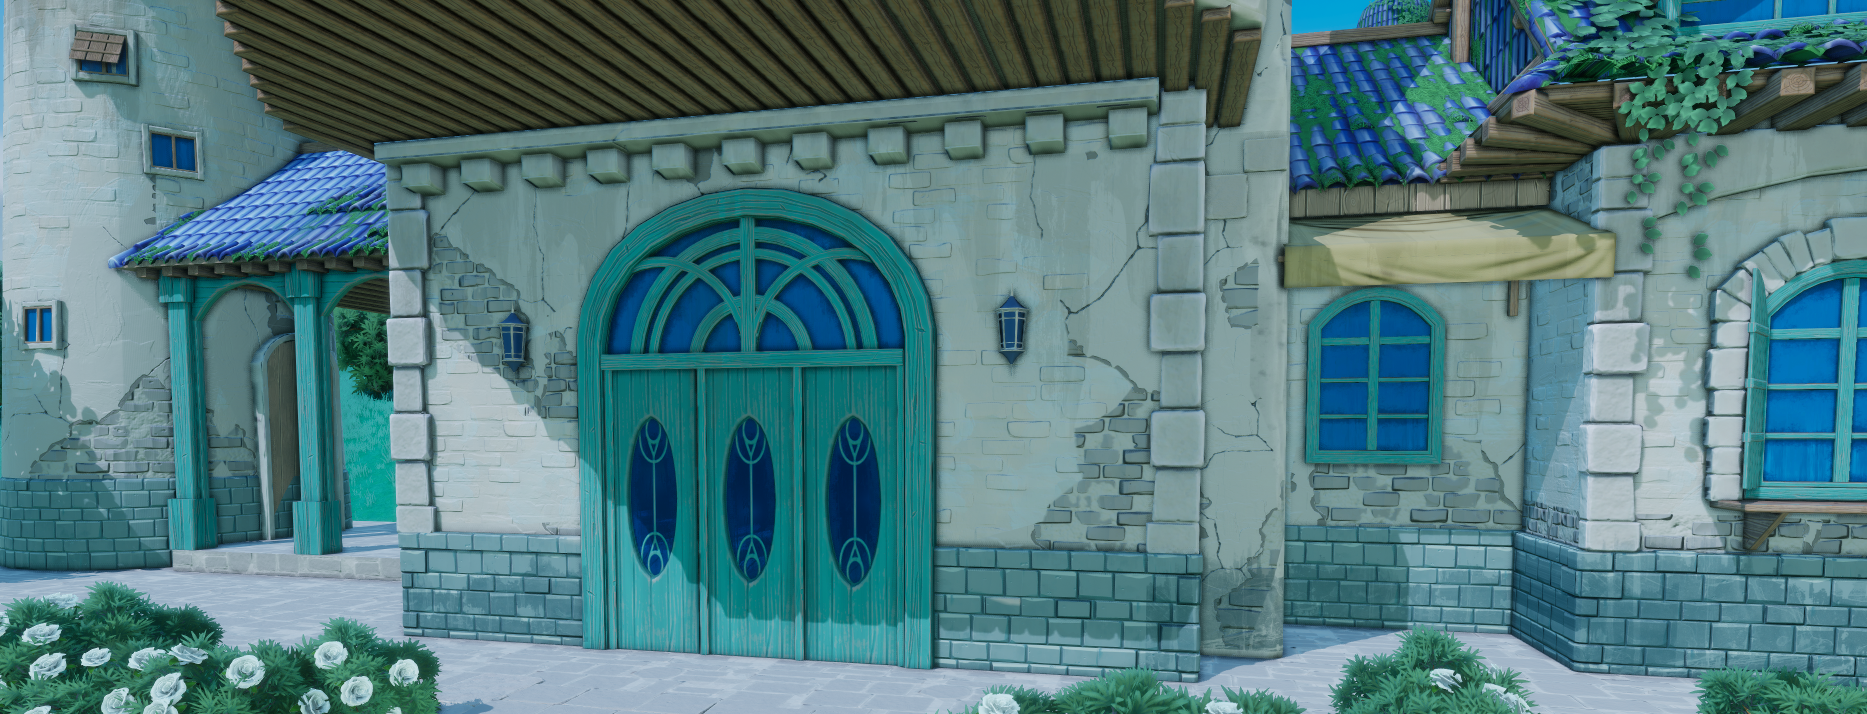
This original concept art that I used was painted by Pixel Cat!
The very rich associations forwarded to me, the melancholy and warm morning. The vine-covered hut and the carefully irrigated bonsai and blooming purple wildflowers indicate the protagonist’s psychological activities that yearn for comfort but fear the same.
At the same time, I also like the scheduling of long shots like in the movie “La La Land”, the lighting of the scene, the matching of colors, and the composition of the picture. Through different ways of expression, different emotions and atmospheres in the project can be more accurately expressed.
I think a successful movie or game behavior is the environment setting of the scenery that can sometimes successfully arouse my specific memories and poetic associations!
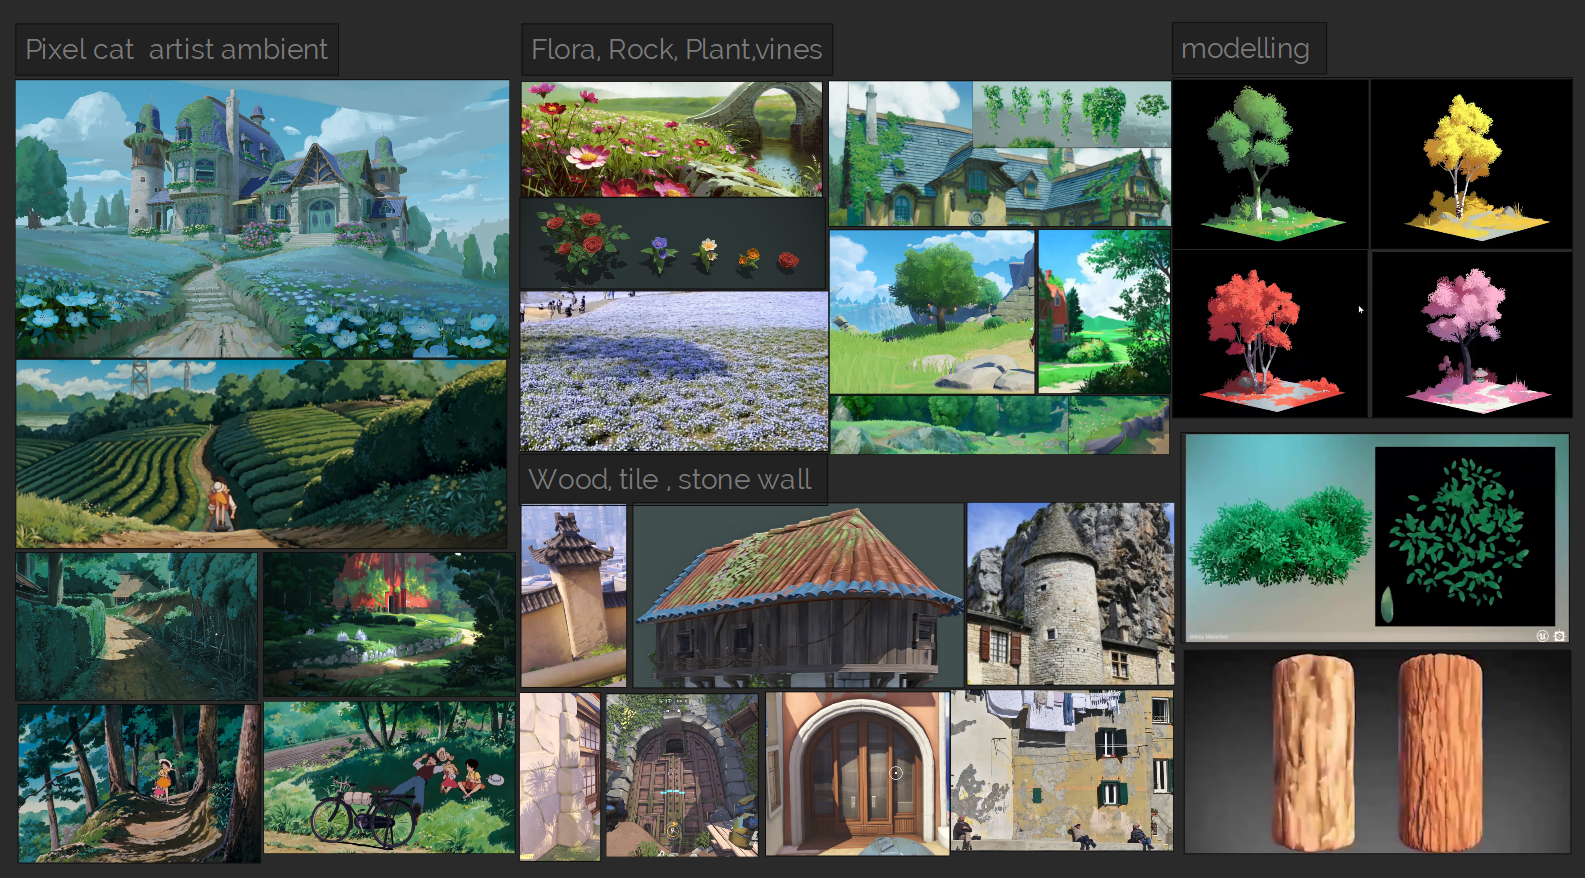
References
Before starting, I used to find relevant references. Having a story and background can be easily downloaded from the Internet. Pick the most relevant images.
This is my part of the reference:
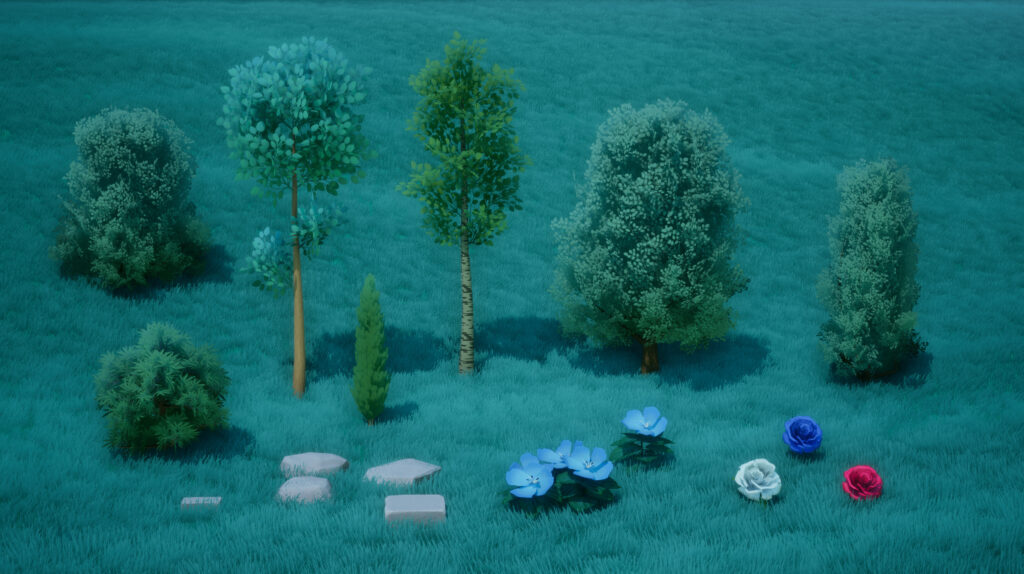
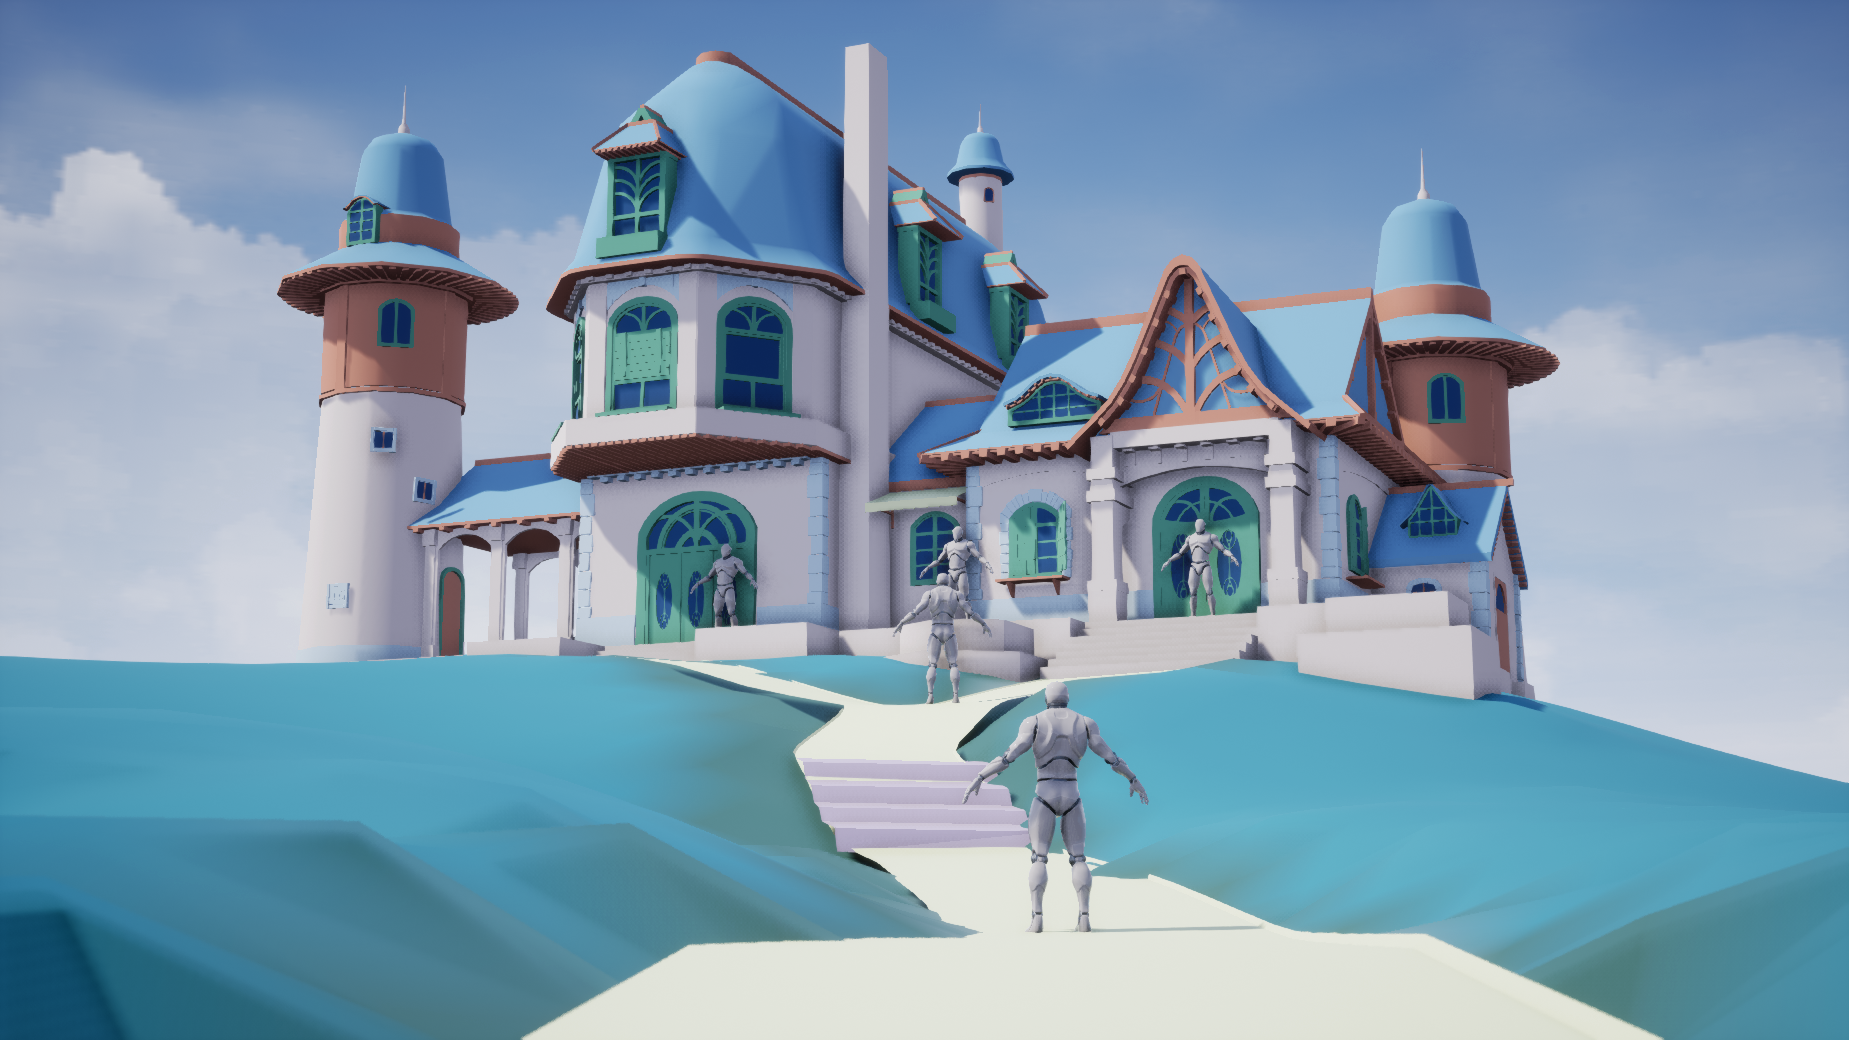
Blockout
Through a simple model, construction can roughly determine the proportion of the final model and the corresponding relationship between the model and the model, which can greatly improve the degree of restoration of the picture in the end.
Texture Planning
In order to avoid excessive space waste of textures and too many textures required by the scene, it is necessary to plan the use of UV textures for the entire scene in advance.
There are 3 main UV texture planning methods:
Full-scale texture:
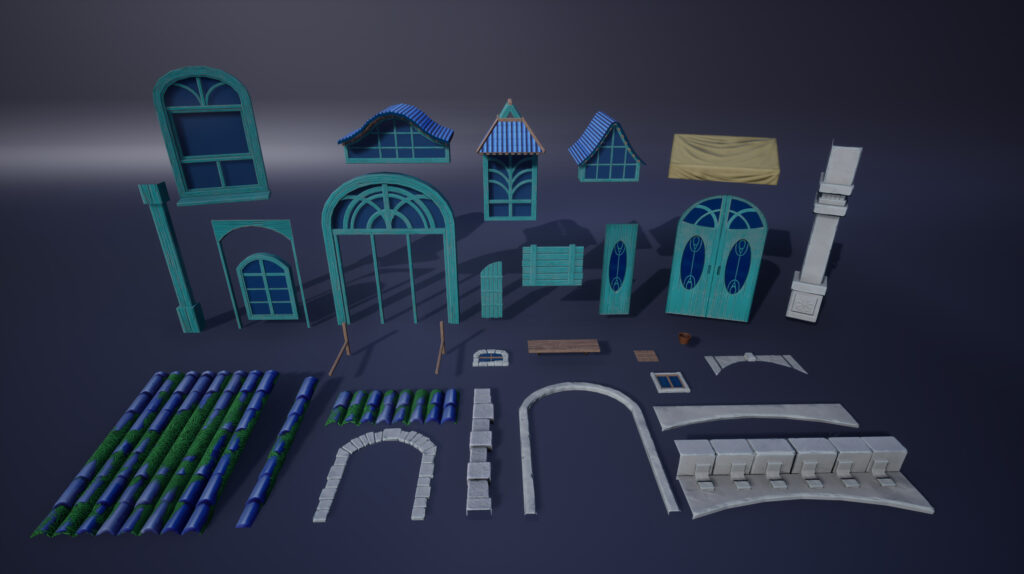
For props such as doors and windows, there are not many common parts, and various detailed textures will be made on them later.
Trim Sheets:
Bluestone bricks and long wooden strips have a high repetition in one direction. Using full-scale textures is obviously not the right choice.
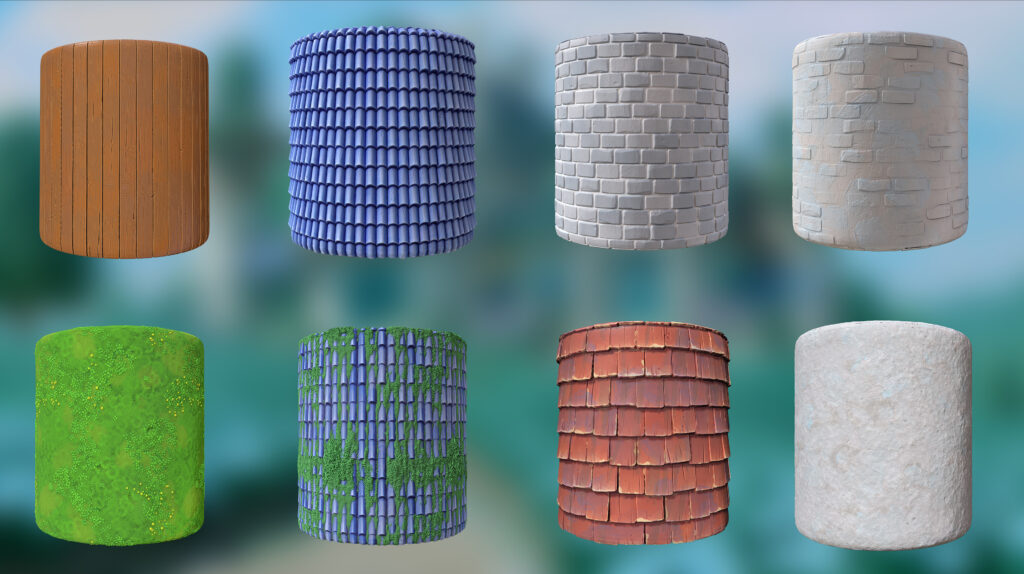
Tileable:
For the walls, roof tiles, ground and grass, the repetition rate in different directions is very high, and the vertex color mixing will be used in the later stage, and the continuity of the four direction maps will be used.
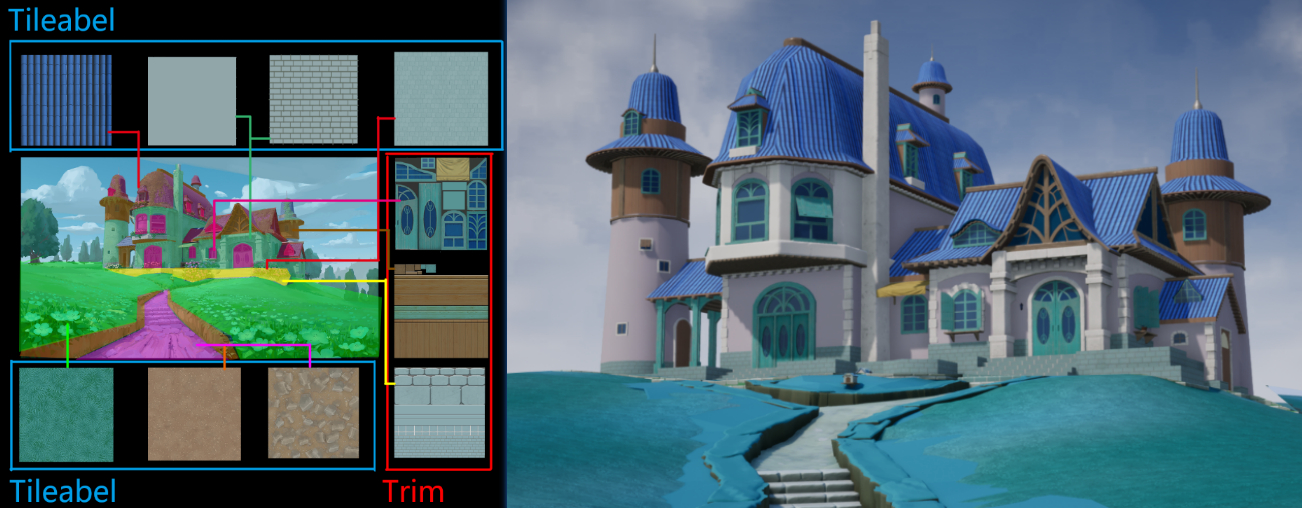
Trim Sheets texture is a cool way of texture arrangement, it can express a very wide variety of models with one picture, take me as an example of making wooden strips, I divide the wooden strips into different thicknesses, and make it The cross-section of different thicknesses can be achieved by adjusting the UV, with a head-to-tail wood strip structure and no obvious seams.

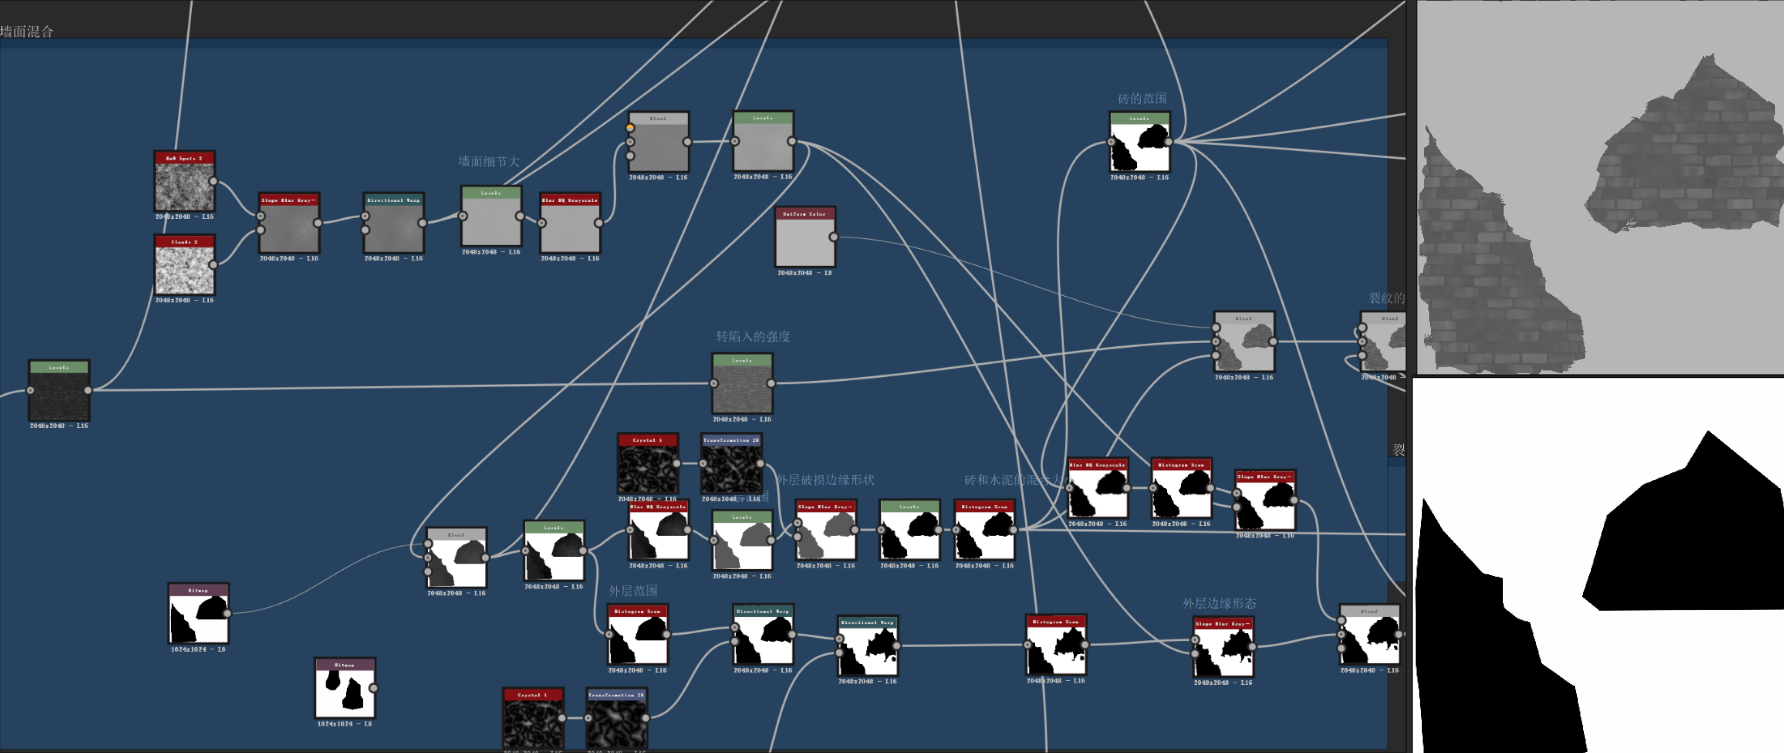
Substance Designer and UE4 Vertex Colors
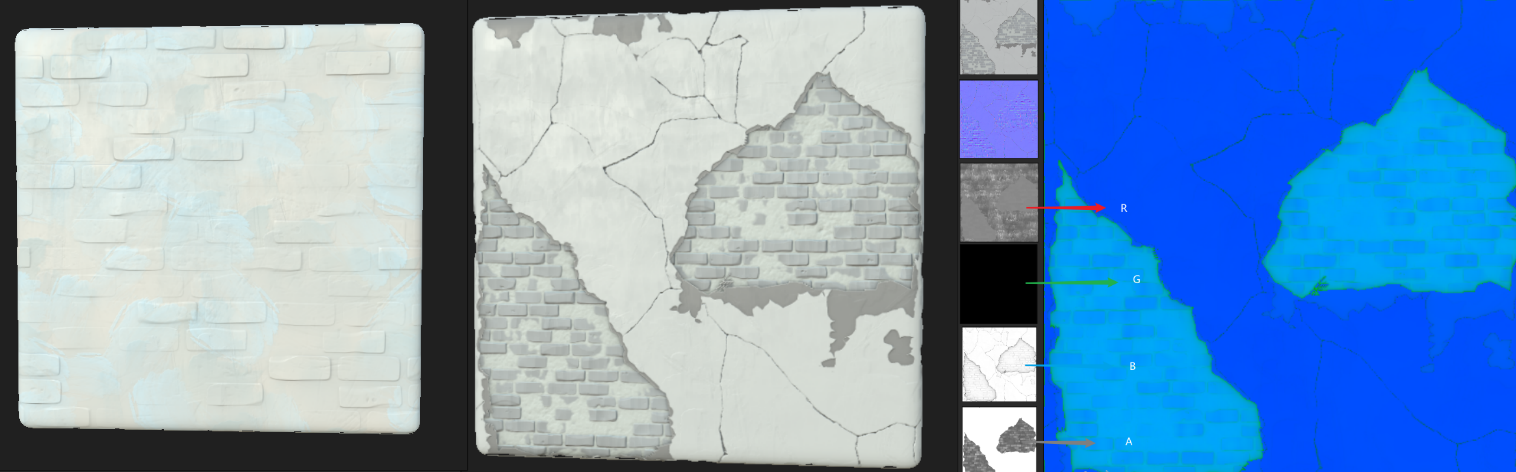
For the tileable texture I used Substance 3D Designer, it can perfectly and quickly realize multiple repeated PBR textures, more importantly, it can be easily realized with UE4 height mixing, which is close to the real damage effect. With this method, vertex painting, the texture will not look very repetitive. Next, I will break this workflow down in detail, and with many pictures.
- Make the basic shape of bricks.
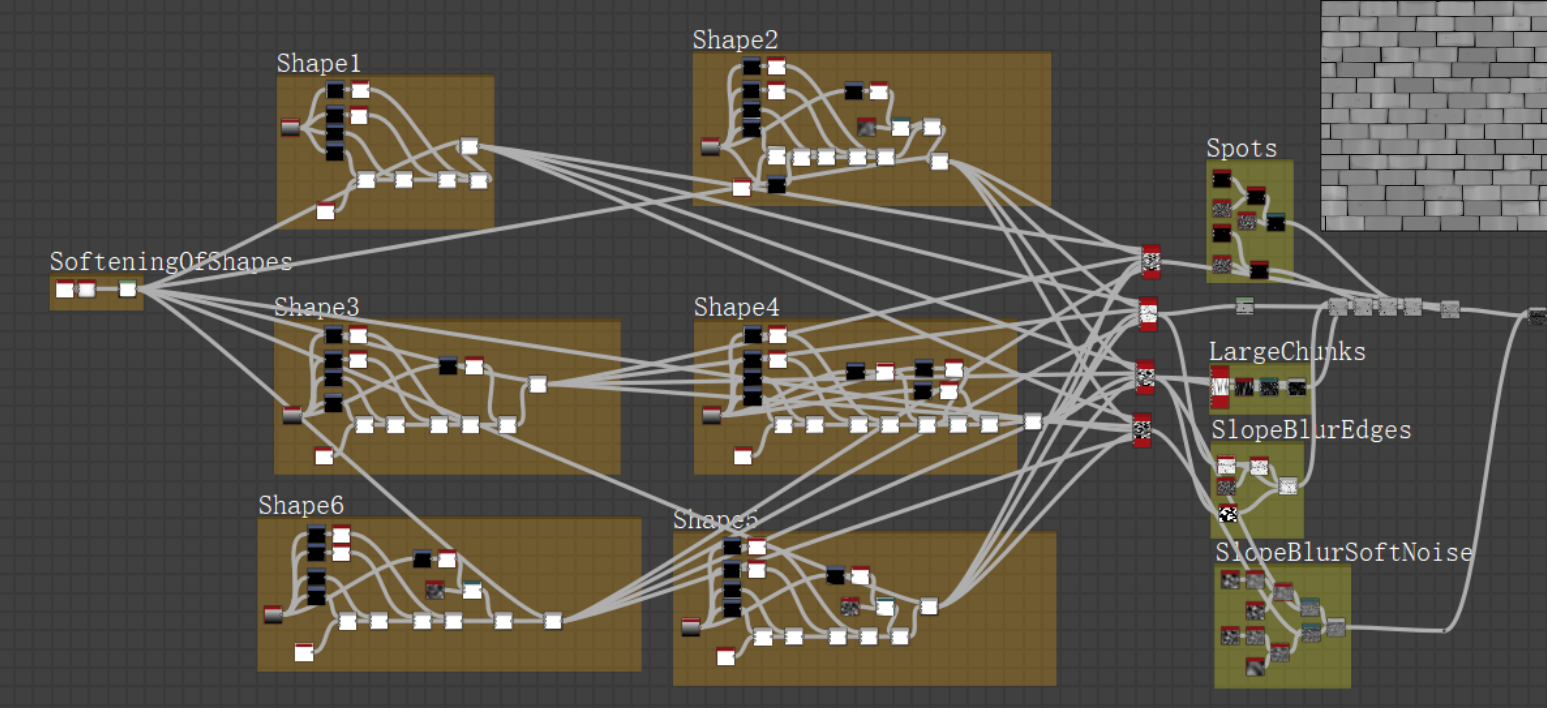
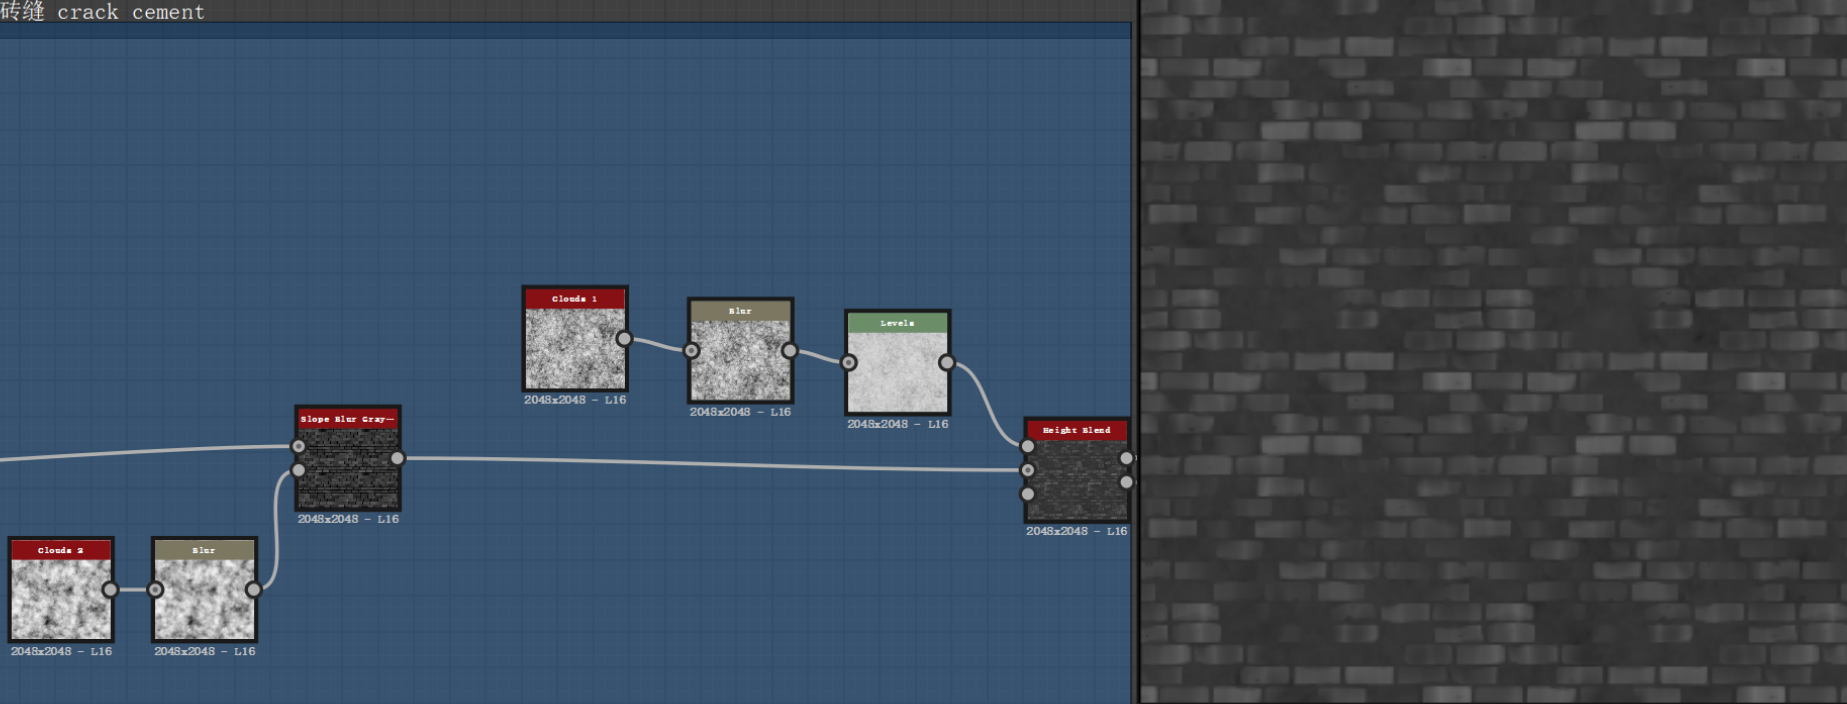
- Mix the cement and brick joints through the height Blend node.
- Draw the damaged area through Photoshop, blend the wall paint with the bricks, and get this Effect.
- Make the mask off the wall surface crack.
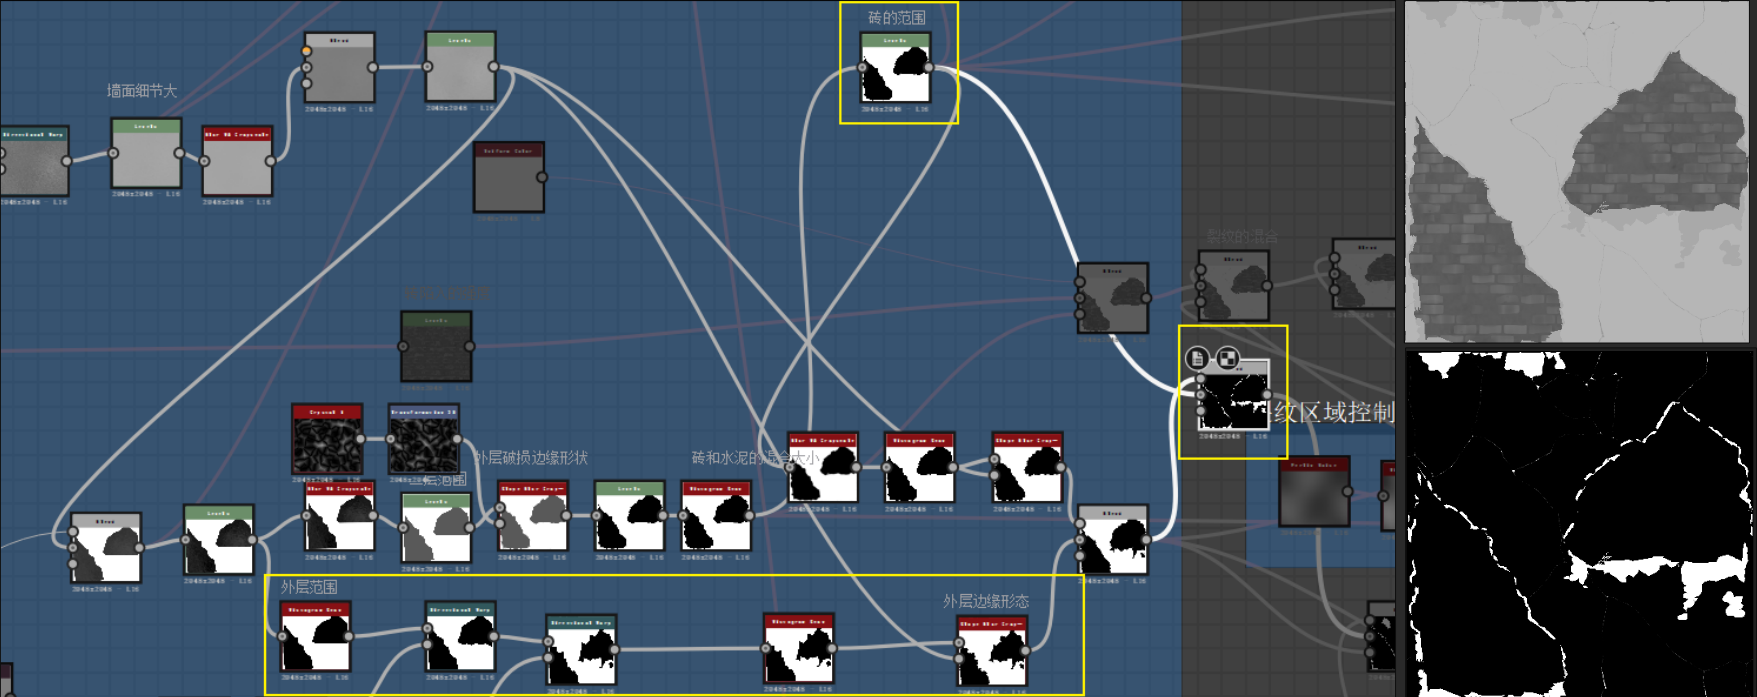
- Getting the above masks, we can add node blending to control the color of each mask.
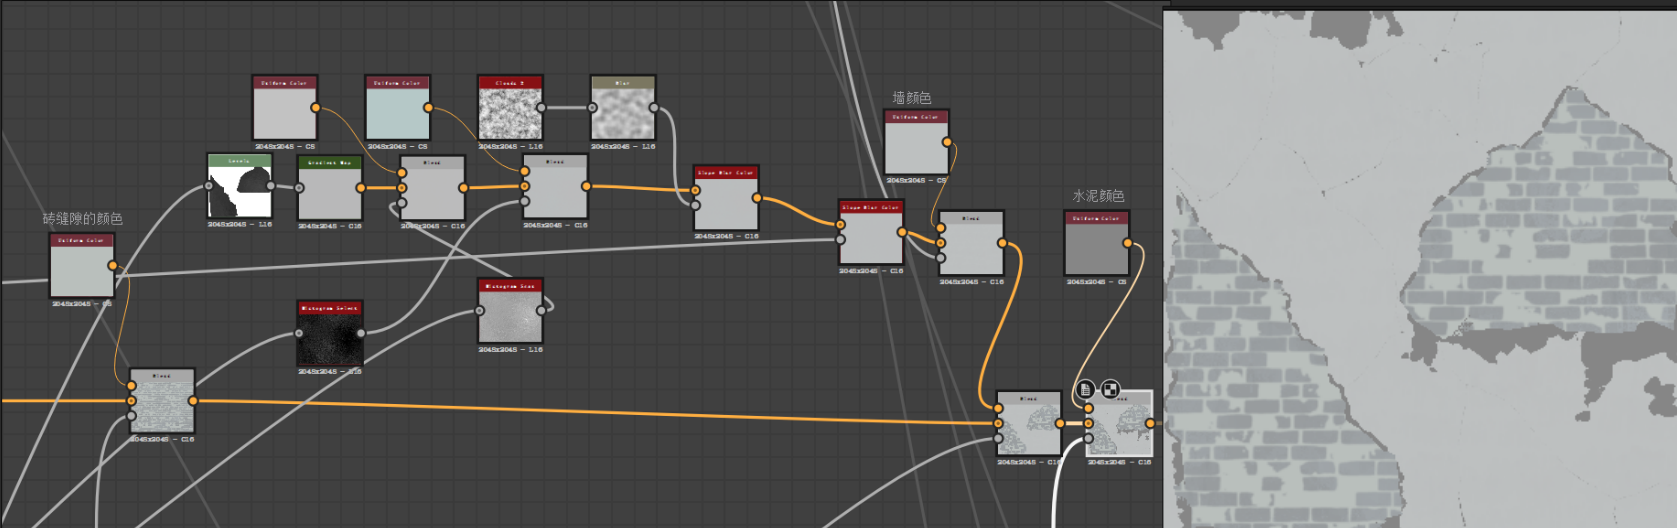
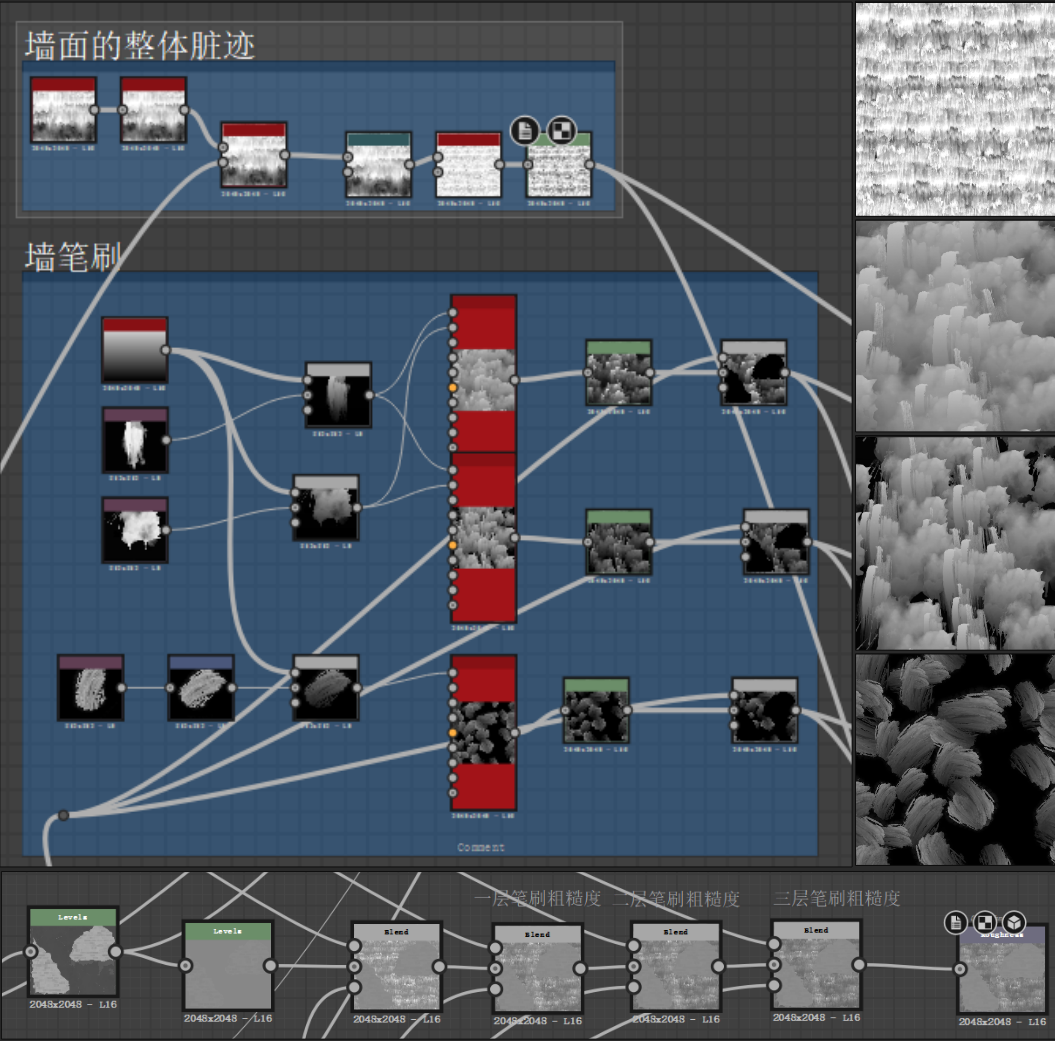
- In order to increase the blending degree of the material, we added the brush effect and the wall dirt effect. Superimposed under the roughness node.

- Separately outputs complete and damaged walls’ textures. The base color, normal, roughness, metallic, AO and height maps. Here I merged the later 4 textures into one file and export them.
- Into UE4 to connect the vertex color control node.

Vertex Painting Process
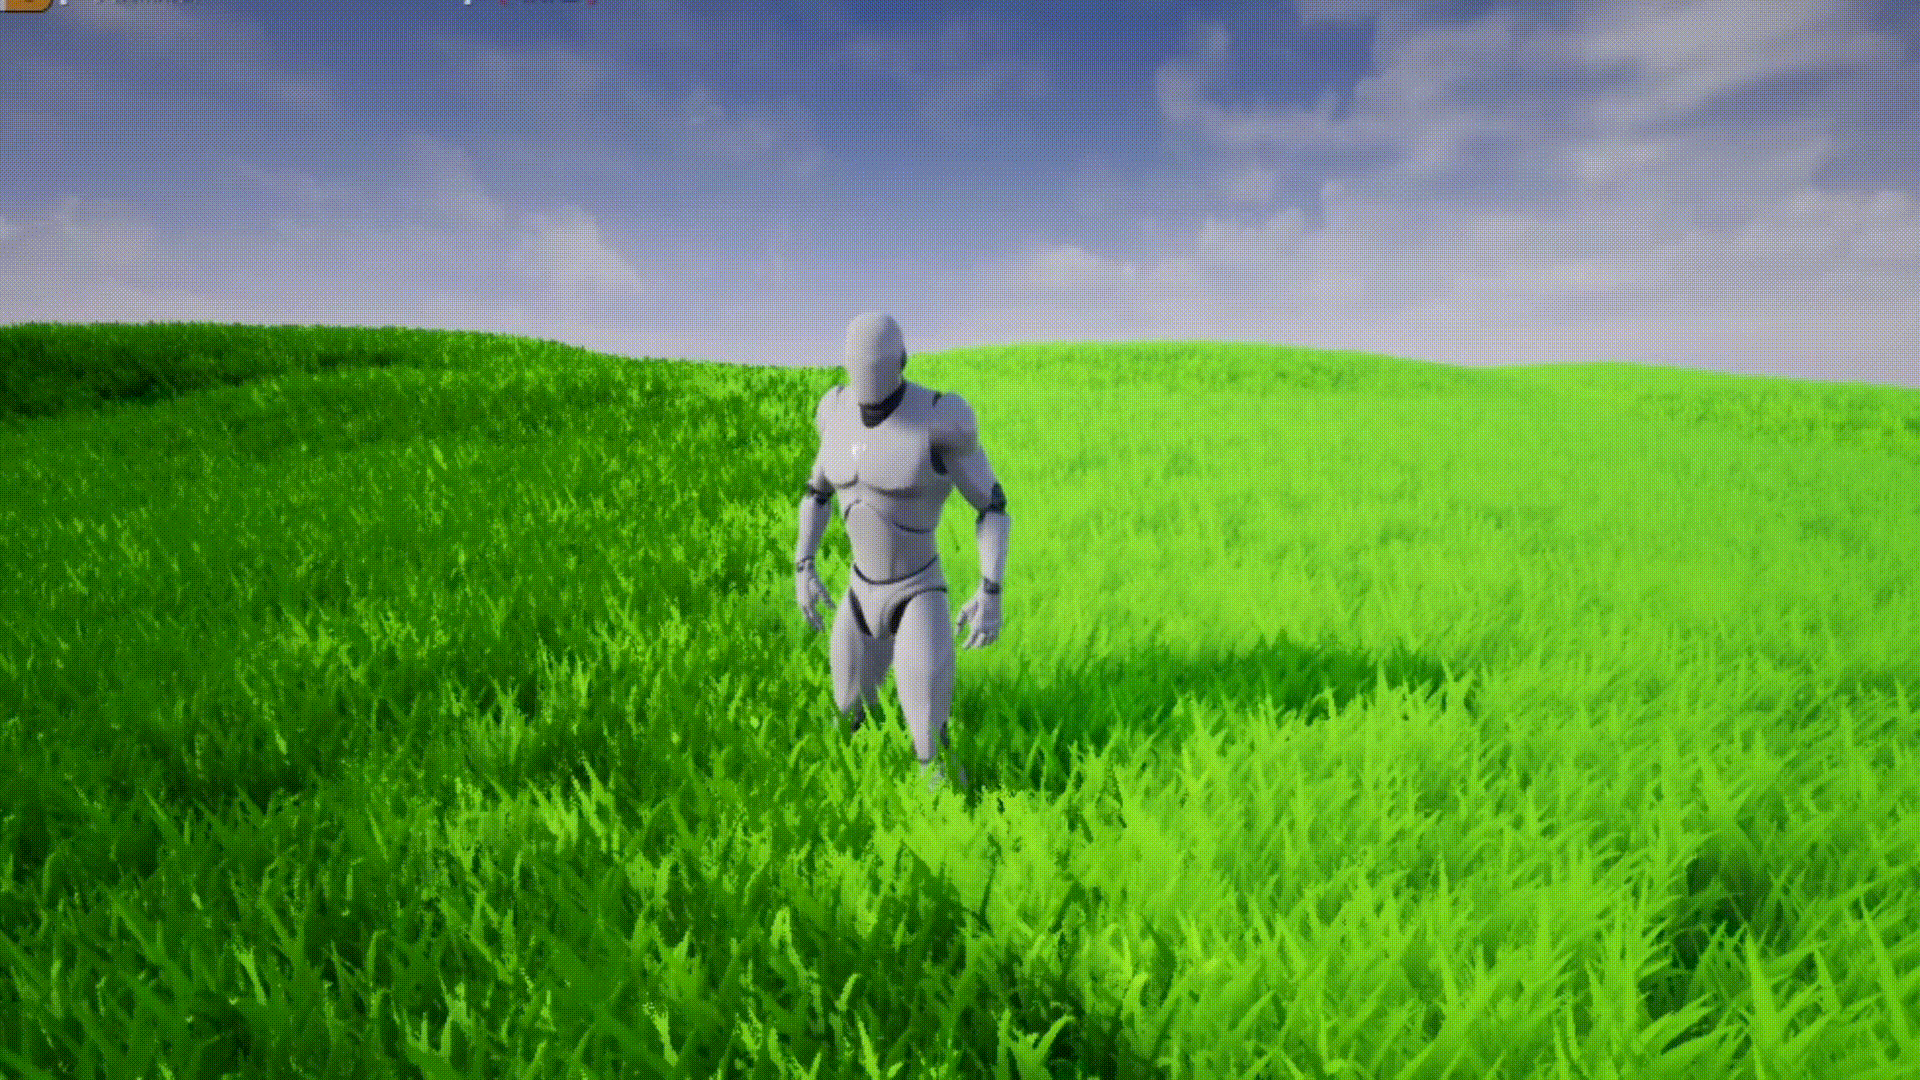
Grass & RVT function settings
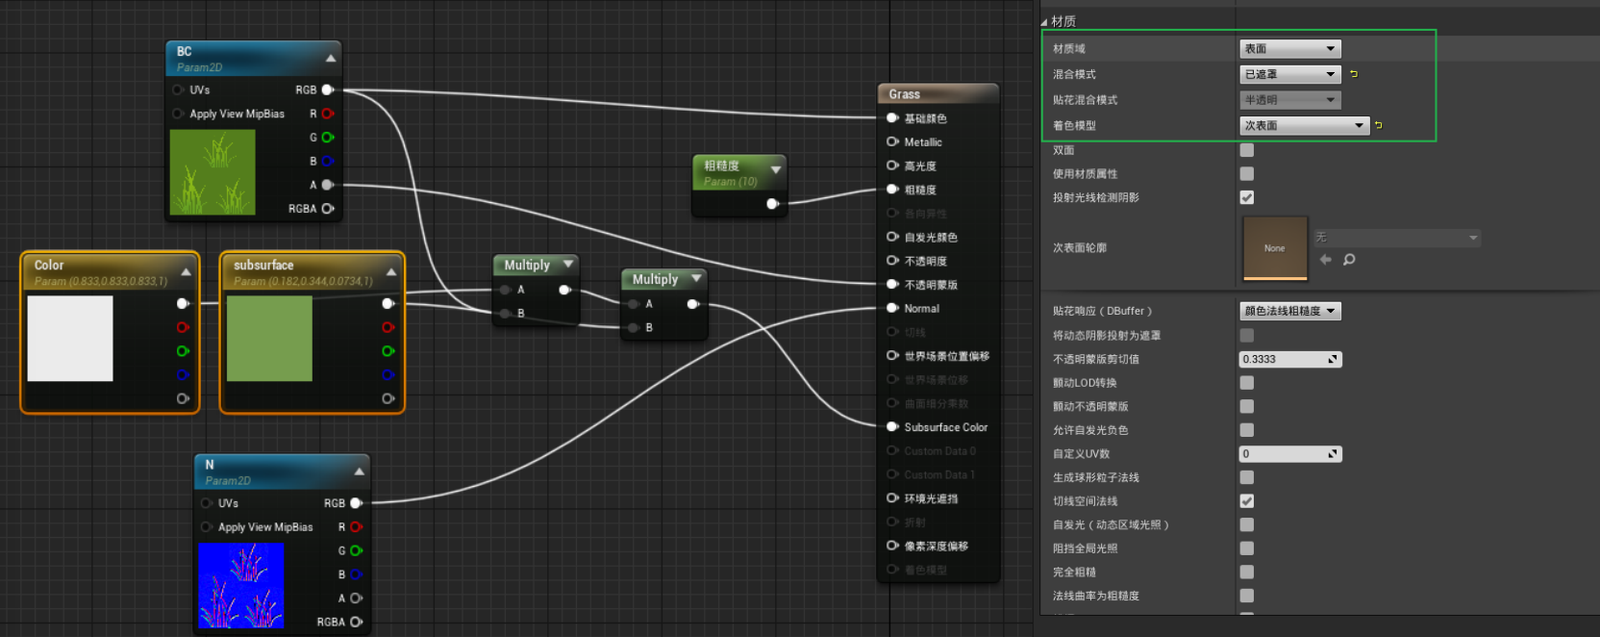
Then I will share the grass creation process in detail. Where will cover the points to pay attention to in the model, the basic material and wheat wave effect in UE4, cooperating with the UE4 engine virtual texture (RVT) to deal with the natural color transition.
- The basic grass material.
- Grass model and adjust the normal direction, making all the normal upwards.
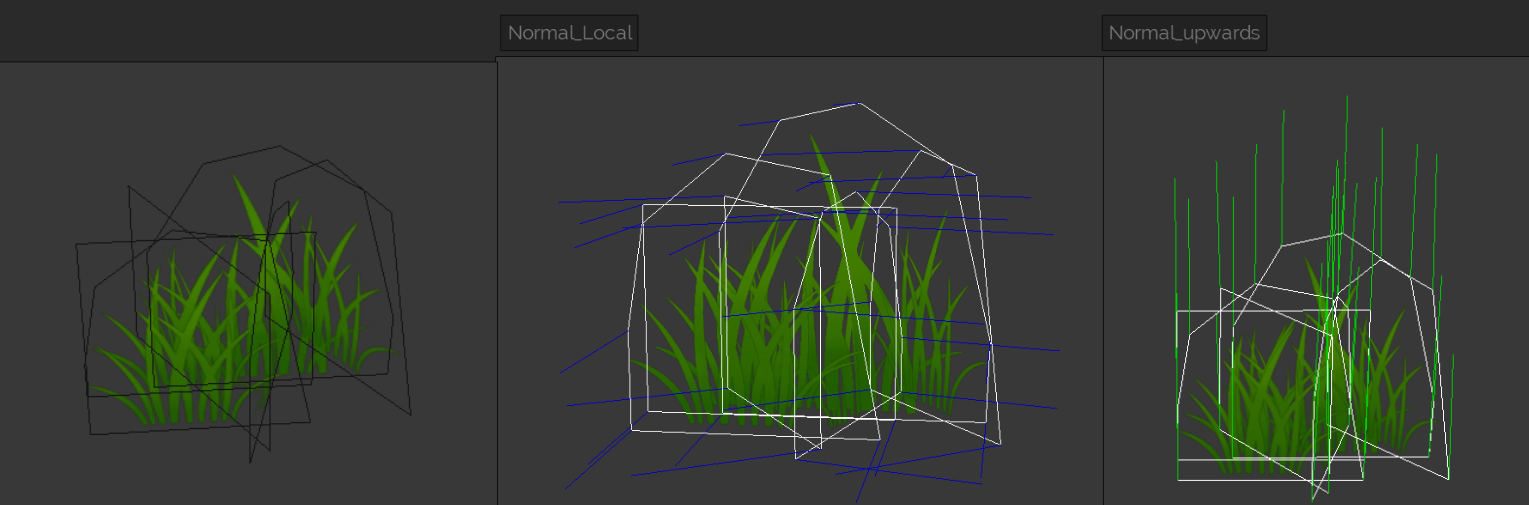
- The normal on the right is facing up and displays a uniform color. The normal on the left is not adjusted. The color of the normal itself is messy.

- In order to allow the weeds to swing correctly, make a gradient for the top and roots of the grass, so that the upper part of the grass moves more strongly than the roots, and at the same time use two colors to dynamically control the upper and lower colors.
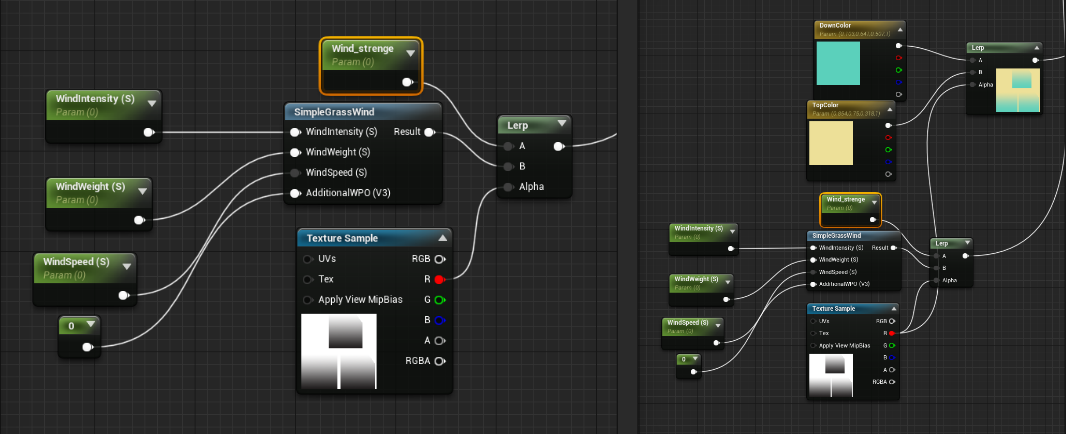
- Make the wheat wave effect through mathematical operations, and mix it in through the lerp node.
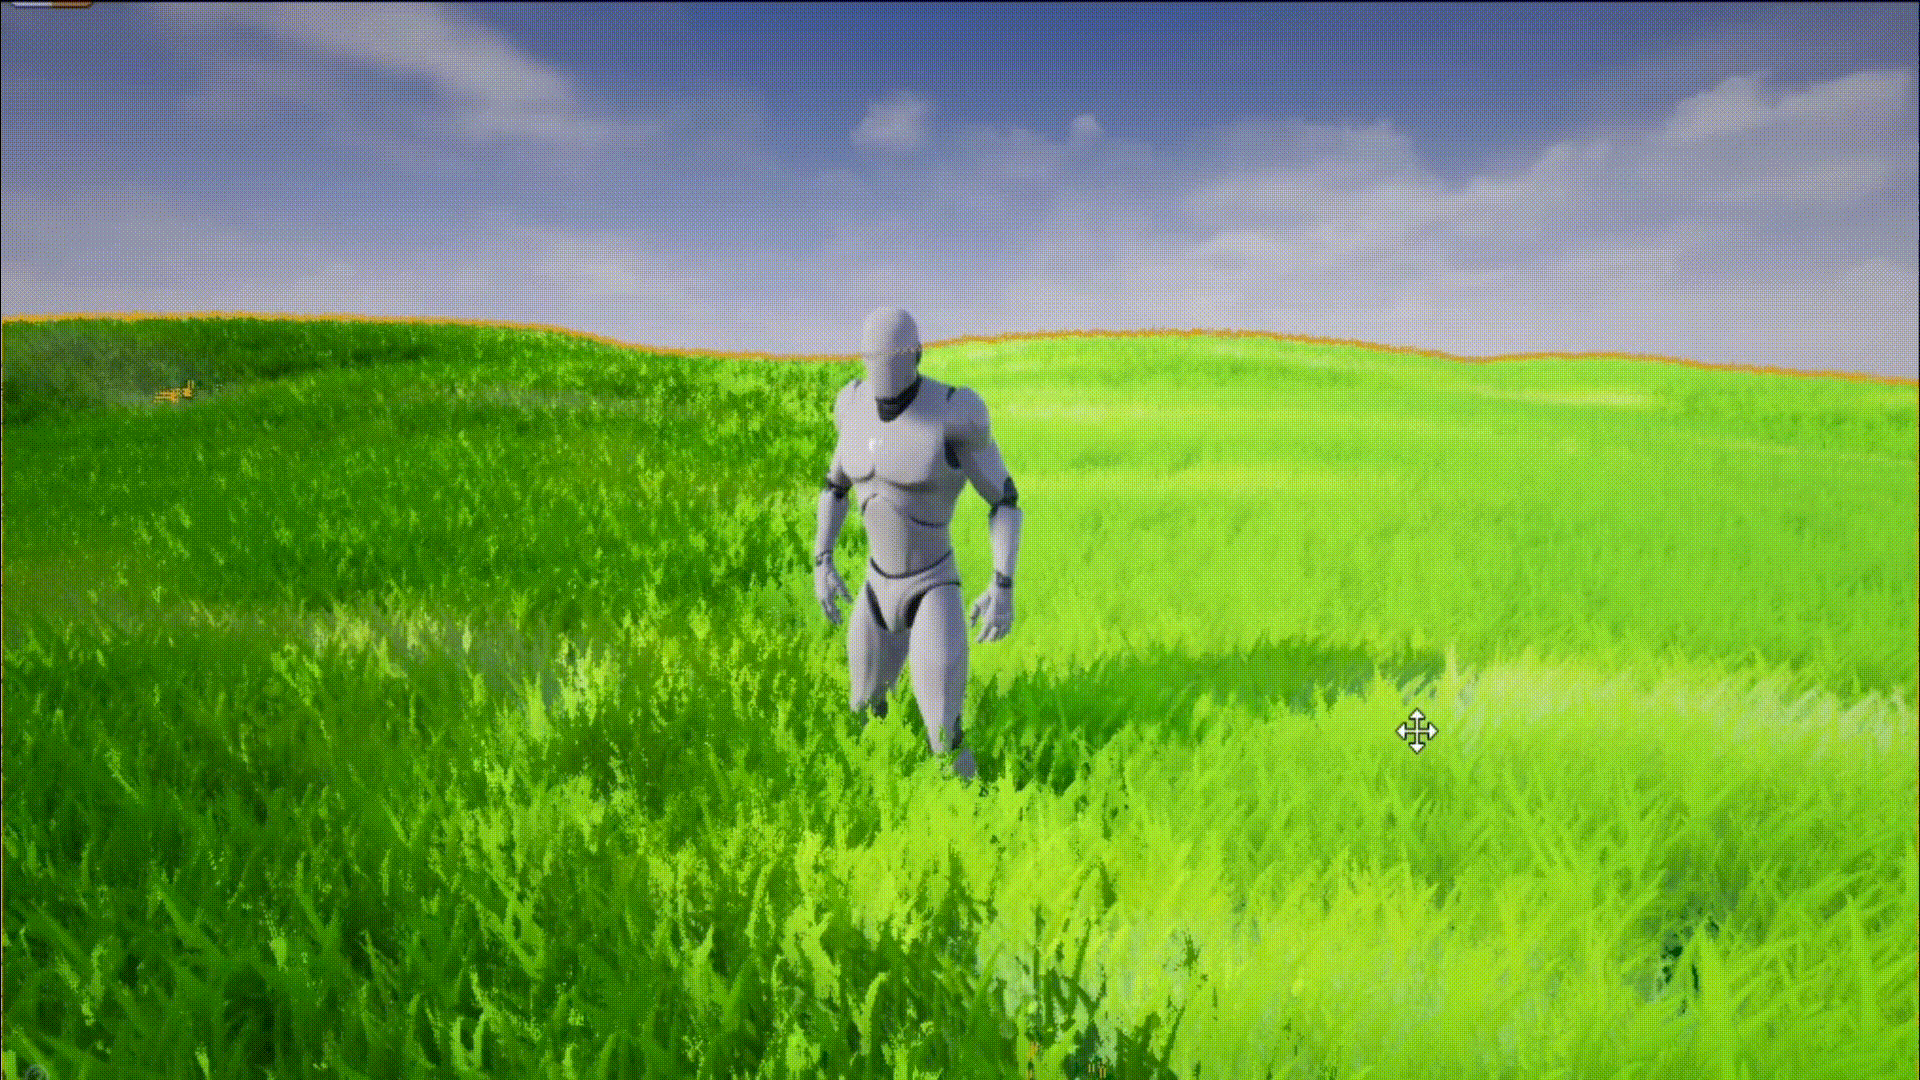

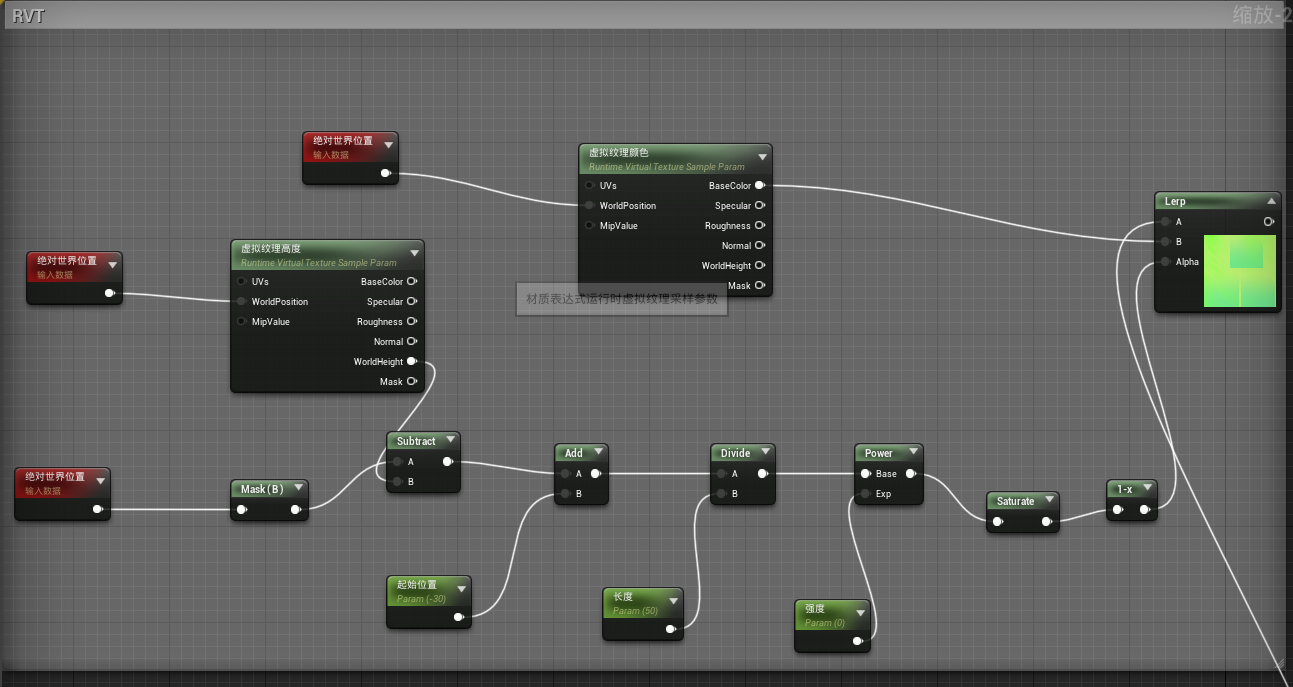
- In order to avoid the blunt connection between the terrain and the grass, using RuntimeVirtualTextureVolume can be better-realized Grass and ground fusion effect and blend in through lerp and grass color nodes.
Conclusion
Finally, I am very grateful to the teacher 魔灯 for his serious careful feedback, and for constantly extracting valuable opinions on the picture effect!
If you have finished reading this article, thank you for taking the time to read my article about game art. I hope some of the tips I share help you on your artistic journey, good luck!
Read more articles
You might also like these articles.