
Introduction
My name is Muhammad Masab Omair - A 25 years old self-taught 3D Prop Artist from Pakistan. I’ve been into 3D for three years, now I'm currently working as a 3D Generalist at FRAG Games (Indie Game Studio).

Goals
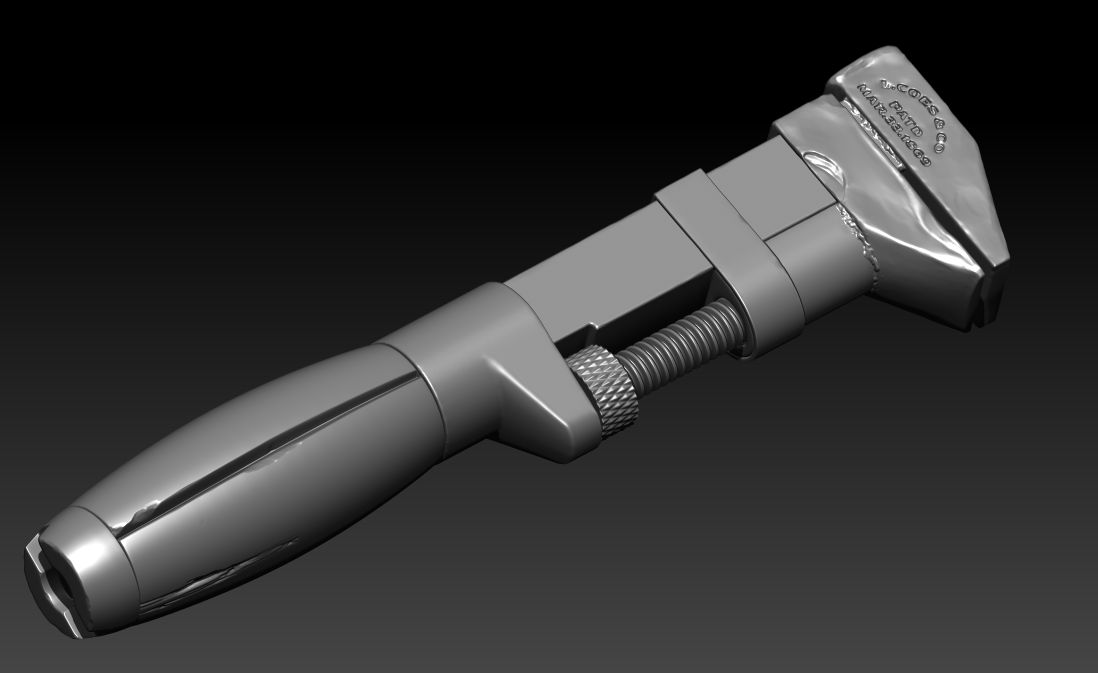
The main goal for me was to achieve realistic-looking texture and push my texturing skill.
Setting up goal really help and that will make you take certain decisions throughout the project, i.e. for me, my plan was to model a simple prop but make it look as realistic as possible.
Tools & Software
The tools I used for this project are:
- Blender (for Modeling Blockout, Retopology & UVs)
- Zbrush (for Highpoly and Adding Details)
- Marmoset Toolbag 4 (for Texture Map Baking and Rendering/Lighting)
- Adobe Substance Painter (for Texturing)
References & Inspiration
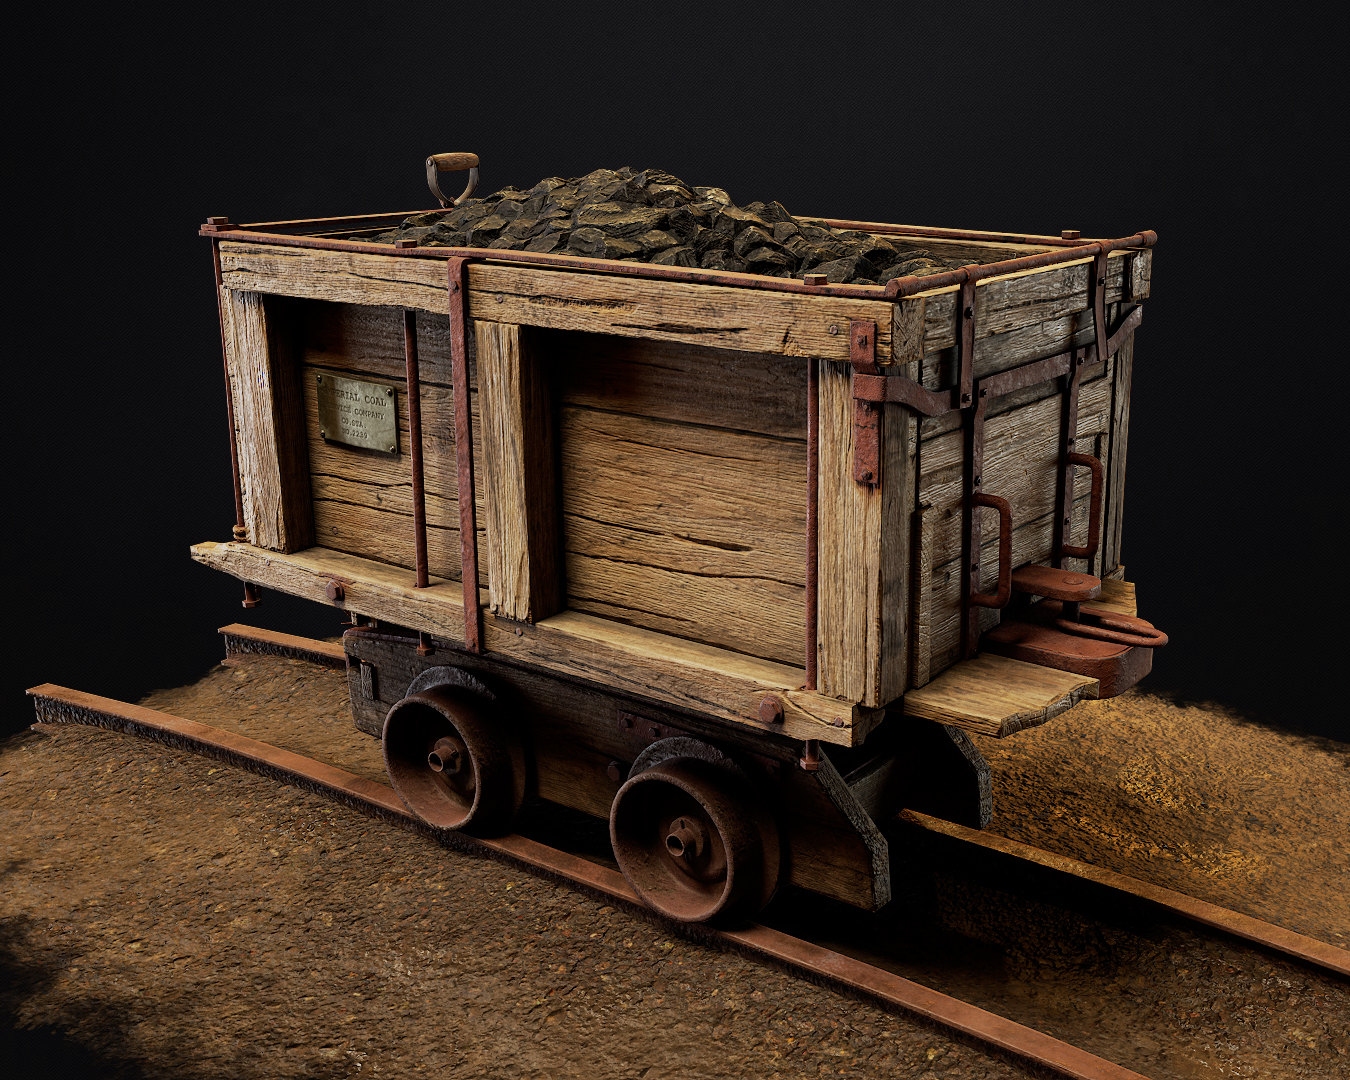
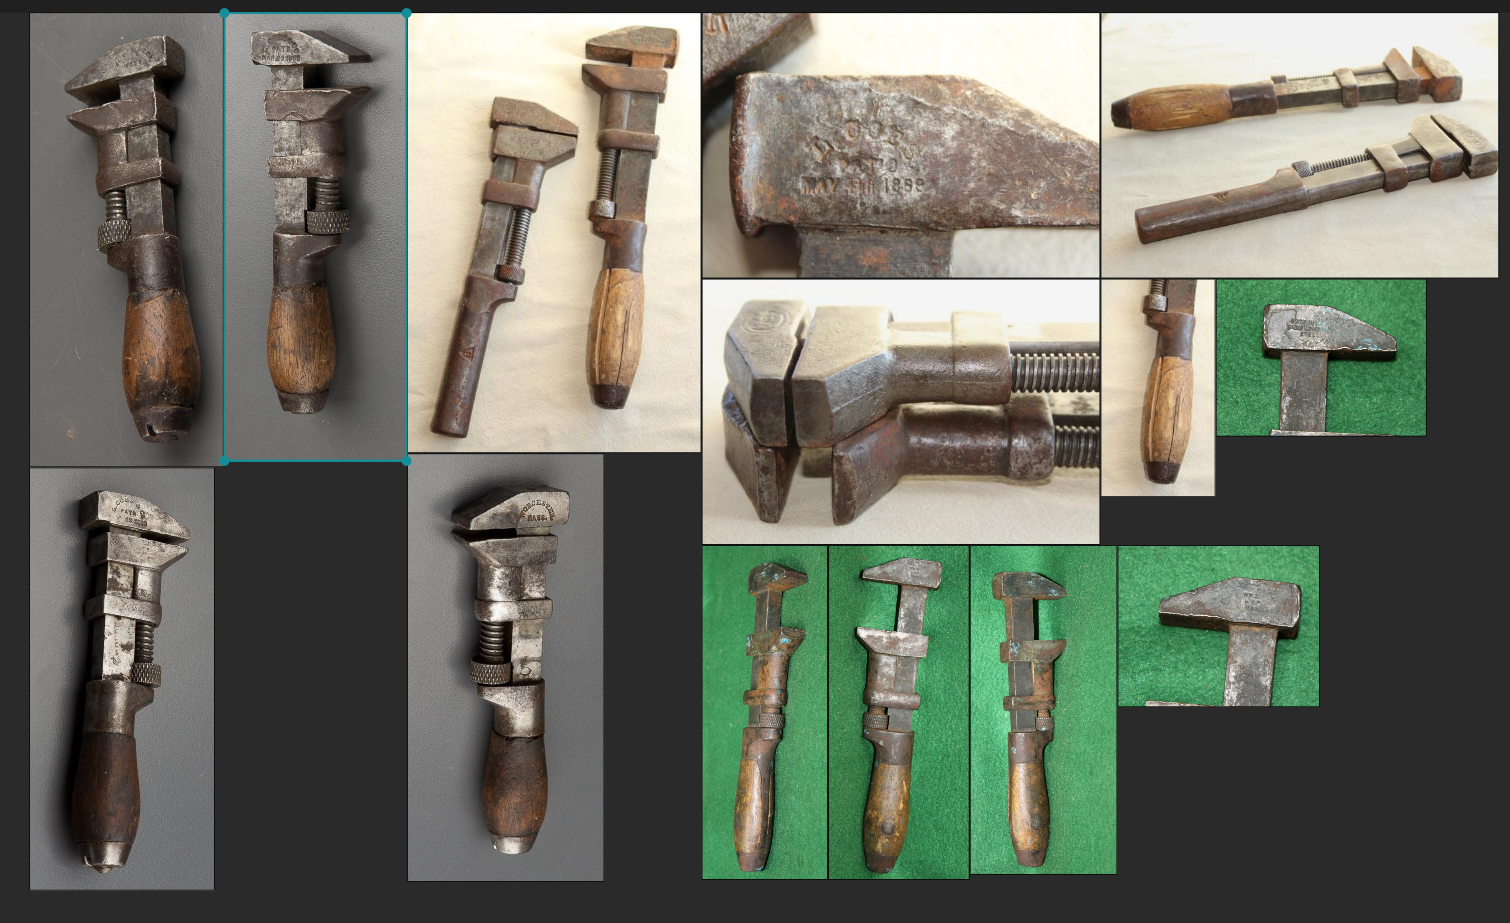
Since my plan was to create a real-world antique asset, I had the advantage of gathering as many references as possible.
My go-to Website option for reference collection for such projects is (besides Google and Pinterest):
Pic Click: https://picclick.com/ (or) any other auction sites.
Not only you’ll find hundreds of similar references but you’ll also be able to gather HD images, which is also quite important in order to mimic the exact texture from the reference.
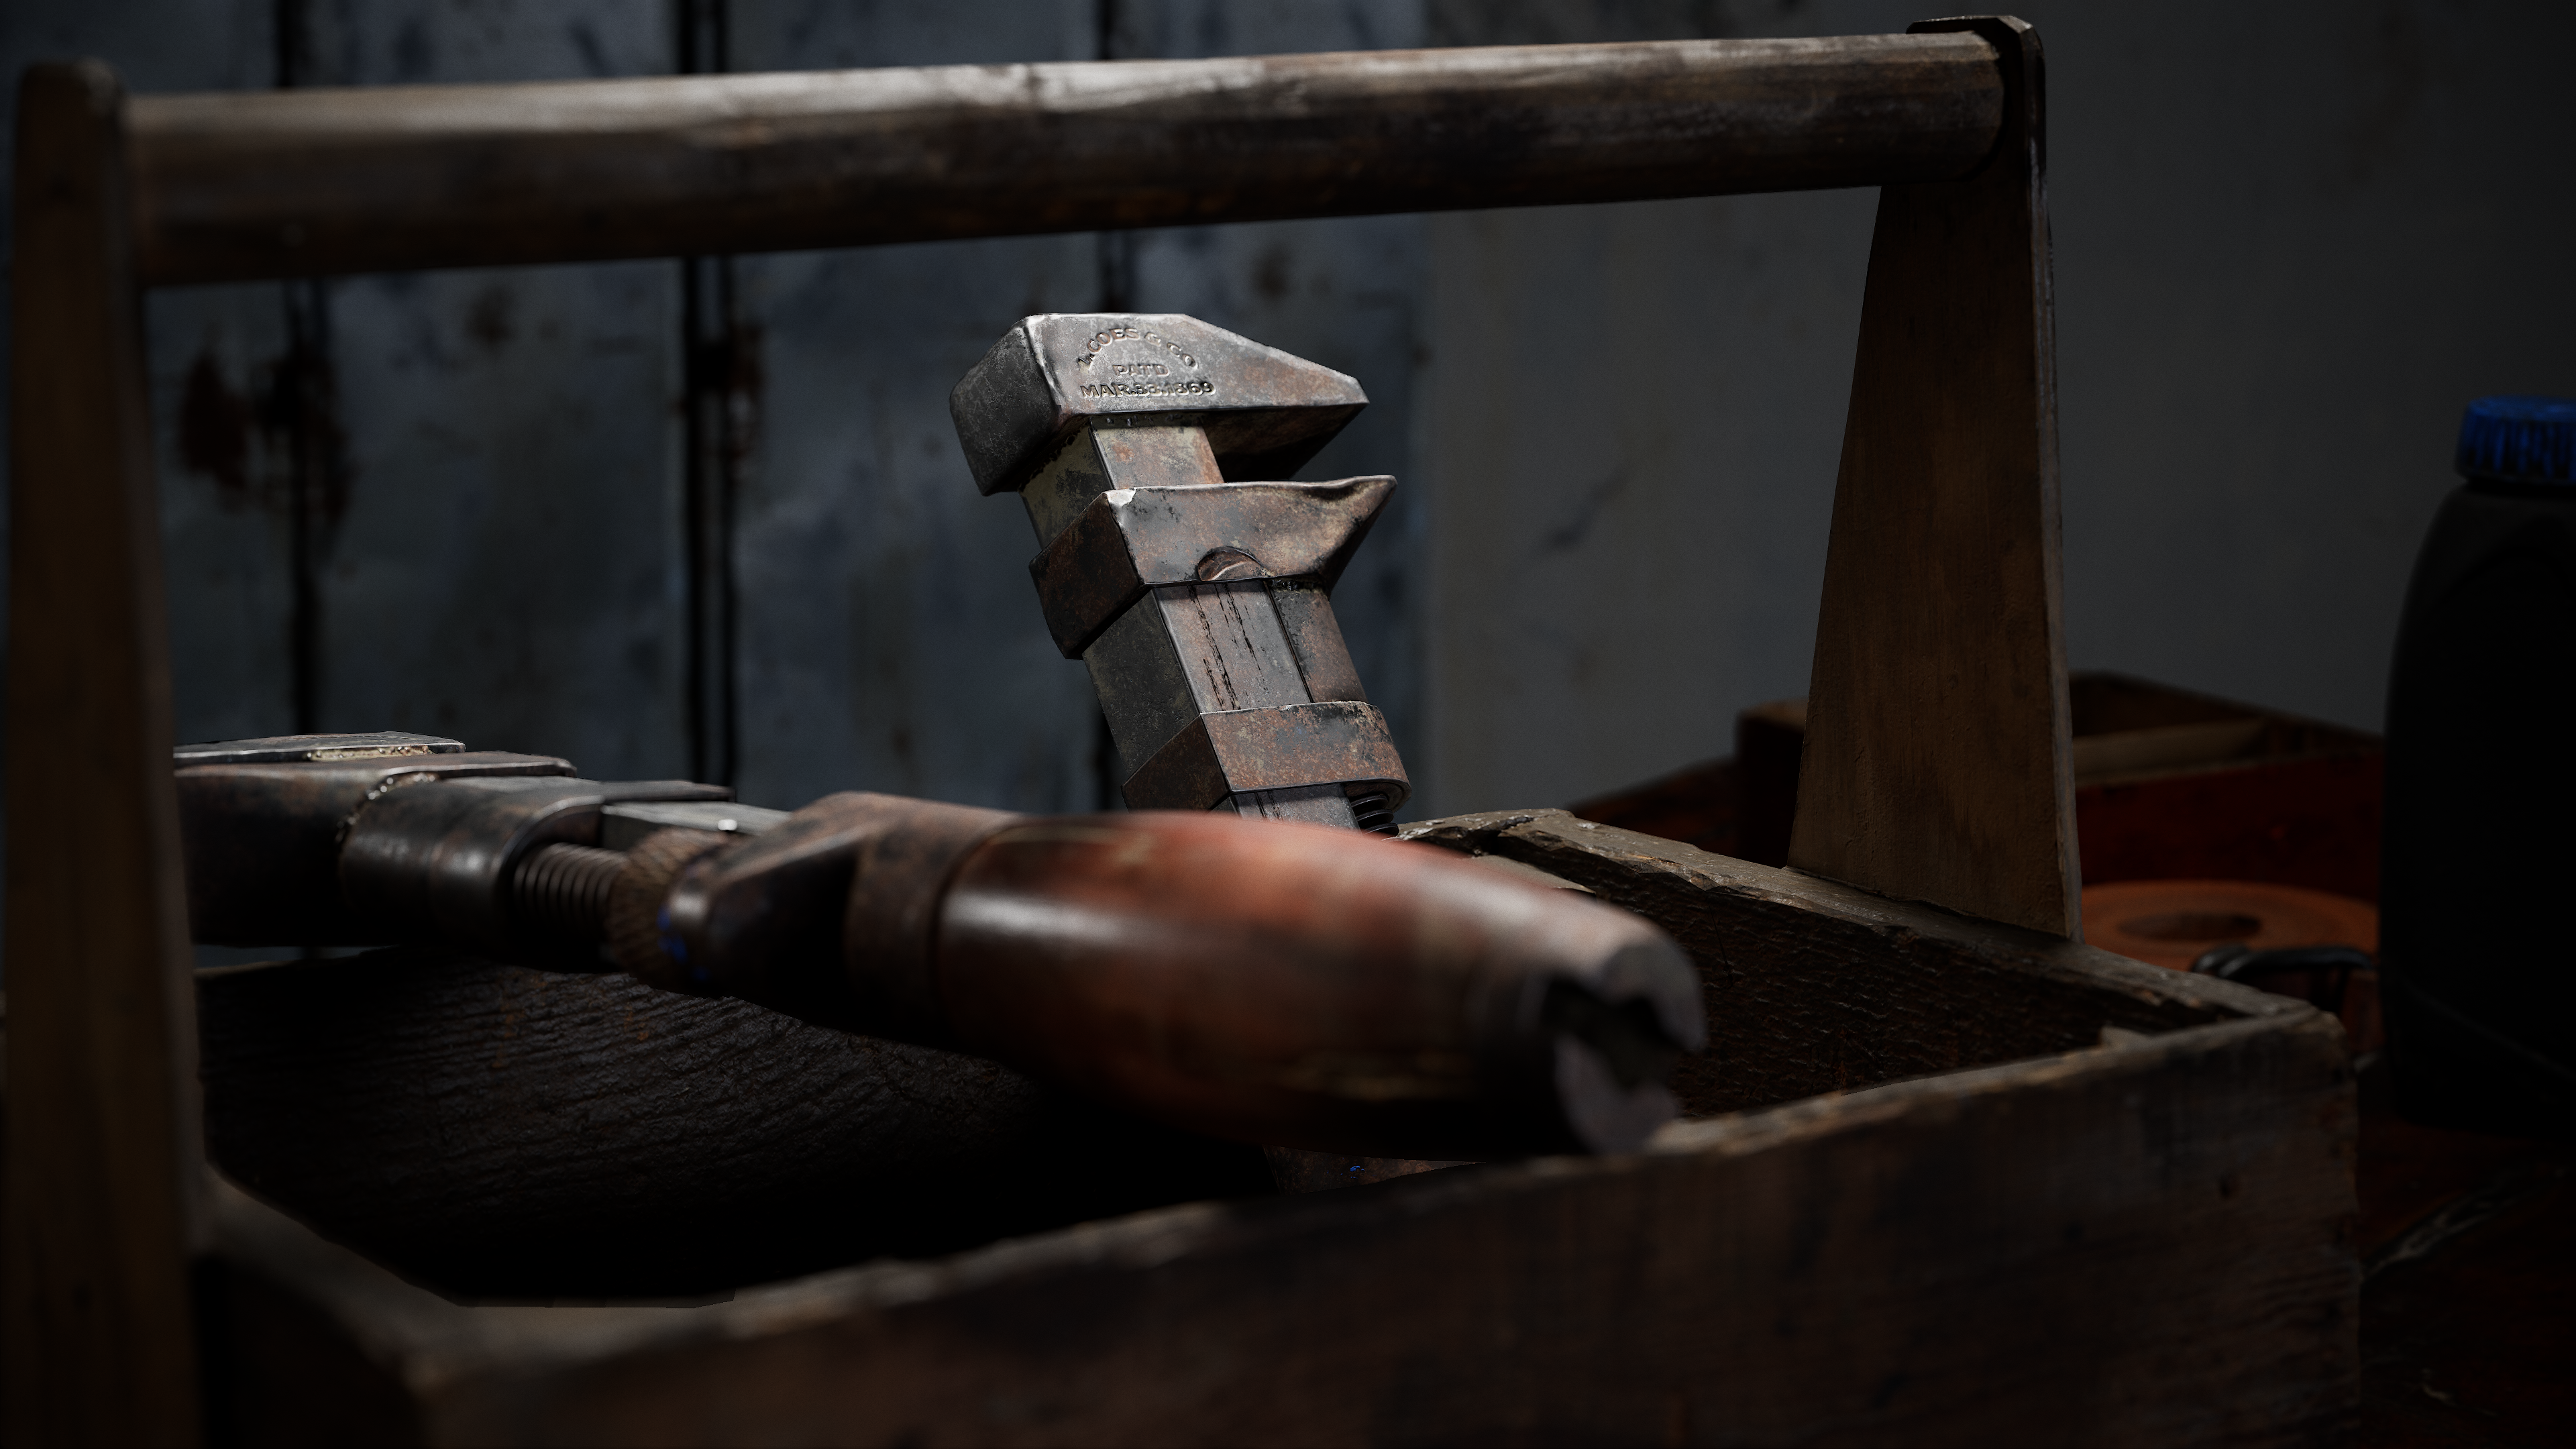
Something else that really helped was watching videos on the Wrench I was working on. While modeling, since I couldn’t find references from each and every angle, YouTube really did help, I was able to take screenshots from the video which really did help me make sense of the model I made.
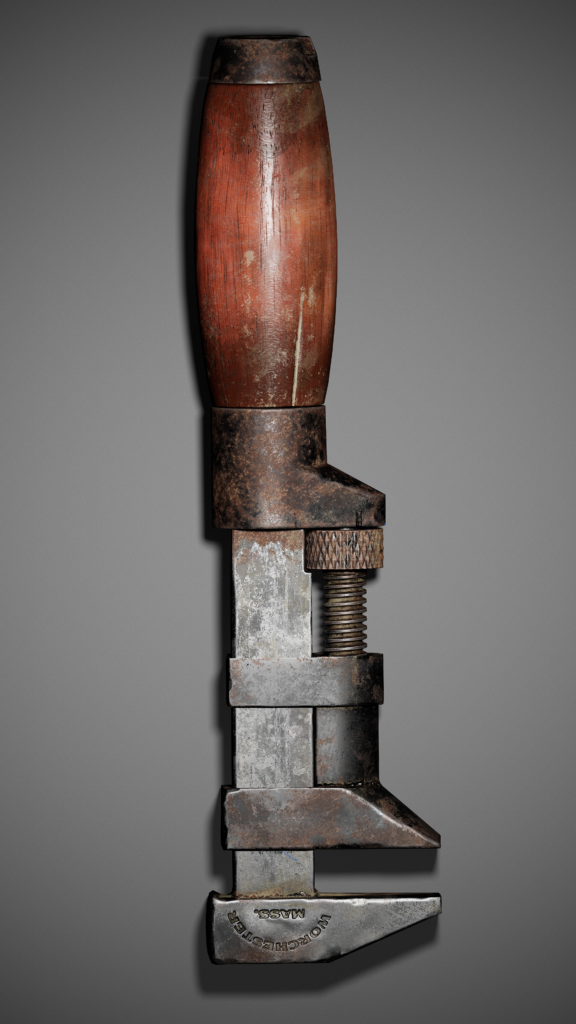
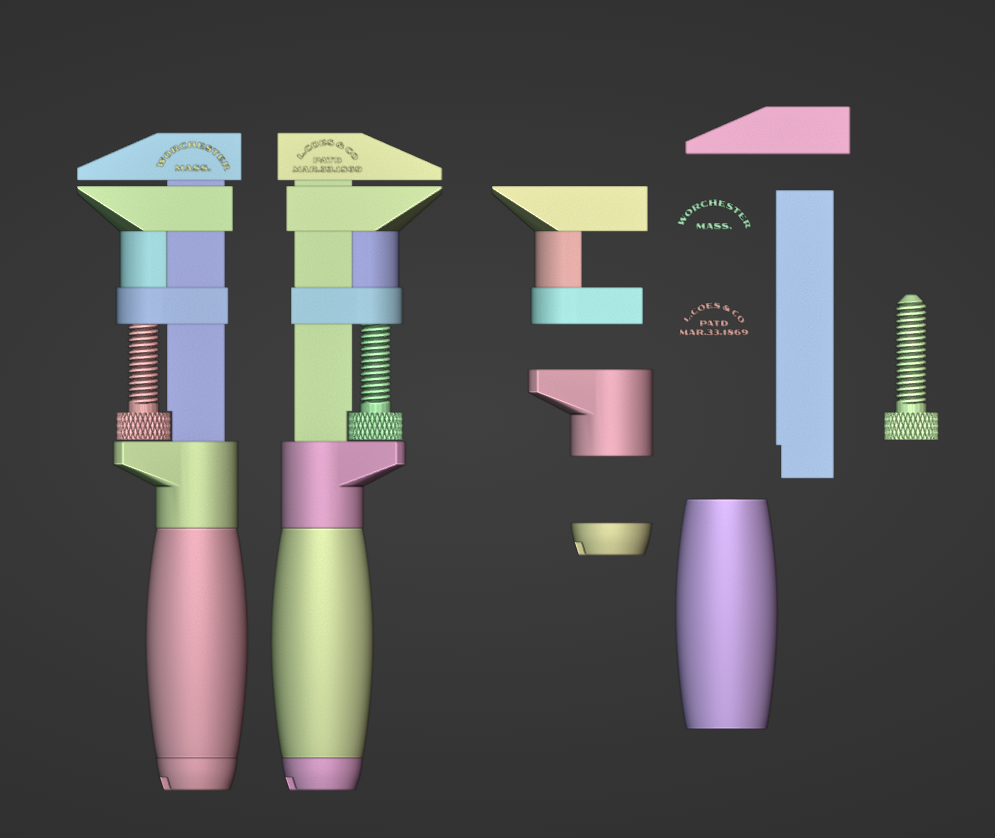
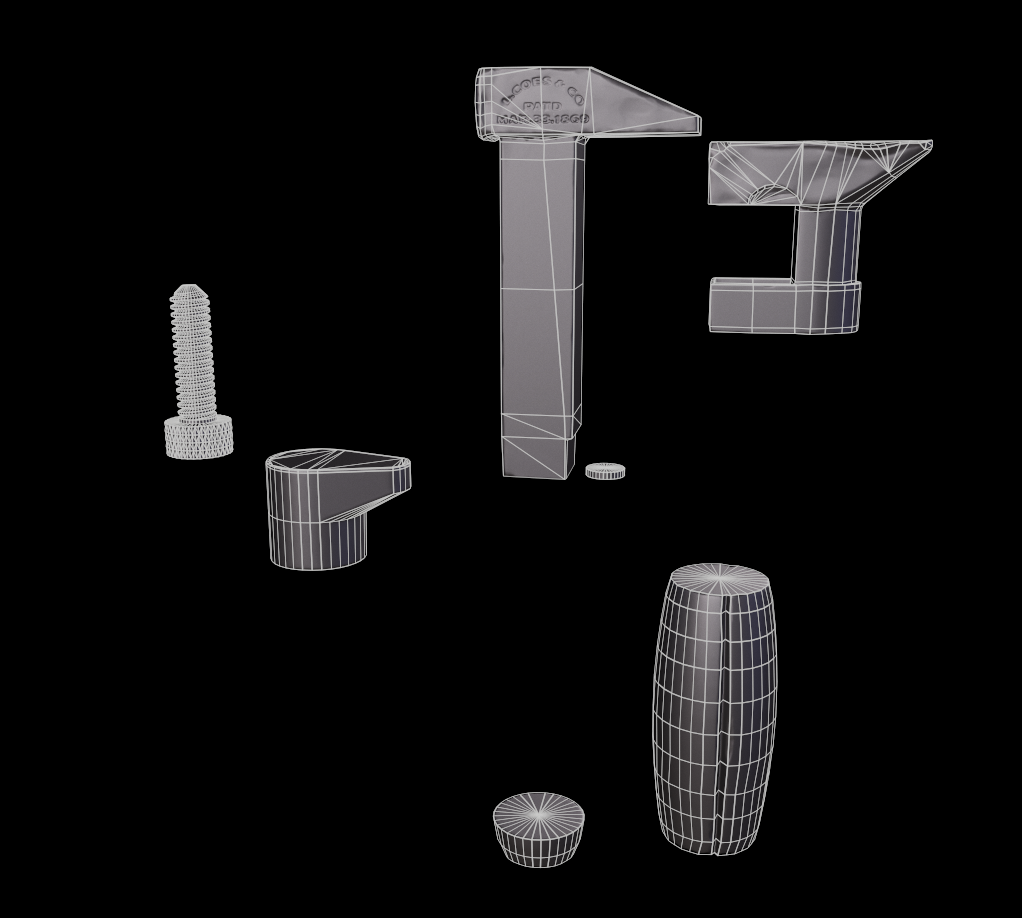
Blockout
One of the most important stages of the process is to create a grey box or a blockout, which allows you to quickly define the shape of your asset. Besides the shapes, it also helps you define the overall dimension and scale, Therefore that was my first step as well. By looking and going back and forth to the reference I was able to make the basic layout of the wrench.
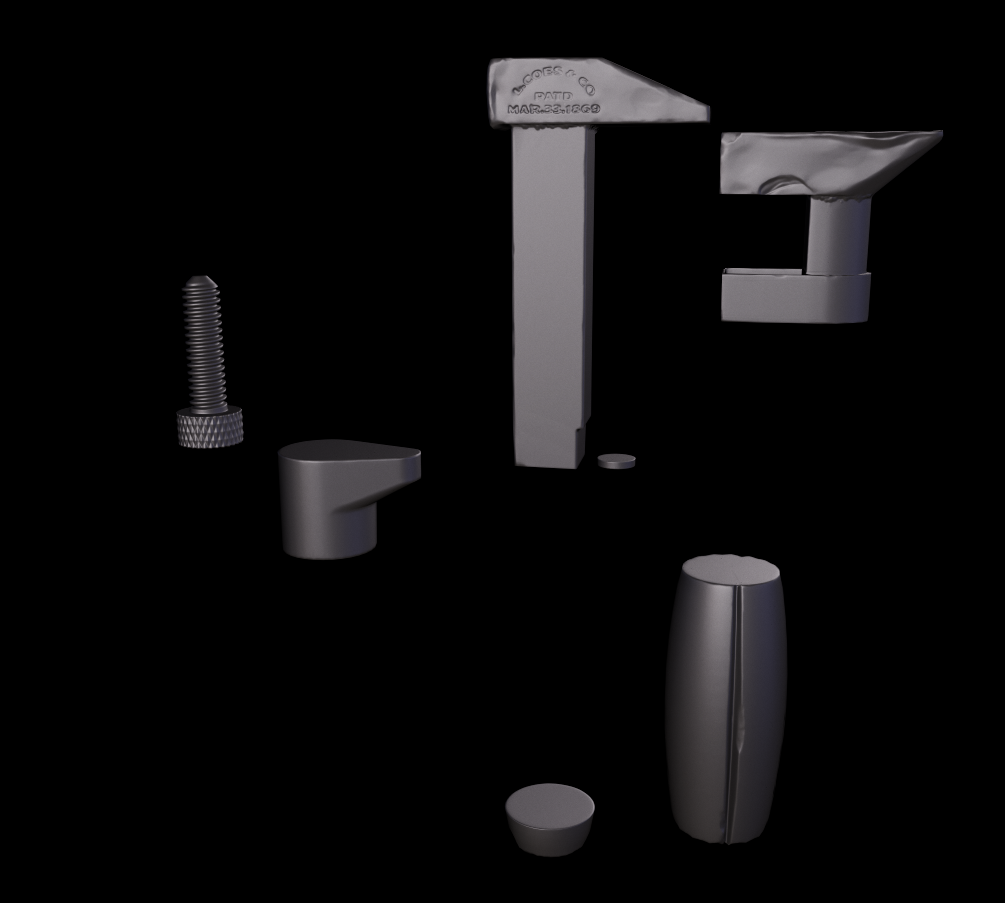
Highpoly
The next step after finalizing my blockout was to add details. For this stage, Zbrush is my go-to option. In my opinion, using Simon Fuchs’ method to go around creating Highpoly Model using Zbrush is way more time economical than using the Sub-D workflow, not saying it’s not important to know though.
Using Blender to Zbrush Plugin (GoB/GoZ) made it really easy for me to switch between my blockout and the model in Zbrush.

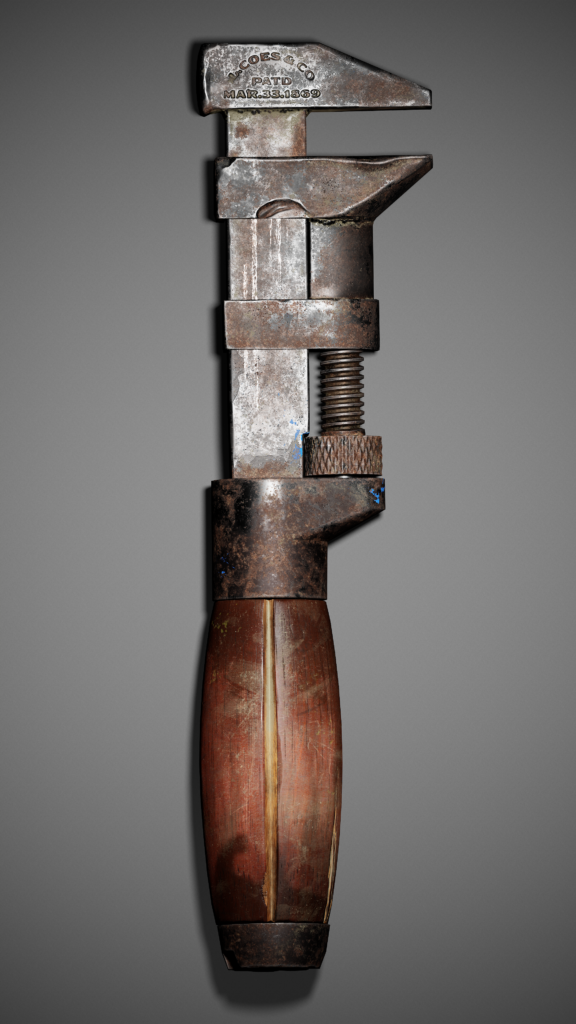
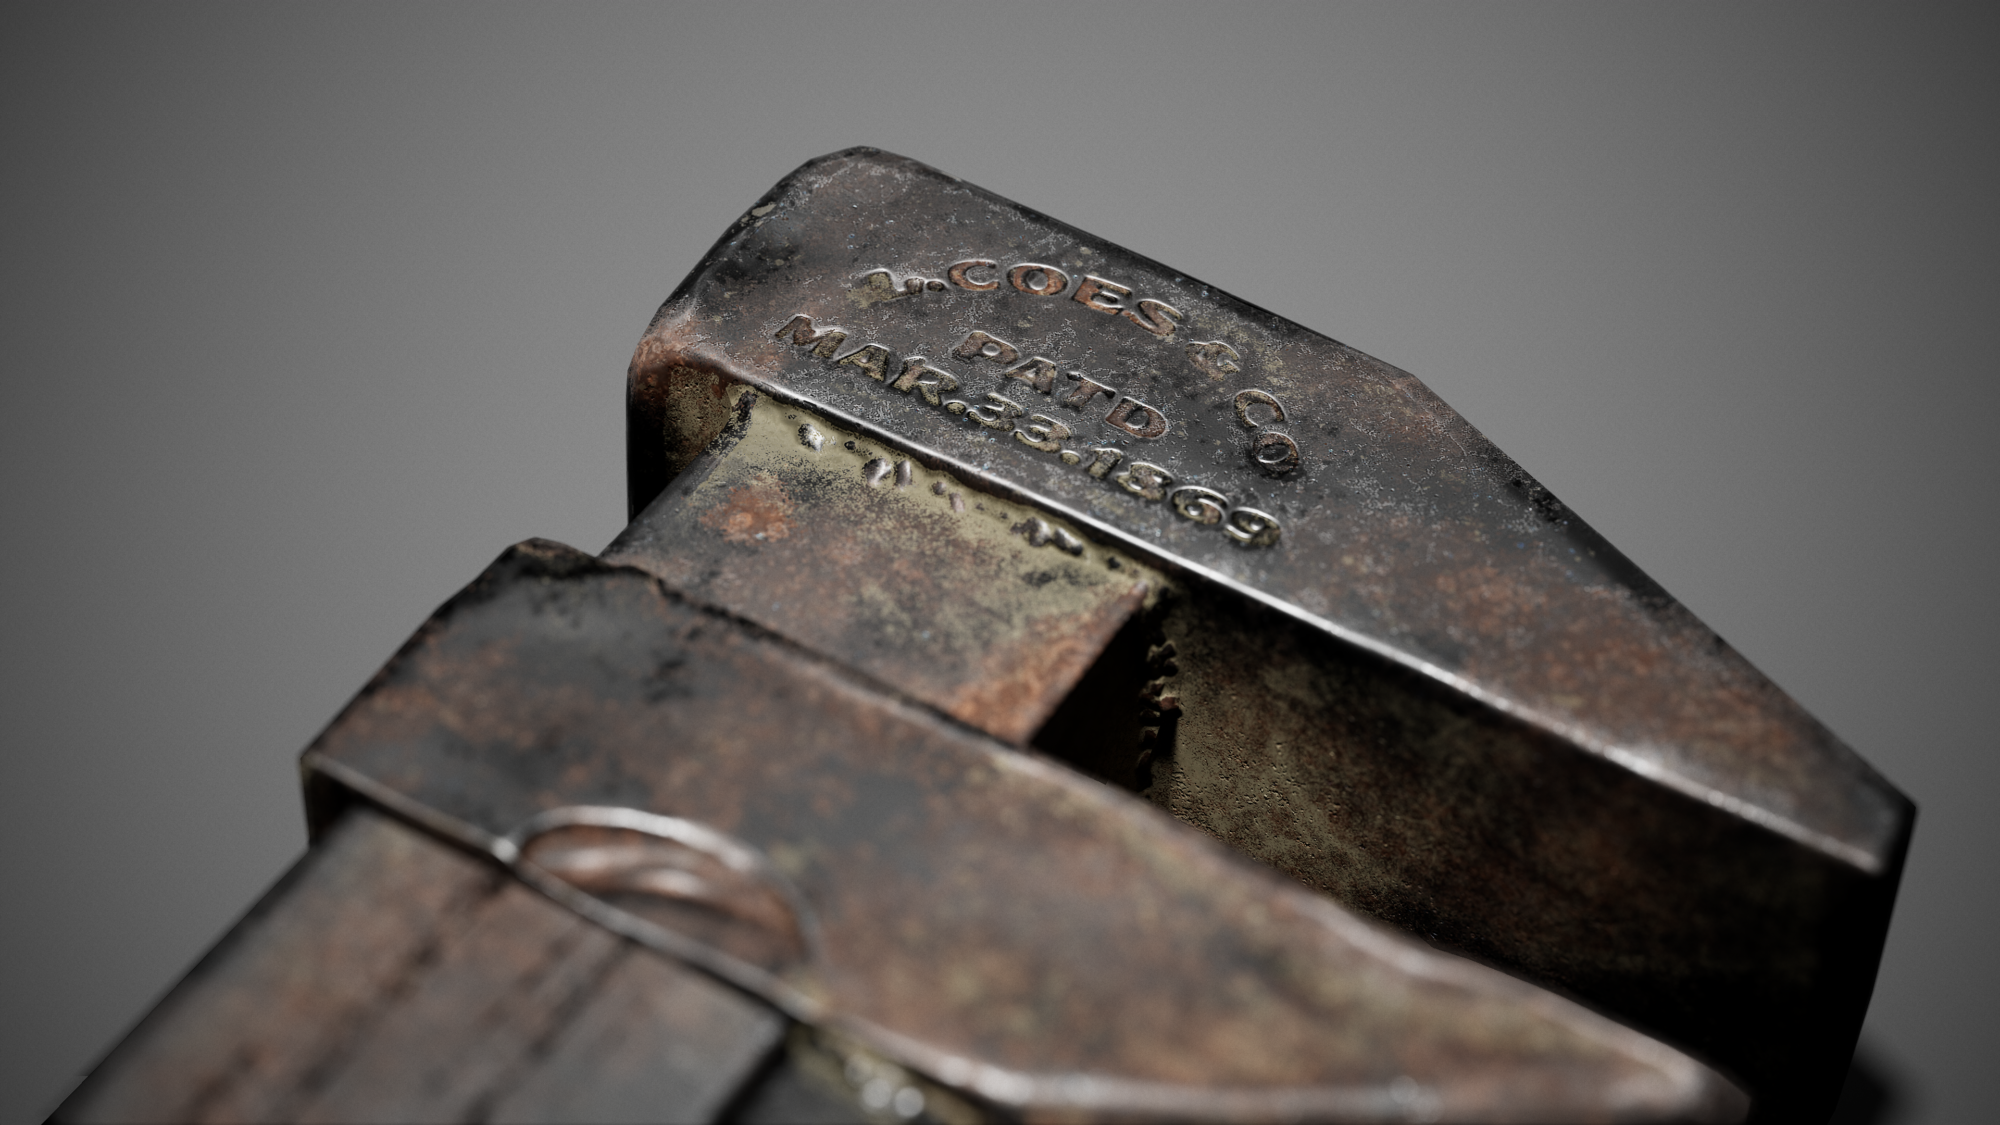
The main task for me was to sculpt real-life damages to the wrench while going through the references.
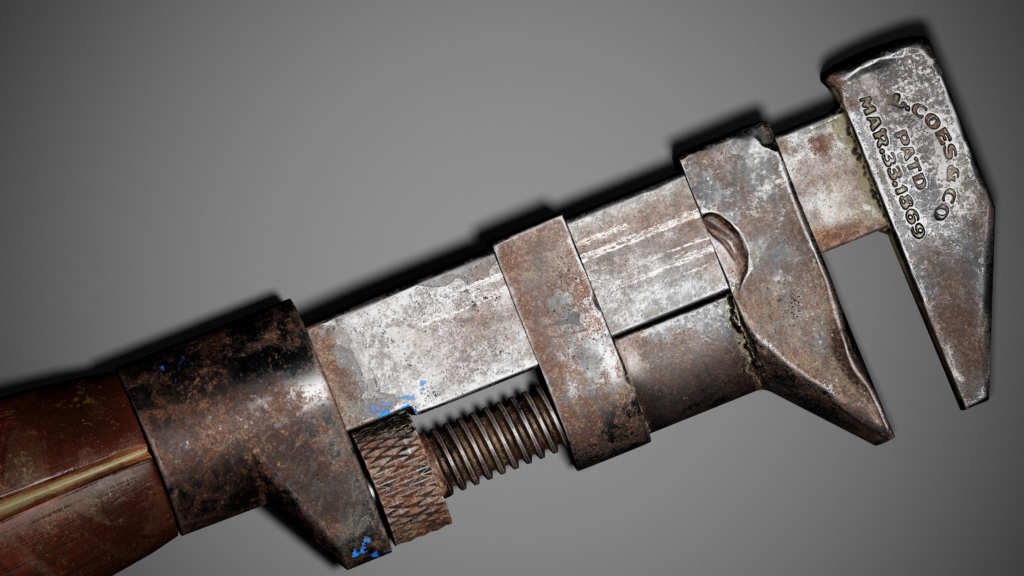
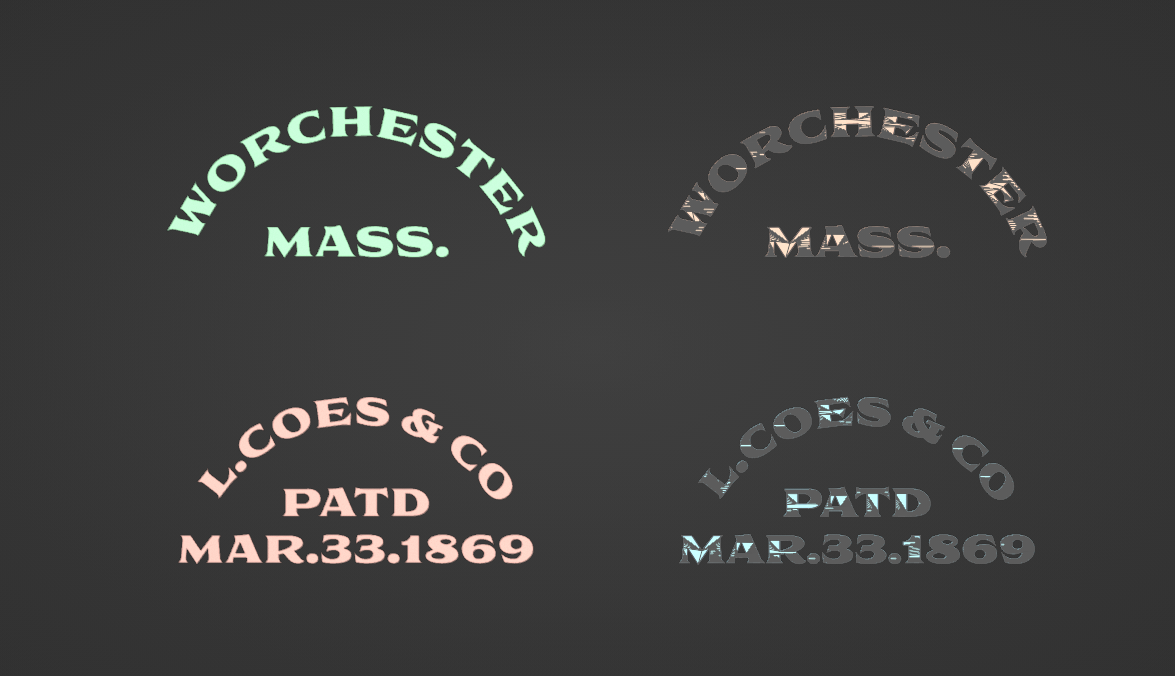
For the Stamp, I used the Text tool and then converted it to Mesh, slightly extruded it and did a Boolean operation on the wrench sides to get the engraved effect
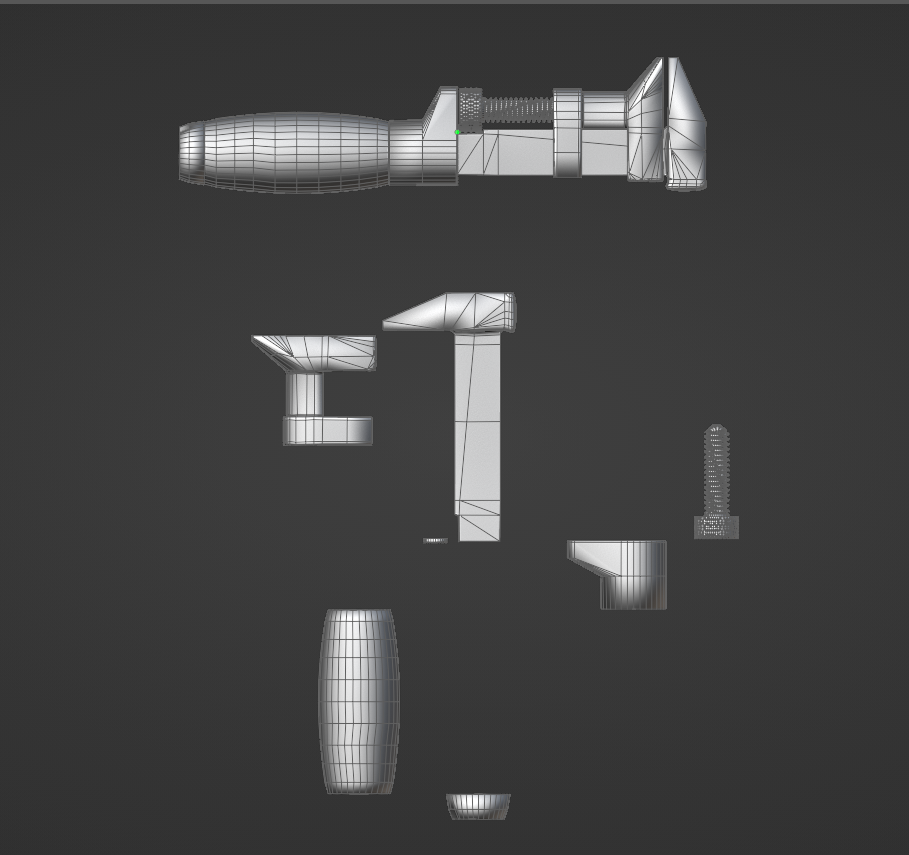
Retopo & Baking
One of the essential parts of the game art process is to achieve detailed-looking assets while considering optimization. After finalizing the Highpoly, I had to create a Lowpoly version of it so that it can be baked later on.
As mentioned above Retopo was done in Blender, considering all the unneeded vertices and faces to be removed in a certain way that won’t affect the final look intended.
Texture Map baking was done in Marmoset Toolbag 4. The best tool for baking as it allows you to fix all the weird artifacts and cage issues real-time on the go.
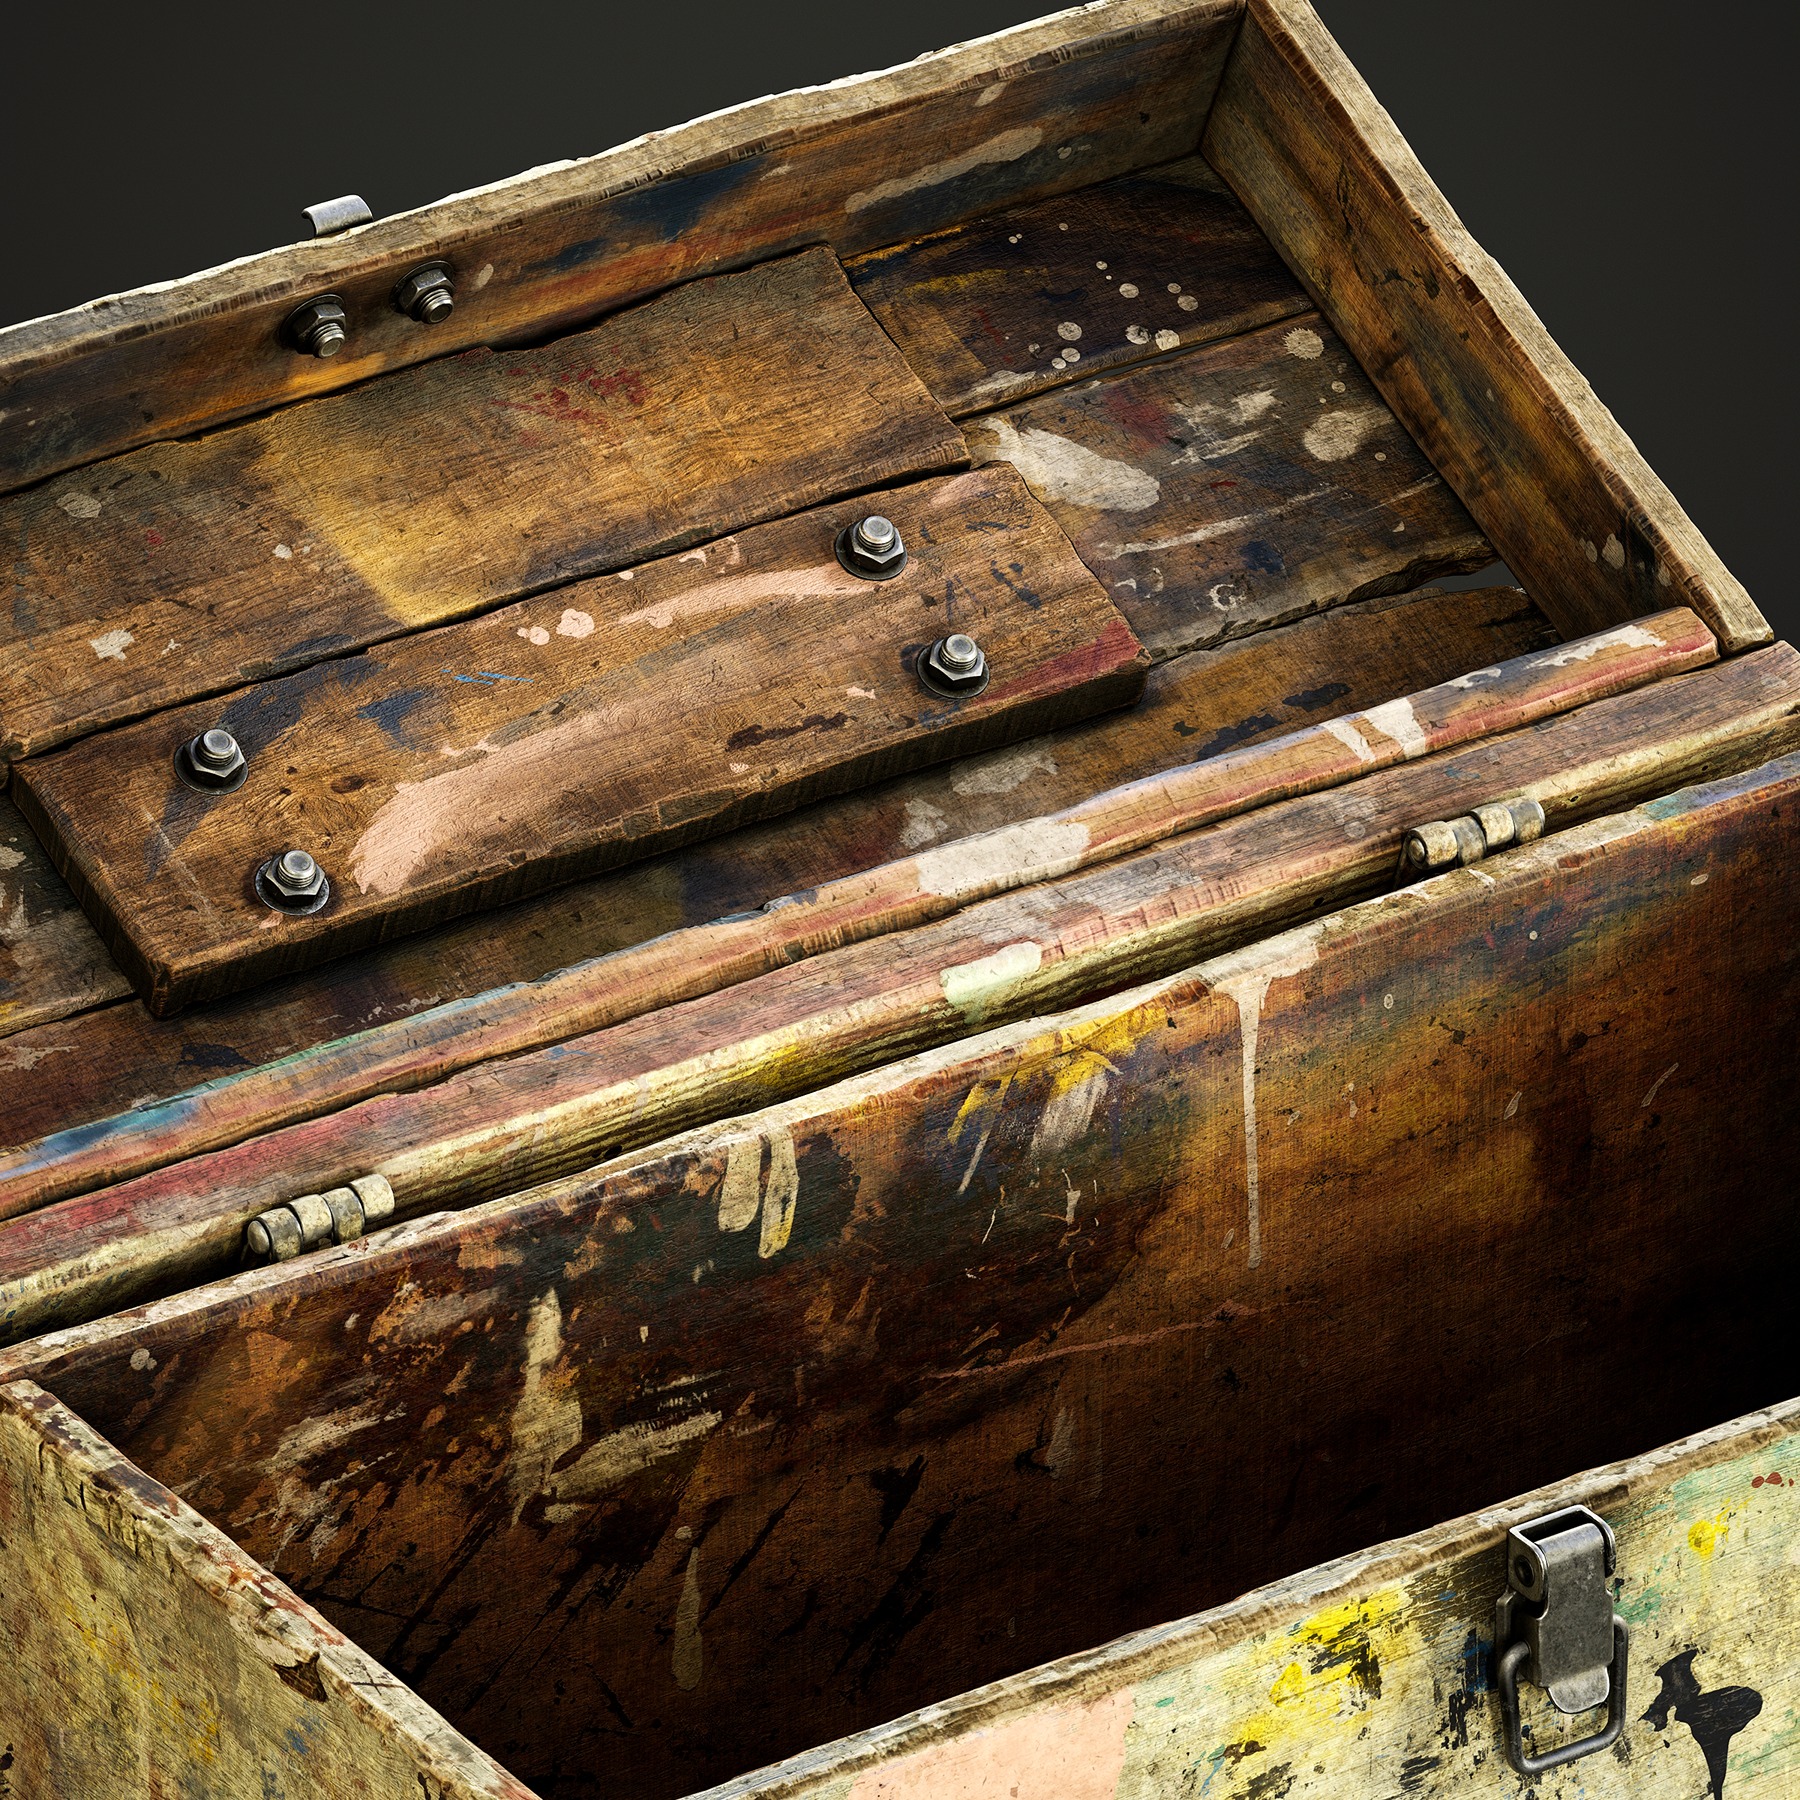
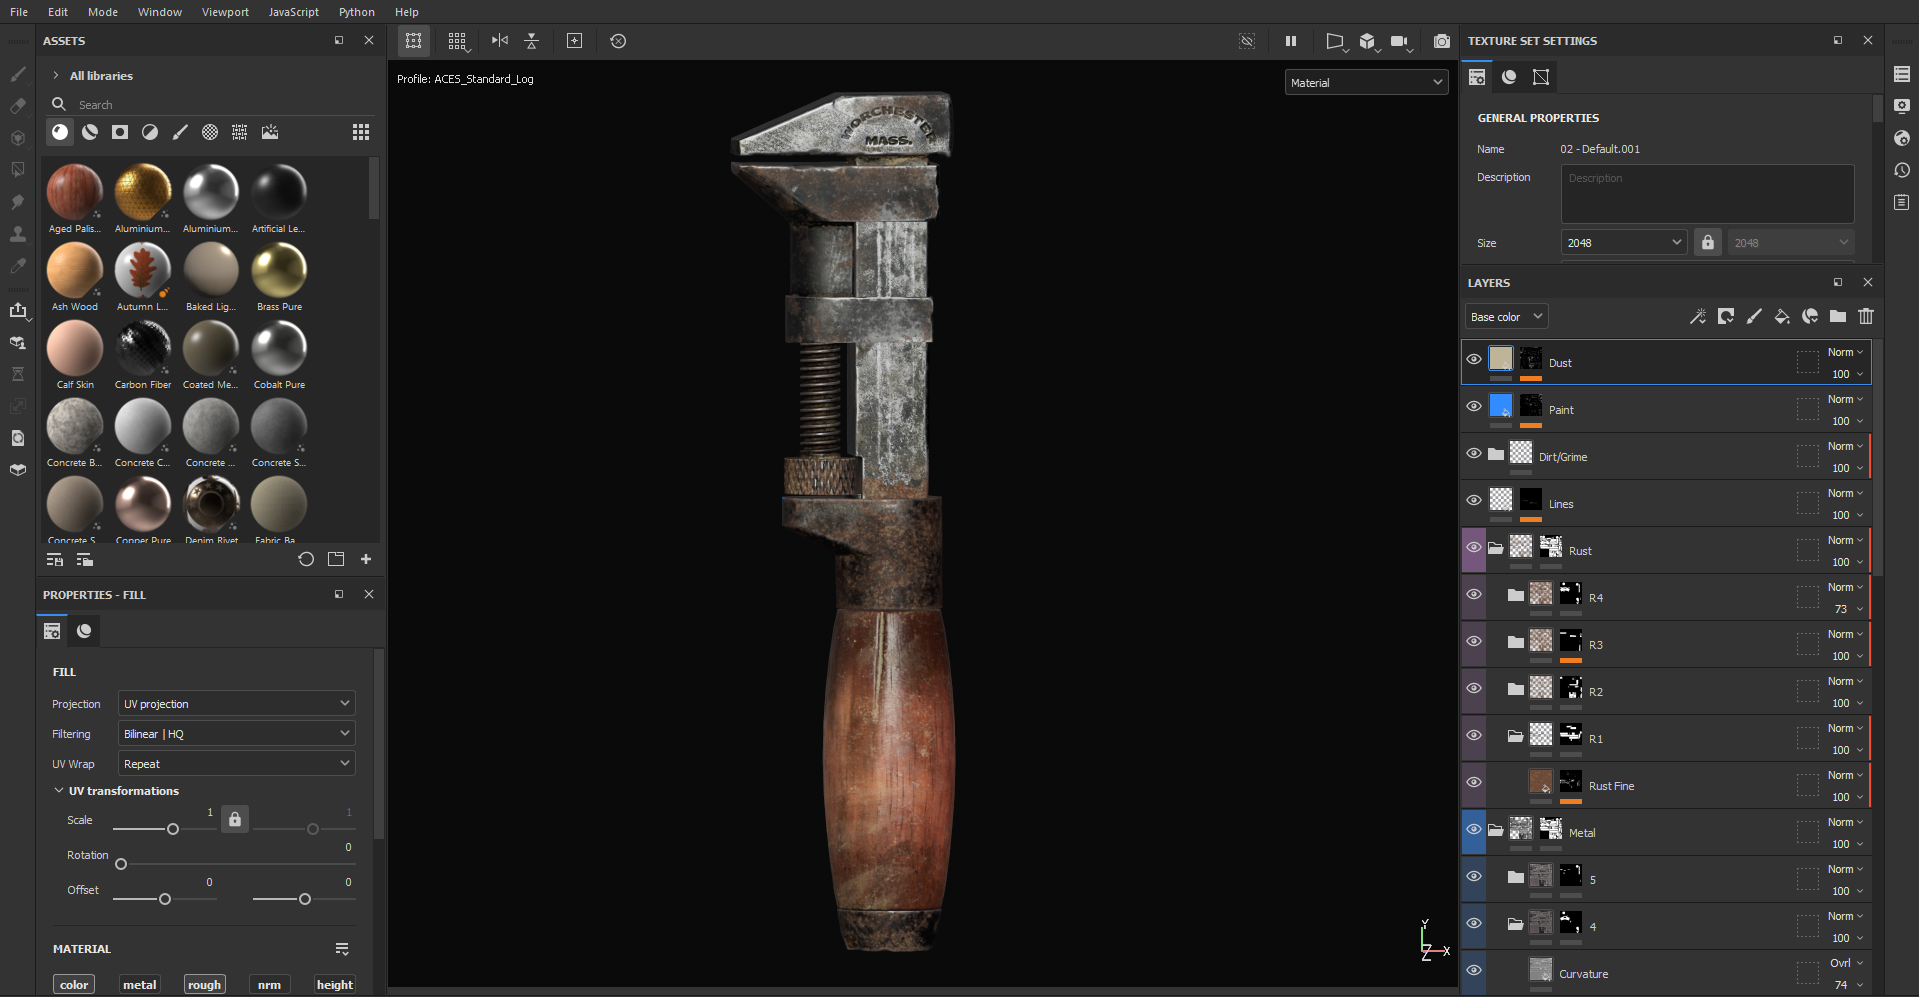
Texturing
As mentioned above Texturing is done in Substance Painter, after exporting Texture maps from Marmoset.
For Metal – Creating base material was super easy since I used the existing default materials but for the details on top, Multiple Procedural Texture Maps (Black and White) were used in order to fake the aged metal which can easily be achieved by playing with Color, Roughness and blending modes.
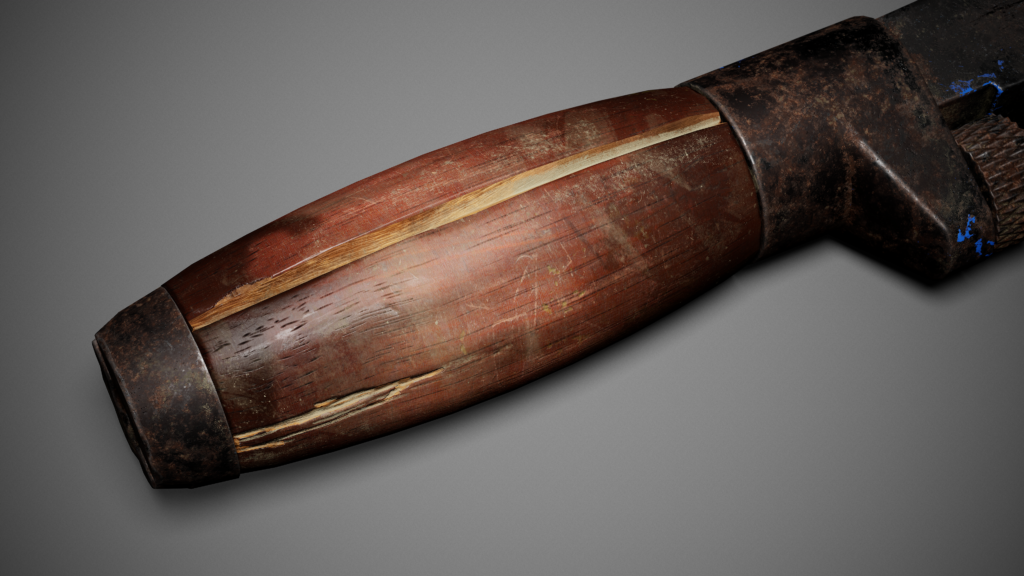
For Wood – The easiest way to achieve realistic-looking wood is by using photo texture (either self-captured or getting from websites like Texture.com), moving on forward adding roughness variations on top wood while referring to the reference is quite important. For adding color variation the most basic way is to use a brush to add a stroke and simply use blur or use procedural maps on top.
For the Dust and Rust – Basic (Default) Dust Mask and Rust (from Substance Source) were used respectively. For variation in some areas, I had to add a custom paintbrush stroke.

Lighting & Rendering
The best way to start lighting is to find some references and copy them which kind of works most of the time.
In my case lights were very basic, I used Studio Tomoco from Substance Painter in Marmoset 4 as my skylight and added one rectangular light on top to create harsh key light and have a strong shadow.
Playing with the Post-Processing setting really helps to make the render look much better.
Conclusion
I hope this article gives you the knowledge and feel free to reach out.
Thank you very much!
Read more articles
You might also like these articles.