
Introduction
Hello everyone! I’m Roger, a Senior Character Artist. Over the years, I’ve worked in everything from games and cinematics to marketing and motion graphics.
Personally, Character Art and Animation is still my passion but my experience in other disciplines gives me a background in storytelling which I think helps the genesis of a character.
Goal
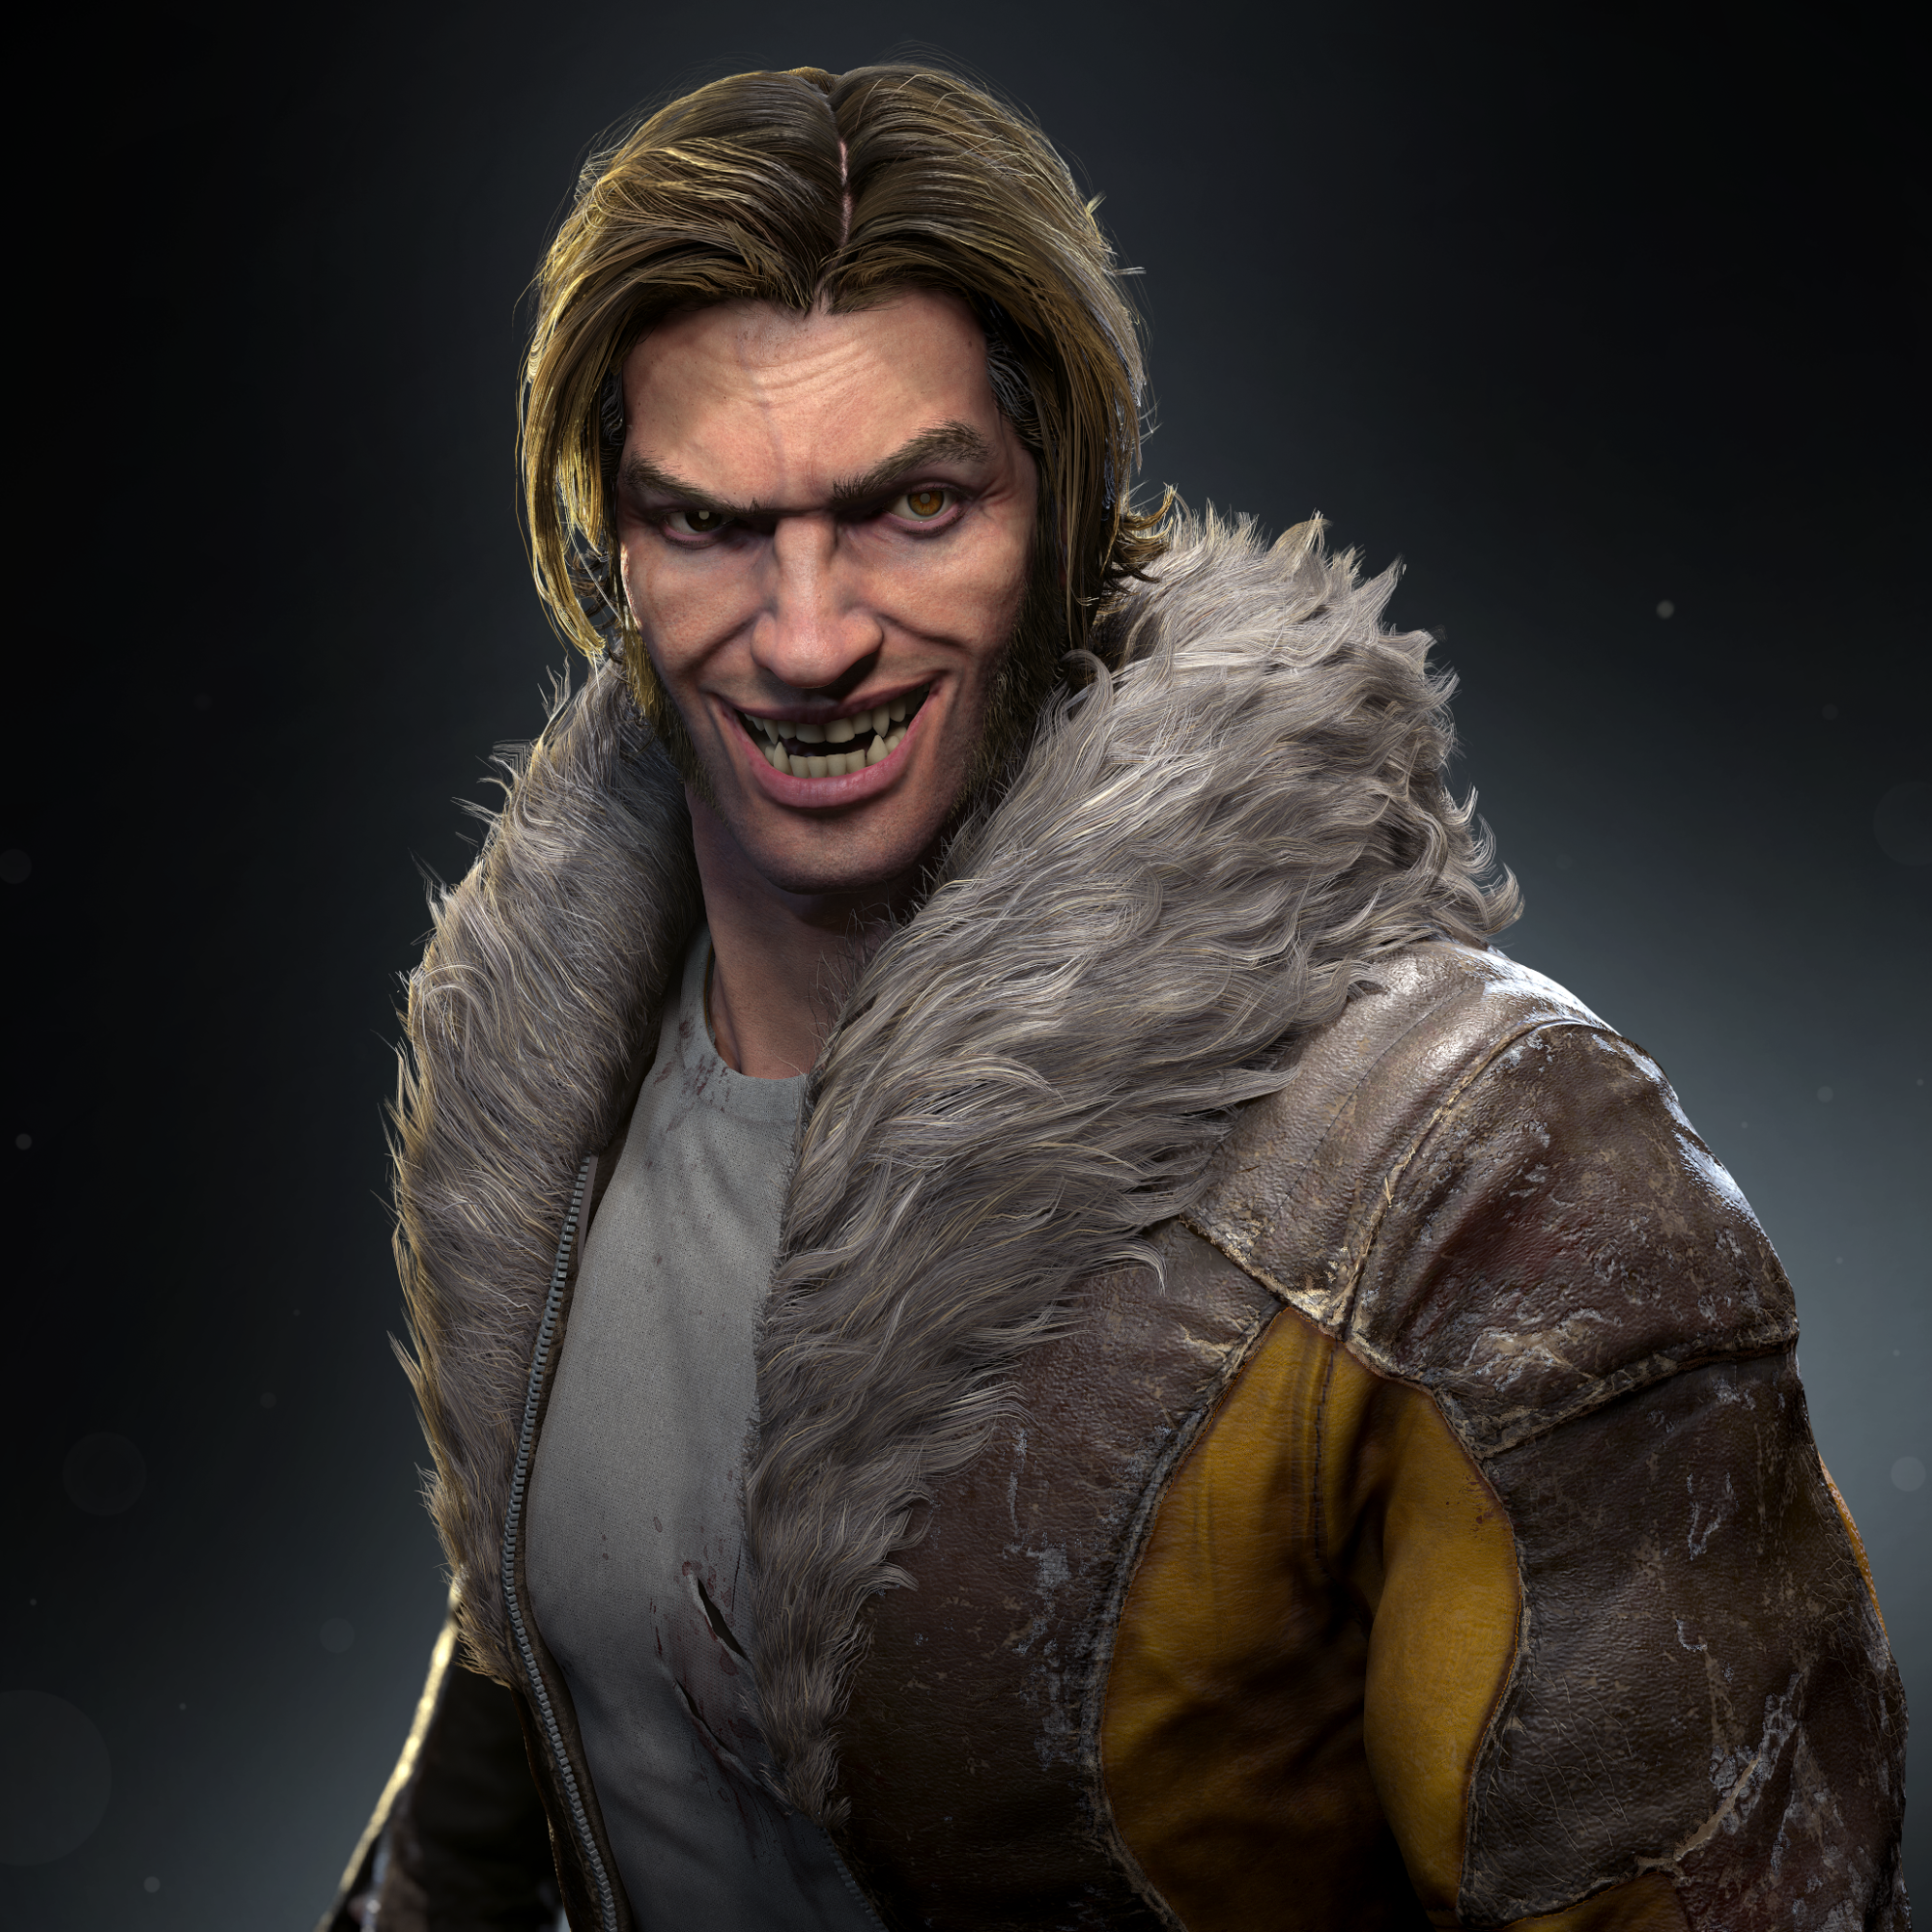
Growing up a fan of the X-Men, it’s obvious Wolverine gets all the love. Especially cinematically. However, Victor Creed aka Sabretooth, his primary nemesis and comrade, gets mostly relegated to an afterthought. When they did give him more of a spotlight, he looked nothing like the source material. So, the idea was to create a contemporized version of him in real time that could exist cinematically and have an accessible look. You could see this feral, savage, and relentless maniac of a mutant in person and know what he was about and want nothing to do with him. One bad mother… you get the idea.

Concept
I wanted to have him in street clothes but an adaptation of his uniform that still made him identifiable and clearly a badass.
Identifiable traits:
-Needs the fur collar
-The uniform color scheme
-Wild yet someone refined hair and chops
-A maniacal look in the face with confidence
-The teeth
-And we’re going to need those claws.
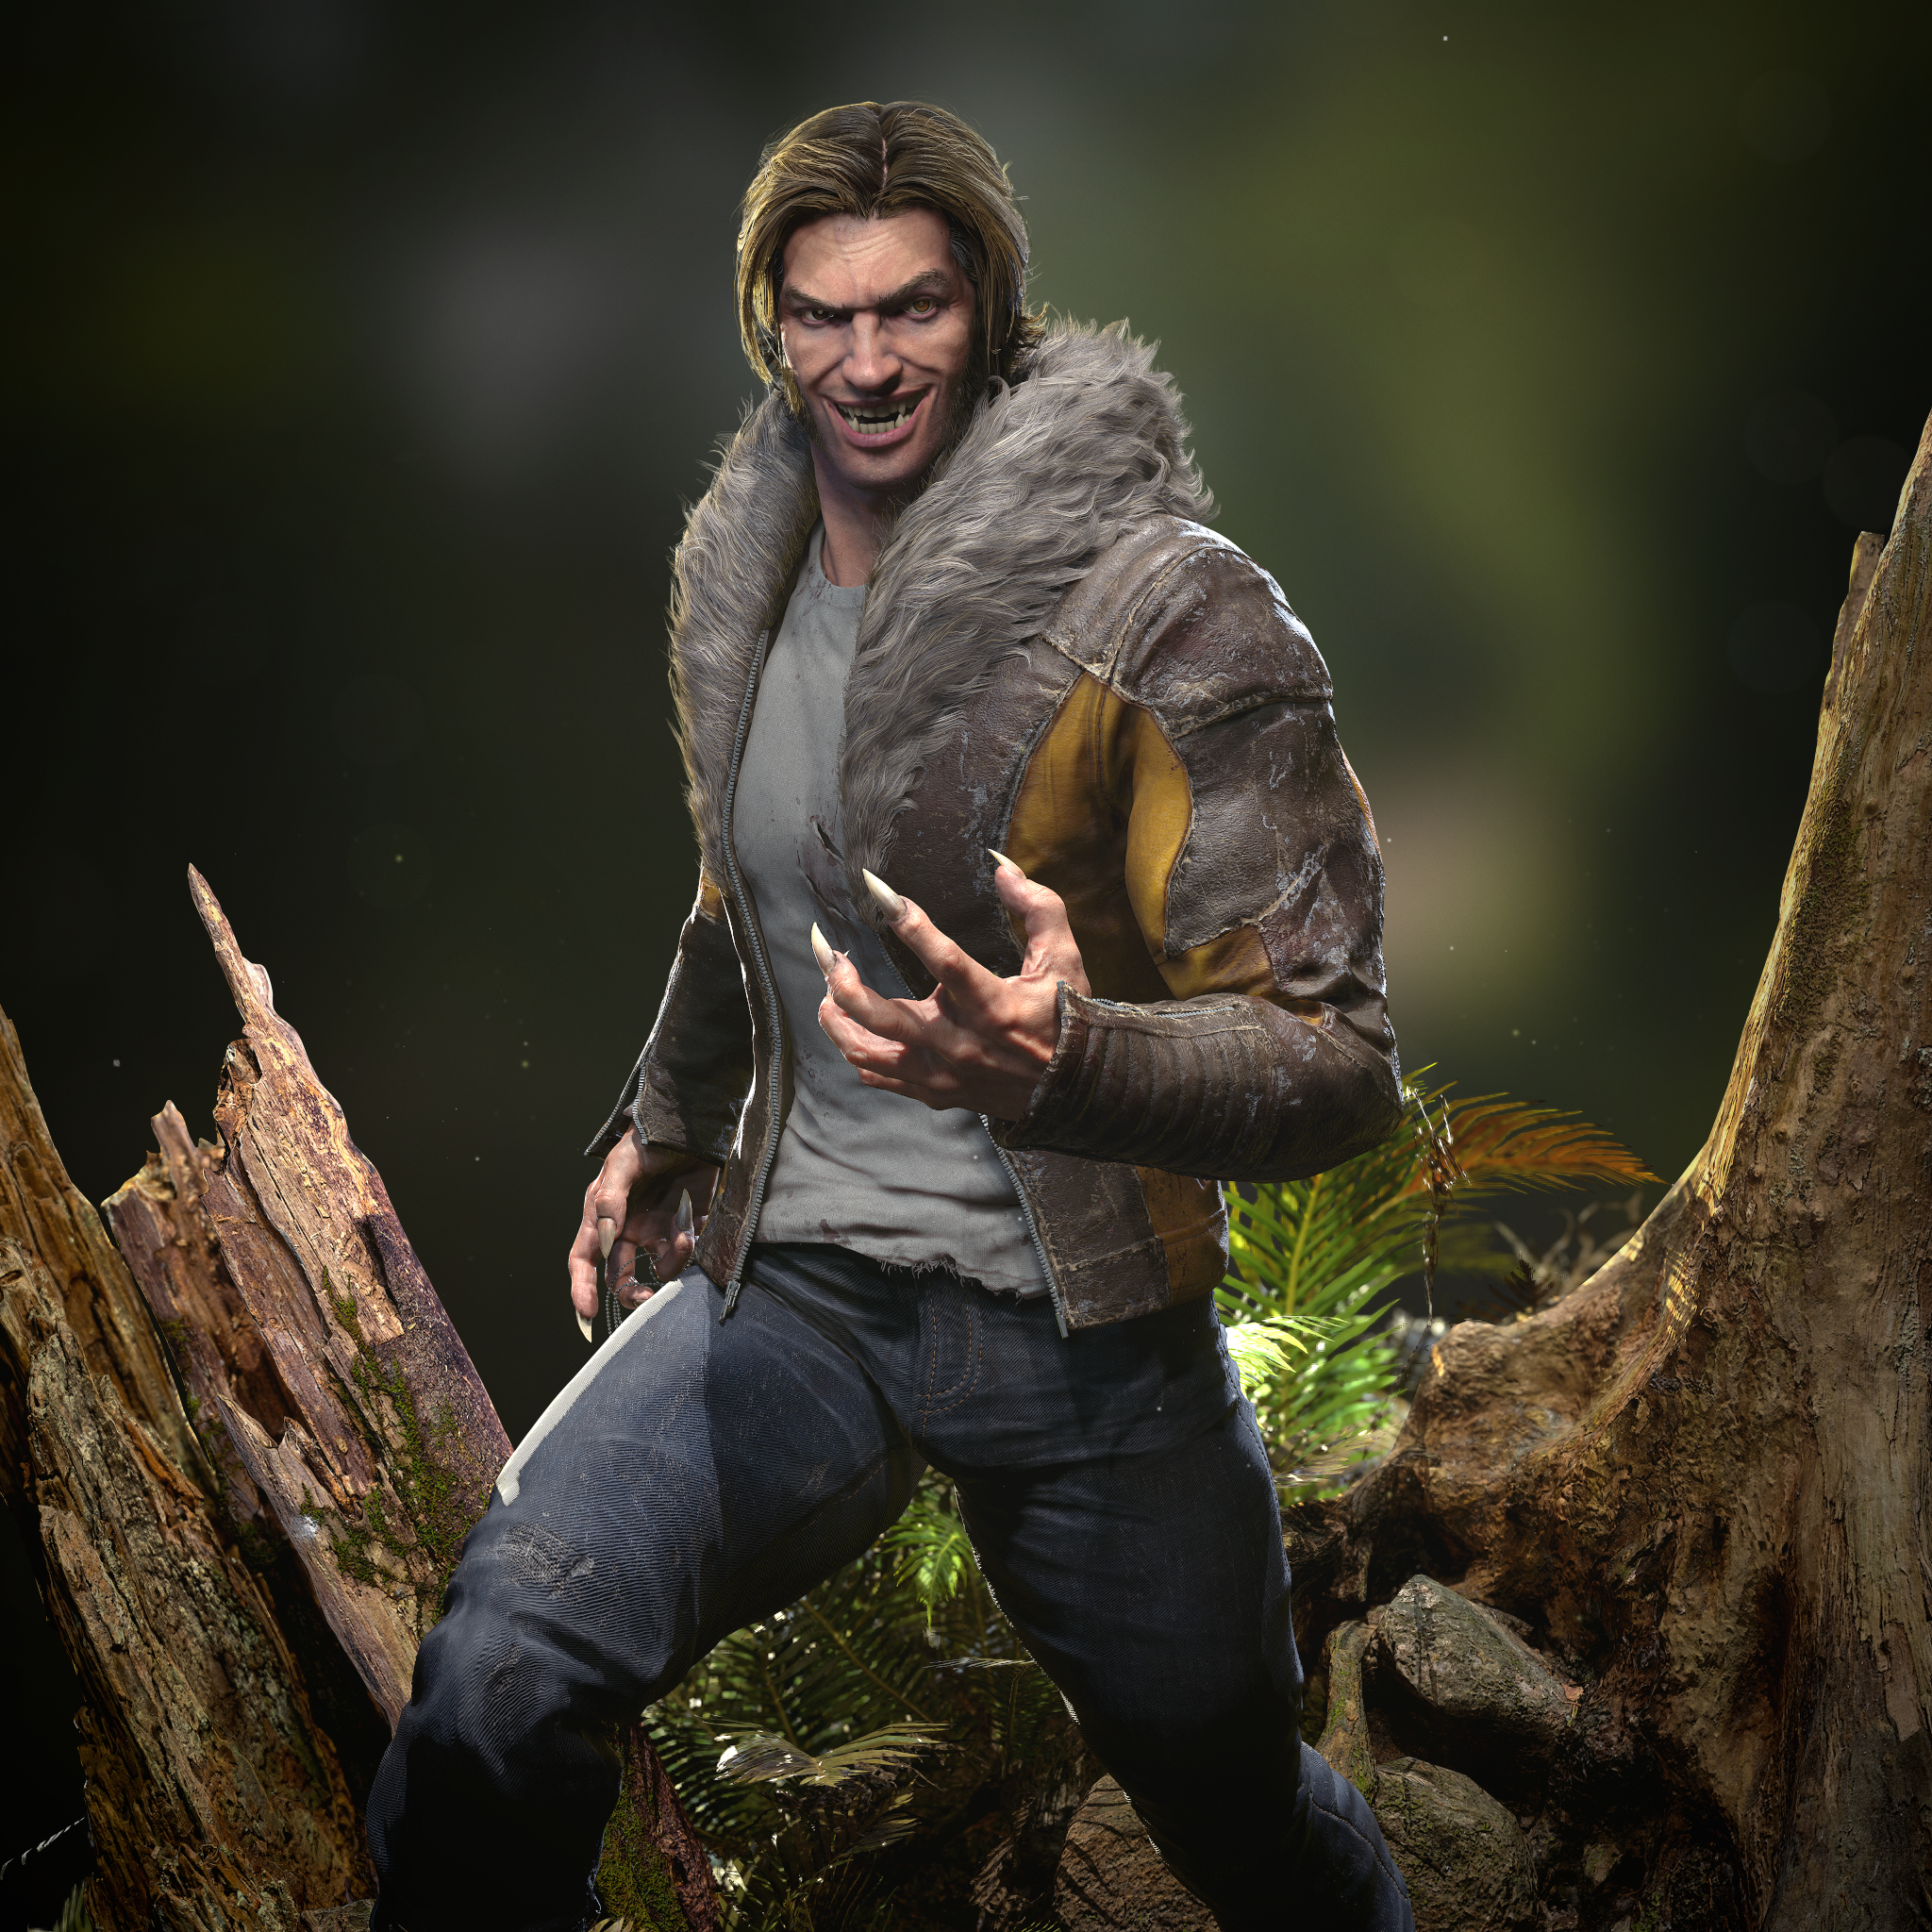
The story of this diorama is he has just fought with his comrade in arms, Logan, in a savage land danger room scenario and clearly has the upper hand. With dog tags in hand and on the hunt, Wolverine is the prey and Sabretooth is enjoying every second of it. The base will be a combination of wild forest terrain of the savage land and a hard surface danger room simulation tech.


Reference and Planning:
From the hair, the face, the clothes, and the base, I needed reference for days to steer the direction and scope of what I was aiming for. Without it, you are throwing darts in the dark and not using your time efficiently. Even if it’s a passion piece, like this was for me, you still have to have internal deadlines, milestones, and sprints to manage each project.
Otherwise, you will lose time and focus. Here is some of the key reference I used for his look.

Block Out Sculpt:
When creating a character, I tend to start from a sphere and work everything from the skull to the neck, body, and extremities. However, having done this for years, I’ve acquired quite a few base meshes that I turn to when starting a diorama like this. At the end of the day, we have to be efficient and invest time where it’s more critical. This mesh has a more heroic style A-pose but great uniform topology, which comes in handy when you are sculpting and extracting geometry for other pieces. As you can see, I moved and manipulated much of the base mesh to fit the less stylized and more realistic proportions for Victor Creed. All the block-out pieces that would become the clothes were all extracted from the original base mesh.

Head:
When trying to capture Victor Creed’s look and specifically his face, I had a few actors in mind, but I really wanted to keep it open and make a new person. I wanted him to look weathered and perhaps in his 40s when it came to pore size and facial lines. Also, keep in mind that he has no scars due to his healing factor, haha.

Here is a closer look at the base mesh of the head. At this early stage, I mostly use the dam standard, clay buildup and move brush to create the general shapes of the face I want. I took some liberties and exaggerated the brow, zygomatic and teeth to create a more sinister and feral look when he sneers.

No scans were used for the skin detailing. All skin details were achieved using layers, noise maker and various pore brushes.
After creating a low poly mesh modified from a ZRemeshed version of subdivision 2, I created UVs with UV master in Zbrush and laid them out in the proper spacing using Maya’s UV layout editor. Next, I used Marmoset Toolbag’s baking tools to create the textures needed to create maps in substance.

Substance Painter. Here is a video revealing each layer I used to create the skin for Victor. There are several methods and workflows, but I tend to follow the basics as demonstrated by Magdalena Dadela and her Substance Demo. This color guide is something it tend to follow as well.


Lastly, assembly and lighting in Marmoset.

Hair
After watching and studying hair via tutorials and reference for a couple of weeks, I found a combination of methods and tutorials from a few exceptional artists and kind of created my own workflow. After aggregating a lot of references, I dove into Zbrush and sculpted a shell and guide for the flow of the hair. Then exported a decimated version of that to Maya. Next, made the hair with Xgen in Maya along with all the hair cards and placement. After doing that for 180 hours of trial and error, I staged and lit in Marmoset.

These are the strands made in Maya Xgen. I made a lot of strands as I was trying to consider all the areas, I’d need variety. Moving forward, I’ll create less. I used Xnormal for normal map creation as well.

Here is a visual break down of my process:
First, I created a sculpt of the hair and general shapes in Zbrush. Nothing special but it serves as a guide for the next steps and it gave me a physical reference to create splines. Took maybe an hour or less.


Once you have the tools installed, take a look at all the fun and helpful extra options you now have at your disposal. For this project CURVE to RIBBON MESH is your friend.

Line up those UVs and tweak the ribbon parameters to curve or widen the hair cards. Also get creative with combining some hair cards for new strands. Rotate and place parallel to create a hair strands with depth.

While placing base cards, keep in mind the silhouette. At all times the silhouette must have variety, uniqueness and plenty of break up. Use the thin strands to create wispy fly-away hairs to help with this. Create unique outer layers for break up.

And this is the beautiful madness that is the results of time and patience.

Hands:

Here are the hands in their savage glory. I started in Zbrush and once I was happy with the high-resolution details at level 7 SubD I took a low res version of the model created ZRemesher, used UVmaster to create UVs and proceeded to Substance. Exported the textures and here we are in Marmoset. This is all real-time at 3,530 polys.
I have a few skin and fingerprint brushes that I used extensively for this. However, most of the work was done using dam standard, crease, move, clay buildup, crumple, pinch and clay tubes.

I needed them to look dirty and in the midst of hand-to-hand combat. So once I was happy with the skin tones, I had to make a dirt and grime pass.


Here is a breakdown of the material settings in Marmoset.

Clothes:


Once I extracted the geometry I needed from the body to create the jeans / shirt / jacket shapes, I proceeded to sculpt folds and broad details in the first 3 to 4 sub levels. Then I used the higher sub d levels to create the fine details, seems and asymmetrical pieces.


Once I was happy with the details achieved at level, it was time to retopologize and create a low poly mesh. I then did a quick UV pass using UV master and further relaxed, aligned, and organized the UVs in Maya.

Next, I baked the details to a low poly model using Marmoset baking tools. Lastly, Substance Painter was where the textures and overall look were established.

Utilizing the ID map I created in photoshop it was easy to isolate the sections I needed to make different colors and textures of leather in substance. I used 4 types of leather from a leather pack I’ve had for a few years from Carel Jordan on Artstation.
For the denim I sculpted the majority of the details and folds. However, for the actual pattern, I used a substance pattern. All the color was created using fill layers and masks.

Creating the real-time fur for the jacket required the same process and workflow I previously posted for the hair.
Having a basic knowledge of Xgen is necessary. This is not an Xgen tutorial but merely a demonstration of the steps I took to create the fur collar. Hope you like as much as I enjoyed making this asset.


These boots were made for stomping. We are creating someone who is rugged, savage and has a “I don’t give a f*ck” attitude. That said, he needs the boots to match.

Inspired by the style of boots made by Andor Kollar and urban boot reference, I proceeded to shape and destroy them in Zbrush. Once I had some good overall fold details and shoe design adjustments, baked maps in Marmoset, Next, I took I took the low poly, and baked maps into Substance to create a worn mahogany brown leather texture, exported 4k maps and finally back to Marmoset


Environment
I wanted to create a contained model and environment to emulate a printable statue and base. The concept is Sabretooth on the hunt and clearly tracking Wolverine. The forest/jungle environment is the savage land. However, the metal base is an indication that it’s a danger room scenario in the X-Mansion.

I modelled the high-resolution model of the metallic base in Maya. Then made a low poly version of 1/3rd of the original high poly. Then duplicated the section twice and rotated it to complete the round base.

In Substance, I kept the approach to the metal very simple. I knew I wanted the steel to be like that of adamantium. A cold blueish steel is worn and slightly damaged with soil and dirt in the crevices. A section of emissive light along the edges and maybe some work painted steel as well.
For the vegetation and organic parts of the base, I used Quixel mixer to create some surfaces that included soil as a base, with fallen foliage /leaves and exposed roots. Since I knew I wanted trees to fill major parts of the base to create some interesting angles and silhouette, I felt the exposed roots in the soil could help sell the wild overgrowth of the savage land. Some of the assets were created in ZBrush and substance while others were Quixel Megascans. Here is a time-lapse video of the assets populating the base and a wireframe view.
Here are some final shots of the environment and Victor. All of this is real time in Marmoset Toolbag.


Lighting
When it came to lighting the scene for this demo, I kept it pretty simple. Here is a quick rundown of the approach I took for the scene. Note: this is not the same lighting setup I used for the reveal video. First, let’s turn on the emissive material of the base. Next, the environment is turned on. I used a completely white rectangle and reduce the brightness to .01 but add 1 light directly above at 9.5 for high contrast. After that, I added two rim lights on both sides of the diorama. 1 with a pale yellow value, and another with a pale blue value. Lastly, front-fill Omni lights to flesh out the whole diorama.


Conclusion
One of the primary reasons I chose to create this specific diorama was to push and challenge myself. As I think everyone should when they choose to create something new. Always push yourself. Once I established a concept for Sabretooth in this diorama, I knew it would require a strong demonstration of organic and some hard-surface disciplines.
I knew real-time hair, high-frequency details and environment art would require new skillsets and new applications I haven’t used before.
So, I started watching tutorials and demos for a solid 2 weeks and even more so during the development of this piece. The bottom line is, it’s imperative to plan your work and take the time to learn new techniques and applications in order to achieve industry-standard art.
If it wasn’t for the generosity of the art community making knowledge and tutorials so accessible, I would not have completed Sabretooth. My advice, always be a student of art. With technology continually changing the techniques and canvases we create; you must keep up and stay relevant.
This project was a passion piece and I’d like to think that I achieved the objectives I initially set. It was challenging, yes, but overall fun and I would like to add applications to my pipeline like Marvelous Designer and Zwrap moving forward. This was a large project to break down and I could have easily dedicated an entire article for some of the sections above, so I hope the content I have included and covered is helpful or is useful to fellow 3d artists.
Thank you for reading and thank you Games Artist for allowing me the opportunity to share my work. For more content or questions don’t hesitate to reach out.
ArtStation:https://www.artstation.com/somuch3d
Instagram:https://www.instagram.com/somuch3d