
Introduction
Hi there! My name is Matt Cane, I am from the UK and I’m in my final year studying game art at Staffordshire University. In this article, I am going to be breaking down how I made this environment as well as the processes behind each phase of production.
But first, a little bit about me. Before University, I had no idea what career path I wanted to take.
In my spare time, I used to play around in Blender. From there I began to wonder how far I could take it not knowing this could be my future job and something I thoroughly enjoy!
After endless research, the time came, I found myself studying BSC Game Art at Staffs, making games I have always loved.
About this project
The main purpose for this project was to re-capture the feel of Bioshock using a range of techniques that I have learnt whilst studying. My aim for this environment was to focus on lighting, texel density and keep pushing my modular kit creation.
I have investigated different techniques and software packages including photogrammetry for some of the tiling textures. This would be my first full scene in Blender, I would love to see it take a swing and become one of the industry-standard software’s as it is so quick and easy to use.
References

(Main concept by Mike Snight: http://www.mikesnight.com)
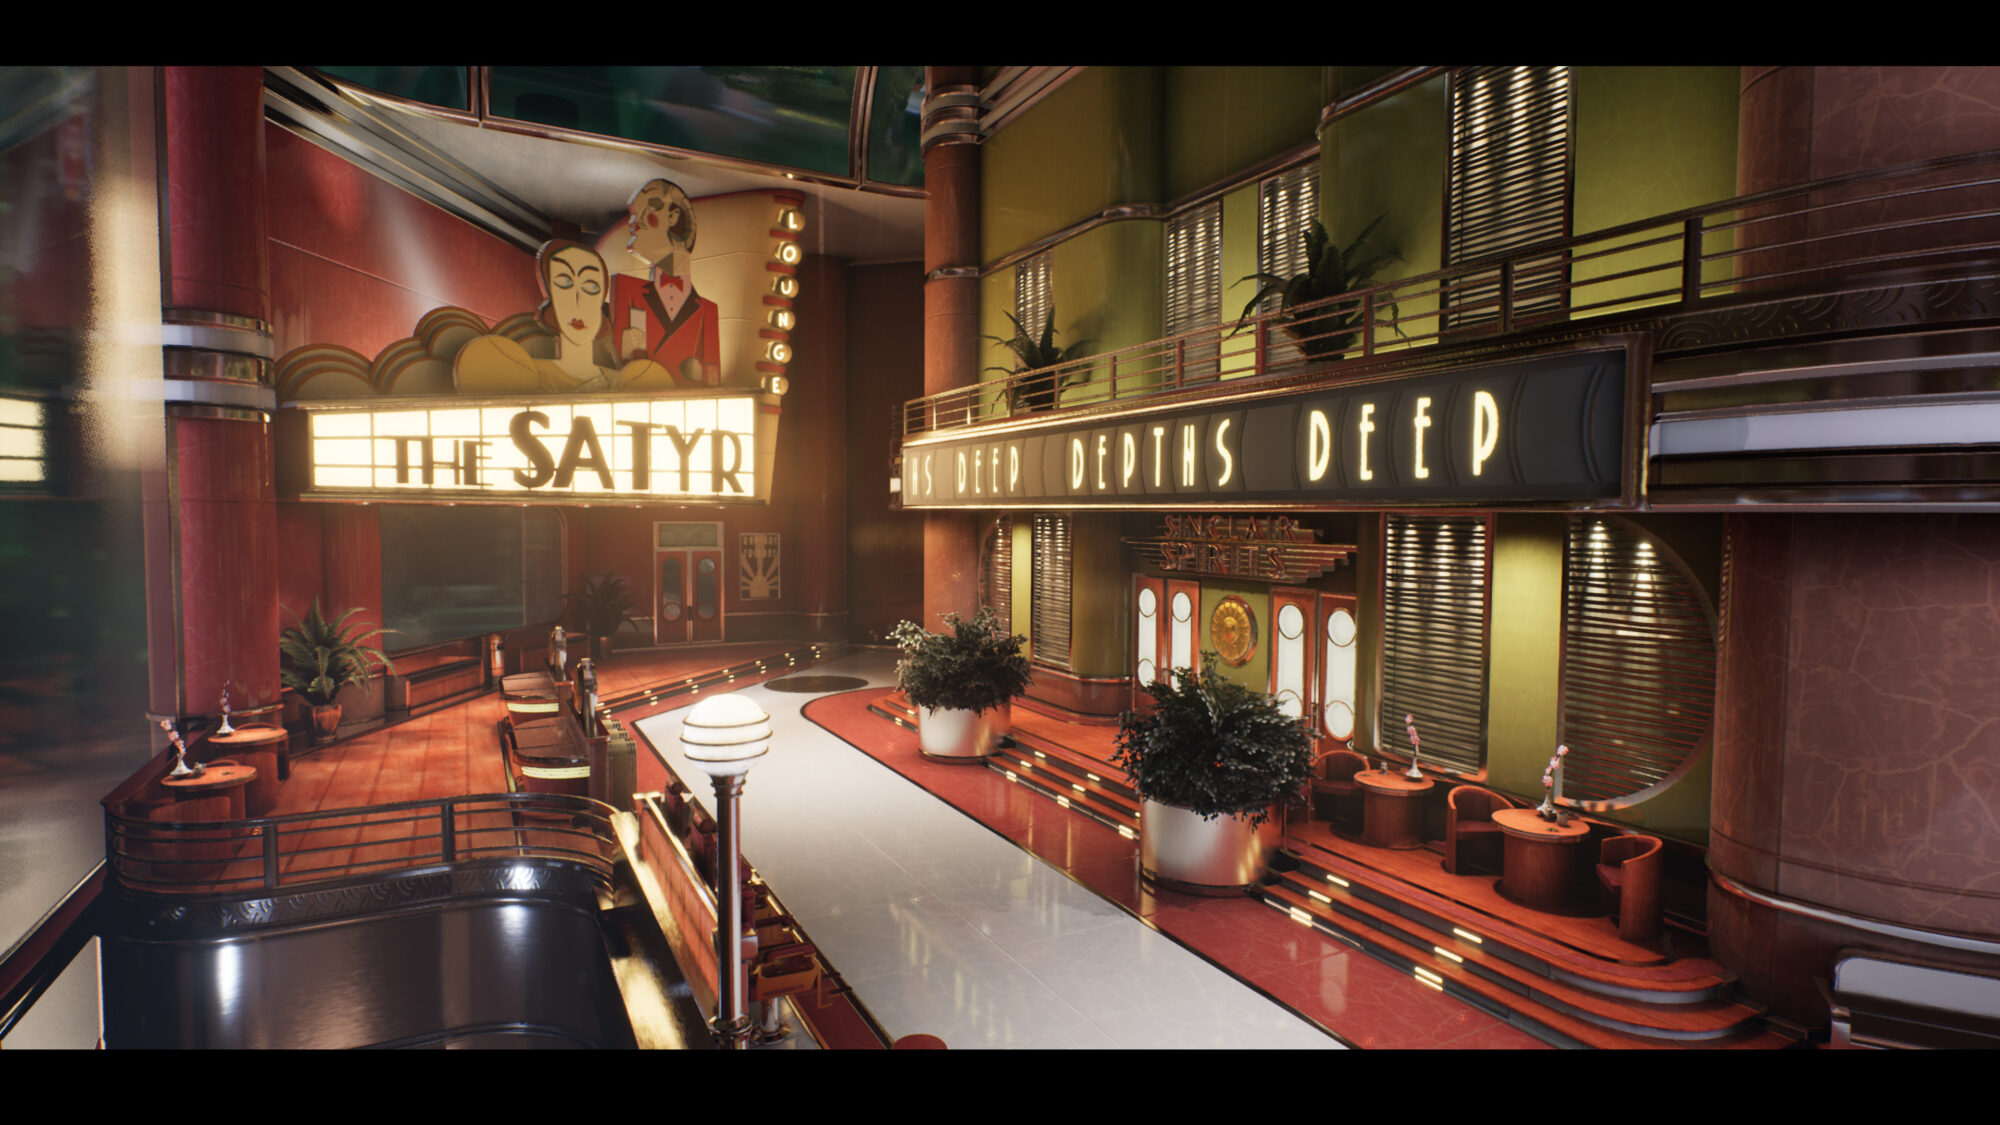
This scene is based on the first section of the Burial at Sea expansion for Bioshock Infinite. The concept I chose to re-create is from Mike Snight. I love the warm atmosphere under the dark blue ocean as well as how alive it feels with people eating and strolling along the promenade.
I began by analyzing art deco as I believe this is how the Bioshock games present their patterns and inspiration for the architecture and atmosphere they have created.
Blockout

I used a hybrid blockout technique for my pre-production workflow. This is done before the production phase as it allows the forms, base colours, composition, and lighting to be understood. This step is crucial to ensure the scene looks pretty before you place any textures.
Now I am not saying the lighting and colours need to be perfect, but it helps to set your focal point and visualize the atmosphere you are going for.
For this scene, I really needed the satyr sign to match with the concept as this is one of the biggest focal points. I then wanted to ensure the silhouettes of my architecture were bang on with the cylindrical supports and curvy railings, as these gave the scene some character.

For the base colours I usually do a very rough pass in UE4 then take my scene into photoshop and adjust the values and saturations to get them as close as possible to the concept. This provided a good base colour for when I began the texturing of the assets in the production phase.
I was determined to match the concept as best as I could when it came to the composition. I spent a lot of time tweaking and adjusting my camera settings so that they mirrored the original concept.

A little trick I like to use for lighting is the blur test. Take your image into Photoshop and gaussian blur it, this will enable you to see the main focal points of your scene. You can also do this if you just squint, the lighter parts of your scene are generally your focal points. I did this multiple times whilst adjusting my lighting to match the concept as close as possible.

Production
In this section, I will talk about the procedure that I followed to reach my final environment. It will cover trim sheet creation, my modular kit, and the importance of texel density when creating an environment. I will breakdown my process as best as I can, and I hope it provides you with beneficial tips along the way.
Trimsheet

I modelled my trim sheet in Blender and baked it in Substance Painter. I also textured it in painter apart from the poster and paper trims I put together in photoshop from images.
When I made the scrolling sign, I used an instance of my trim sheet and panned my texture in UE4.
I haven’t added any colour variation to my diffuse and I kept the roughness noise to a minimum so that I could tile my own roughness map in UE4 to have control over how it affects my environment and prevent any noticeable tiling.
Modular Kit

Here is my modular kit in Blender and UE4 with my materials. To curve my railing my general workflow consisted of using splines to bend the geometry and keep it on the grid. I also double check my snapping in Blender before taking it into UE4 as it can save me jumping back and forth between the programs which can sometimes be a pain.
Tiling Materials
The tiling materials I created were done in Substance Designer. I managed to get a marble picture for photo scanning however I did not like the result that the alchemist gave me, so I decided to make it by hand. I learned that scanning textures are still not the do-all end-all approach. I had a lot more control making these by hand, however, I can see how powerful it is to get more complex materials, such as the wood texture seen below.
Photo scanned Materials

This is the only material that I photo scanned and was happy with. I wanted to trial this process out and it quickly became clear that it is super fun to do. I would take a picture and then take it into substance alchemist to get a clean base.
I then took it into Designer to adjust the values and add some planking in for a second variation. I tried this process on multiple textures however I like to be flexible when I work, and this was the only useable one that I liked and met the high standard I set myself. I added a slight tint in-engine rather than in substance designer so that I could update it in real-time, hence that is why it looks different in my final render compared to the breakdown above.
Texel Density

Texel density in games is incredibly important. While studying and creating numerous environments, the importance of texel density became clear. I wanted to focus on this for the project as it can be a hard concept to get your head around.
I opted for a 2k/m texel density (2048 texture per metre). I would recommend using 1k/m if you are learning how texel density works as I feel it scales nicely with your texture sizes. If you are unsure what texel density your game/environment should use, I would go off this:

Top-Down game: 512/m (as the camera is quite far away).
Third Person Shooter: 1024/m (camera is close but can’t see all the minor details).
First Person Shooter: 2048/m (you can see everything close up).
You don’t have to stick to these, but it is a nice base to work from.
After using UE4, I was surprised there is no default texel density checker to use. So, I put matters into my own hands and created one!
(I have linked this to the bottom of this article, it’s FREE!).
After some setup, it will take your environment as seen above and show you your texel density for your scene. This is a huge help for environment creation, and I have made it really to check this in the engine.
Multiple Unwraps
Multiple unwraps can be a powerful piece of knowledge you can add to your tool belt. I am going to look at what I call “normal unwraps” as I cleverly used them in this scene to get the paneling done for my modular floor and wall pieces.

As you can see, my first unwrap (UV1) goes to the edges of the UV space and I have a beveled normal map that it uses and is assigned in UE4. My second UV channel (UV2) holds where my diffuse, roughness, etc will go which in this case is the rest of my marble texture maps.
This unwrap (UV2) is texel density aligned whereas the normal unwrap (UV1) breaks texel density, this is because it usually uses overlapping, symmetrical or stretched UVs. This means that I can control the normal map tiling amount separate from the diffuse amount whilst maintaining my desired texel density.
Lighting

I am still fairly new to lighting, I spent a long time in this project figuring it out. I re-lit this twice to get it to a crisp standard and the level I am happy with. The reason I re-lit my scene so many times is that I was learning what works and what doesn’t, what lights to use and what all the settings do.
I also experimented with raytracing as I was lucky enough to get an RTX card. It’s lush but I faced a lot of problems which aren’t documented much because, as you all know, it’s a fairly new piece of technology. Before I managed to optimize my scene, it was running at around 10 fps, however, when I managed to figure out the settings, it began working at 60fps.
My only tips on lighting are to keep trying. Try different lighting styles and experiment with the different types of lights. Use reference for what you are trying to make and re-create it in your scene as best as you can. Most importantly, don’t be afraid to scrap your lighting set up and start again, you will learn so much by doing and learning from your mistakes which is exactly what I did. The more you fail, the faster you learn.
Importance of feedback
I reached out to a few people in the games industry and gathered some feedback for this scene as it was in mid-late production, from this I was given some invaluable feedback. TJ from Creative Assembly was super helpful and kind enough to do me paint over for my environment.
This supported me to push my understanding of silhouette and colours even further and push my environment that extra 10%.

Feedback is one of the most important parts of the creation process. Whether it be from a friend or an industry professional, we all have our own visions of how something should look. I would usually get someone I know is brutal but also give me constructive feedback about my work, and I am lucky to be surrounded by some great people. There are multiple discords out there such as 021 Space which is full of awesome people from the games industry that will happily help you out.
Outro
Thank you for reading this and I hope you all get something from this article. If you have any questions, feel free to reach out to me on Twitter or Artstation. If you want my texel density checker tool, the link is below.
Take care and stay safe!
Twitter: https://twitter.com/matt_cane_
Artstation: https://www.artstation.com/mattcane
Texel Density Checker for UE4: https://gumroad.com/l/DxDYD
021 Discord: https://discord.com/invite/PjPZxJe

